


SandFlea
-
Posts
94 -
Joined
-
Last visited
Content Type
Profiles
Forums
Gallery
Articles
Everything posted by SandFlea
-
TK-7435 requesting EIB status ANH Stunt [154][AM]
SandFlea replied to SandFlea's topic in Request Expert Infantry Status
Well AM shins are pulled from two molds so the left and right only have inner and outer versions. The big thing here would be the overlap. The way I look at it is the opening should be to the inside not the out. My shins are the wrong way but EIB doesn't have any requirement that I have read which states this is the way it needs to be done. What I have done is a cover strip and just flippin the overlap to face inward instead of outwards. Bottom line it appears to be a matter of preference. Either way putting the opening towards the inside hides the gap better so my feeling is that is the way it should be done. -
TK-7435 requesting EIB status ANH Stunt [154][AM]
SandFlea replied to SandFlea's topic in Request Expert Infantry Status
Lol read that wrong. So what's available? -
TK-7435 requesting EIB status ANH Stunt [154][AM]
SandFlea replied to SandFlea's topic in Request Expert Infantry Status
Great what is available? Darren -
TK-7435 requesting EIB status ANH Stunt [154][AM]
SandFlea replied to SandFlea's topic in Request Expert Infantry Status
Thanks guys. I finally made it. If the EIB challenge is still on I could use the gloves or 40 mm receiver. I just donated a kit to a new recruit and I will be adding it to his stuff. He is short boots, gloves, bucket, holster and blaster. I am doing everything I can to help this guy into the 501st and the Central Texas Squad. Again, after major repaint and replacing parts on the belt I made it!!!! Darren -
TK-7435 requesting EIB status ANH Stunt [154][AM]
SandFlea replied to SandFlea's topic in Request Expert Infantry Status
Thanks guys. You rock! Darren -
TK-7435 requesting EIB status ANH Stunt [154][AM]
SandFlea replied to SandFlea's topic in Request Expert Infantry Status
Sorry I had to post links to pics. Laptop passed away and I'm down a computer. Please say a pray for the o'l laptop. RIP. Changes should be to standards. Let me know if anything else is needed Darren TK-7435 -
TK-7435 requesting EIB status ANH Stunt [154][AM]
SandFlea replied to SandFlea's topic in Request Expert Infantry Status
Here are the fixes to meet EIB standards Utility belt and drop box straps Bucket has been repainted and brow trim replaced -
Great Idea Eric and I hope to meet you at All-Con. See you there my brother! Think I will add this to mine before this weekend too. Darren SandFlea TK-7435, TD-7435
-
Well I'm done with this build but I lost some of the pics along the way. I know I'll have more on MEPD so if you want to see a few more pics of this armor check over there. My name is SandFlea on MEPD. These are the last test fit pics before I went and got all dirty. I hope you all like this armor. Paul makes a heck of an armor kit. It was a true joy to build. Thanks to all. SandFlea
-
Little update Working on the Bucket this time. The first thing I did was mark off area with a pencil which was going to be trimmed out. Then I trimmed and dremeled out the areas on the teeth, eyes and excess. I installed rivets, ear pieces, brow trim, green lens, fans, added black mesh in teeth area, and painted the grey ares on the bucket. I used a Testor paint pen. I didn't have anyone to take pictures of some steps but I utilized hot glue to secure the lens and teeth mesh to the bucket. The fans are just in with velcro so I can move them around. I will be using ROM/FX Pro with this armor and not sure I will be placing it in the bucket. I can remove the mic tips for HOVI speaker type if I want to at a later date. The padding in this bucket is Spydex which is the same type of padding in military helmets. it is a velcro setup which is comfortable and easy to move around for adjustments The paint isn't perfect and that is what I was going for because the pictures of the buckets I've research from the original ANH had the same look. I will hand paint the black outlines and chin on the helmets today and will ad finish pics of the bucket before I weather it. I'll keep at it and will work to update the tread. I'm a lot further in this build then I have on here so I'll work to update this more. Thanks guys hope you enjoy. I have to say this armor is a wonderful thing to build. Thanks Paul. Darren TK-7435
-
TK-7435 requesting EIB status ANH Stunt [154][AM]
SandFlea replied to SandFlea's topic in Request Expert Infantry Status
I just figured out what you all talking about with the grey touching the lips. I am going to get my hands on an air brush and redo the tubestripes and frown. I shortened it instead of actually correcting what you all were talking about. It clicked after Terry sent me the link. I have decals and the tubestripes from Mike already so it should be an easy fix. Issue is getting my hands on an air brush gun. Give me a bit and I'll get it fixed. First attempt at air brushing so I don't think I did too bad. Just didn't see what you all were saying. Thanks. -
TK-7435 requesting EIB status ANH Stunt [154][AM]
SandFlea replied to SandFlea's topic in Request Expert Infantry Status
Thanks for all the tips and corrections are done. Adjusting paint on the bucket was a pain and took forever so I did not redo the tubestripes....I would be working on a complete repaint of the helmet to do it. Here are the pics Thanks to all and I hope to join you elite troopers Darren -
I'm going to use some of the straps from stuff I've learned here with some mods of my own. I have some tactical orca suspenders I plan to use. Not sure yet Karin
-
I could have but I am just doing ruff trim so I am doing finishing with a razor and metal ruler for straight edge. You won't really be able to see it under the trim piece but it will make it easier to line everything up in my opinion.
-
Hi there Troopers, This will be my Trooper master armor sandtrooper build. I will be building it and will post pics of my progress. I hope to make this a good tutorial for all of us to use. Please add to the body of knwledge here to help others and me to build the best armor possible. This is a 1mm sandtrooper kit made by troopermaster (Paul) and let me be the first to say this is a true work of art. I feel this armor is going to produce a sweet set of armor. I will say it is expensive but in my opinion well worth the price. When I'm done I will change my screen name here to Sand Flea...for some reason it fits. Hope you all enjoy this build! Thanks for looking, Darren Here is the kit out of the box plus Canvas belt/shoulder straps, TK boots, Pouches from Zadokk, Sgts Paulderon, and my E-11 blaster After laying out the kit my first task is to do some basic trimming. This kit comes untrimmed and needs to be cut down in order to do your measuring cuts. Here are some pics of the intial trim: Paul marked all pieces with a L or an R to help you figure out where they go. If you look at the picture you can see the lip I'm trimming off. It wraps upwards and will interfer with a measured cut. I suggest you just rim the bare min here then do your measured cut for the final trim. Measure twice on that step and cut only once! In this pic you can see how it curls up and will interfer with a measure test fit...depending on how you build. I am going to use the shims but may or may not overlap the actual peices of armor. If your not sure start with this step until you decide. More pic on this when we get to the measured cut statge. Yes all peices will need some basic trimming. Fin piece with basic cut. It is flat now and can be overlapped or will not interfer with the metal ruler This step only took about 2 hours for the whole armor...had a lunch break too. Not too time consuming and depending on your armor building skill well worth the time investment. Next post will be on measured cuts and will show some of my suspension set up. I will take this tread to the weathering point and then I will only post on MEPD. Thanks and I hope you enjoy this build. Darren
-
TK-7435 requesting EIB status ANH Stunt [154][AM]
SandFlea replied to SandFlea's topic in Request Expert Infantry Status
James, You have a pic of this or where to find it? I don't see why this would be that hard to add to my build. Update Helmet almost done paint is taking a bit. Fixed drop boxes to correct with white, trimed belt, back plate and forearm. Will be reposting pics once helmet is done. Darren -
Not completely new to armor but.....
SandFlea replied to Splattum's topic in Getting Started - Read this First!
I have small calves too. My recommendation is to drill a small hole in the corners or the top part of the shin pieces and cu the lip to the holes. this will allow the shine piece to close more without cracking the piece from excessive bending. additionally I put a small amout of foam in the top part which added comfort for long wearing events. If you have questions PM me and I'll email you some pics on my shine peices. Darren -
John and I talked about this on Thursday and I should see him today. I live about 20 mins from him. We were heading to the gun show to see if we can find a sterling or parts. I'll post pics if we find anything.
-
This is the home for 501st and how to join info http://www.501st.com/members/join_how.php Available numbers are here for the 501st http://www.501st.com/members/search_avail_ids.php hope this helps you.
-
-
Hey guys, I planning to build a scratch built E-11 all aluminum build. Plans are to have it match up to a true replica as best I can. I plan on having a fully funtional stock, electronics with LEDs and will add one or two small speakers for sound effects. I'm sure this will be a six month or more project with many adjustments. I need advice on where to find some parts like the counter and scope. I would like to put Led lights in counter and make an illuminated scope. Any help here would have my thanks and credit in this build. Additonally, I have looked at Hyperdyne or blaster core for the electronics...Any thoughts? I like the blaster core set up but know it will take me hours to craft this properly. I am currently in research phase of this project and have a significant budget to work with to do this. My wife told me to go play and leave her alone...MY MASTER PLAN WORKED! I'm setting up my work space and buying needed tools to begin this project in the next two months and after I finish my TM Sandtrooper build I will begin this project. I think after I get this prototype finished I may build some more for fun. I will follow some of the blaster tutorials I've seen to guide me and will add to this knowledge as I go. Thanks in advance for your thoughts and tips to aid in this proect.
-
TK-7435 requesting EIB status ANH Stunt [154][AM]
SandFlea replied to SandFlea's topic in Request Expert Infantry Status
Dang I can't believed I missed that one. Thanks now that I see it NO WAY I can let that be...WOW. Must have been asleep at the wheel on that one. Thanks. -
TK-7435 requesting EIB status ANH Stunt [154][AM]
SandFlea replied to SandFlea's topic in Request Expert Infantry Status
I trimed them a bunch...couldn't walk in the at all and I wanted to be able to move in this armor. They are stream lined to my legs so I can move and run if I want in this armor. I like the way they turned out with the mobility I can get now. Can you explain the trim overlap on forearms more so I understand what your saying? -
TK-7435 requesting EIB status ANH Stunt [154][AM]
SandFlea replied to SandFlea's topic in Request Expert Infantry Status
OK Noted, I air brushed the tube stripes and all other parts of the bucket...not as talented as I would have hpred for. going decals for tube stripes now. getting white straps for drop boxes...will retake pic after I fix snaps for holster and straps for drop boxes. Better pic of buttons This is a big old FX/AM bucket next to KW....BIG size difference Here are non air brushed decals for tube striping on other bucket...will this work? Will paint lines around ears...fix tube stripes move and moving eye brow...I put it upside down...now I see this. Few more tweaks and I will retake pic....will have flexiable hand guards in next round too. Forgot to put them on in these pics. Thanks guys and I'll get these fixes done. -
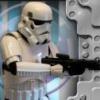
I am Respectfully submiting for EIB. Darren Haverstock 501st and FISD name: TK-7435 Star Garrison, Central Texas Squad Armor= ANH Stunt Armor master (AM) Helmet= KW ANH 2.5 Blaster= E-11 Hyperfirm Height = 5'8" Weight = 180lbs Boots = TKBoots Electronics= ROM/FX Classic Hope the Pictures work and thanks to those who helped me upload these.