

keith
-
Posts
200 -
Joined
-
Last visited
Content Type
Profiles
Forums
Gallery
Articles
Media Demo
Posts posted by keith
-
-
Lets see those wall mounts. They look great!
Did you make those yourself?
Keith.
-
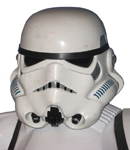
It just looks like an original ANH helmet.
Fantastic work Dan!
Keith.
-
Glad you are happy with the mic tips and they worked for your speaker set-up. Nice job.
Keith.
-
Thanks for all your help.
I'll give that one a try Mark as it sounds like it will make a strong bond. Its for a biker scout helmet so its very important the glue never fails, as that would mean the filler covering the join lin would crack.
Cheers,
Keith.
-
I need some good strng ABS glue. I'm in the UK, so i cant find the IPS weld-on #16 stuff.
I was going to get this before i noticed you can buy it from B&Q. The fact it can be bought from B&Q has put me off, as its probably crap if they sell it. -----------
Anyone know whats the best stuff that can be bought over here in the UK?
Keith.
-
The mesh in the ROTJ mic tips is a larger aluminium mesh that was painted silver. The ROTJ mic tips were all made out of metal.
If you look at the photos of my ROTJ helmet replica, the mesh i used is spot on to the originals IMO.
Keith.
-
Still got no decals. I will probably make my own decals for it.
Keith.
-
Screw it, i'm gonna take borrow the money
 Got to get me one of these!
Keith.
-
I will buy one in kit form, but not yet, as i'm skint

Keith.
-
Cool thanks!
No hurry though, just got to finish something first

Keith.
-
It looks cool!
It would be nice to take some pics of it in a forest and photoshop an AT-ST and stuff in the background.
Keith.
-
I was planning on doing something like that Pete for the lenses. Pushing them through the eye sockets of the helmet is too risky.
I'm going to take two partial fiberglass castings of the face buck (just the eye sections). One casting will have deep eye sockets and the other will have more trimmed out eye sockets, so i will have a choice how to trim the eyes on the kits.
I will have to give the welders shield a try. What did you use to form the shape?
Keith.
-
Great job Pete!
I can't wait to do a weathered helmet myself now my pristine version is finished (well it will be when i get some decals for it).
What are you using for the lenses?
Keith.
-
Humbrol is poor paint IMO.
Some of the satins are ok, but i avoid humbrol where i can.
Keith.
-
Thanks!
Here are two photos with the brow pushed up higher. Sometimes i like this look better, sometimes i like the low brow look better:


A side view:

The tea stain on the left has now been cleaned off. Don't know how that got there as i don't drink tea. Must ask my wife about that!:

A close up showing some original mold damage, probably from when they cut the faces off the mold. It will be under the neck trim, but i made sure it didn't get touched when i was working on the draft on the molds:

Keith.
-
Here are some photos now the helmet is painted. Again, it is totally impossible to tell its painted even with close inspection.
The decals made from the scans of original decals are still not done and i'm still looking for a neck trim that matches the original ROTJ trim.
I know the correct neck trim is out there, as i had small section of perfect ROTJ neck trim a while back.


Here are some without the flash:


Keith.
-
Looking forward to seeing this built. Its a fantastic helmet.
Its starting to become my favourite type of trooper helmet. I'm fighting it, as i love the ANH helmets, but i can't help it, ROTJ helmets really look cool!
Keith.
-
No problem

Mark is correct, patience is the key here. And the longer you can leave the paint to set the better. It will become a rock hard shell after a month or so.
Keith.
-
I've finished T-cutting the paint and it looks perfect. Just going to give it a few more days before i start painting the frown and stuff.
Keith.
-
BTW all the parts of the helmet are now painted.
Here is my painting method again for any newer memebers who might have missed it years ago....
Mask off the inside of the helmet parts if you are fussy and want it to look like an unpainted helmet.
Prime the parts with white primer. The best primer to use is Tamiya fine surface white primer in an aerosol.
You can use normal automotive white primer, but you will probably have to wet sand it when it is dry, which means unmasking and remasking the inside of the parts again and this takes a while. You don't have to wet sand the Tamiya stuff.
Stand the can of primer in hot water for a few minutes before spraying it on the parts.
When the primer is dry, check for any dust particles that may be on the helmet and remove them.
For the gloss white, i use Halfords automotive spray paints. This paint is fantastic, but i don't think it will be available outisde the UK.
A really nice white is Mercedes polar white. Its very white, but a sort of brown white and not a blue white if you know what i mean.
This paint is in 300ml cans and you will need three of them for one stormtrooper helmet.
Again, stand the gloss white paint can in hot water for a few minutes. If you are not very good at spray painting and always seem to get paint runs, you might want to skip the standing the paint in hot water part.
Spray the helmet fast to keep the paint wet and avoid overspray as much as possible. Thats the hardest part of the job. You want to find a sort of spraying path around the parts that keeps the paint as wet and glossy with as little overspray as possible. Make sure you get paint all around the eyes and inside the mic tip wells.
As soon as you are done with each coat, get a hairdryer set on warm on the part quick. The paint can get conensation on it otherwise and it will leave little dimples in the paint.
You also want to avoid paint runs. If you do see the paint start to run, stop spraying and get the hairdryer on the part, holding it at an angle so the run won't get any worse. You should be able to sand away the paint run later, so just keep coating the part with paint trying to avoid anymore runs.
Do not sand the paint between coats.
If you have any dust particles in the paint, dry the area a bit more with the hairdryer (don't over heat the plastic though) and sand it out with very fine wet and dry paper. Take great care doing this, as the paint will be far from set.
For the final two coats, i always change the aerosol for a new one, as they spray the paint better when full.
You want to avoid overspray on the hard to sand areas on the final coats. So get the paint nice and glossy inside the tears, traps, mic tip wells, frown, around the eyes, around the vocoder and so on and have the overspray on the open, less detailed areas of the part you are painting.
Let the paint set for a week or so and then, using very fine wet and dry paper, wet sand the paint smooth. Take care sanding where there are high spots or edges, you don't want to sand all the way through the paint, as you will have to start again.
Sand an area, give it a quick wipe with a towel to dry it and you will see lots of glossy dots. This is the texture of the paint. The high spots of the texture have been sanded and the lower spots have still not been touched by the wet and dry paper. You need to keep going until there are no glossy dots and the surface is flat and smooth. Try and sand the parts until you only just get rid of the texture/glossy dots. Sanding more than this will just make the coat thinner and you will be at more risk of sanding through to the plastic.
Now you have sanded away the top layers of paint, you will probably find that the paint is soft again in these lower layers, so take care how you hold the part, or you will leave fingerprints in the paint. It will take weeks to fully harden, so just watch how you handle it for a while.
Use a cutting compound like T-Cut on a soft cloth to polish the paint to the finish you want. You can get a mirror finish if you want. Do not use polish or car wax of any kind, as this will slow down or even stop the paint from fully setting.
Thats it!
Keith.
-
Thanks guys.
Its resin holding the bolts in the ears as Mark said.
Joe, you sent me the stuff inside the mics when you sent the helmets. Its a chopped up polystyrene-foam peanut thingy from the packaging.
Mark I am using Halfords Mercedes polar white to paint it. Its a nice shade of white for the Jedi helmets.
Its a fantastic helmet to work with!
Thanks,
Keith.
-
I'm painting this helmet tomorrow. I can't spray paint in the house, so i've had to wait until weekend.
I've fitted bolts to the ears that are just long enough to fit the nut on inside the helmet. The top bolts will be hidden by the chin strap and the bottom ones are hidden by the neck trim.


Here is an ear showing the small bolts that hold them on

Keith.
-
Thanks!
Kevin, i used a rotary tool for the dimples.
Keith.
-
I should be getting back working on this helmet soon.
Keith.


Where to buy a E-11
in ANH BlasTech E11
Posted · Edited by gmrhodes13
link not working removed
Can anyone tell me how much a hyperfirm E-11 is worth within the UK in GBP?
This is my bendy mannequin holding it with no problems....
---------
Keith.