


edlitmus
-
Posts
28 -
Joined
-
Last visited
Content Type
Profiles
Forums
Gallery
Articles
Media Demo
Posts posted by edlitmus
-
-
Ed,
Just email me with your complete mailing info and pay for the S/H.
T

You are the best! Thanks bro!
-
While talking to Daetrin at Dragon Con he mentioned that the stunt style ANH trooper should only have the 2 lower rivets/snaps on the belt for the holster. I was wondering how strict that guideline is, as I built my wife's suit before I heard about that and assumed that 4 rivets/snaps was the way to go.
Once I finish my belt (and build a replacement thermal det *cough*Dragon Con*cough*) I'd like to try and get our EIB status and that is the only hold up on her suit I think.
-
I managed to lose my thermal detonator at Dragon Con and need to build a new one to get my EIB status. I have and extra control plate but I need end caps! Anyone have spares they'd be willing to sell me?
My suit is TE2 but I am sure any caps with similar dimensions will work just fine.
Thanks!
-
Regularly

Ha! I guess that solves that mystery...
-
Maybe I just had bad luck but I tried painting a pair of boots white and it was a disaster. The painting part went fine, however the paint job quickly cracked when I wore them and looked like crap. I was not able to touch them up at the point. If the boots are for a sandy then who cares but for a TK, it was waste. Not to mention you really need to make sure they fit properly under the shin armor.
I recently tried my hand at using Meltonian Leather Spray stuff. Same problem, after 3 coats and a week of cure time it cracked the first time tried walking in them. I even prepped the leather and lightly sanded it with super fine grit sand paper.
How are the rest of you dying your black boots white?
-
Put me down for two please!
-
The helmet arrived the other day (thanks 4510! you do amazing work!) and I got it painted!

I also managed to finish the upper arms.
I'm getting the shin pieces going and trimming the big pieces later today.
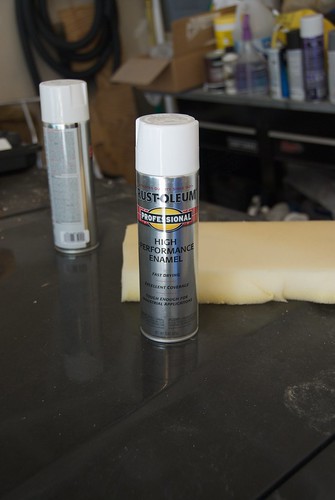
Once I get all the pieces trimmed and the edges sanded, I will move on to paint. One question, what are everyone's thought on using primer or not? I know there have been some issues with paint flaking off, would primer help? Or is the flaking due to using the wrong paint? I'm planing on using Rustoleum Professional for the whole suit and giving it a nice long cure time. If anyone has thoughts on the primer vs no primer and flaking problems, please chime in!
-
Do you have a pic from your work?
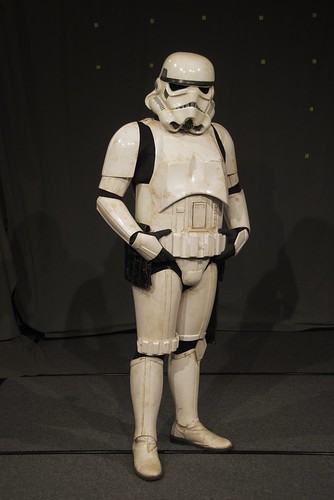
Here's a recent pic of me in my armor:
Here are some comparison shots of my thigh pieces side by side with a TE2 thigh piece (full set of pics in this Flickr set):
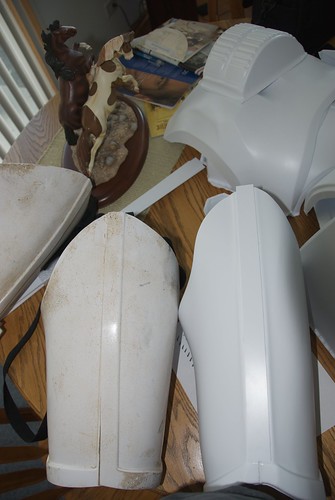
Obviously I could trim more to get the look closer to the TE2, but I'd be taking too much off at this point. I really wish I had just trimmed them more like the TE2 to begin with, but I didn't know any better when I first got the FX suit.
-
Man, I just *love* build threads, and a TE2 one to boot? I'm so on this

Did you see oneal's AP tutorial on http://forum.whitearmor.net/index.php?showtopic=3404 ? That should help as well.
Yeah, that's a good one. I am pretty much following every build thread I can to get ideas and advice. This suit is much trickier than anything I have done to date. I want to be sure to get it right!

-
Congrats! I'm glad to see another TE2 build, the more the merrier!
-
Not too much progress to report as I have been busy all weekend trooping for a fan film, but I did manage to get the left thigh trimmed and the front glued:
I will have to shim the back a bit, but I am going to wait until I have more done elsewhere before I get to that. I can't believe how skinny those actors must have been. There is no way I could fit into this suit. (sniff...)
Ah, well. I can live vicariously through my wife.
-
Ok..thanks,man. Your update is one of the best I´ve ever seen for the FX.
I played a little bit with paint,to make the FX-Legs alittle bit more movielike..look at the left leg..what you think about the cuts?:

I have trimmed my thighs to look more accurate, and it does help the look quite a bit.
-
As the Master himself told me...

"Don't forget: Lines of illusion, that's the secret."
T
Yes, sir! I am paying close attention to those lines, I think those are the real secret to the proper look.
-
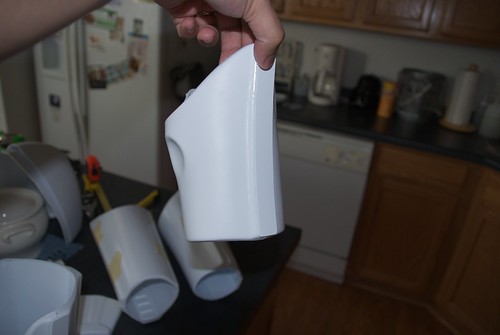
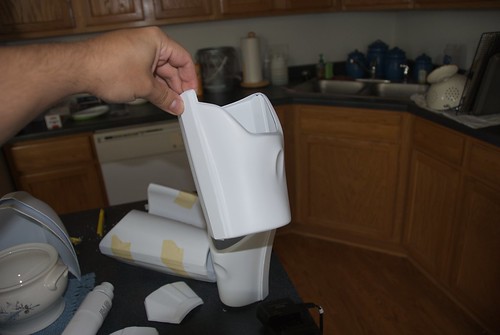
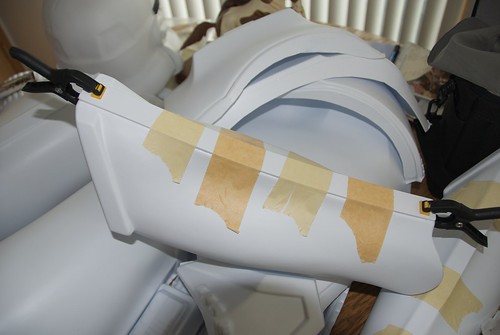
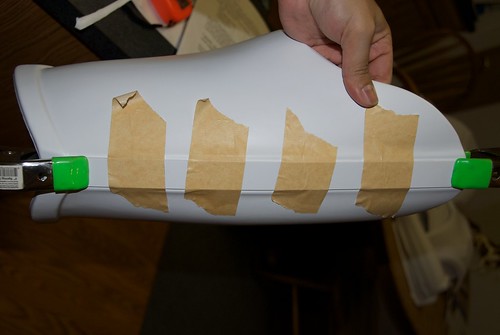
Okay! As soon as I got off work I started working on the smaller pieces; handbacks, forearms and upper arms.
First a word of caution: wear gloves when trimming armor, or this might happen to you:
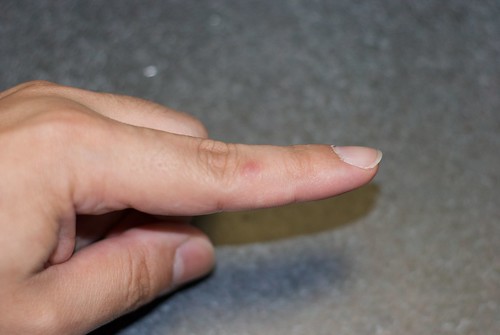
That circular scar used to not be there. It hurt. A lot. Okay, enough about that...
Handbacks:
Marked:

Scored:
Ready to be sanded:
The upper arms were a little tricky. The one on the left in the next pic is easy to see where to trim, but the other is a little bit tricky, so I had to do it by eye:

The same thing happens with the forearm pieces, one side is easy to see where to trim, the other not so much.
Tomorrow I start on the calves and thighs!
-
Awesome info guys! I will be sure to take care when I get started.
-
No sooner had I unpacked the armor to bask in its glory then I realized: I have no idea how to trim this stuff. I am used to ABS, not HIPS!
Oh noes! What to do? Ask the man himself, naturally!
Q: Should I use a utility knife or can I use a dremel?
Mr. X: "I use both - however, I'm very old school and the majority of my serious trimming is done with a good old Xacto knife (and plenty of sharp blades)."
And:
Mr. X: "Also, sandpaper, sandpaper, sandpaper. I usually start out smooth the edges with a 100 grit. Then finish up with 250 or 300. I've never had to use primer to paint the body armor but you can if you wish. The Rustoleum Professional Glossy White has become my favorite paint. TE recommended that or KRYLON Fusion."
Sweet! Now I know. And knowing is half the battle! Yo Joe! (Sorry, I'm always a bit goofy in the morning...)
Trimming begins this evening. I'm thinking of starting on smaller pieces first (hand back, thermal det, etc). See you then!
-
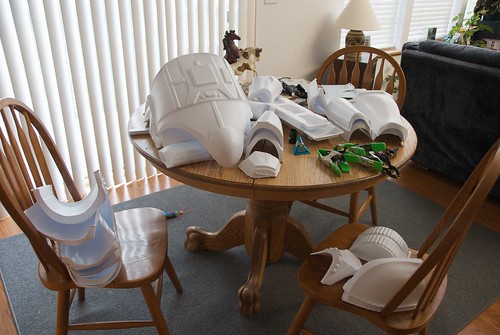
I came home to a beautiful sight today!
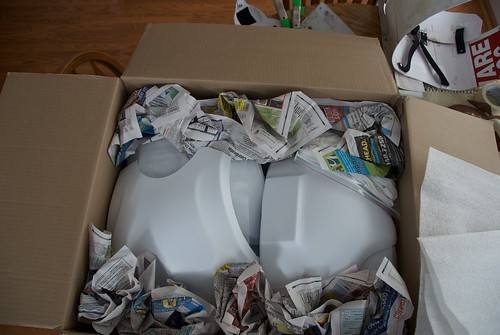
This is a set for my wife (who can fit into it. I alas have to loose a few...

I will try and post pics of my progress as I go, and I will keep a Flickr set of the pics updated here:
This is going to be fun, if a bit nerve wracking!
Thanks Mr. X!!!!
-
Studied physics in college, then dropped out my senior year to work as a software engineer. Been doing that for 10 years now.
-
Ok like many of you I'm married, while I'm new to life with the 501st I'm curious what tactics have you all developed over the years to get your significant other "Imperial Requisitions Officer" to understand why you need more than one armor, or why you won't stop touching it...armor that is.
It was my wife who suggested we join the 501st! I had been thinking about it but wasn't sure if she'd think I was going off the deep end, then she suggested it out of the blue. She started as a TIE pilot and will be getting a set of TE2 armor next month.
-
My RomFx (2006) came with AA cases but I reverted to a 9v. If I could fit the AA in my helmet it would be better but it's a tight fit already.
What helmet do you have? I have an RT/Mod and I can just fit the 2 AA boxes comfortably. I might try 2 AAA boxes and see how that works for my next helmet (a TE2 that needs painting, too bad it's too cold here to do it
 )
) -
Sweet
John May swears by Duracell M3. I usually use one 9V one.
Although my new lid with have a 11.2V LiPo rechargeable battery. the ones they use in model aeroplanes.
I had originally thought I could just get a really good 9V and be okay, but since changing to the 12V set up I have been REALLY happy. I thought about using special batteries, but was worried that they might generate too much heat.
The next mod I am thinking of doing is the same as the 4xAA, but using AAA to see how long they last. The size reduction would be nice, but even with 2 4xAA boxes my bucket fits fine and isn't very heavy. It's an RT/Mod, and doesn't have a lot of room to spare.
-
I know!!!!!!!!! Its way shinier (?) than my ABS FX bucket. I'm following the TE2 Stunt Buildup as well as yours (Smitty).
I'm doing the same, but I can't start painting until it gets warmer.
It's incredibly frustrating to get this far and come to a dead stop.
-
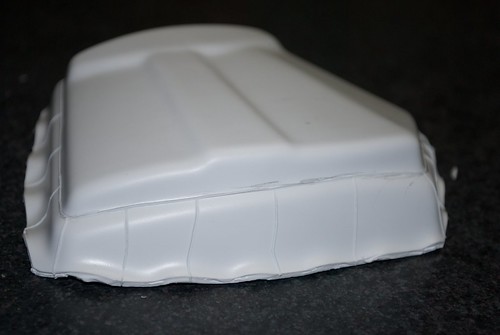
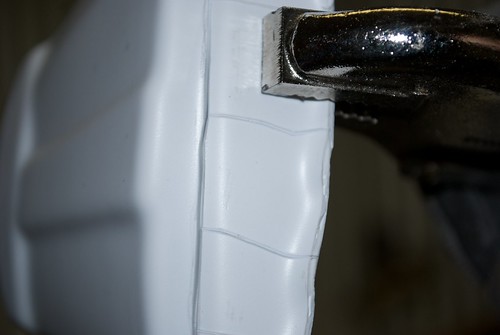
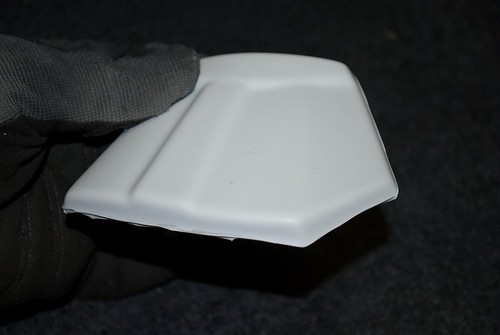
I have been building a new TE2 bucket and thought I'd share some build pics and some side by side shots of an RT/Mod helmet and the TE2.
I still have to paint and detail the TE2, but it's so cold here I can't get any work done in the garage, so I'm stuck waiting for warmer days. Which totally sucks, as I am dying to finish.
Anyway, enjoy the pics!
-
Please enable me for 501st access. TK4544: http://www.501st.com/members/displaymember...amp;userID=7605
Thanks!

Of belts and rivets...
in Expert Infantry Program
Posted
Thanks for the clarification, and it was great meeting you at Dragon Con!
My wife will be relieved I don't have to redo her belt. :-D