


teddz77
-
Posts
8 -
Joined
-
Last visited
Content Type
Profiles
Forums
Gallery
Articles
Media Demo
Posts posted by teddz77
-
-
Hi everyone,
While the work on my armor slowly moves along, I've started work on my F-11D heavy blaster, based off The5thHorseman files. Since my 3d printer is a long ways away from being completed, I found someone local to me who does 3d printing. I plan to have most parts printed by them, then I'll clean them up, put it all together and possibly make another one out of resin or fiberglass reinforced epoxy.
As such, the parts that I don't have printed, I'm going to make from Aluminum and grips from rubber. I also plan on making a PCB with some electronics and sound. Based off the file names, here's the lists...
Aluminum
1. Barrel - Muzzle plug 1
2. Barrel - Muzzle plug 2
3. Folding stock - Bracket
4. Folding stock - Flashlight 2
5. Scope - knob - 1& 2 (modified to act like a real scope and go "click" when it's turned.)
6. Scope - Tube (modified with threaded ends for the eye rings)
7. Scope - Front eye ring
8. Scope - Rear eye ring
9. Scope - Rail 2
10. Scope - mount 2 (modified to attach to mount 1 with screws, also keeps scope in place without glue)
11. T-Tracks
12. Cocking lever
Other modified parts...
1. Cast rubber grips all around
2. LED's in the magazine on custom PCB
3. LED in the barrel that's trigger operated
4. Sound
That's what I've got for now, but I'm sure I'll find more things to make from aluminum or something else as the build progresses. If there's something you want to see in aluminum for this weapon, let me know.
Since enough of you are using the same files, if there's enough interest in the parts I listed above, I can run the numbers and do a run. Let me know which parts you're interested in.
-
I'm a pep fan myself. Are these free files or paid? Can you post a link? At least this may get me started while we wait for other sources for good kits.
I can't recall where I found them, the RPF maybe, but they were free. I can email you the original file if you like. PM me.
So...How many hundreds of hours are you going to need to spend on this...And how many hundreds of dollars in glue, resin, fiberglass cloth, Bondo...Etc.
It's not as bad as some people think. Because of the glue I use, UHU Universal contact cement, putting the together goes pretty quick. The shaping is also pretty quick because I do a lot of the roughing while the "bondo" isn't fully cured. It's like an eraser in it's cure and I use a rasp or heavy grit sand paper to take off what I need. I don't know how many hours, but I would estimate it at a few hundred spread out over the next few months. The helmet will take the most time. I already have a partially finished helmet, but it needs more work in correcting it than just making a new one that's much closer.
As for the cost, since I'll be making just about everything as a one-off I'm estimating around 700 euros in all build materials also including the purchase of gloves, boots, belt and under suit. To offset some of the cost, some of the parts I'm making for the blaster & pistol out of aluminum I will offer for sale.
Building suits, props, models and such is what I do.
I absolutely love the determination and dedication mate, and by no means am I trying to discourage you in your quest.
I myself was prepared to do an entire kit from pepakura. Then I started to get concerned with weight, maintenance, and all the extra heat generation and overall appearance.
Those kits aren't as expensive anymore, and for around the same cost as what you are about to invest in doing.
Super stellar work so far mate, and can't wait to see how it turns out.
Here to help if I can as well so don't hesitate to ask!
Thanks for the kind words..
The weight doesn't really concern me that much. It's not going to be a very heavy layup process. I'm going to use epoxy and some light cloth that's used in R/C. If needed I'll reinforce some areas with adequate layers, but if it's not needed, I'll keep it light. I also don't do a "rondo" slush inside the pep. That adds a ton of weight that isn't needed. Before I lay up the epoxy and fiberglass cloth, I drench the pep in cyanoacrylate glue - Super glue. This helps seal the joints from any interaction between the contact cement and the epoxy or resin, and it also makes the pep as hard as plastic. You can still crush it, but it holds it shape very well.
As for the heat, if this were foam, there's a good chance I would overheat real quick. The helmet will have fans and as for the suit, maybe some cooling system for a cool shirt if it's needed. There's another suit I'm working on that I'm considering making out of foam, only because it's going to be fairly bulky and making it out of paper is just too much of a headache.
Meh... I'm not into buying something when I can make it. I'm that kinda person... I like the challenge of building it and figuring out how to do things. Plus, I need this ready by the next AthensCon in December.
Hard-core costuming, that is all. Thanks for the share.
Thanks... I have an update coming soon..
-
 1
1
-
-
Hi everyone,
I've been wanting a FO trooper armor since I saw the movie, but paying 7 grand for the Anovos suit just isn't going to happen. Even the kit is more than I'm willing to pay for vacuum formed plastic.
So I found a pepakura file of the complete suit and started the measuring and scaling process. The file was originally made for someone 5'7" and I'm 6'1", so everything needed to be adjusted. It's FAR from accurate, but it's a decent base to work off of and with all the reference I accumulated, making it accurate should be relatively painless. The plans are, the suit will be white epoxy/fiberglass with rubber gaskets, mic and speaker for the helmet and custom electronics for the weapons to make them light up and go pew pew.
I'm still not 100% done with the scaling of the parts, but I've already managed to print out and assemble some pieces.
The following are just the raw paper assembly. I still need to go over them with CA (cyanoacrylate) glue (this helps in making things somewhat rigid and 'seals' the seams to keep any interaction between the glue and epoxy) then hit them with epoxy and fiberglass cloth, THEN spend more time than I care to count sanding and shaping everything. After the hard parts are done, I'm going to make a template for the gaskets and cast them, then tackle the heavy blaster and a sidearm.
There are a few more parts that I printed but haven't had a chance to assemble yet since I had some commissions to complete and get shipped off to clients... If all goes well, I plan to have this suit ready for the next AthensCon...
Shoulder
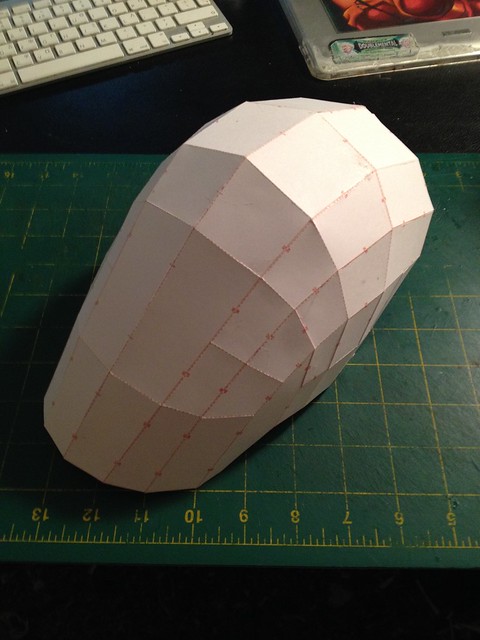
Bicep
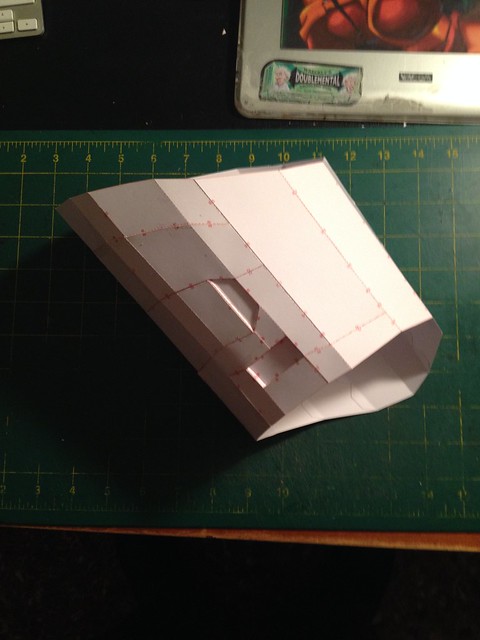
Forearm
Hand plates
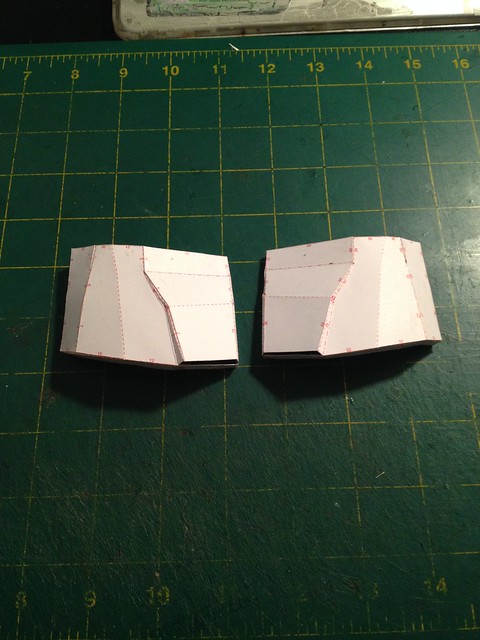
Knees
I plan to update as I progress...
Thanks for looking...

-
2
-
-
Thanks for the warm welcome everyone!!
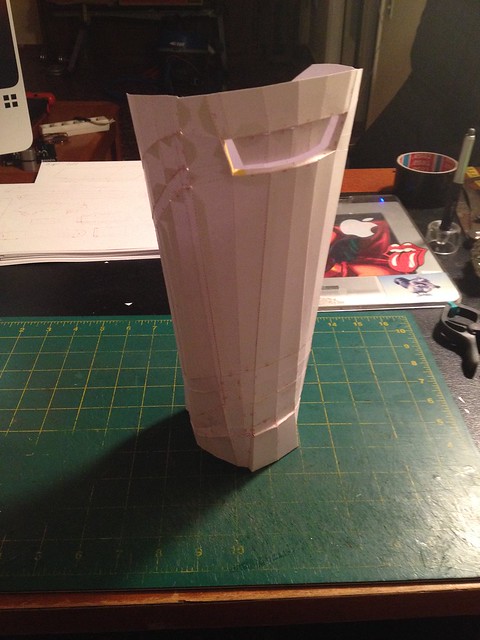
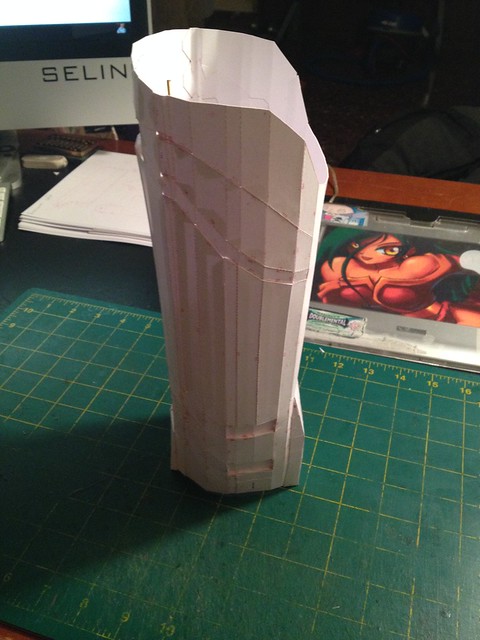
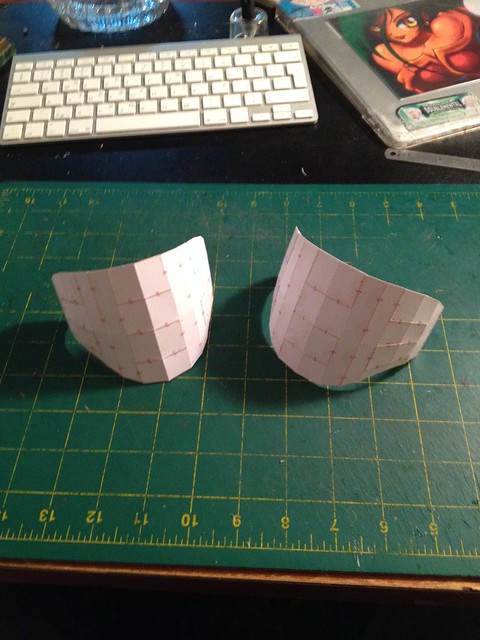
Here's a sneak peek at the armor.. I printed out a few parts, ran out of 250g card stock, so the rest will come later when I get more paper and apparently toner for the printer.
At this stage, I'm doing all the measuring, scaling and essentially eyeballing it all as to how it should fit on me compared to the movie references I have. Measure twice and print once (hopefully)... but there's nothing like spending a couple of hours making a bicep thinking it's for the other arm only to find out it's the same bicep I just made.
Hand plates... which are very wrong, but will be corrected, along with all other parts that need modification.
Forearm
Bicep
Shoulder...
And just to touch on other abilities.... a couple billet aluminum (also available in steel) replacement barrels for the Tomenosuke Blade Runner replica blaster. The lathe work was done and now I'm in the process of drilling some holes, tapping them and cutting a slot in the back end.
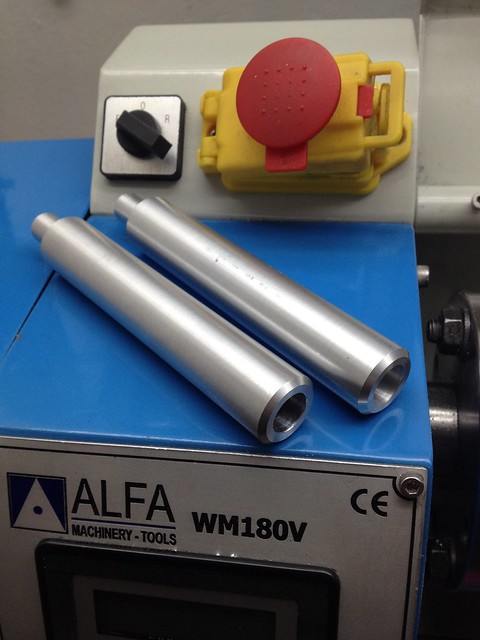
Wait until I make my heavy blaster along with the SE-44C and it's mount.... should be fun.
-
Hi everyone, I've been lurking around these parts for a while..
I'm originally from NYC, but moved to Greece some years back... I love it here.
I'm a model and replica prop builder / machinist / graphic desginer / engineer / chief cook & bottle washer. I have a small workshop in the spare bedroom of my apartment with a 50cm x 60cm x 22cm CNC router, small metalworking Lathe in the closet and a bunch of tools for whatever may come by my bench.
I recently started building my own first order stormtrooper armor from a pepakura model I found. It's a decent base to work from, but it's far from accurate. I'll modify the parts as needed to get them right and will be starting a build thread when I have something worth showing... right now I'm still in the measuring and re-scaling of the parts so they fit (the file was made for someone 5'7" and I'm 6'1" )
Stay tuned...
Where do I find a tutorial for making a vacuum former?
in The Foundry - Armor and Prop Making
Posted
I don't know if there's a tutorial for a large former based on exactly what you want. You'll have to do a bit of research on your own coupled with the knowledge you gather from the tutorials you find on smaller sized machines. Then once you have an idea of how it all works and what's needed to scale up to what you want, design it and build it. It's what I did when I was building my CNC Router.
I think I have some blueprints I found online somewhere for a former... maybe... might have lost it when my HDD crashed. If I find it, I'll send it off to you. It's a nice start to get an idea of what's needed.