

.jpg.ec81d4c298bd552131f85a991bb21f90.jpg)
DarthSarcasm
-
Posts
50 -
Joined
-
Last visited
Content Type
Profiles
Forums
Gallery
Articles
Media Demo
Posts posted by DarthSarcasm
-
-
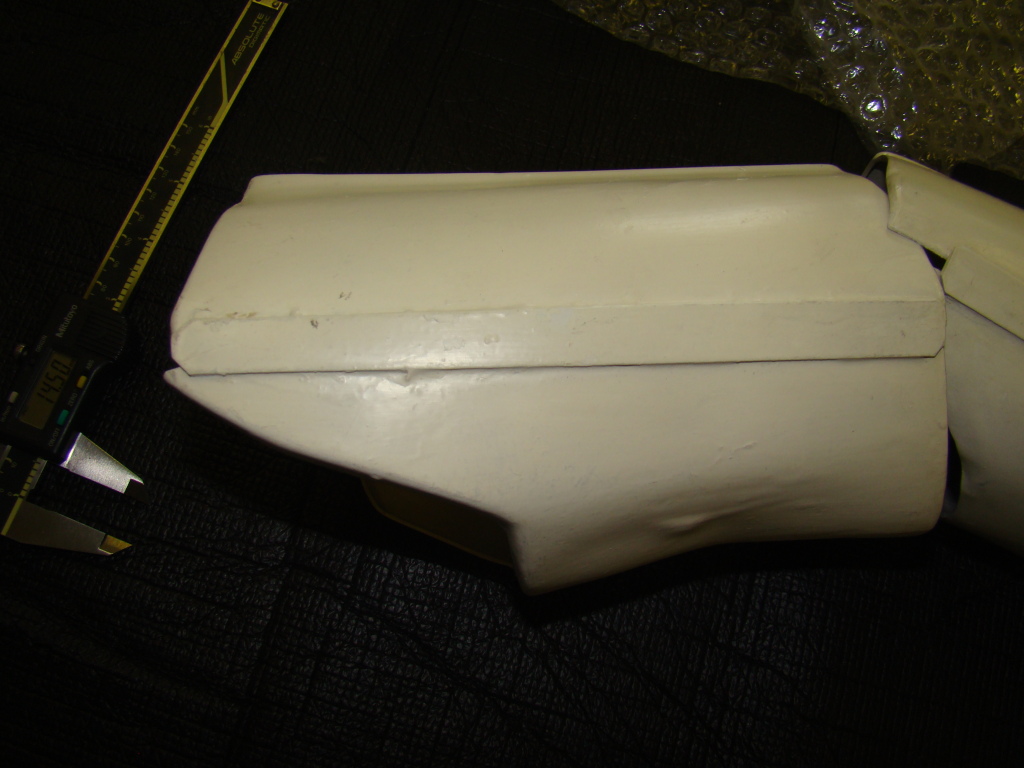
Here's a pic showing the raised cover strip area on the forearm. Check out how funky the lines are on the RS armor.

Sent from my SM-G930T1 using Tapatalk -
Thank you Sir!Screen accurate have cut corners (some just round the corners) and mostly flat edge although some can be cut on an angle to follow the armor. Cut corners or rounded corners both are acceptable all the way to L3, same with the armor pieces, you can trim them so they are level at the tops or leave them stepped.
You are truly a Scholar and a Gentleman.
Sent from my SM-G930T1 using Tapatalk
-
 1
1
-
-
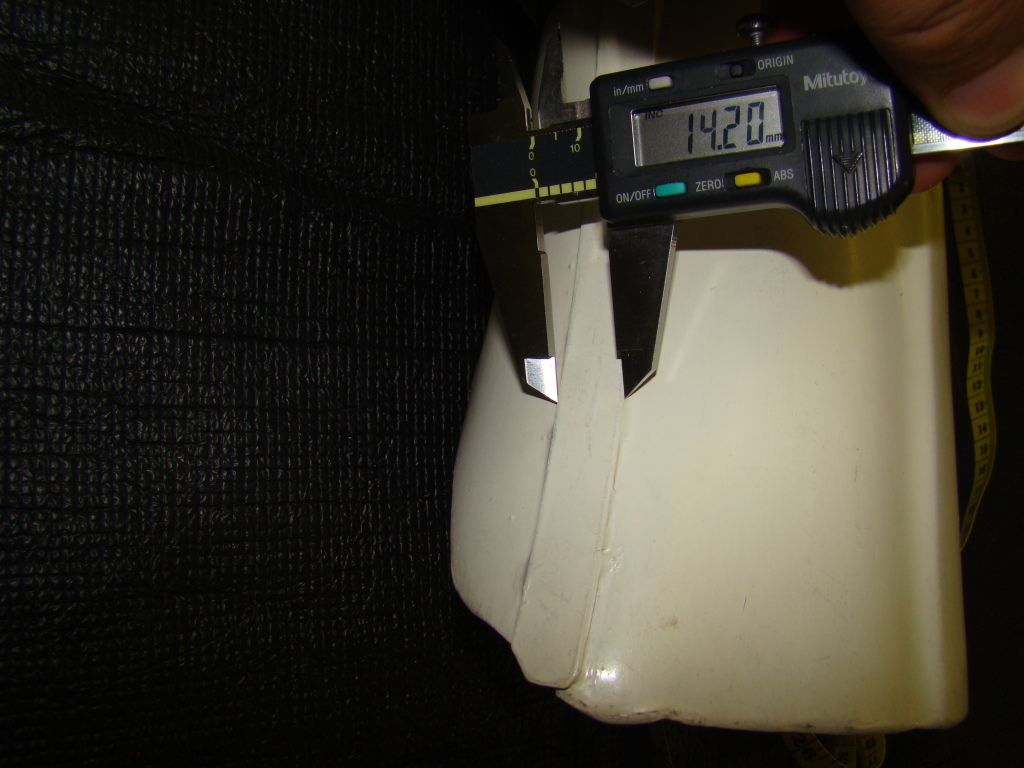
This morning I have pencil marked the returns on my biceps and will be removing them before final measurement and assembly.
By the way, what is the proper way to finish the ends of the cover strips?
Sent from my SM-G930T1 using Tapatalk -
I think I'll try to get my wife to help me with my Duct tape Doppelganger tonight so I can start on the rest of my pieces.
Being wrapped in Duct tape by a woman may have seemed exciting when I was younger, now it just makes me uneasy.
••••••••••••••••••••••••••••••••••••••••••••••••••
"Aren't you a little chubby for a Stormtrooper"
Quote courtesy of the wifey
••••••••••••••••••••••••••••••••••••••••••••••••••
Sent from my SM-G930T1 using Tapatalk-
1
-
-
It's Humbrol #5 alright. It's just the lack of good lighting for my phone/camera.What paint are you using it looks very dark, should be humbrol No5:
You may want to remove a little paint from the gums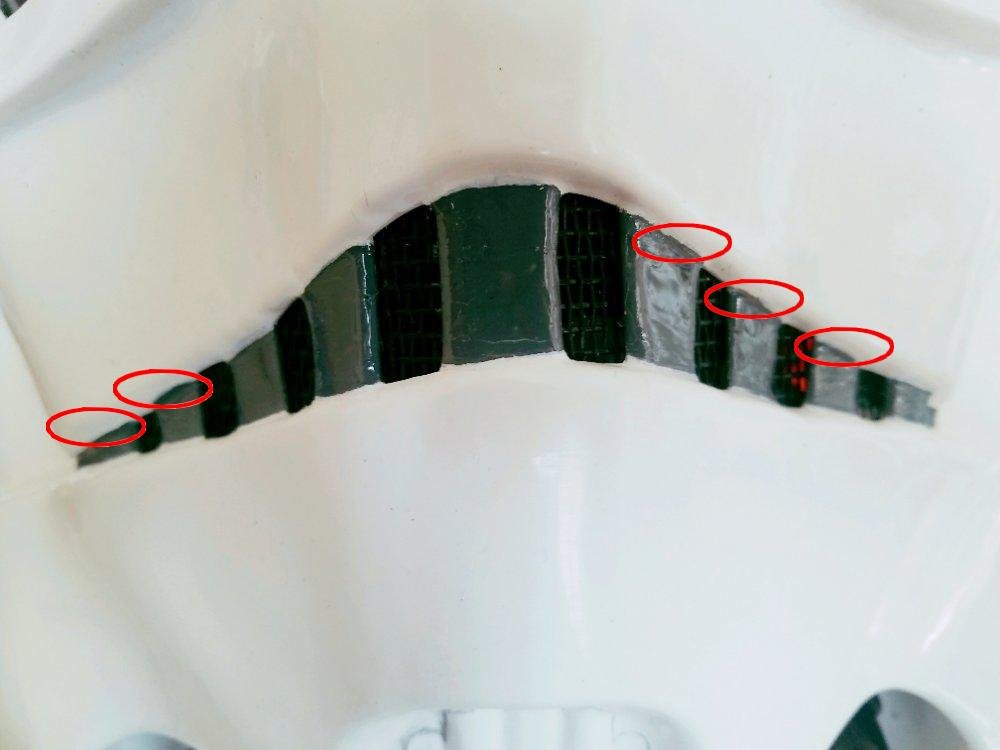
I'll get more on those teeth tonight. Thanks for the speedy reply.
Sent from my SM-G930T1 using Tapatalk
-
1
-
-
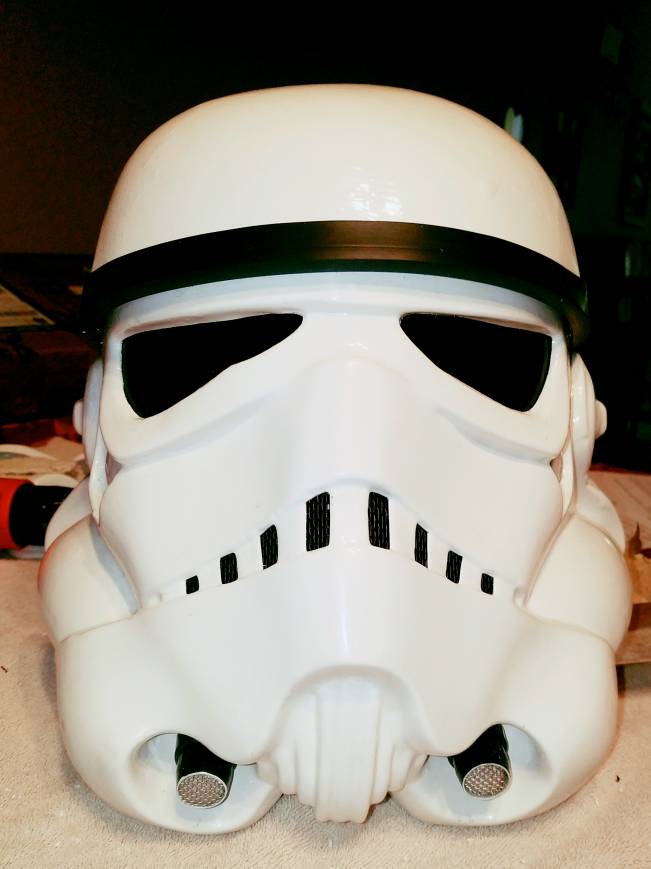
And how do these toothies look?

Sent from my SM-G930T1 using Tapatalk -
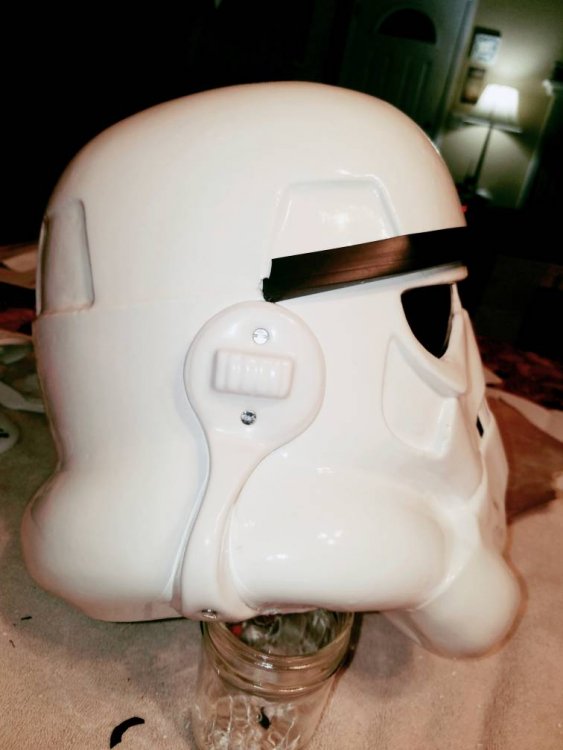
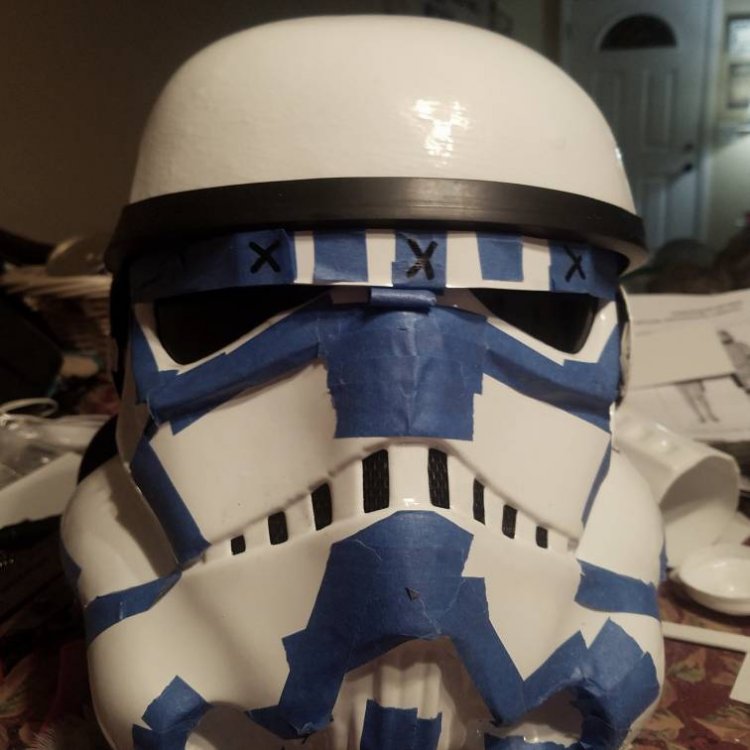
Here's the penciled outline of vocoder. I need opinions before I paint.

Sent from my SM-G930T1 using Tapatalk -
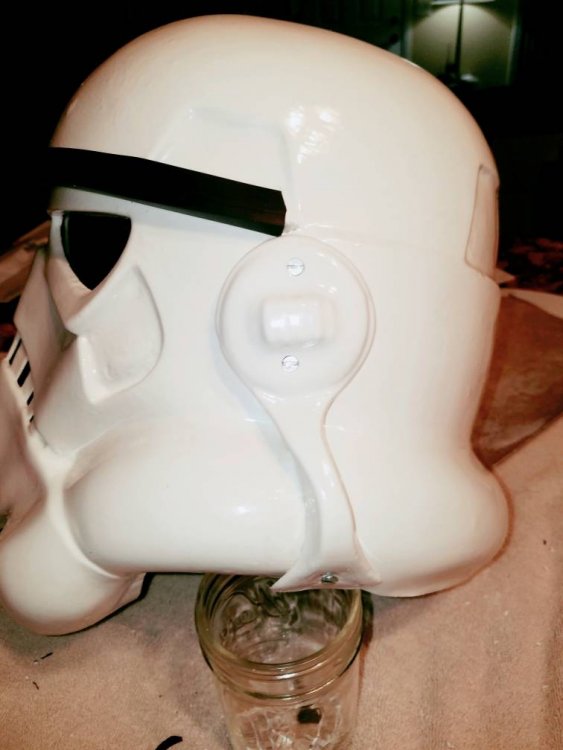
Thanks, I'll make those changes. Good thing I got two sets of templates.Nice work helmet looks great, if you wanted to you could add a couple of tweaks:The tube stripes should fall forward on the front of the helmet
back //////////// front


Tube stripes should ideally be a pencil width from the cheek


You could match the sides of your vocoder, one side hump is a lot lower then the other and the tops don't match. Also the paint on the teeth should stop just short of the gums and not the full length of the teeth


Just on the rear stripes they could be a touch lower.
You've done a great job and these are just suggestions just to take it up a notch

Stay tuned!
Sent from my SM-G930T1 using Tapatalk
-
1
-
-
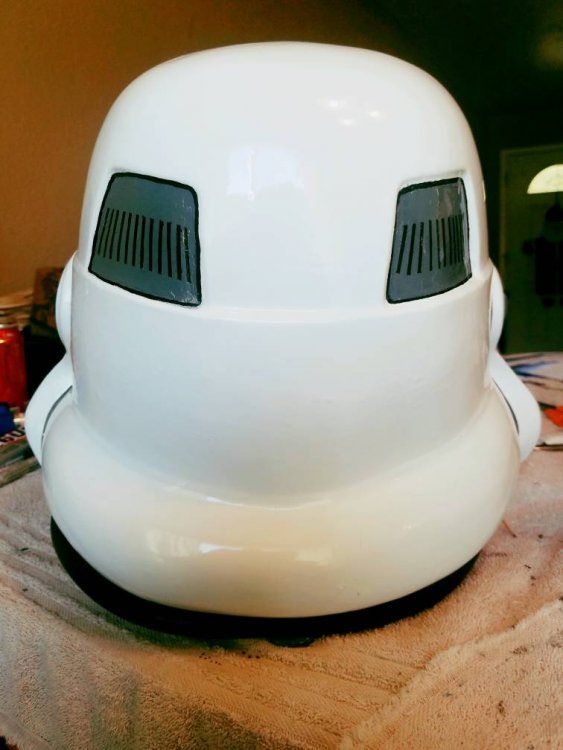
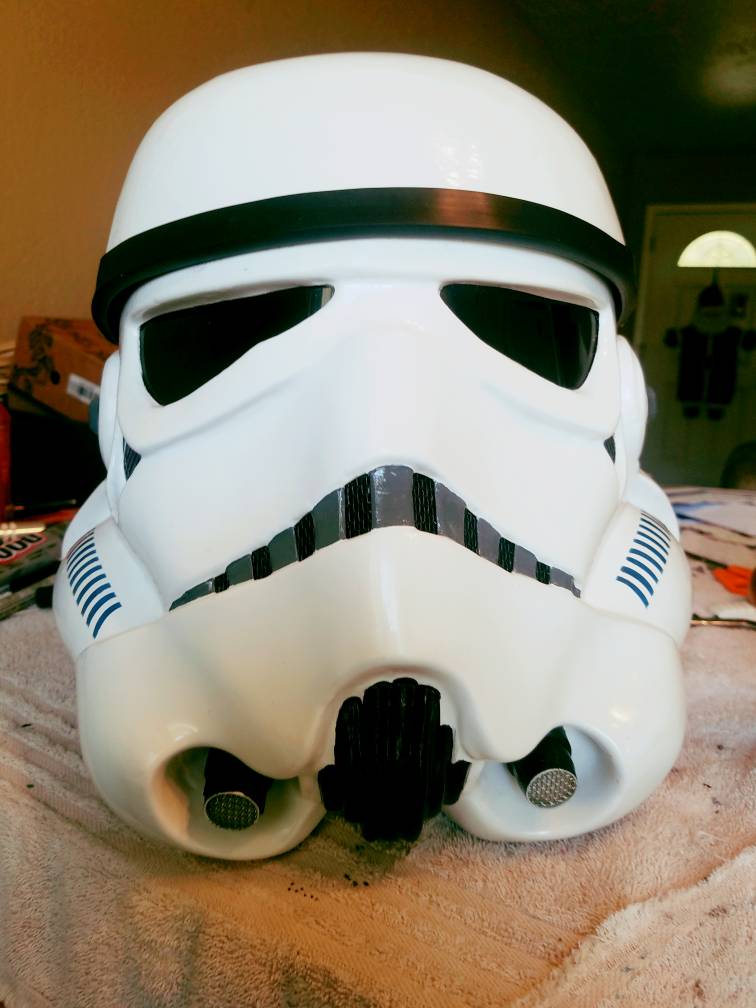
Here's the paint job on my bucket. Please comment on needed fixes.


Sent from my SM-G930T1 using Tapatalk -
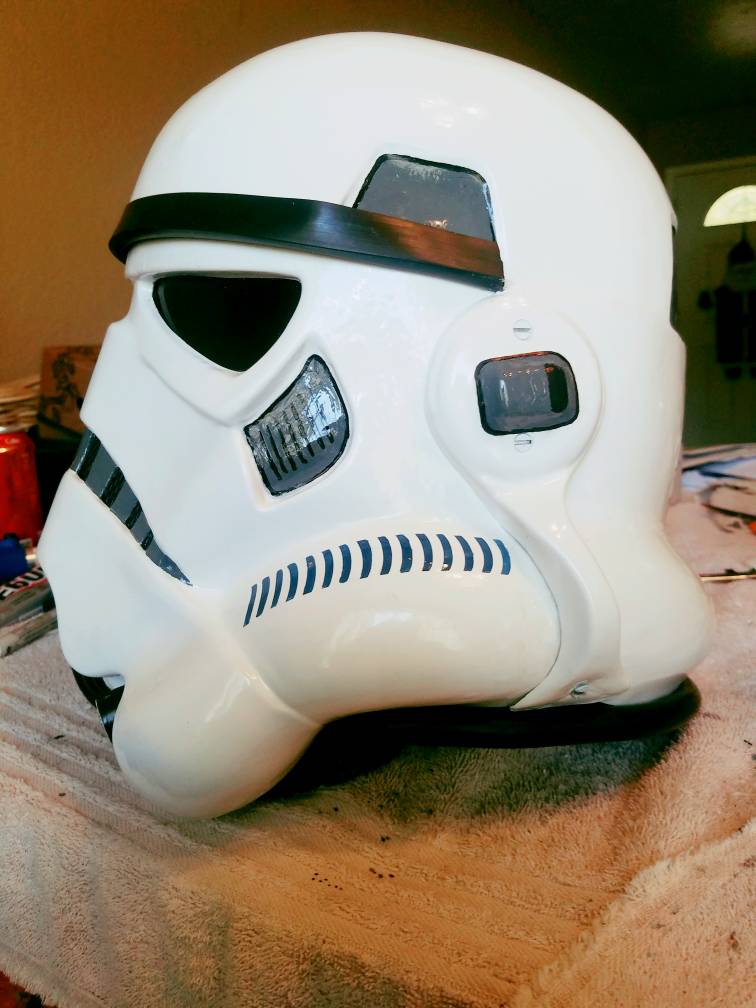
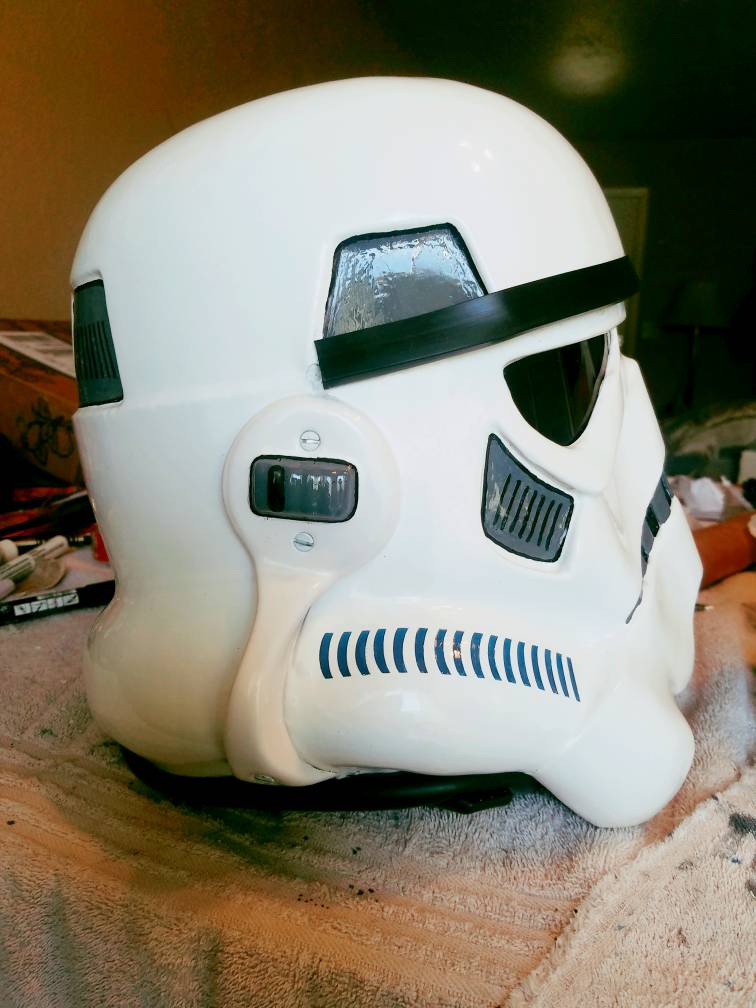
Here are some pics of my bucket with the ears on for your perusal and comment. Putting these things on is as hard as hunting Krayt Dragons with a vibro knife.


Sent from my SM-G930T1 using Tapatalk-
1
-
-
My Hovi's arrived from UKSWRATH today, I will be putting them on tomorrow.


Sent from my SM-G930T1 using Tapatalk-
1
-
-
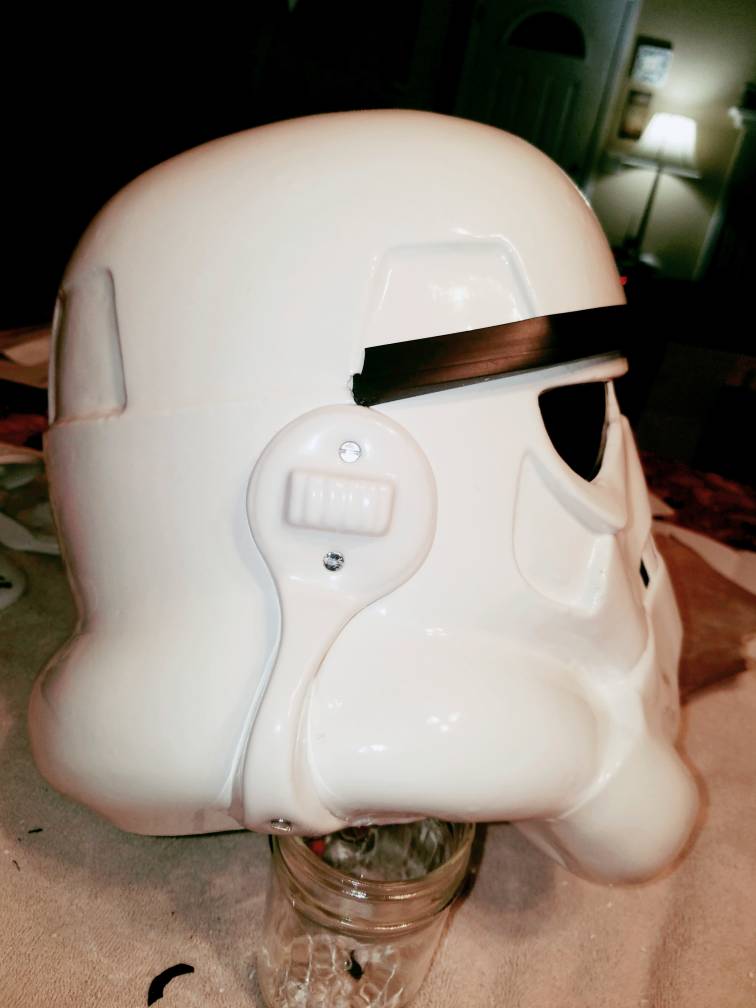
Got two screws into right ear to check alignment.

Sent from my SM-G930T1 using Tapatalk-
1
-
-
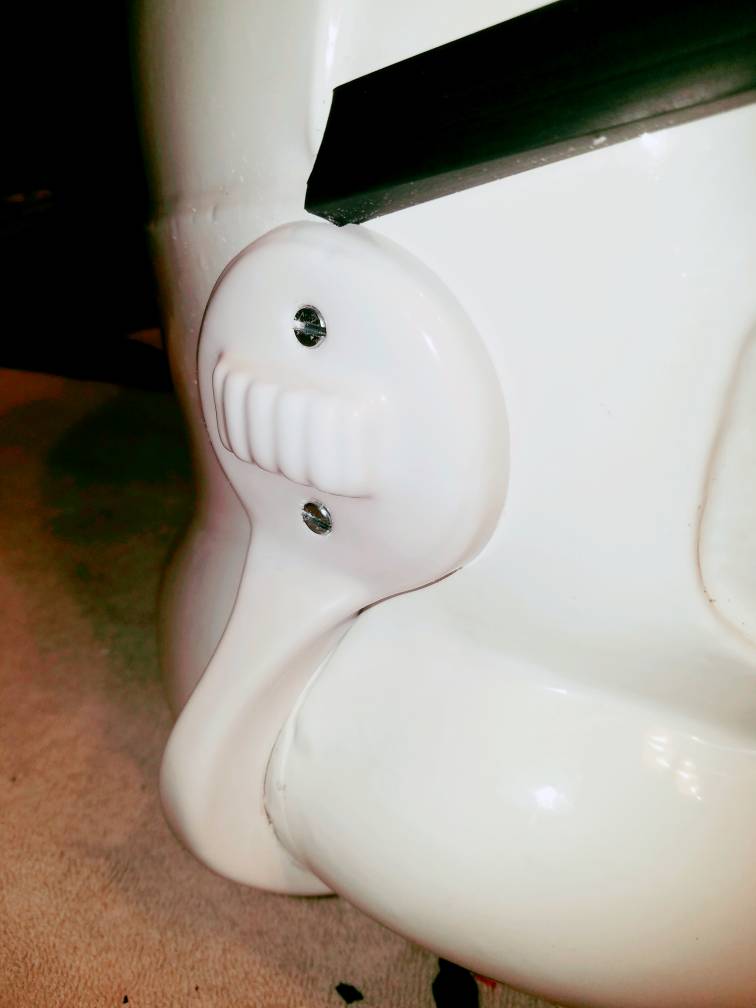
Yea, here's a better angle.
Thanks
Sent from my SM-G930T1 using Tapatalk-
2
-
-
I ordered machine screws from amazon and they sent me zinc instead of brass. Are these acceptable since they will be painted over?
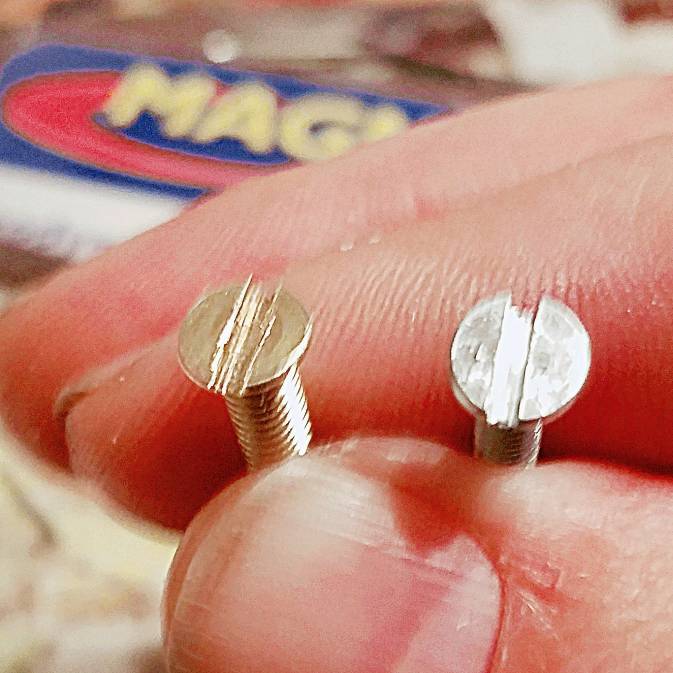
Sent from my SM-G930T1 using Tapatalk -
Thanks, this is by far the most unnerving part of the bucket.Nice positioning
Sent from my SM-G930T1 using Tapatalk
-
1
-
-
I've got the front and back together, now time for the ears.
Here I'm lining up the screw holes with the edge of the trap.
Sent from my SM-G930T1 using Tapatalk-
2
-
-
Copy, Copy!
Sent from my SM-G930T1 using Tapatalk -
Guess this answers my question!

Sent from my SM-G930T1 using Tapatalk-
1
-
-
30 minutes ago, gmrhodes13 said:Dan has an nice documented RS build which may help
There is a lot of tweaking with helmet builds, move one spot and it affects another spot, you will find most helmets will have a gap until pieces are pulled together, using magnets can help aligning things upGREAT! Thanks!
Sent from my SM-G930T1 using Tapatalk
-
1
-
-
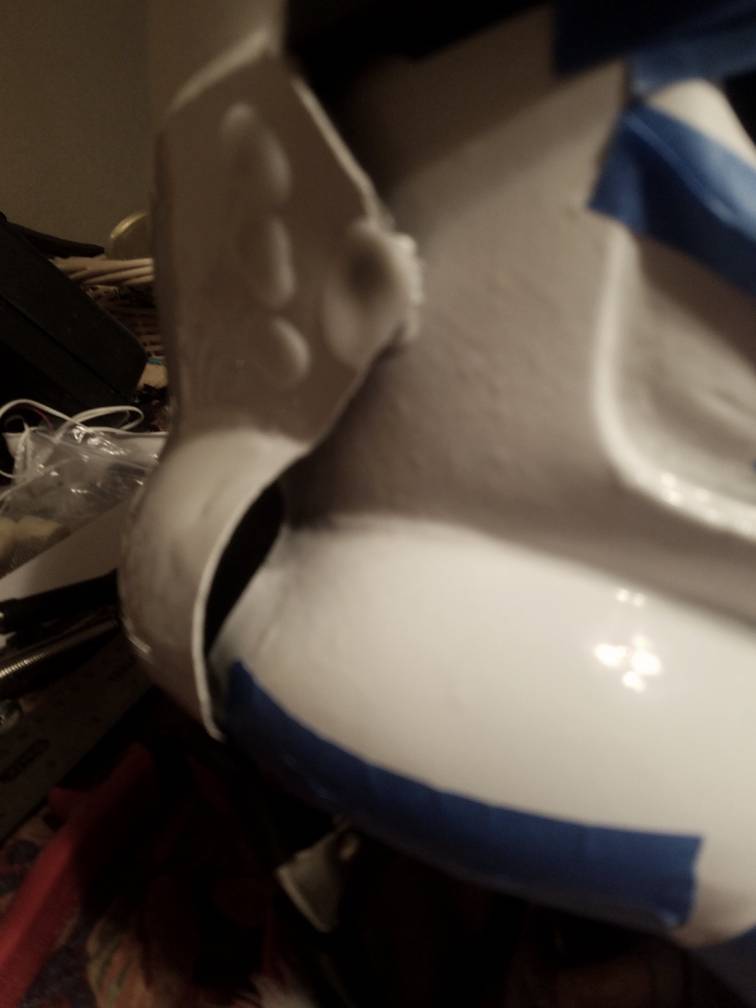
Can anyone who has built a RS Bucket let me know if this gap is normal?
I could raise the face piece but that would put the brow gasket right on top of the lenses like a hero bucket.
Sent from my SM-G930T1 using Tapatalk -
Can anybody who has assembled an RS suit let me know if this gap is normal?
If I push up the front section to lessen the gap the brow trim will sit on top of the lenses
Sent from my SM-G930T1 using Tapatalk -
The brow now sits cleanly on the jig an I can move the sides around and get a good alignment before the drilling starts.
Sent from my SM-G930T1 using Tapatalk -
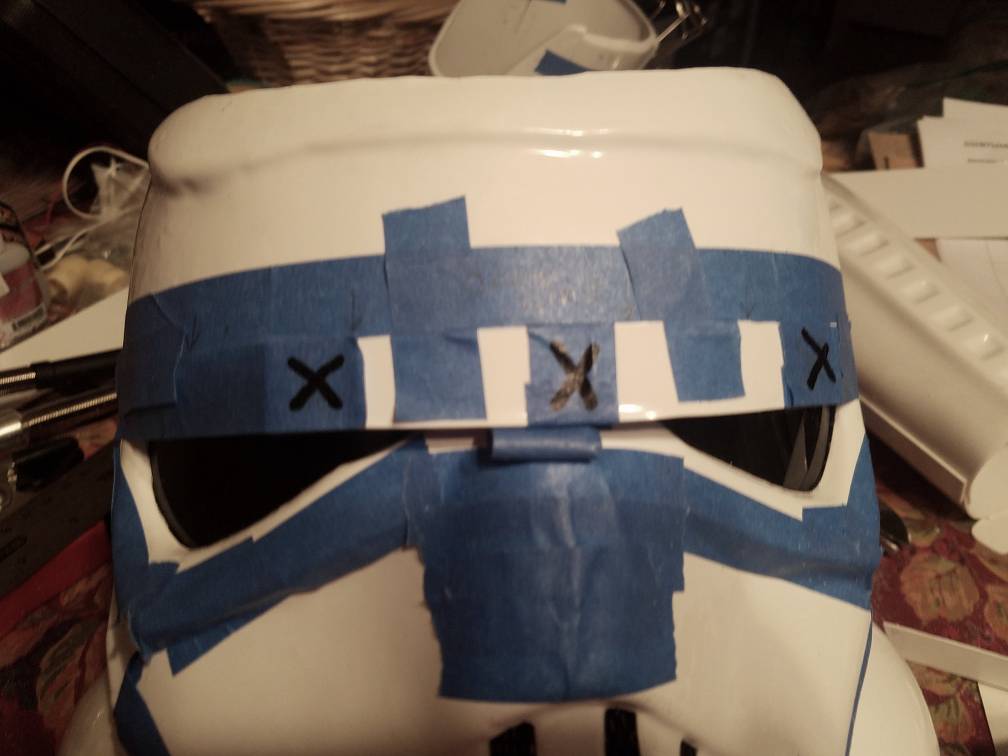
Most builders know that it can be a real hassle to marry up the back of the bucket to the front and keep everything from going akimbo (Akimbo is actually a Ewok word that loosely translates in basic as "To Sh*t) every time you make an adjustment. Since I can't afford the two extra cybernetic limbs I saw on Ebay and I don't think I'll be bitten by a radioactive spider anytime in the near future, I had to improvise.
My remedy is, as you can see in the first photo, to make a Jig out of two pieces of scrap taped together and then I heat bended them to conform to the area above the lenses.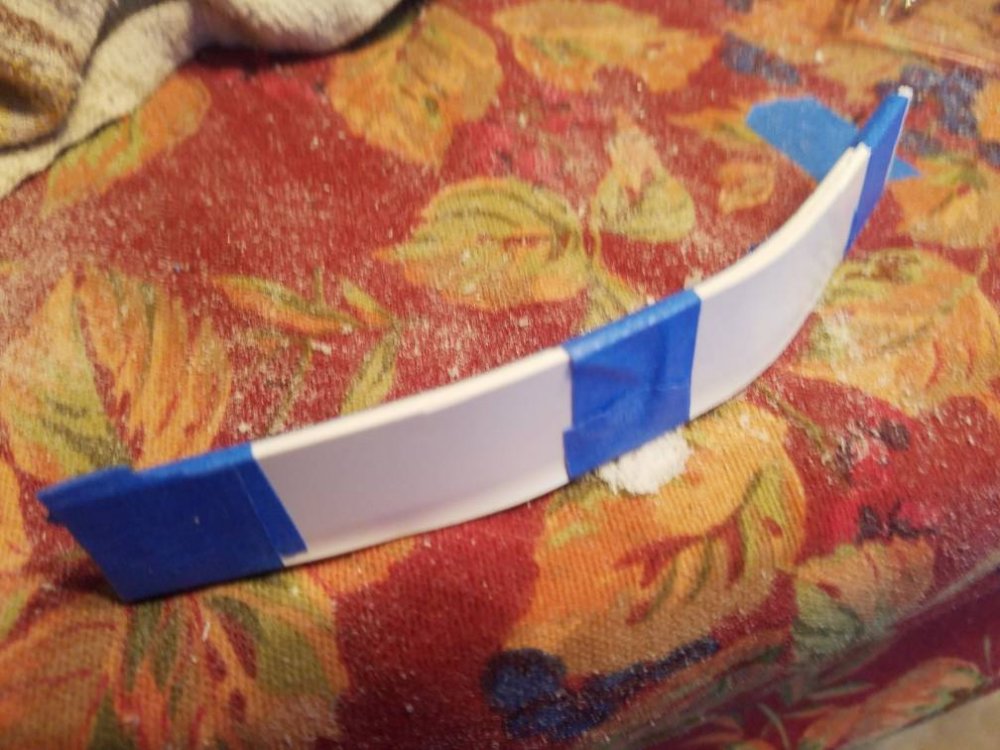
Then I tapped it below the area I've chosen to be my brow line
I back rolled some tape (Sticky side out) and stuck it under the center of the jig to give support so it does not slide down.
And so it goes...
Sent from my SM-G930T1 using Tapatalk -
So before everyone asks, all the tape is to protect the protruding edges so they don't get scratched when I move the bucket around. I tend to get really focused and take less care when moving it around.
Now, on with our show...
I'm working out where I want the brow to be above the lenses. I used blue tape to get a decent straight line that was equally spaced above the lenses.
The bottom edge of the tape is where I want the bottom of the black rubber to sit.
Now, Time for a station break...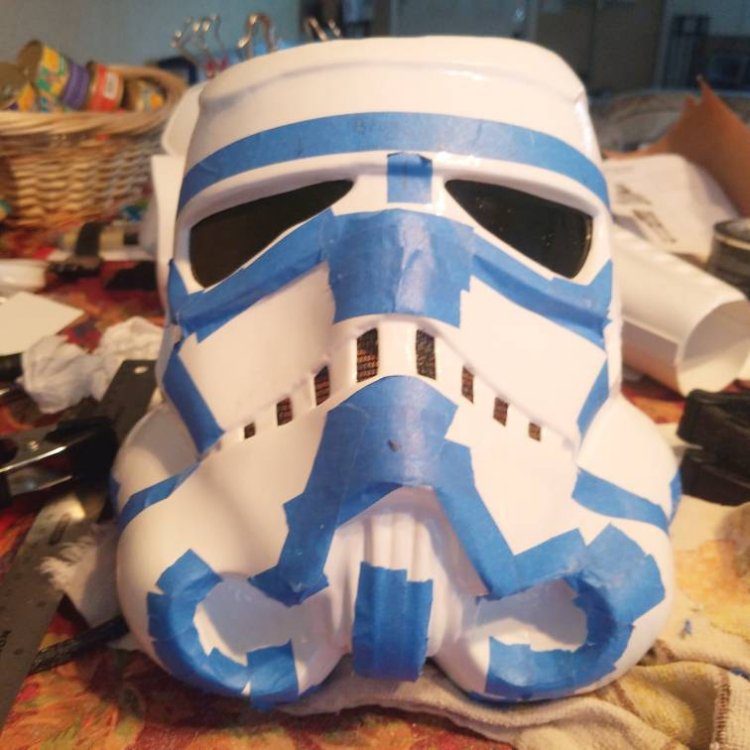
Sent from my SM-G930T1 using Tapatalk


Darth Sarcasms RS PVC Build
in ANH (Stunt and Hero)
Posted
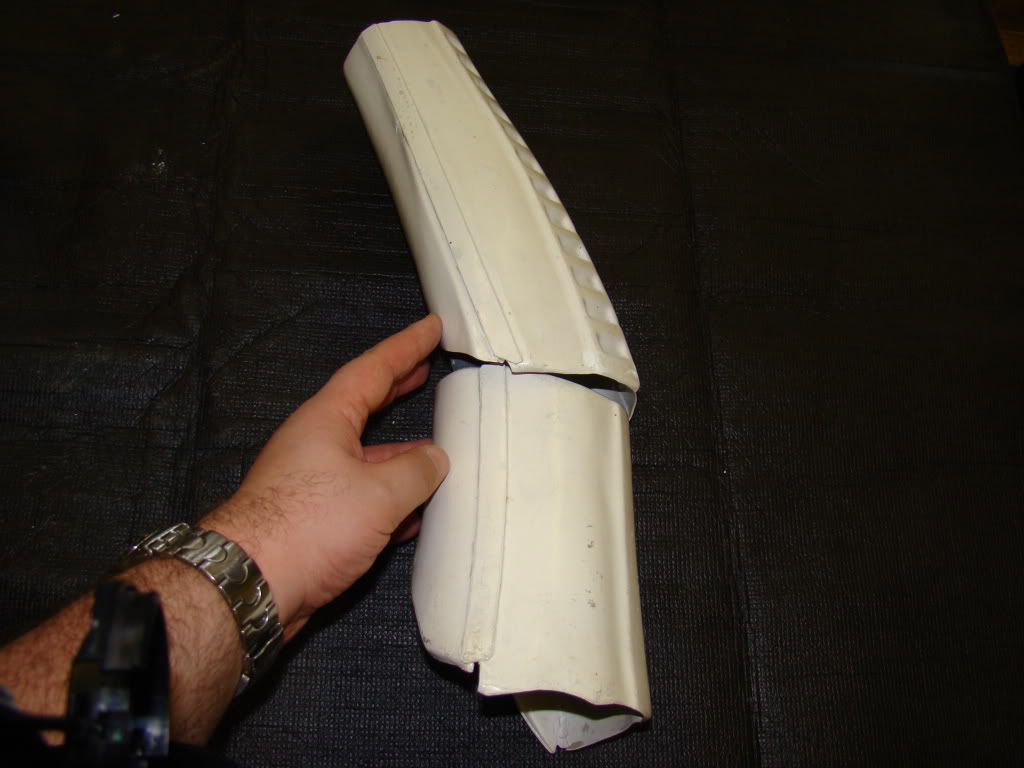
I removed the return edge on the fore arms as seen here.
https://www.flickr.com/gp/184848106@N07/797C1g
But as you can see from this next pic the profiles don't come anywhere towards matching.
https://www.flickr.com/gp/184848106@N07/0Ux7Yw
So, do i need to remove the hump from the right fore arm to match the left?
Sent from my SM-G930T1 using Tapatalk