

GoofySGB
-
Posts
37 -
Joined
-
Last visited
Content Type
Profiles
Forums
Gallery
Articles
Media Demo
Posts posted by GoofySGB
-
-
Wow thank you this just made my day
-
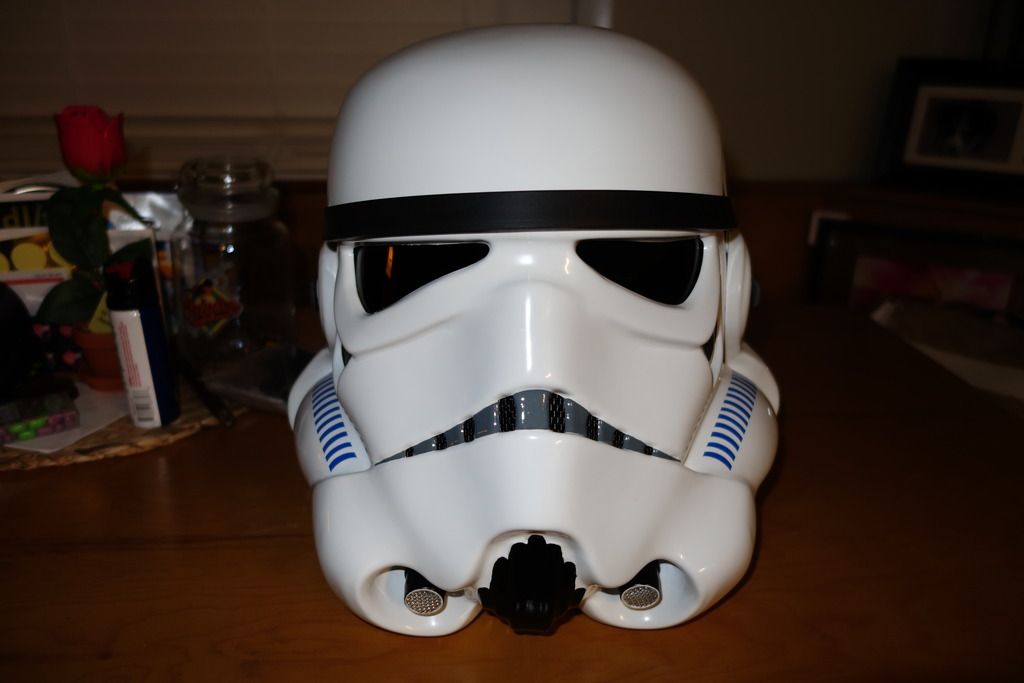
Name: Stephen Bauchan501st ID: TK-17081 501st Profile PageFISD Forum Name: GoofySGBGarrison: Old Line Garrison
EIB Suggestion Modifications:- Wrong AM Ammo Belt, replaced the Ammo Belt.
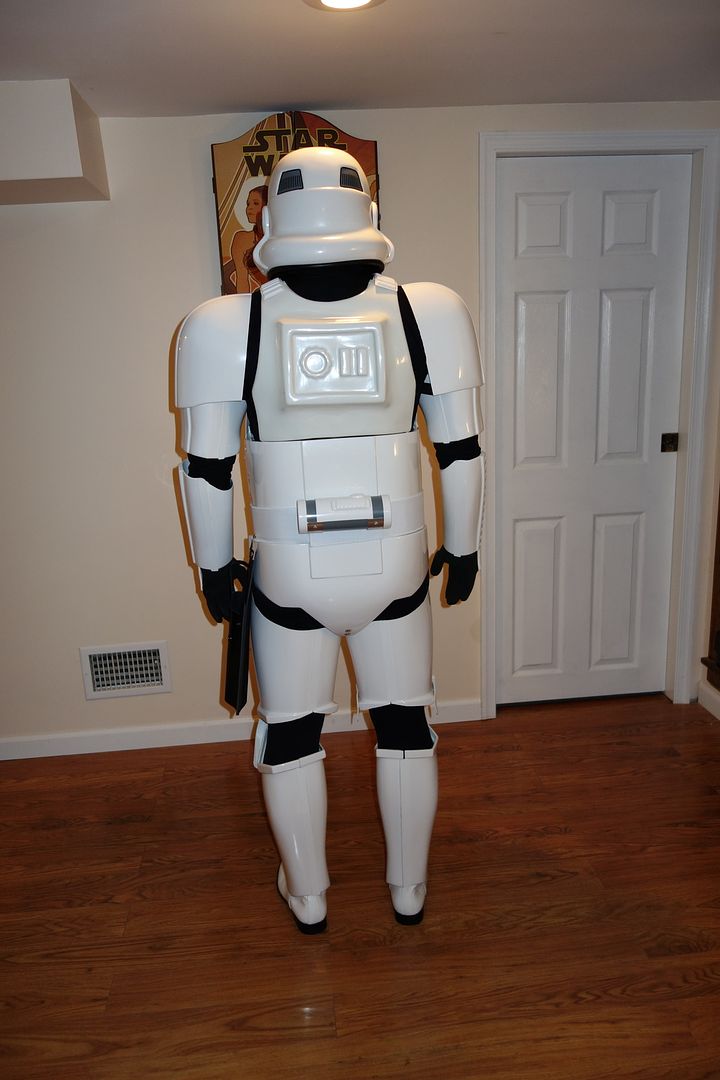
Armor Maker = AM 2.0Helmet Maker = APBlaster Type = Hyperfrim Grade B ANHHeight = 5’11”Weight = 215 lbsBoots Maker = TK BootsCanvas belt = TrooperBayHand Plates Type = TrooperbayElectronics = Ukswrath’sHovi Mic TipsIcom, Audio AmpCooling SystemNeck Seal Type = Extreme RacingNecksealUndersuitHolster Maker = Darman 8ozFull Body Front Full Body Back
 Full Right
 Full Left
 Right Side Detail
 Left Side Detail
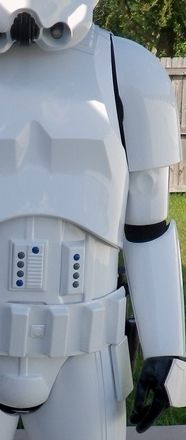
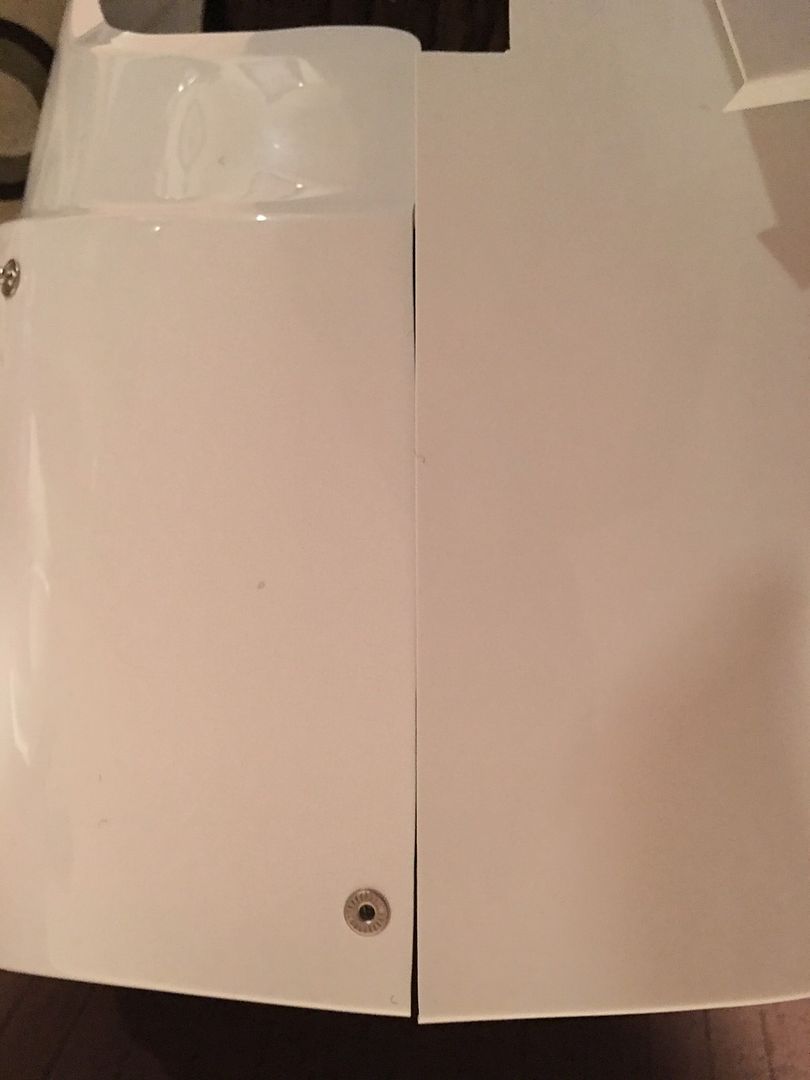
 Abdomen Detail
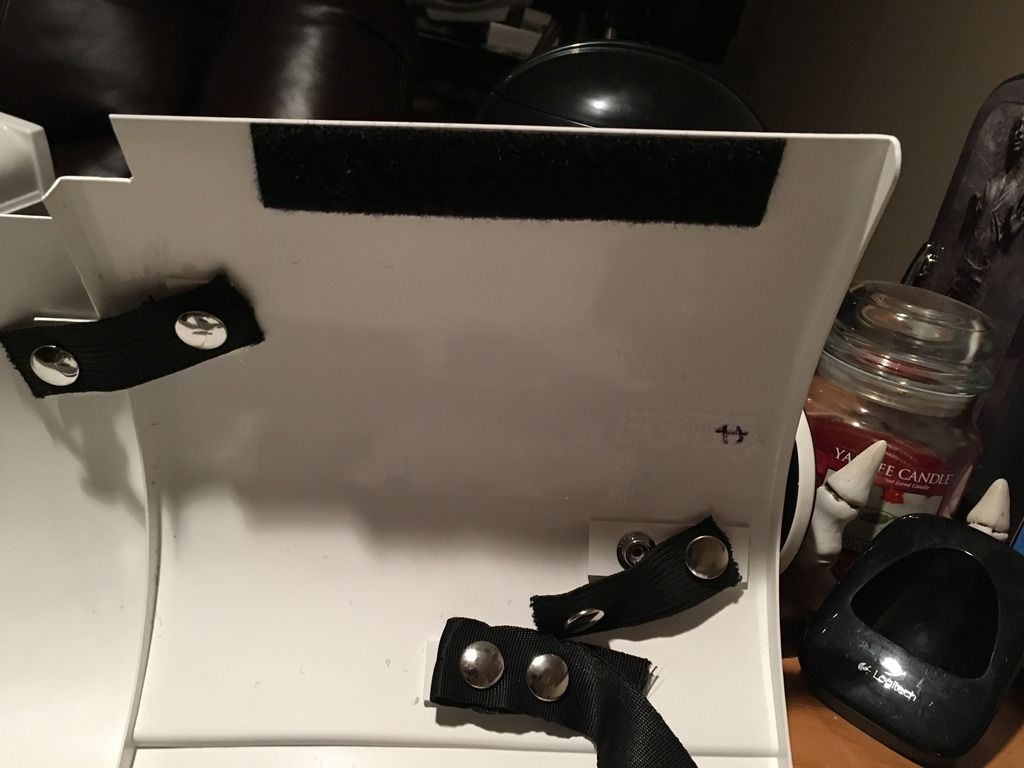
 Interior Strapping
 Hand Guard
 Shoulder Strapping
 Knee Ammo Pack
 Knee Sniper Plate
 Ammo belt Front
 Ammo belt Back
 Forearms
 Cod/Back Connection
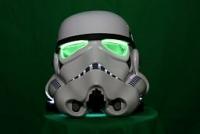
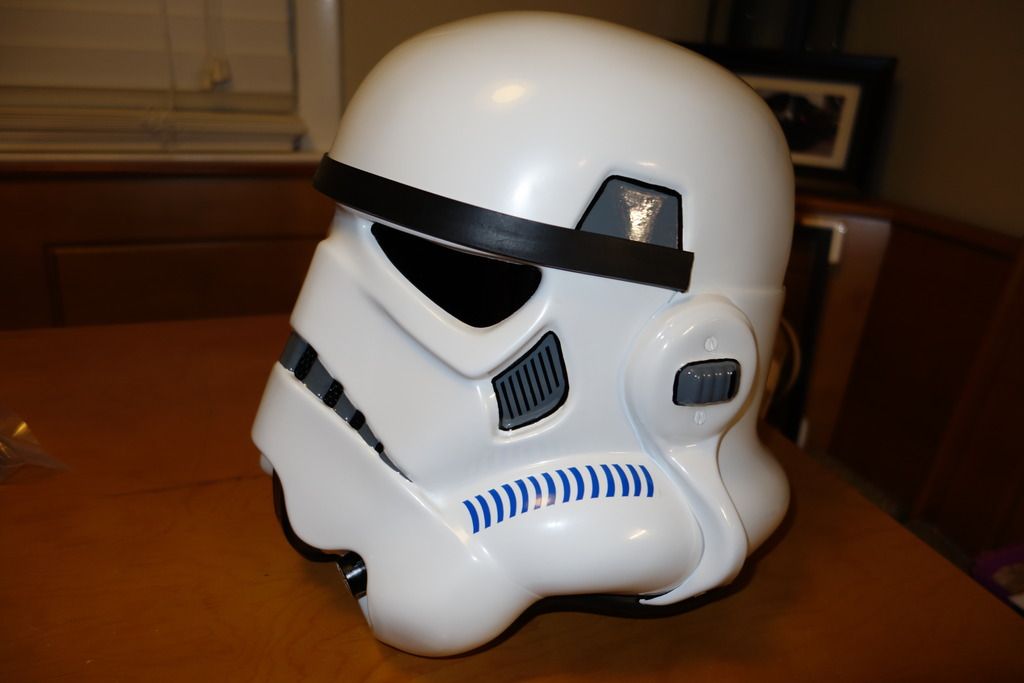
 Helmet Front
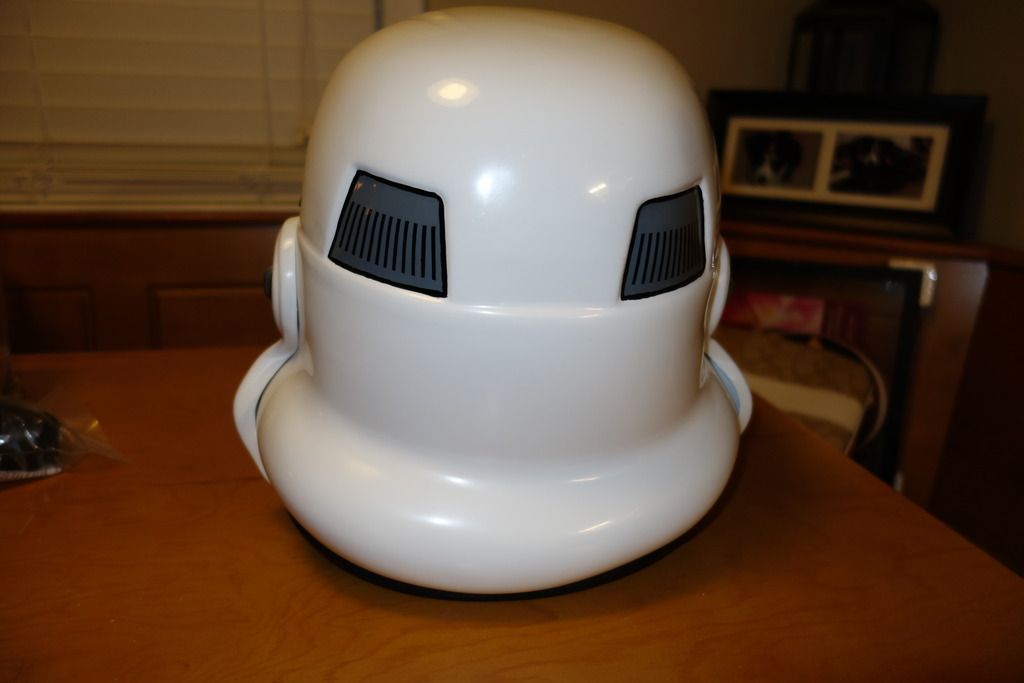
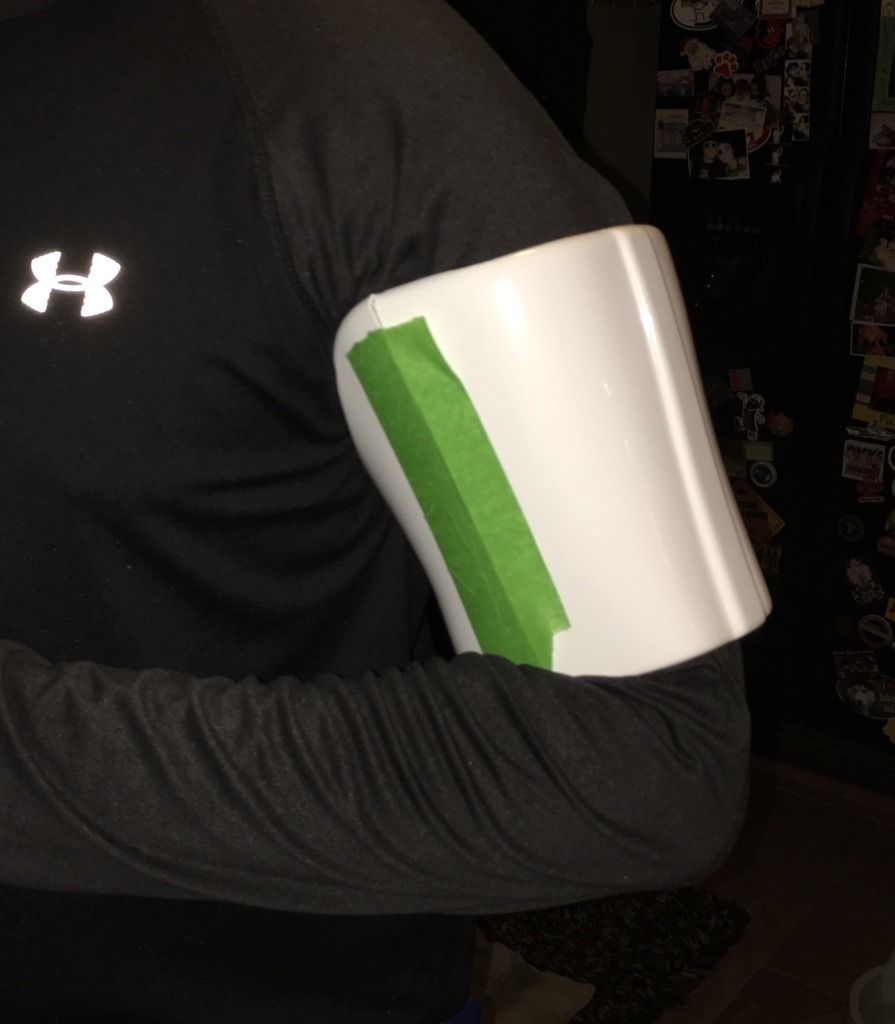
 Helmet Side
 Helmet Back
 Helmet Lens color
 Hovi tip detail
 Blaster left side
 Blaster right side
 Neckseal
 Thermal detonator back
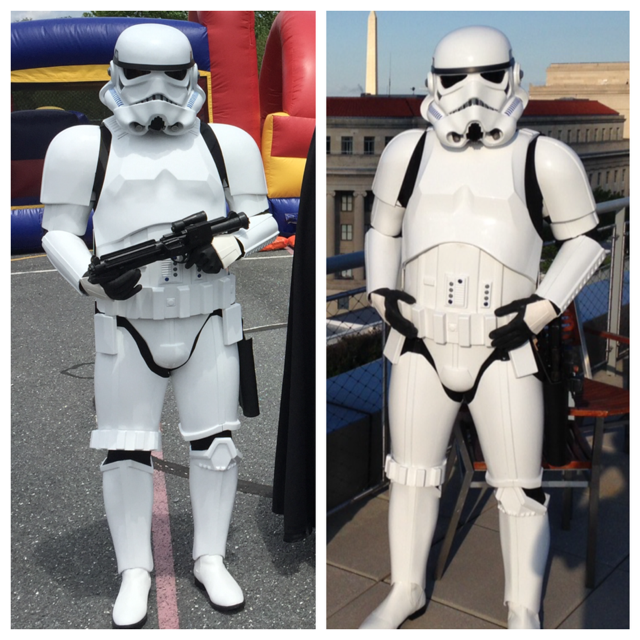
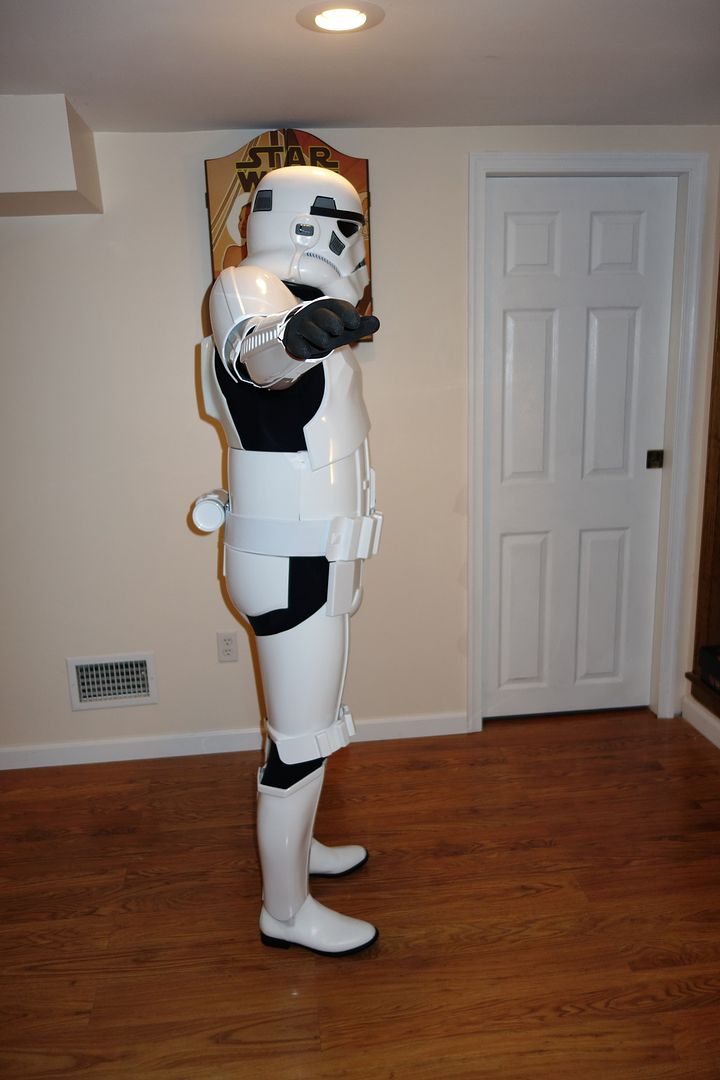
 Action Shot
- Wrong AM Ammo Belt, replaced the Ammo Belt.
-
Stephen Bauchan 17081 EIB letter size Andrew
-
 1
1
-
-
Thank you for the review and will be working on that belt right away.
-
Missing the back of the belt
Back of Belt

-
Thank you looking forward to the review
-
Name: Stephen Bauchan501st ID: TK-17081 501st Profile PageFISD Forum Name: GoofySGBGarrison: Old Line GarrisonArmor Maker = AM 2.0Helmet Maker = APBlaster Type = Hyperfrim Grade B ANHHeight = 5’11”Weight = 215 lbsBoots Maker = TK BootsCanvas belt = TrooperBayHand Plates Type = TrooperbayElectronics = Ukswrath’sHovi Mic TipsIcom, Audio AmpCooling SystemNeck Seal Type = Extreme RacingNecksealUndersuitHolster Maker = Darman 8ozBuild Link = GoofySGB AM 2.0 BuildArmor PhotosFull Body Front
 Full Body Back
 Full Right
 Full Left
 Right Side Detail
 Left SIde Detail
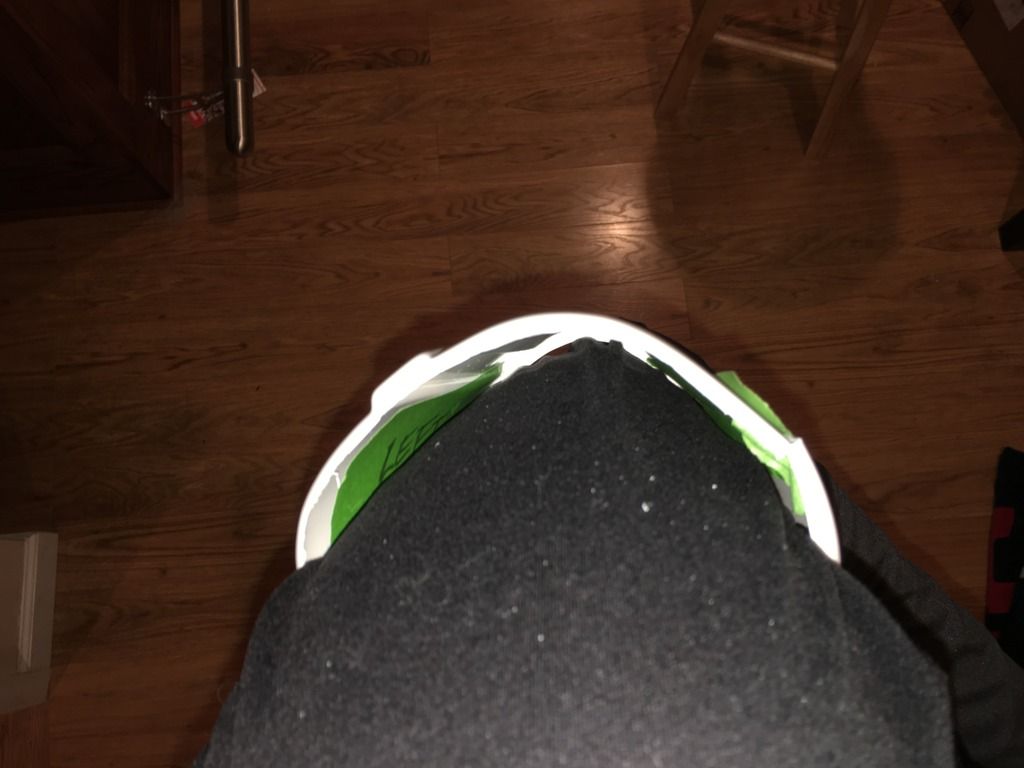
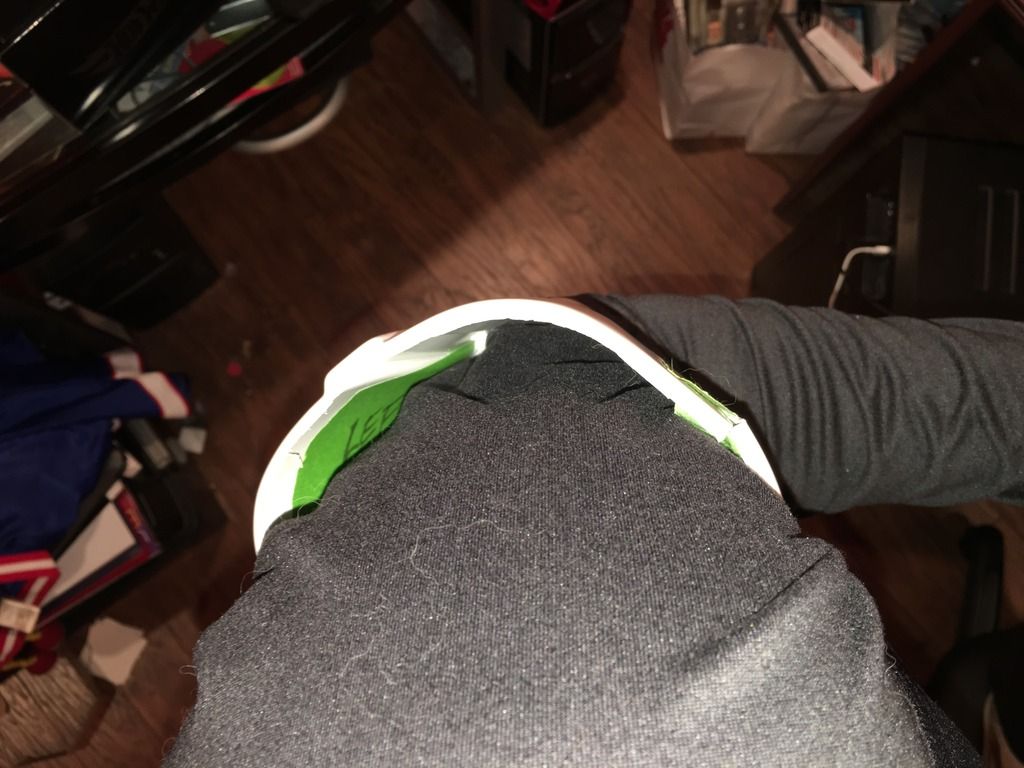
 Helmet Detail PhotosFront
 Side
Side Back
Back Hovi tip detail
 Lens color
 Accessory PhotosAmmo belt
 Neckseal
 Blaster left side
 Blaster right side
 Thermal detonator back
 Action Shot
 Interior Strapping
 Abdomen Detail
-
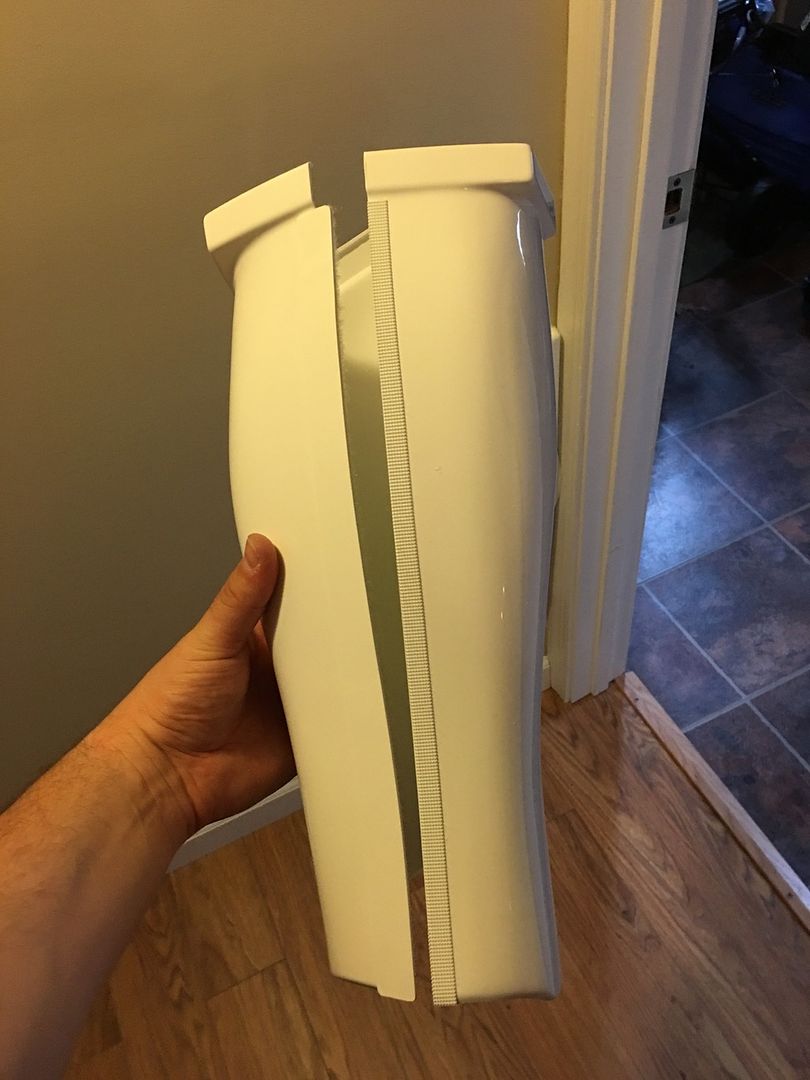
Hey Stephen my suggestion would be to trim the bells if you have shoulder room. If you can maintain the same clearance between the bells and the shoulder covers then trim the bells. Edit NOTE: There should be little to no gap between the bell and chest plate. Removing the lower bell return edge will also move the bells closer to the chest plate which should assist if you choose to trim the bell edge closest to the chest plate.
Hope this helps
there is a very very small return edge on the inside of the bell, and looking at upgrading to a more stronger elastic to hold them up. and i have room in the side the bell as my shoulder are more curved then boxed just not sure how much to trim as trooper gear doesn't sell individual parts so if i screw up the bells it could be a long time before I can get them replaced.
-
That does seem a bit strange, Stephen... how old are the different sets?. I have an AM 2.0 kit, and mine are shaped like the one on the right. I don't think (but I may be wrong) that you can alter the shape of the ones on the left. Hopefully someone can be of more help....
This is a close-up of my AM 2.0
The one on the left is Sept 15 the one on the right was around Sept 14, they recently redid the molding. I reached out to trooper gear to ask about it and this is the response I got
"Yours are newer and more accurate. There were most of the lien once which is why we upgraded our molds. You'll notice your chest back and firearms are different too unfortunately those molds are retired and we no longer pull them"
So now I am trying to figure out how to not be so box like in the shoulders and more uniform like the rest of the TK in my garrison.
-
looking the AM 2.0 shoulder bells there very boxy compared to other troopers I have seen. Trying to figure put if or how to go about trimming them to be less box like and more oval shaped. Any advise would be greatly appreciated.
AM 2.0 on the left AM 1.0 on the right
You can see the AM 2.0 there more box shaped has anyone else ran in to this issue?
-
Fixed the front plate thanks for that can't believe that was over looked. I am looking to go for EIB then to Centurion is there anything anyone see that might not pass? That would still need some tweaking?
-
Wow didn't even noticed the ab buttons I will fix that tonight and I have elastic between the forarm and biceps need to shorten it up and will probably get a stronger elastic. <br><br>
For the everything internal it straight up nylon that pulled tight with the exception to the right side of the chest plate put on elastic strip there to help get in and out of the shell
-
So its been a while since i have post progress pictures went to a local Armor Party which was a major help in getting my assembly completed.Legs are done, had some issue with the sniper knee plate from what i ready it suppose to match the contour of rim for either the plate is short or i need to trim more off to get it to fit right not sure yet.Back
 Front
Front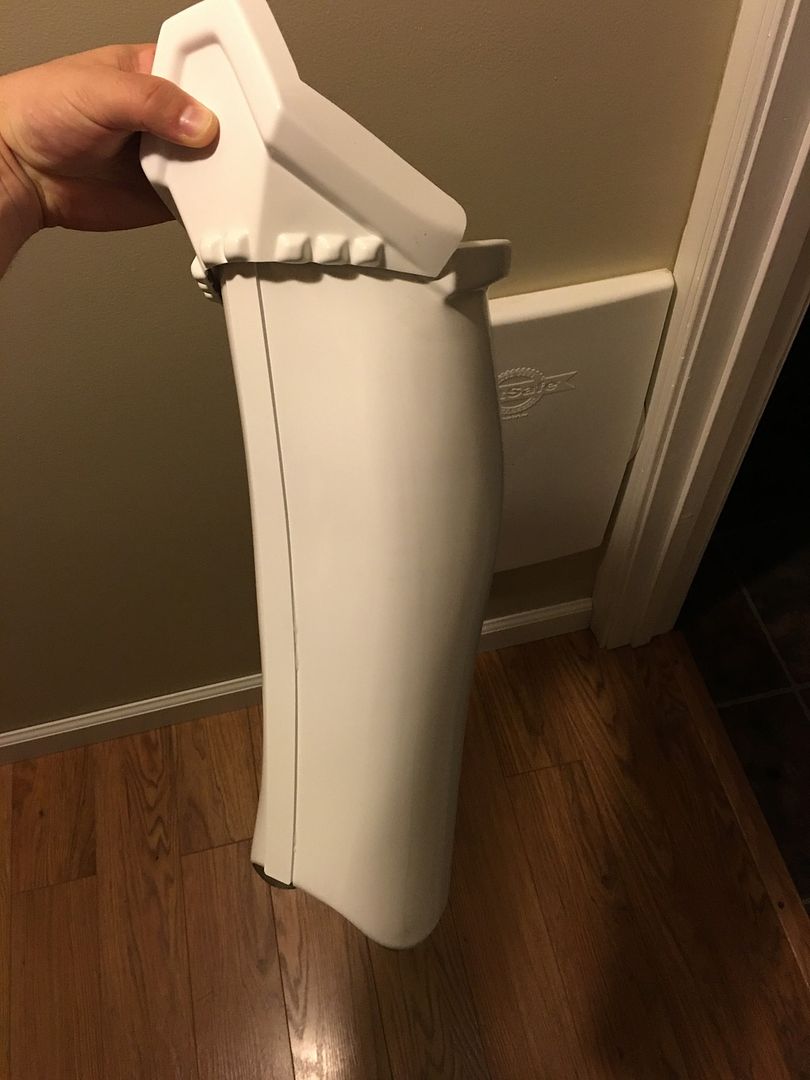 The tighs came along nicely had to cut of an additional inch on the contour of the upper tighs, didn't trim the ammo box fortuantly the hole was drilled far enough down then ill be able to fix it with out having to order a new one.Front
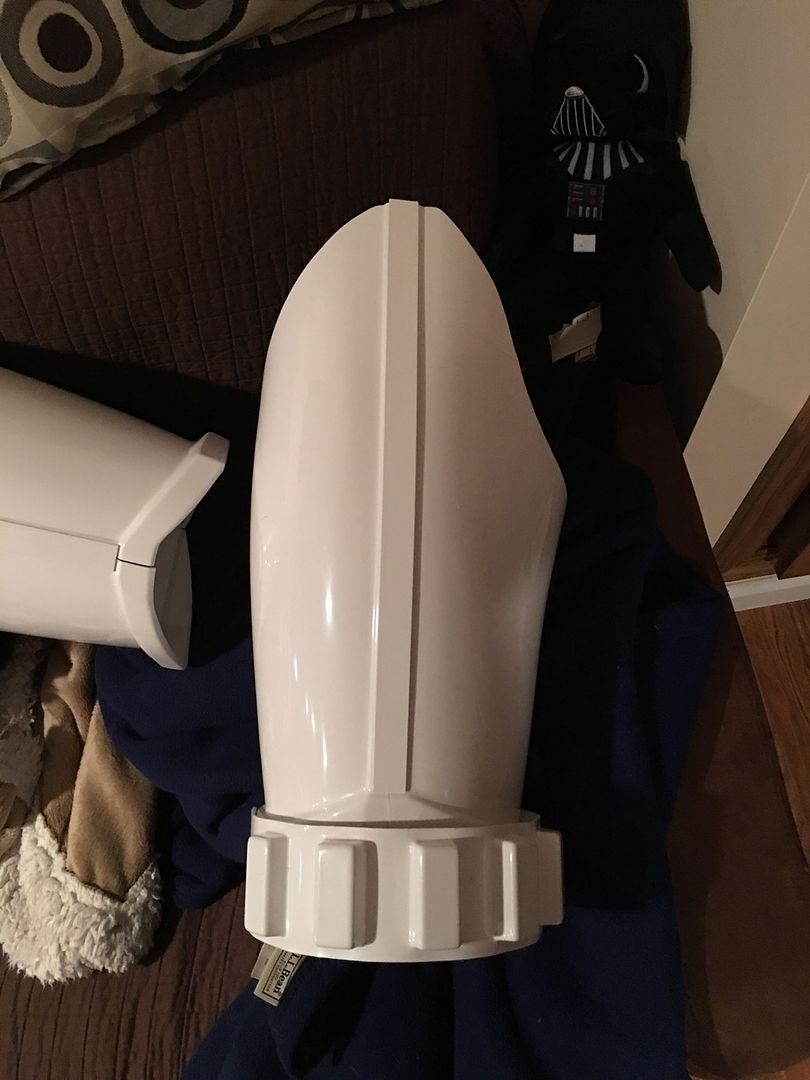 Side
Side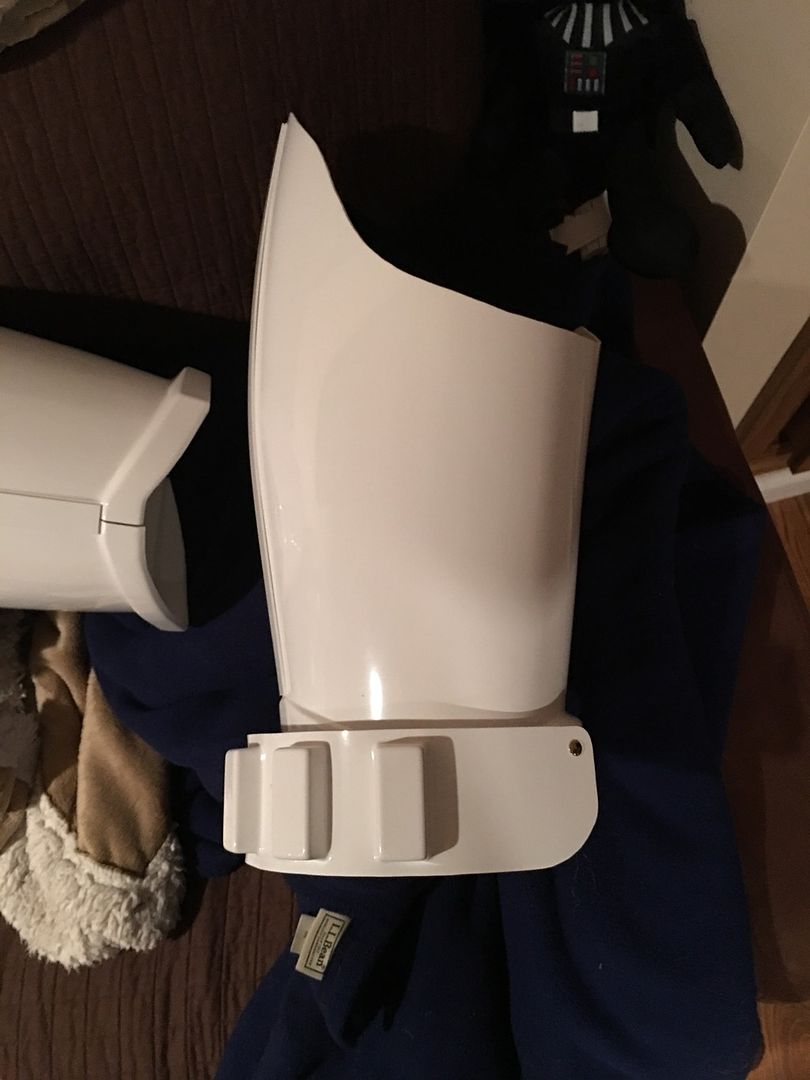
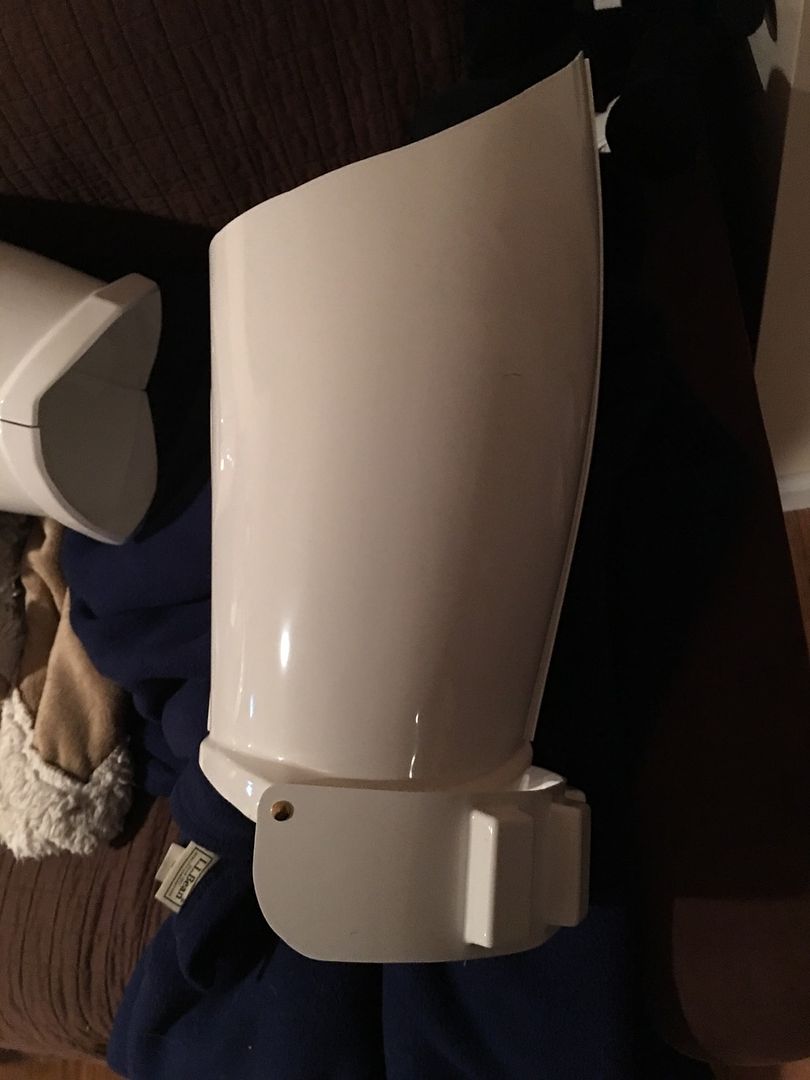 For the highs straping I went with the 3 inch elastic cut to 8 inches too a piece 3 1/2 x 2 piece of thin plastic that was excess from triming the tighs put some CA glue and just slaped the elastic on to it and then glued it to the front of the tighs was going to go with velcro on the end to attach to the front cod piece but I think I am going to go with the belt method found it easier to put on the thigh with the belt and then put on the armor piece.
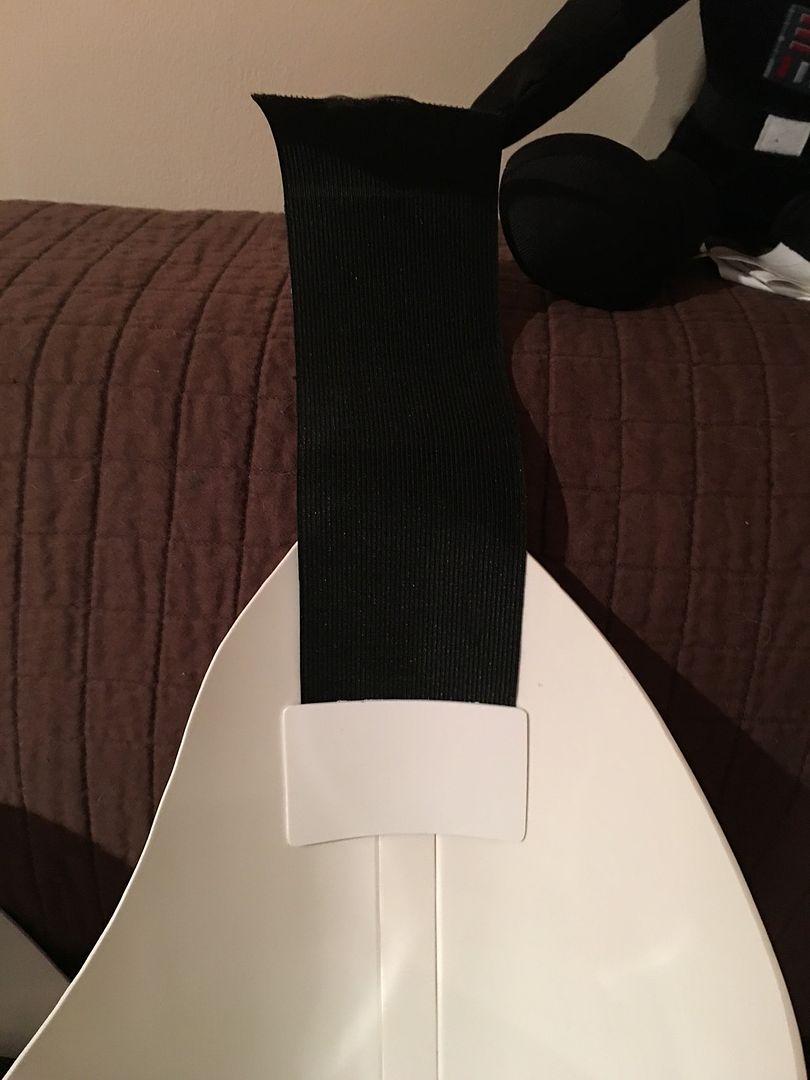 The mid section was a little more fun to do
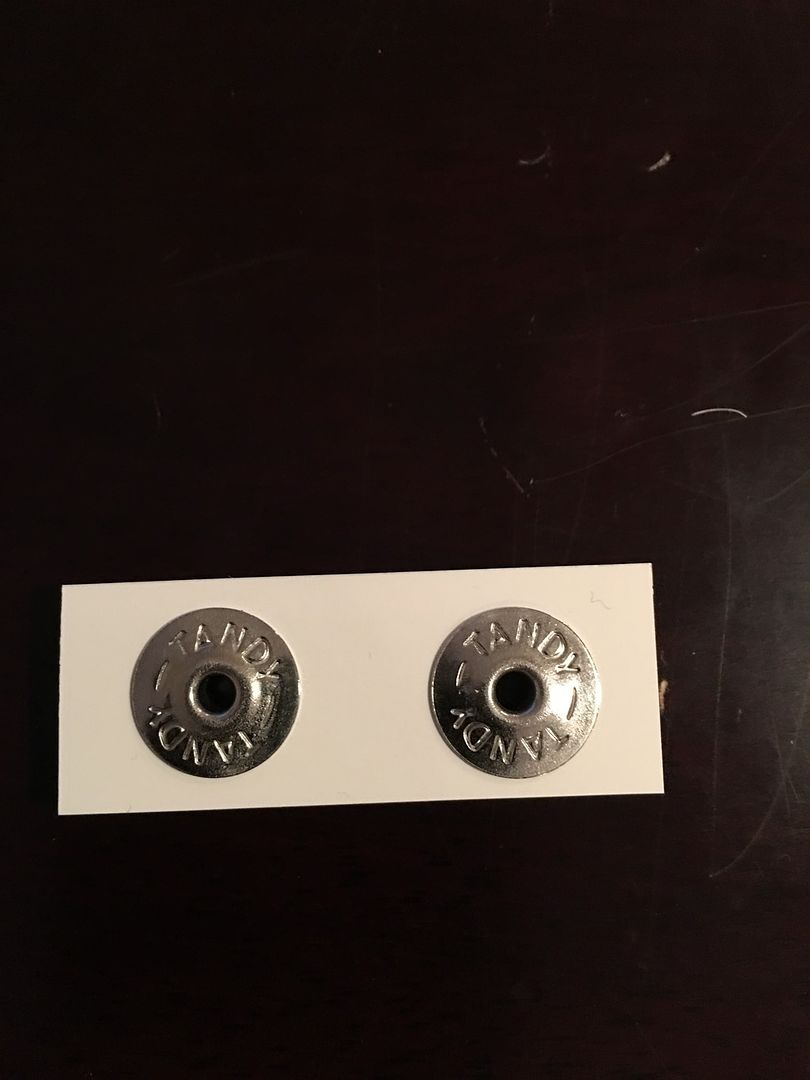
 I started of by cutting 3/4 x 2 piece and then drilled 1/8 inch holes to do snaps. Tandy makes some very heavy dutty snaps found them hard to snap together and come off so made a few 3/4 x 1 for a few of the piece. I used the cover strip plastic for this had extra 3/4 ones cut.
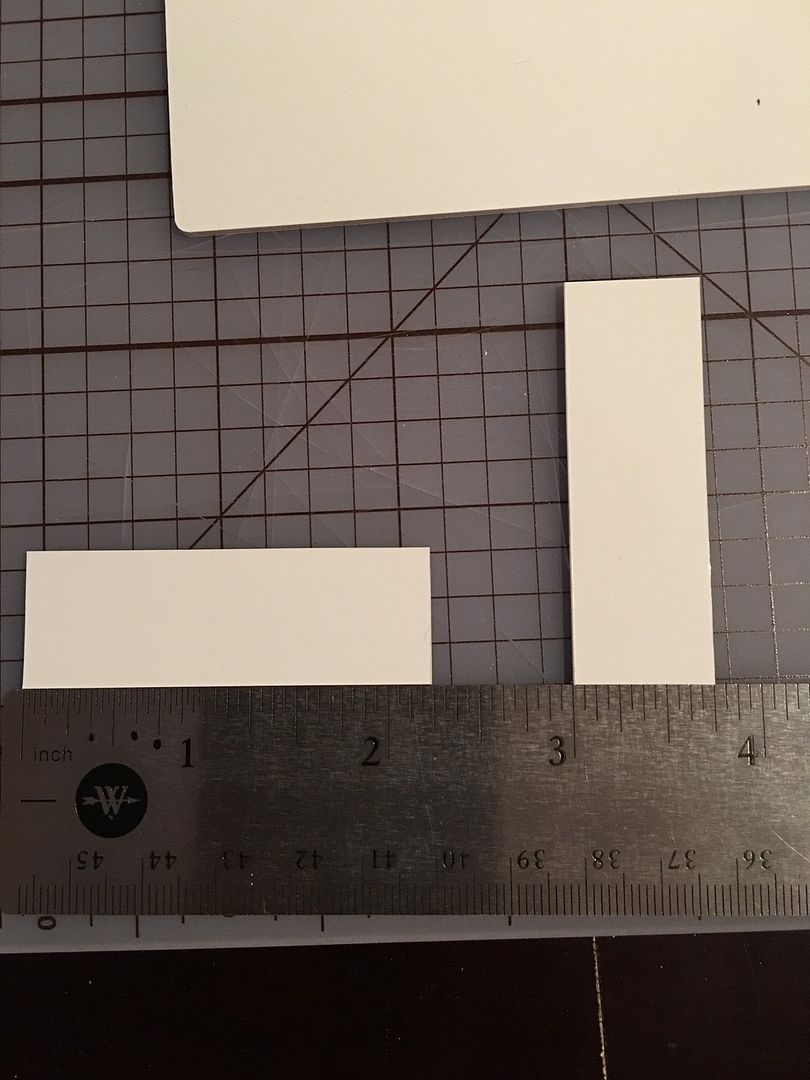
 I then used a little CA glue to glue the snaps down the plastic I found it was a little if i made a mistake i can pop it off I instead to go back and cover the edges with CA glue once I liked how everything was laid out.
 I then just taped all the piece together so it was flush and cut 1 inch elastic to make all the connecting pieces.
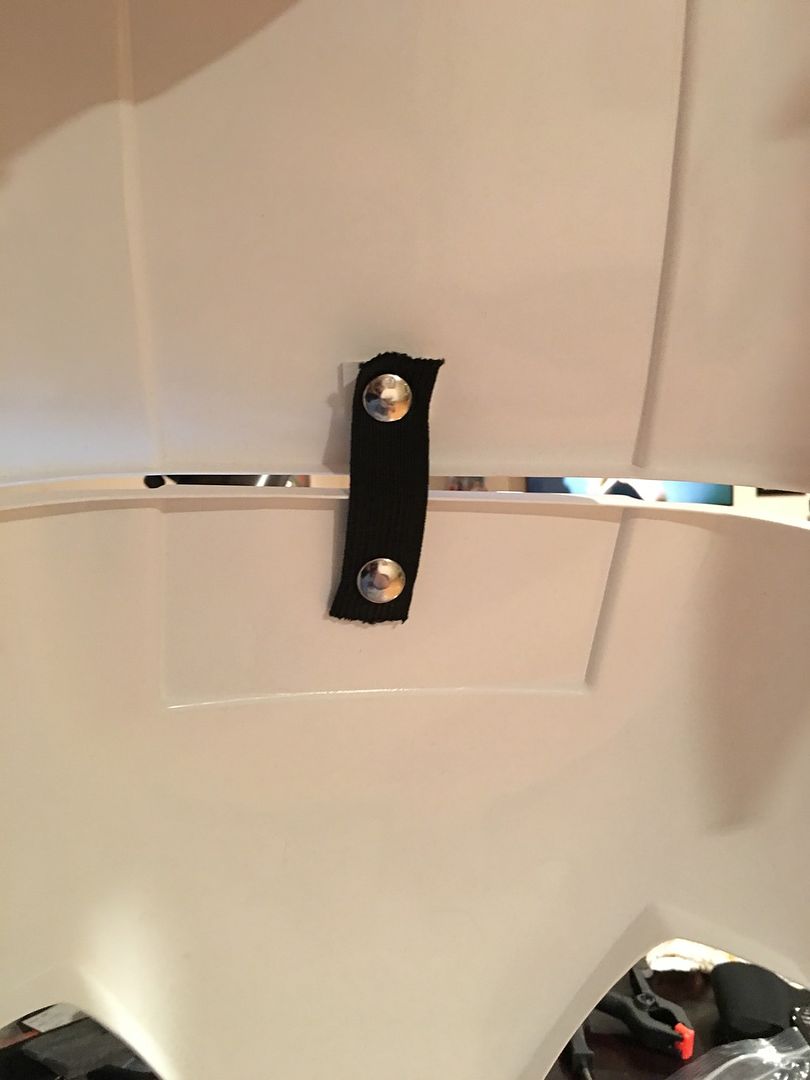
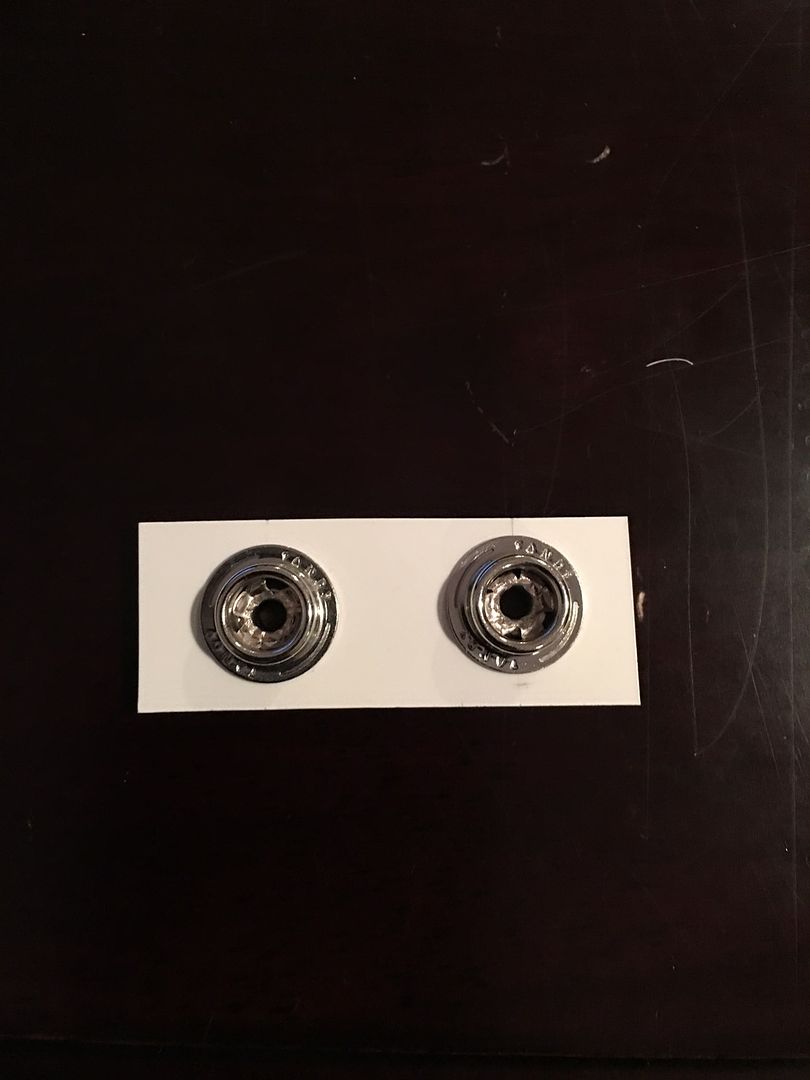
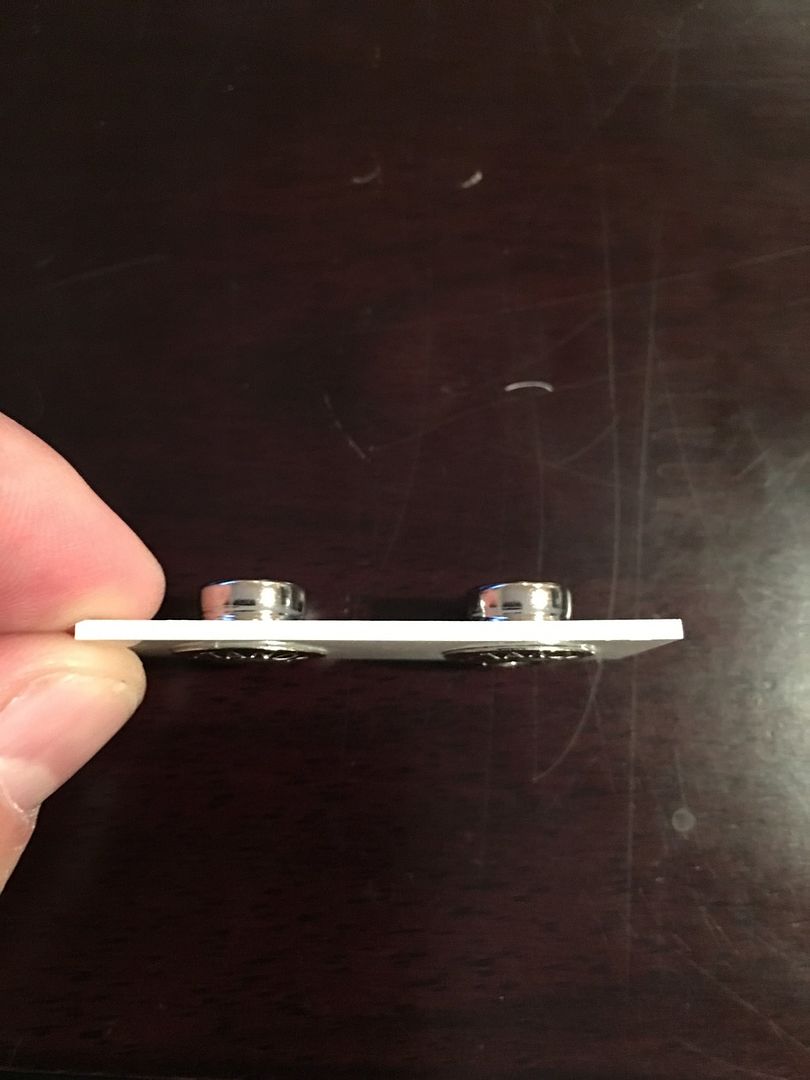
 The AB piece was fun to work with for the side button and the belt I went out and purchased the mini Anorak Snaps.
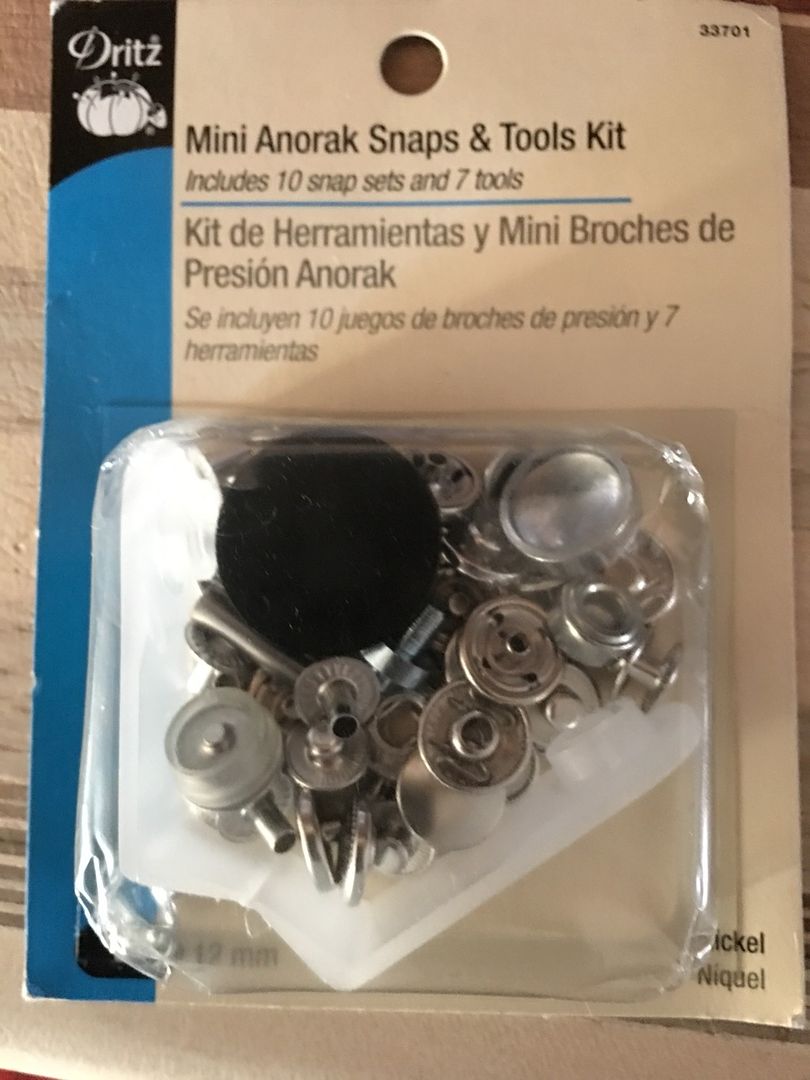 drilled 1/8 hole thru the plastic I took the drill bits and ran it thru some soap this made it easier for the snap to go thru the plastic.
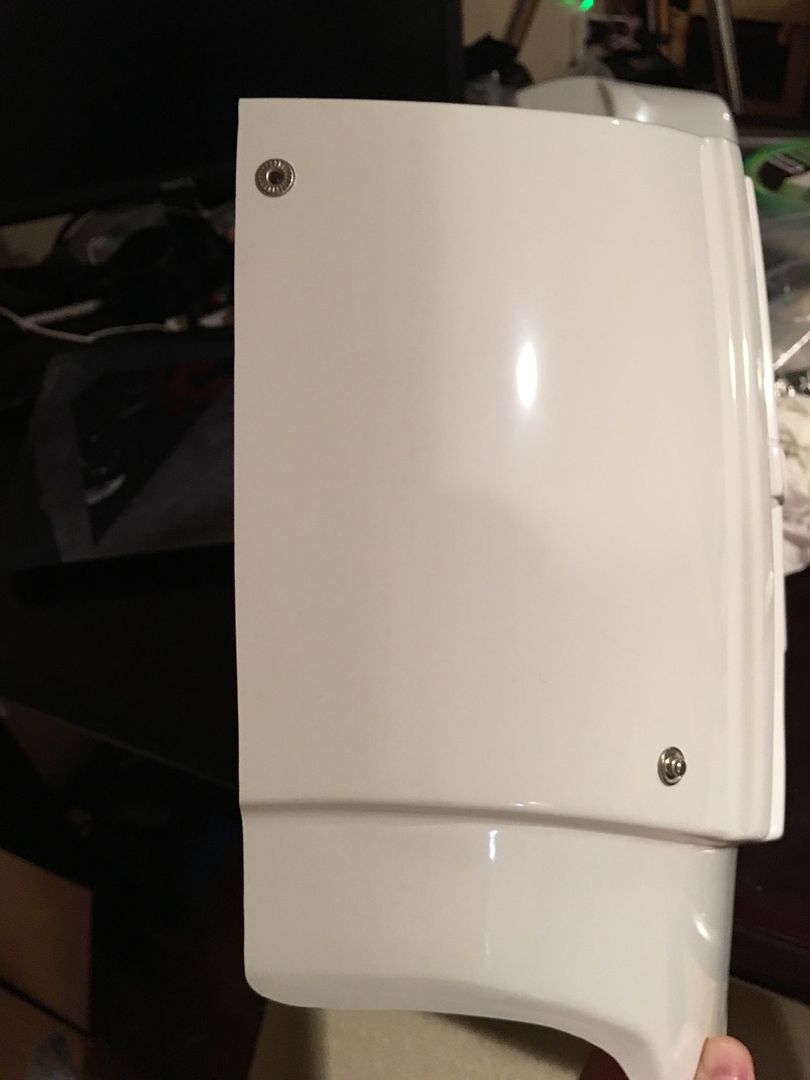
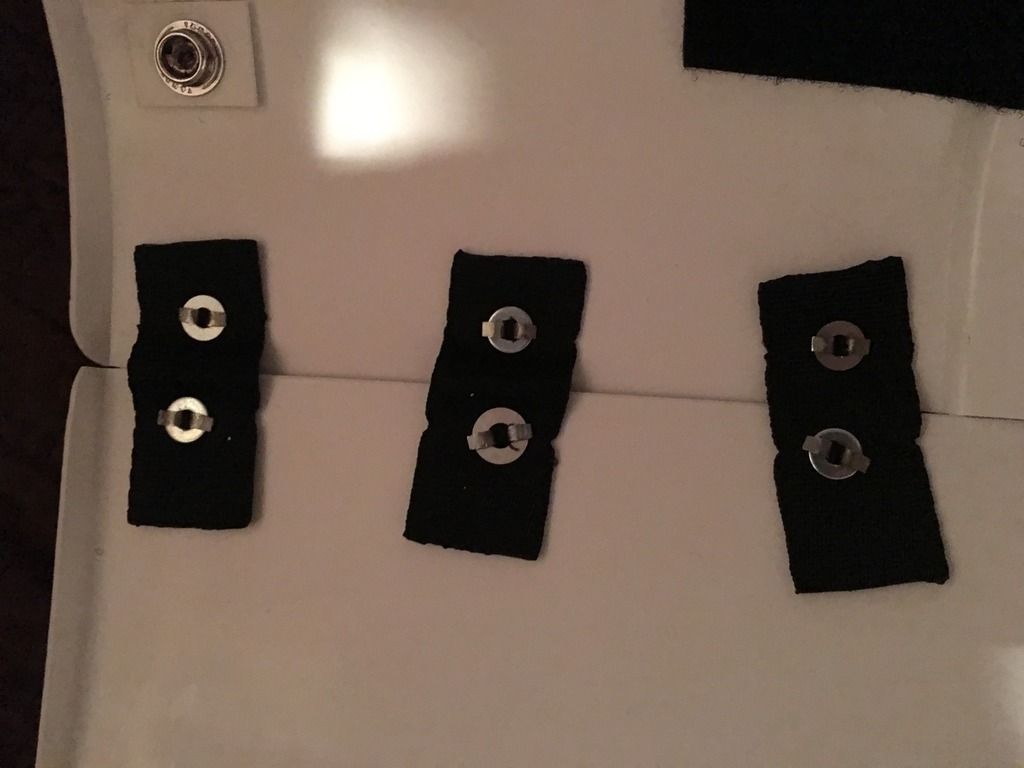
 For the straps I did a loop and used 2 snaps to hold them in to place. So far I haven't had a need to break out the sewing machine.
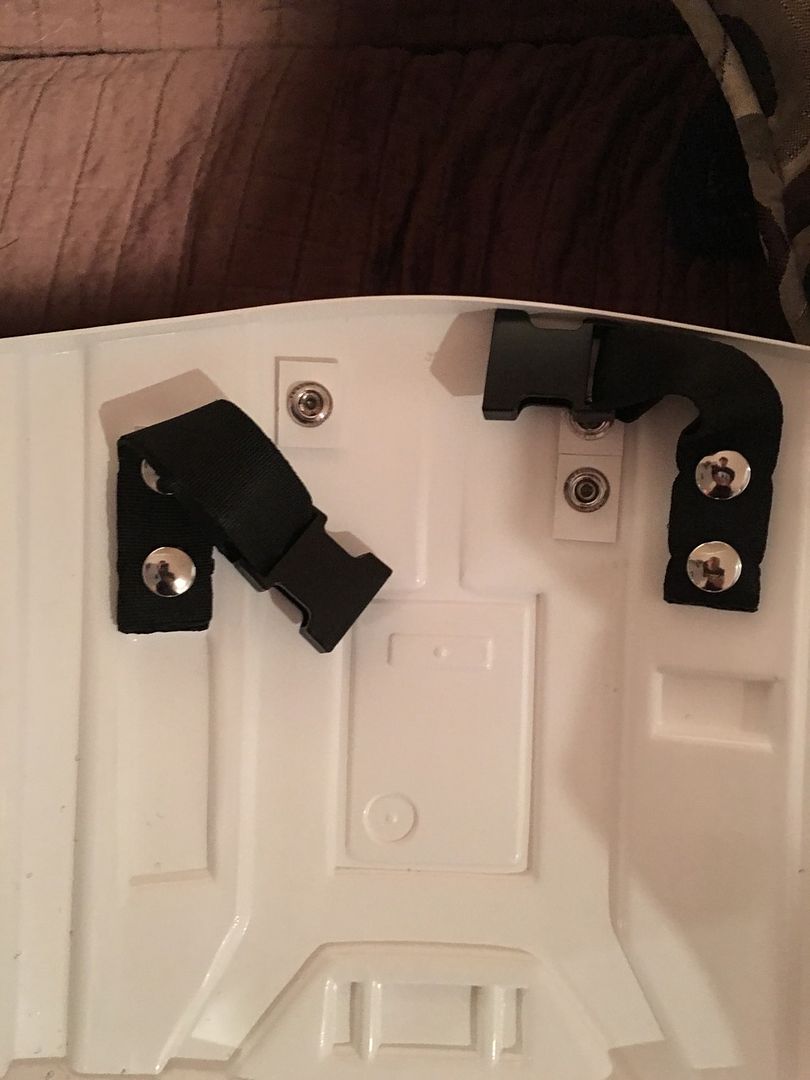 The back straps are adjustable I just made loops to hold straps together so that they wouldn't come lose I might go back and sew them on but for now as I make adjustments this works fine thus far.
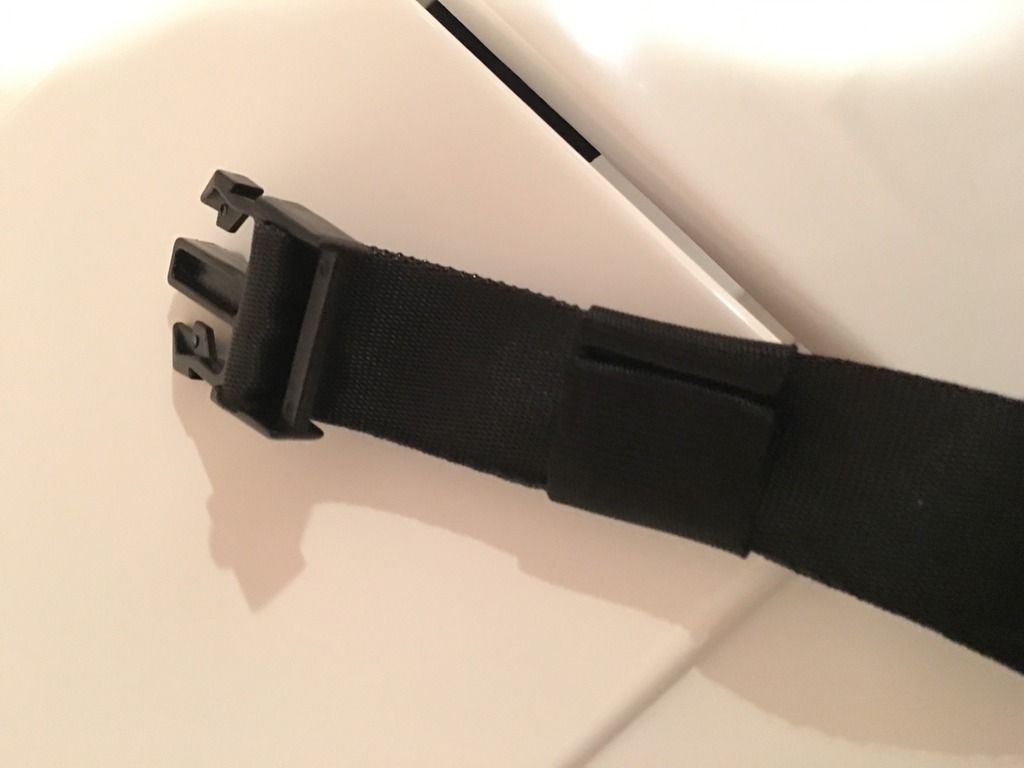 I had two sets of split rivets I ended up using the silvers ones made then pretty tight as for the CLR said no gap.
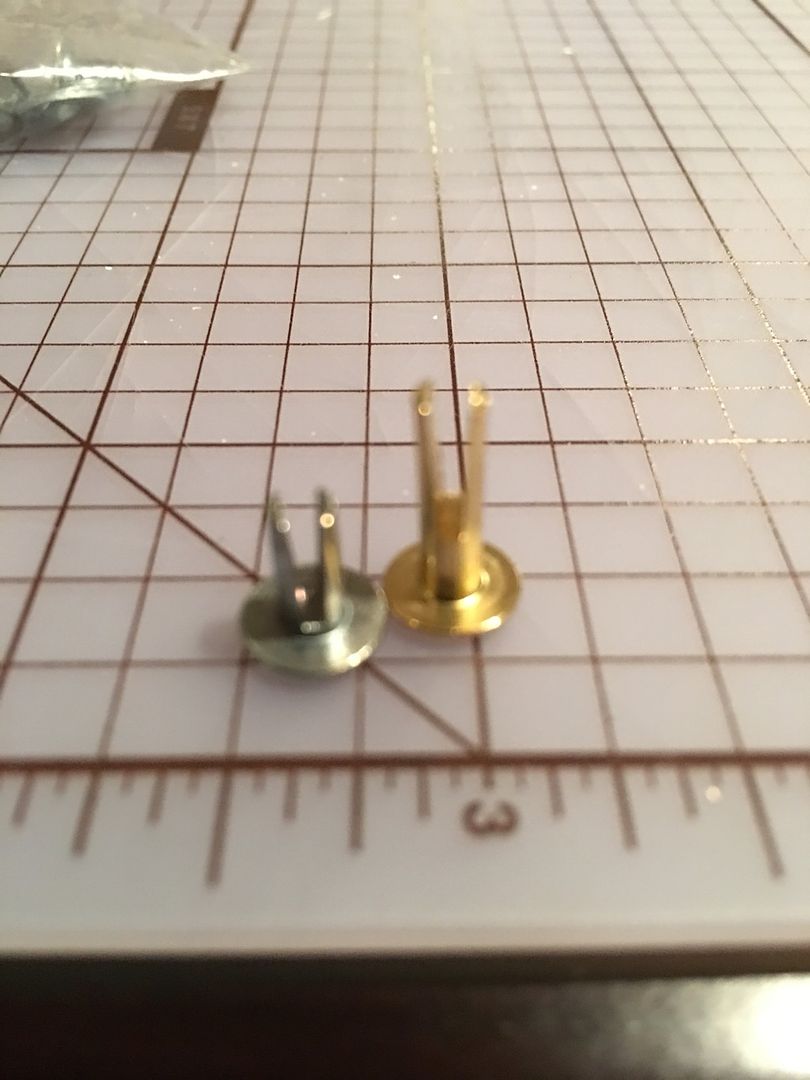
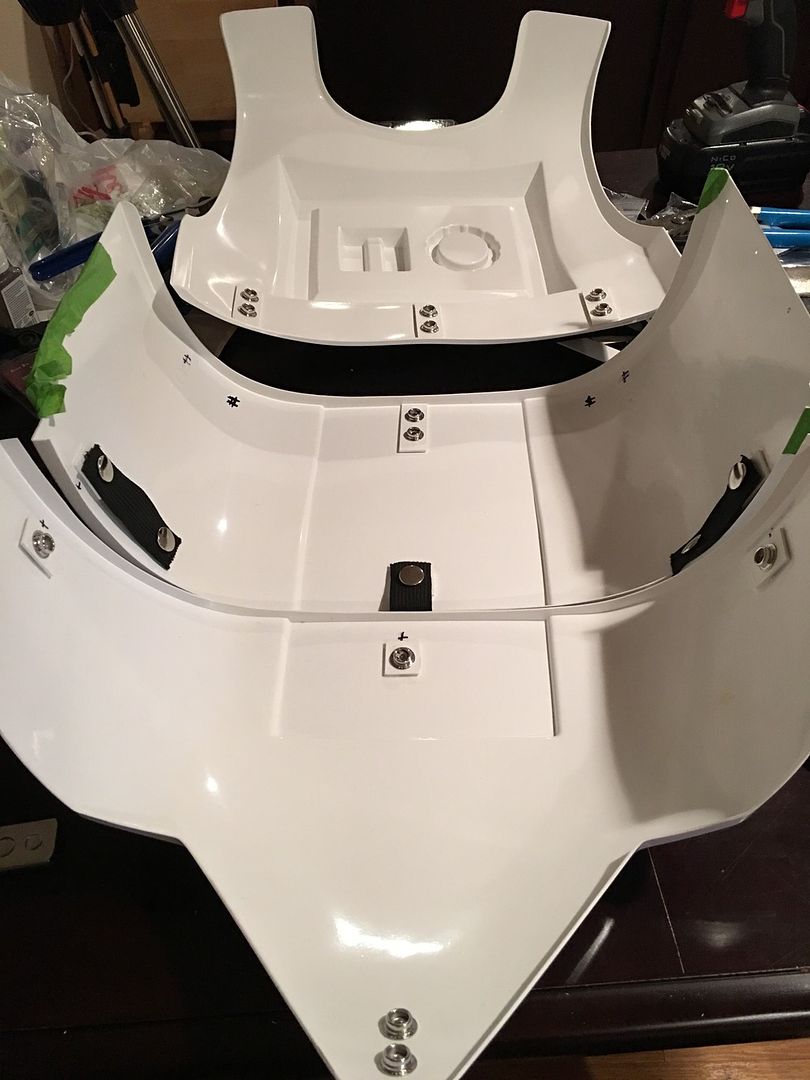
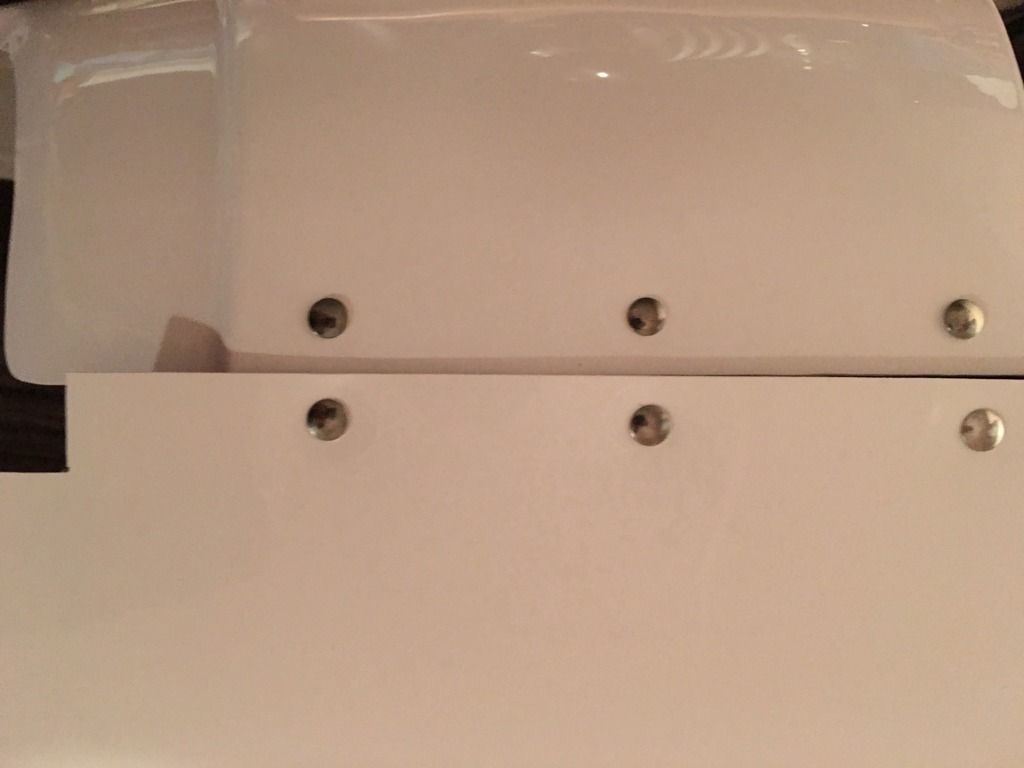 for the right side took a piece plastic and put on industrial strength Velcro and then again on the ab and back plate to form a seal.
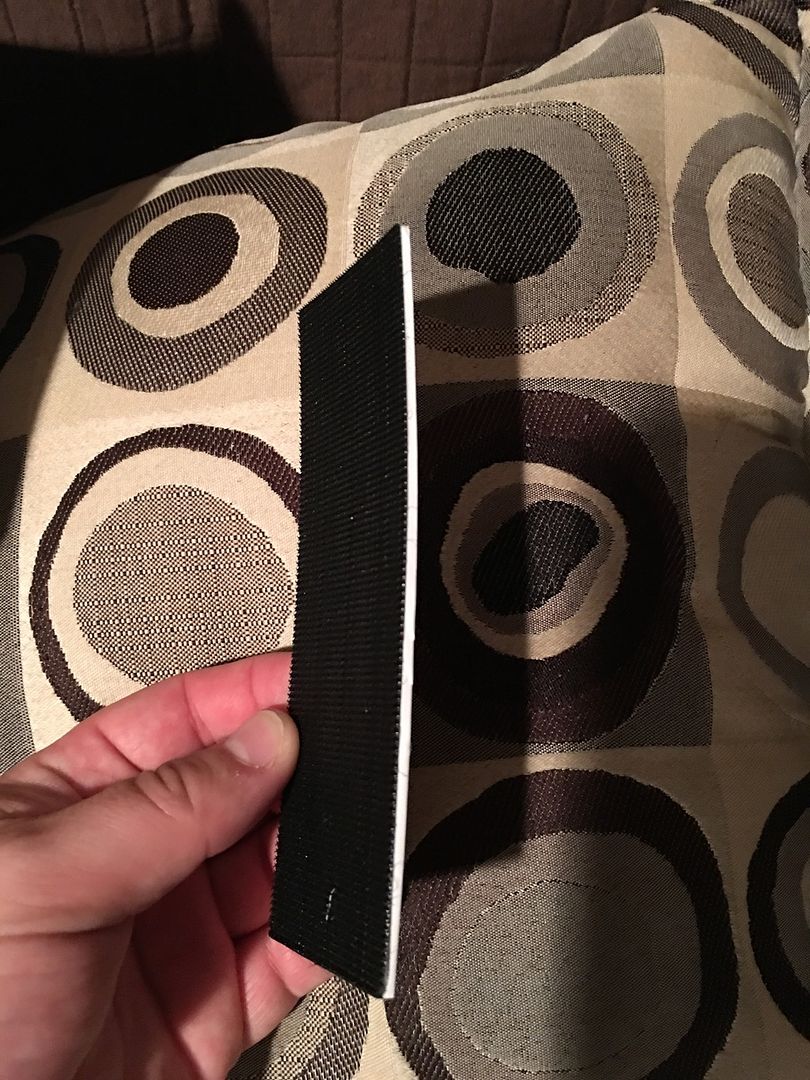

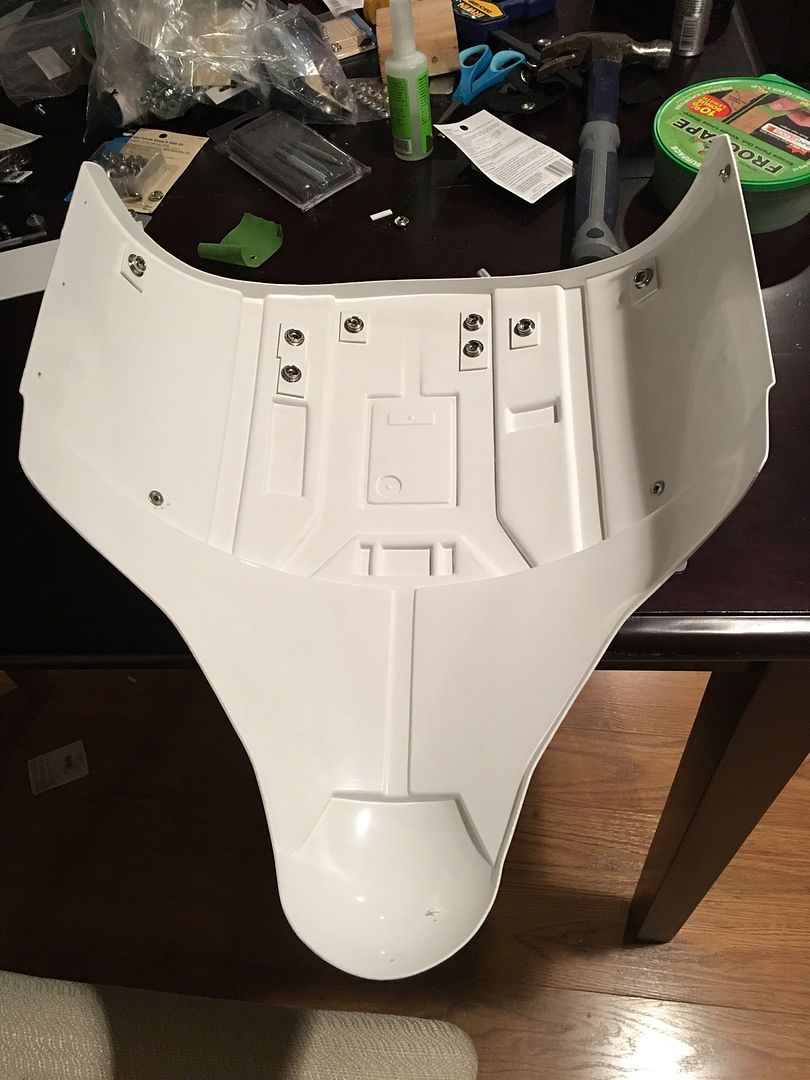
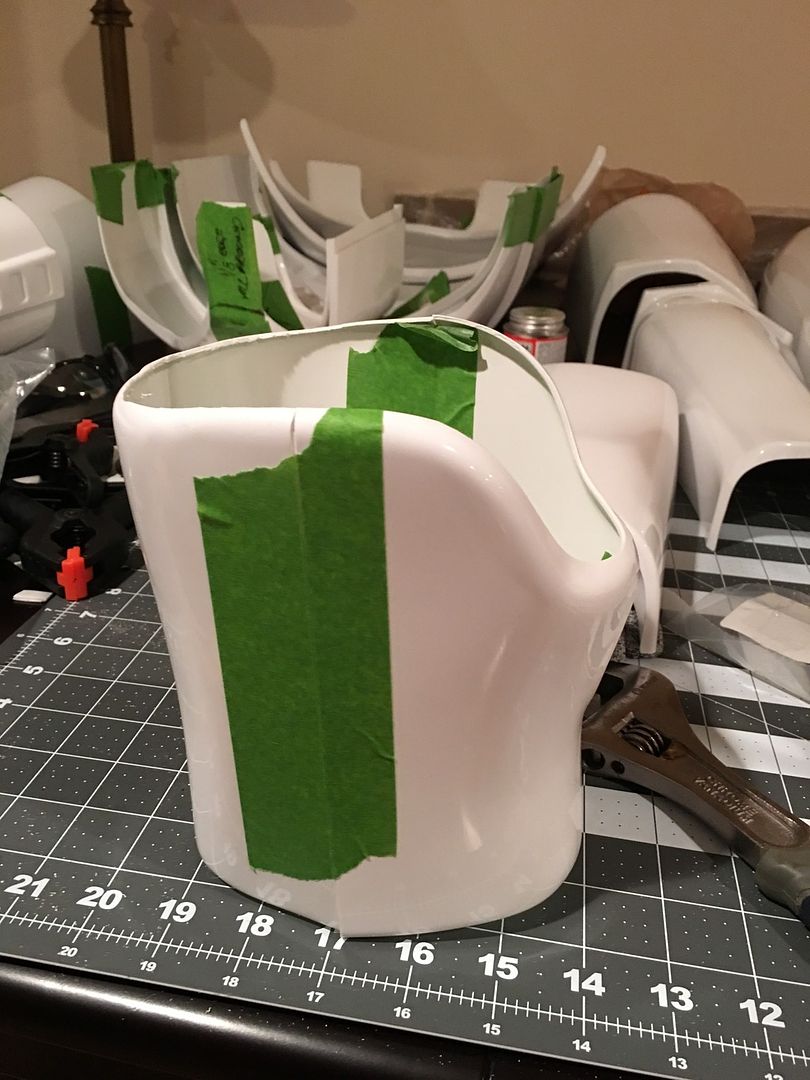
 End product of the inside shell
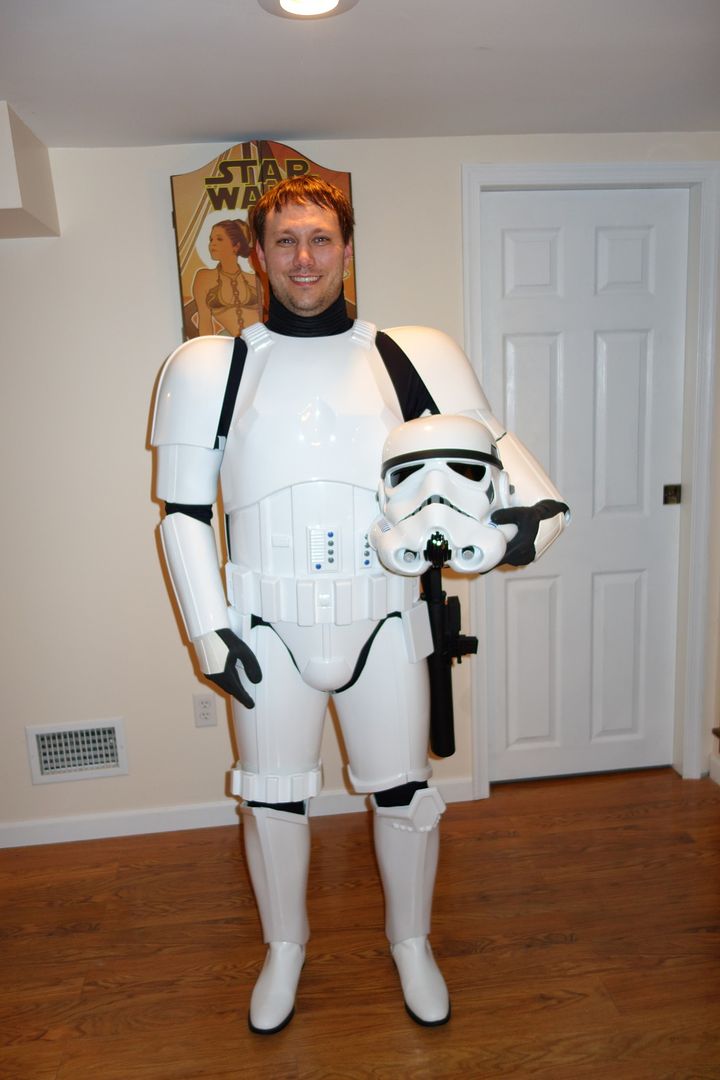
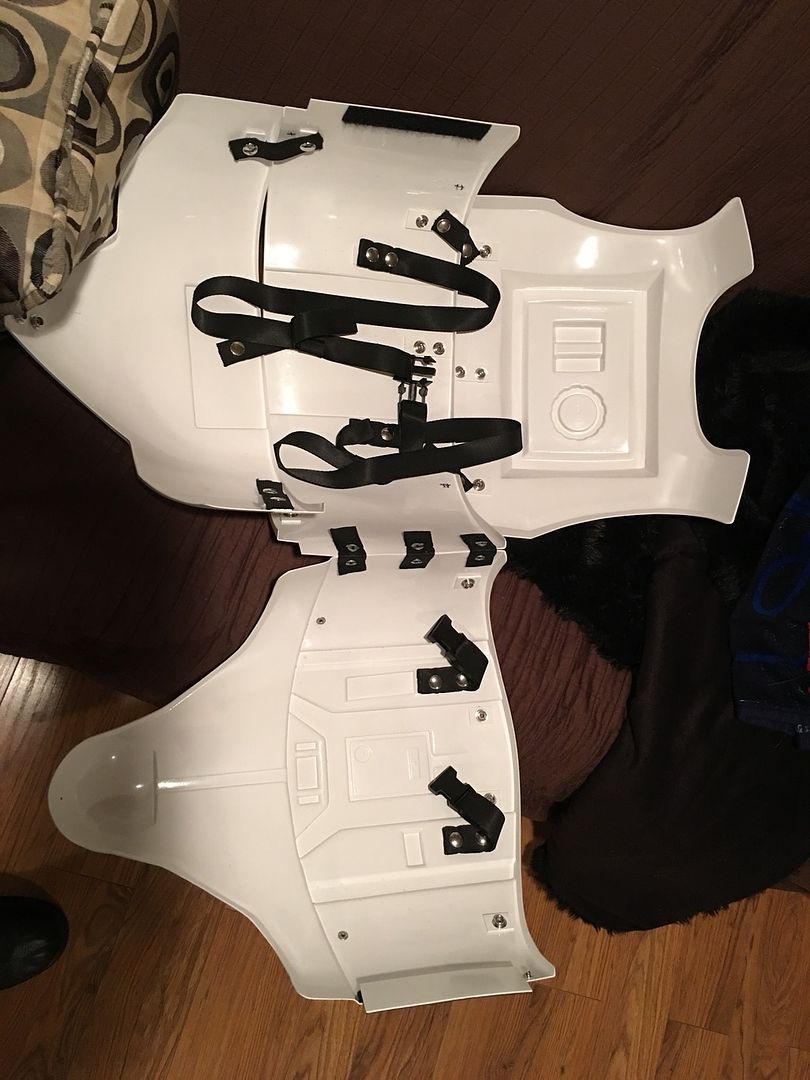 My completed TK
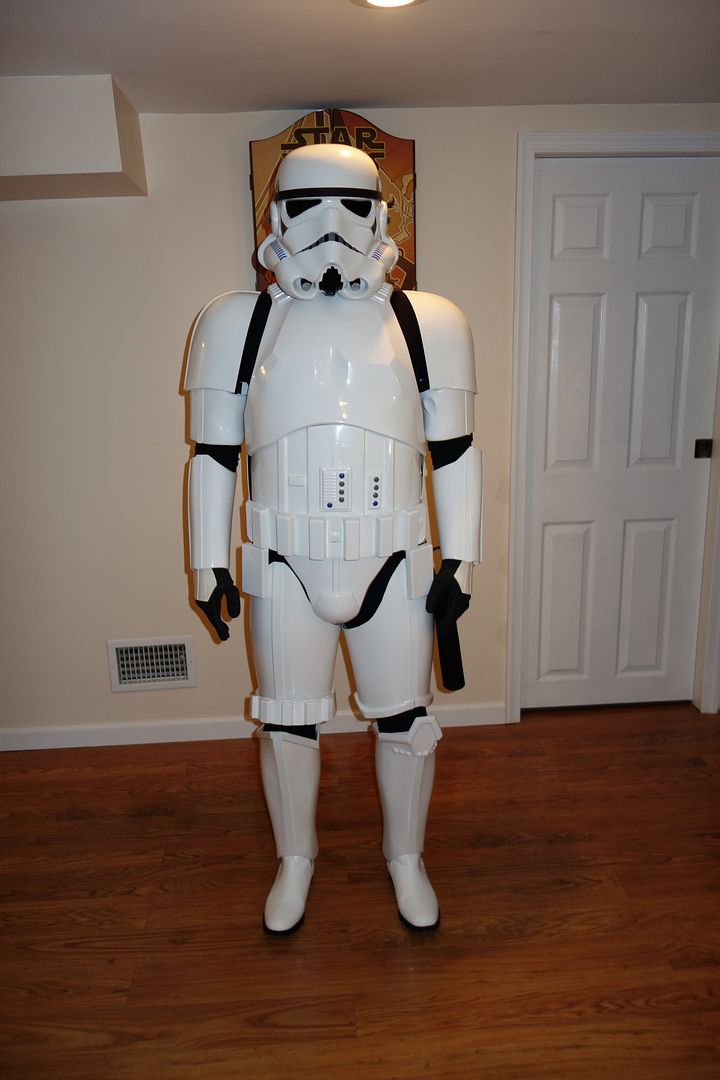

-
1
-
-
-
Lots of parts, eh? Is this your first build?
Yes this would be my first build
-
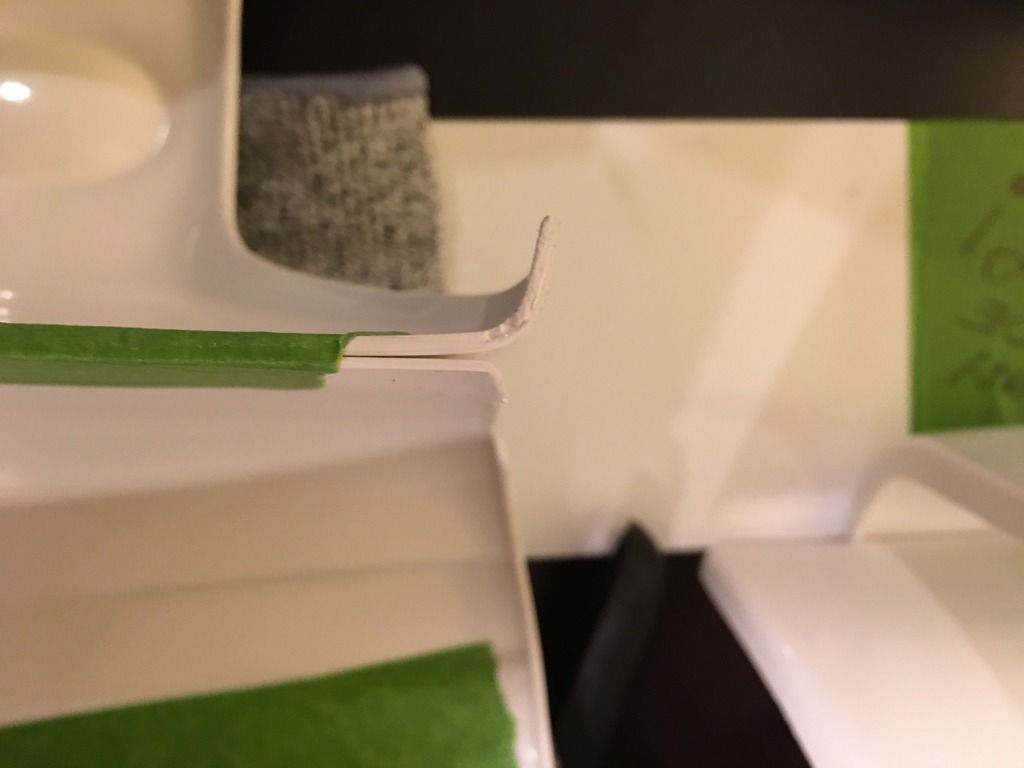
I was able to connect up with a member of one of the local Garrison who was nice enough to show me his armor build, along with some of the tips and tricks he learned during his build. If you able to do this I would highly highly highly recommend it, learned so much took several pictures got to see how everything connected what to do what not to do it was great. By the time i left have everything marked off and was able to start assembling, started of with the left side biceps running in to some issues with it fitting right feels like I need to make is smaller?but when I make a muscles it seams to fit right so kinda of not sure what to do with it as of yet.

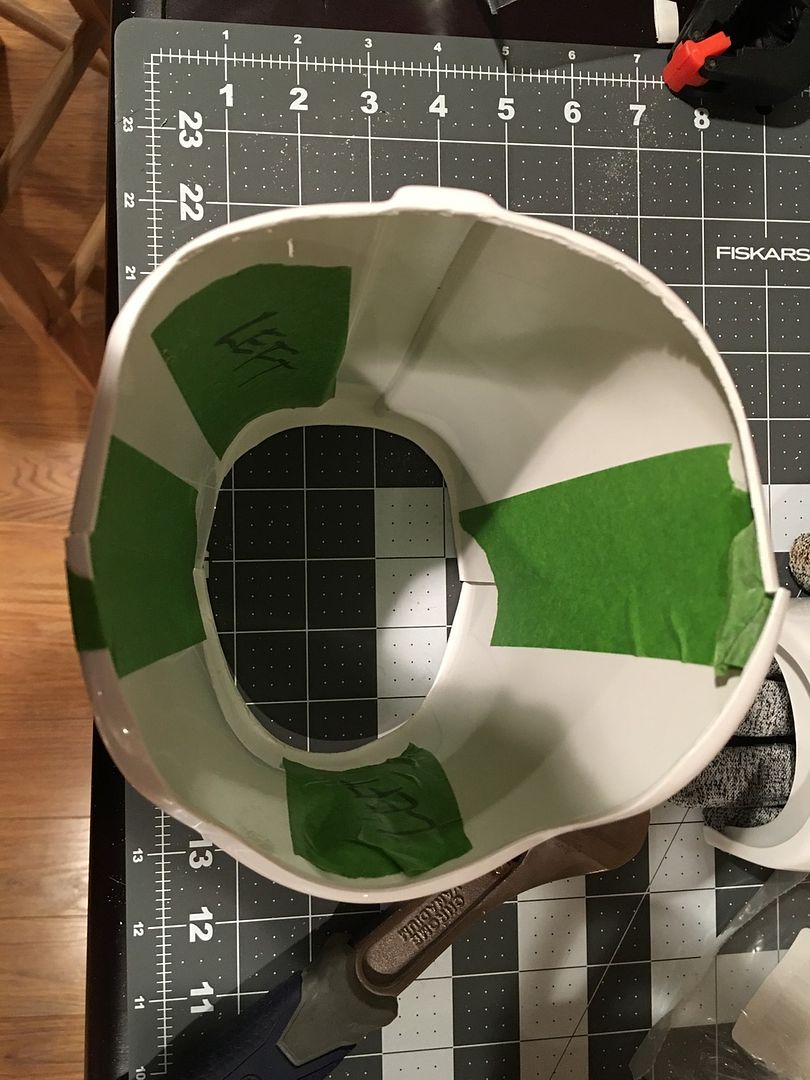
I am guessing I should make this flat that there shouldn't be a little nitch like that.
-
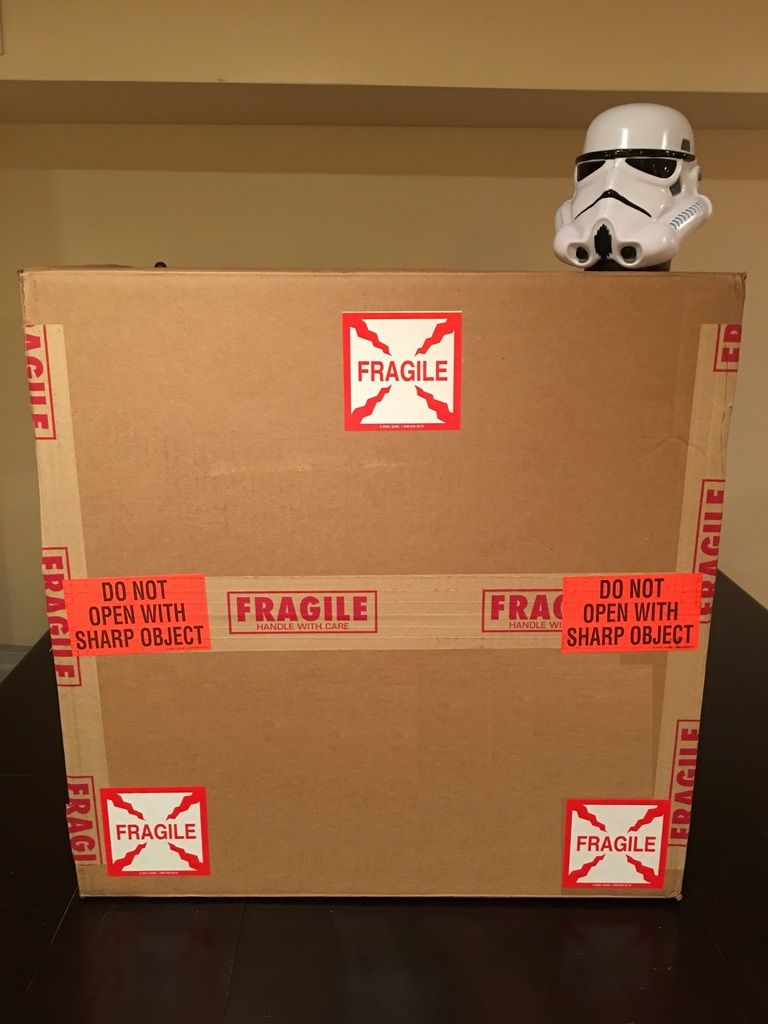
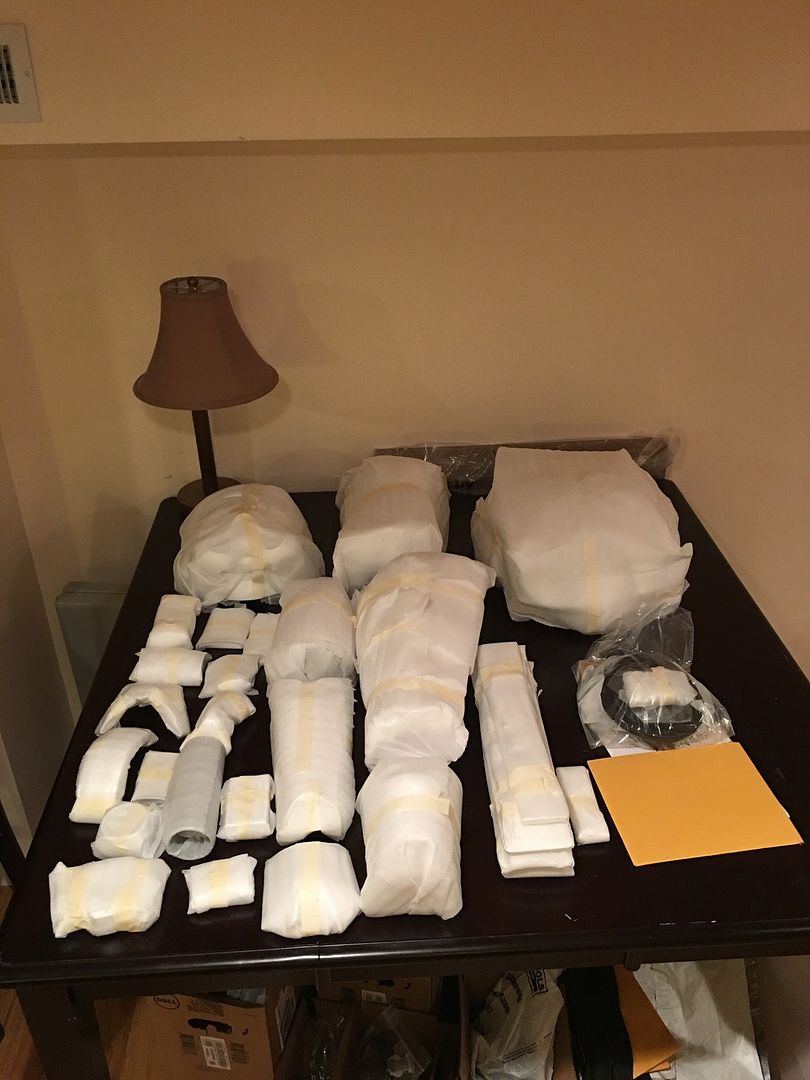
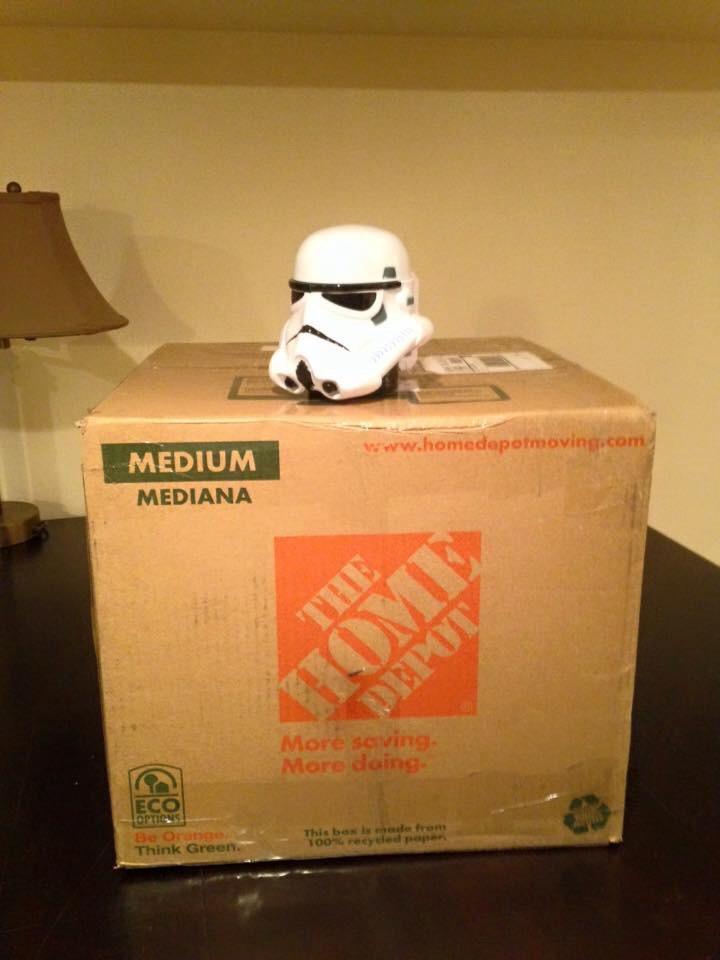
Got my brown box on Tuesday Sept 29th. go everything unwrapped and verified all the parts where there.
There is a list of my assembly parts.

-
I went ahead and purchased the AM2.0 trying to sell AP at my local Garrison I don't have permission to the sale site here so trying to figure out how to. I can unbox the AP and do a full dryfitting if you think it's still manageable if I can't sell it I might make it as a second suit maybe make my AM A TD and the AP a TK if I can somehow make it work
-
So the GAP concern is when I place the half on both sides where its very snugg there is a 1 1/2 inch gap in order to get it to the point where I can take my arm or leg out it would require about a 2inch gap on both sides so would need to shim an extra 2 inched before I can even lay down the strip. So thinking of selling the AP and going with AM 2.0 but I have ready that AM uses the FX model which isn't centr approved anymore. and its three piece in stead of two like AP. So now I am not sure what to do.
-
So I did some looking around on the forums and went with the AP build, it seam like that's what most people where building when I first looked. Placed my order with Mark and then started getting my supply ready. The more I started getting supplies the more I realized I think I made the wrong armor purchase I am 5'10 214lbs. Email Mark to see if the armor would fit was told I would need to shim the sides okay no big deal I think I can do that. My armor arrived today supper excited did and inventory of everything. Then started to dry fit sure enough everything is small have about a 2 inch gap every where for comfort my need to heat up some of the plastic to prevent it from pinching. But the bigger issue is what to do now? <br><br>
Should I try and sell it on eBay see if I can't recoup the cost and go for maybe the FX or Am or TE2<br><br>
Is it possible to shim everything so it can fit and if so how would I go about doing that I take it I would have to spray paint the armor so it keeps that nice sheen.<br><br>
What would you recommend I do I am sure you see a lot of situations like this if I happen to be the first then any and all help would be grateful<br><br>
 <br>
<br>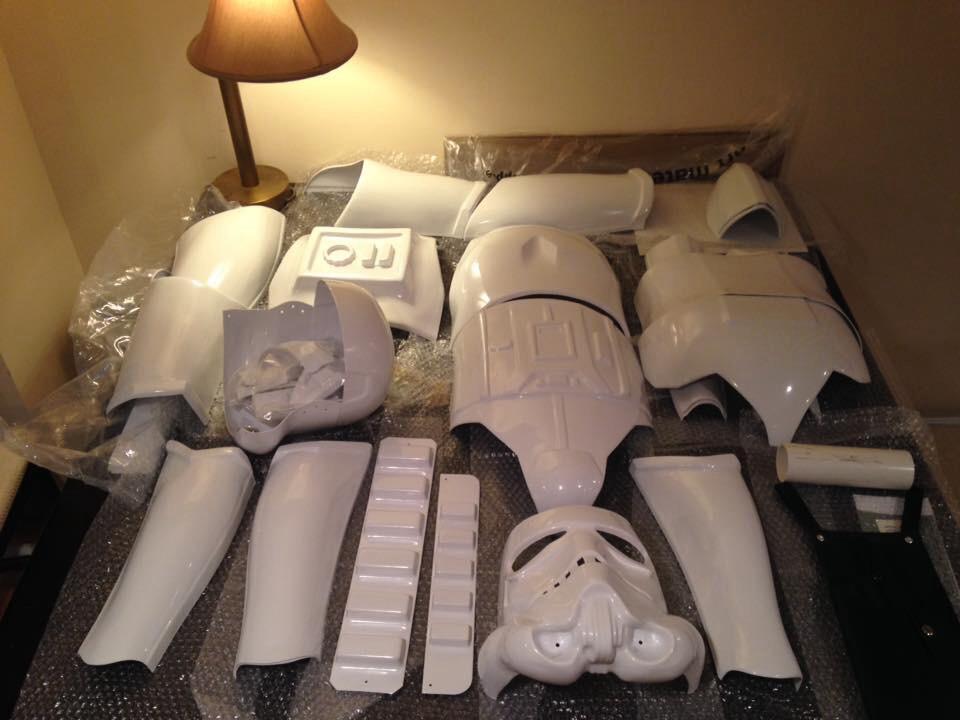
-
I order the AP ANH Stunt armor and starting my list to order parts so when it comes it in can right to building. I am looking at going for the 501st level 3 certification and plan to take my time with the build to get as accurate as possible.
Items already purchased:
Trooper Neck Seal from Trooper Bay - http://trooperbay.com/trooper-neck-seals.html
Items need to purchase everything else and looking for recommendations and suggestions:
Paint:
I plan to go with the Humbrol Paint.
I plan to do all the detail painting on the helmet and abdominal heard it more difficult to do but comes out better the the decals and trying to go for the 501st qualify they mentioned it need to be painted.
Armor Assembly:
I am planing on using the assemble videos found on trooper bay.
Glue: In the video he used Zap a Gap but I have ready that first time build should use E600 glue so on the fence with that still.
Assembly Items: Looking thru the list of items I need to assemble and in my research I came across the Accurate Assembly Bundle and was wondering if I order this will there be any additional items that that I would need to purchase for my AP armor set. Would this bundle get to all the items or is it better to just buy them individually?
Accurate Assembly Bundle http://www.rspropmasters.com/product/accurate-assembly-bundle/
Abs Button:
Stormtrooper Plate Masking Template - http://trooperbay.com/abdominal-plate-masking-template.html
Helmet Assembly:
I can't tell if the kit comes with a green lenses and screen if you have the armor set please let me know if it doesn't I plan to get the lenses and screen from trooperbay
Lense http://trooperbay.com/accurate-acetate-green-lens-material.html
FrownScreen http://trooperbay.com/trooper-helmet-frown-screen.html
Paint Templates - http://trooperbay.com/trooper-helmet-masking-templates.html
Mic Tips: I am not sure what to do here I thought about just getting the regular ones of trooperbay but then I found out they sale actually Micro phone ones and consider getting them in stead any suggestions would be great. I am still doing research on the amp as well. But I think it will come down to if i go with the speaker amp on the chest or in the helmet but its all depending if i should get the regular mic tips or the actual speaker mic tips.
Regular http://trooperbay.com/mike-tips.html
I would like to get a system where it does the voice clicks still looking around for a good setup prefer not to have wires that go from the helmet to the chest piece but then again not sure if it can all be done in the helmet or not. If that is the best way to go as well.
Boots:
Not sure where to get them from i have narrowed it down to two places
TK Boots http://www.tkboots.com/
Imperial Boots http://imperialboots.com/products/chaussure/
This pretty much covers everything I think already have the black under suit but it is getting old and will be looking for another so if you have any recommendations for one as well I am all ears.
-
I have always wanted to be a stormtrooper and part of the elite group of the 501st. Went to my first comic con this year and got to meet a few member and decided now is the time to build my armor and join up. Just purchased an armor set from Authenticprops looking forward to getting it in the mail and starting my first ever build.


Request your Centurion Certificate here:
in Request Centurion Status
Posted
Stephen Bauchan 17081 Centurion letter Tony
http://www.whitearmor.net/eib/certificates/17081-centurion.png