


MarxKnight91
-
Posts
48 -
Joined
-
Last visited
Content Type
Profiles
Forums
Gallery
Articles
Media Demo
Posts posted by MarxKnight91
-
-
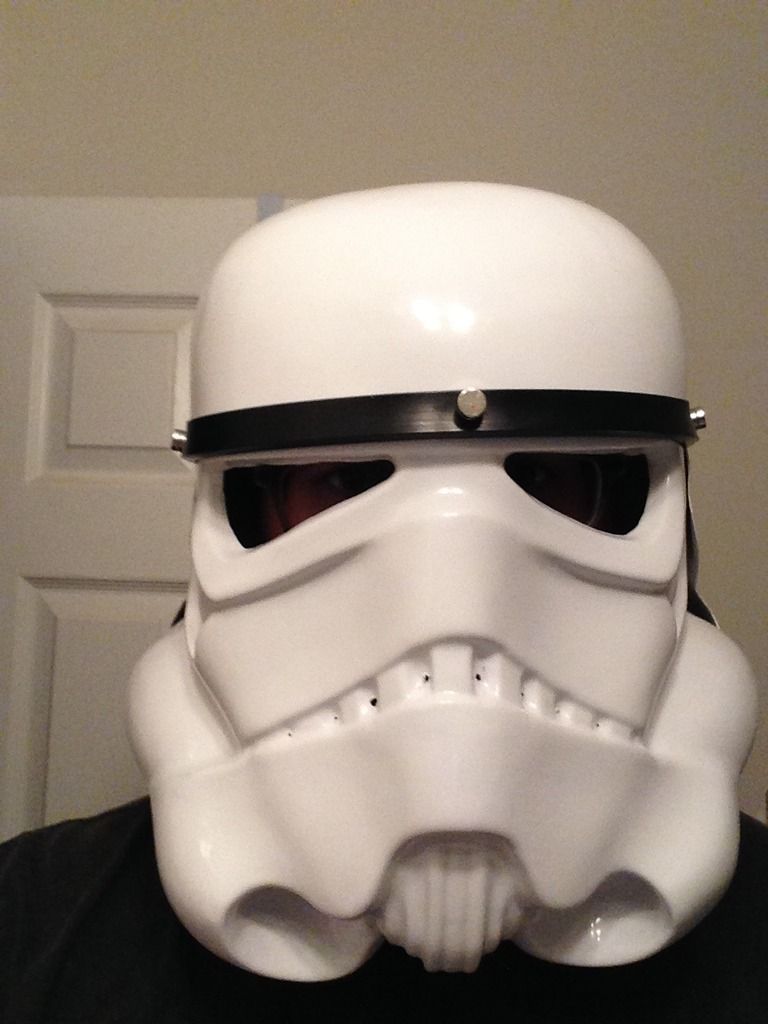
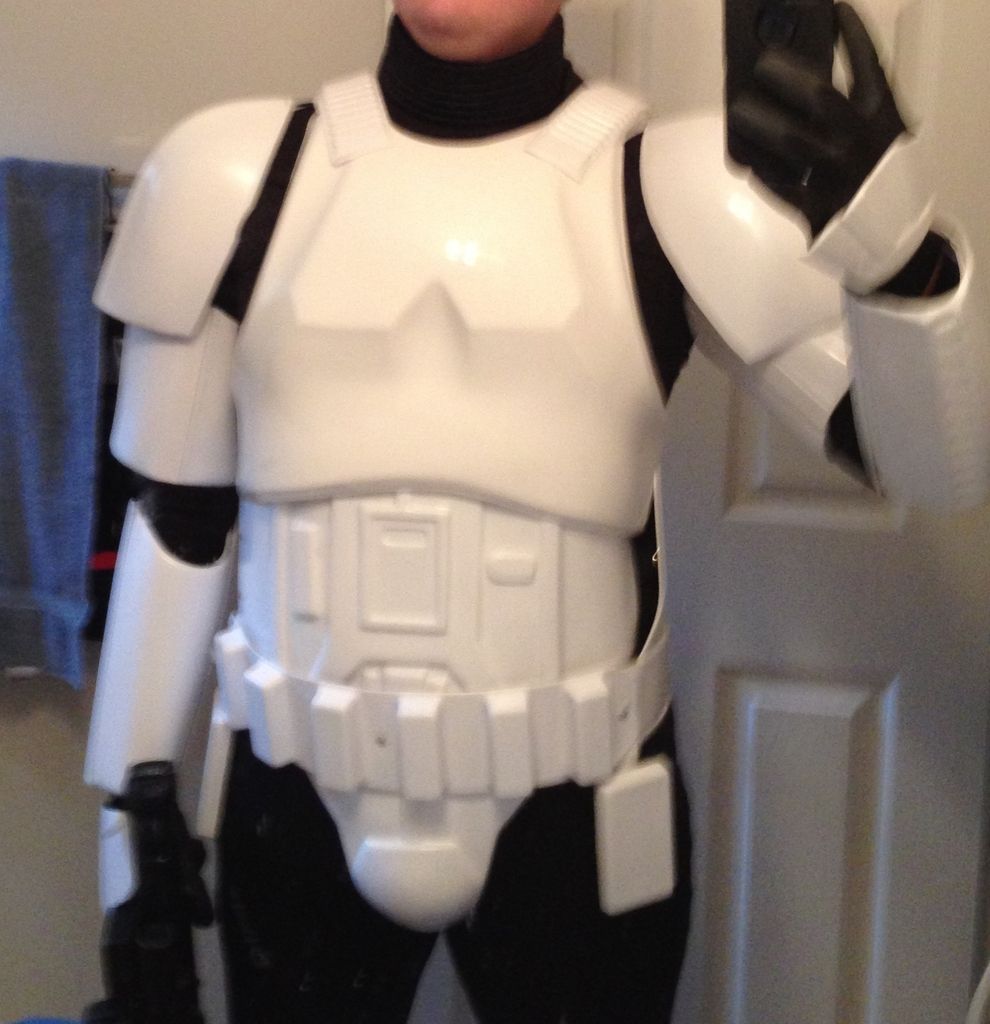
It's been a while since I updated, mainly because I lost my main mode of interacting with the site; house got robbed back in August and so I've lost my best way to upload to photobucket. Thankfully none of the TK was taken or damage and I was able to complete it by DragonCon! I wore it out for a visual inspection from the garrison and so I could go in costume to the 'Last Party on Alderaan;' if you were there and saw a TK back up dancing, that was me. <br><br>
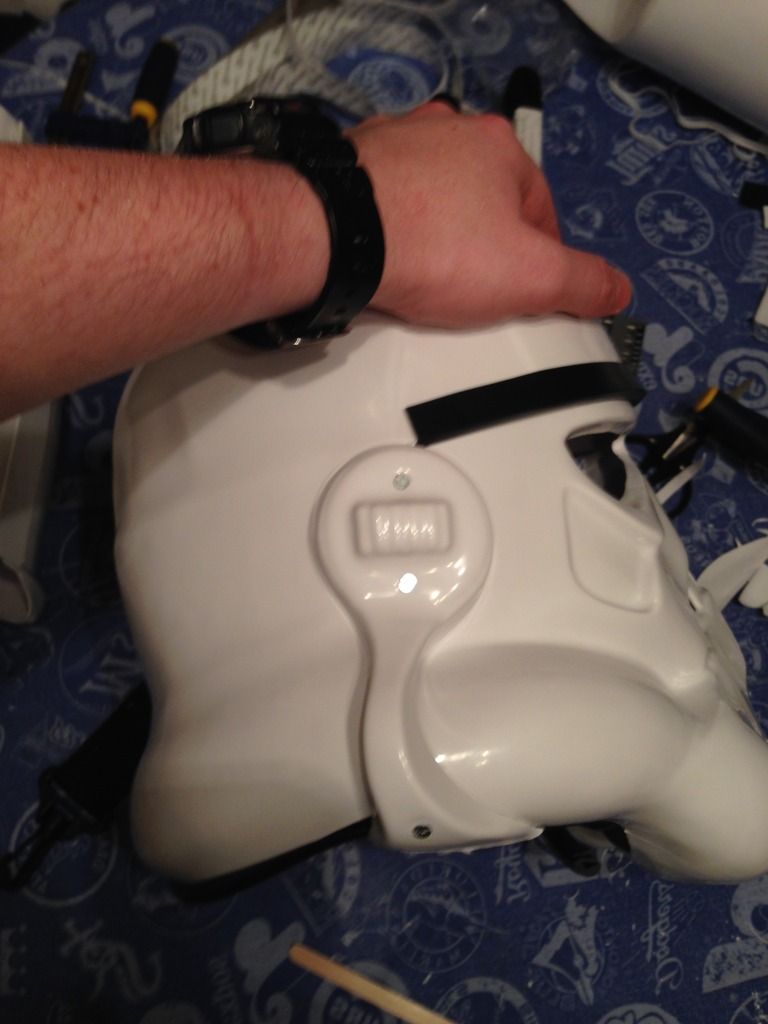
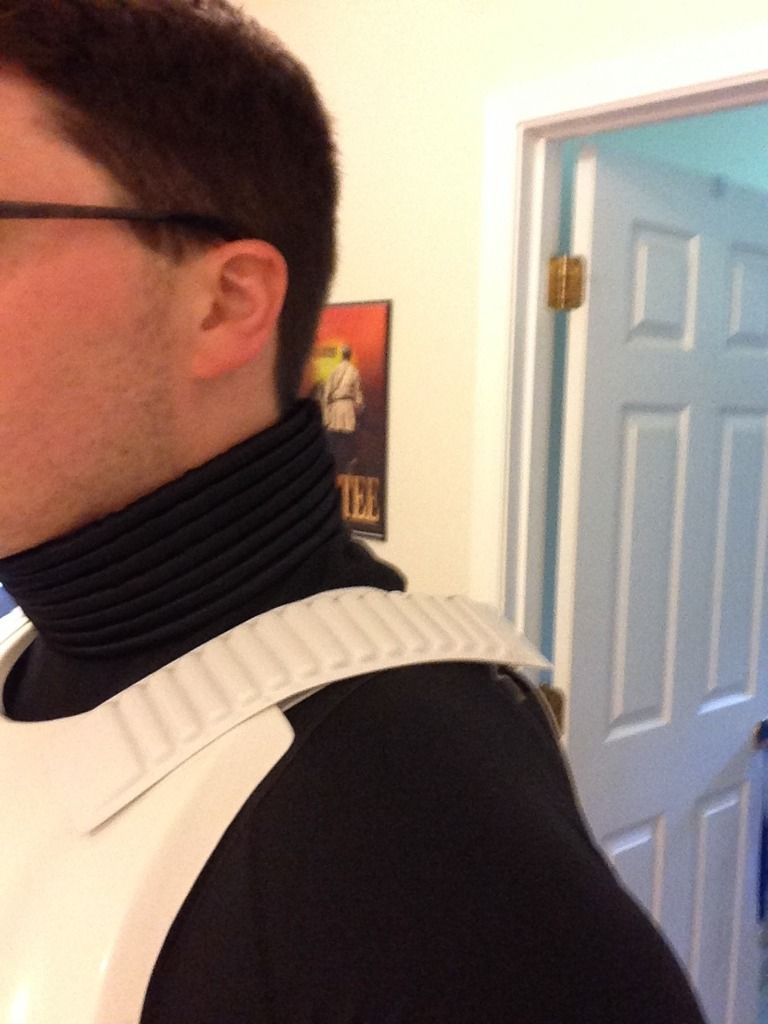
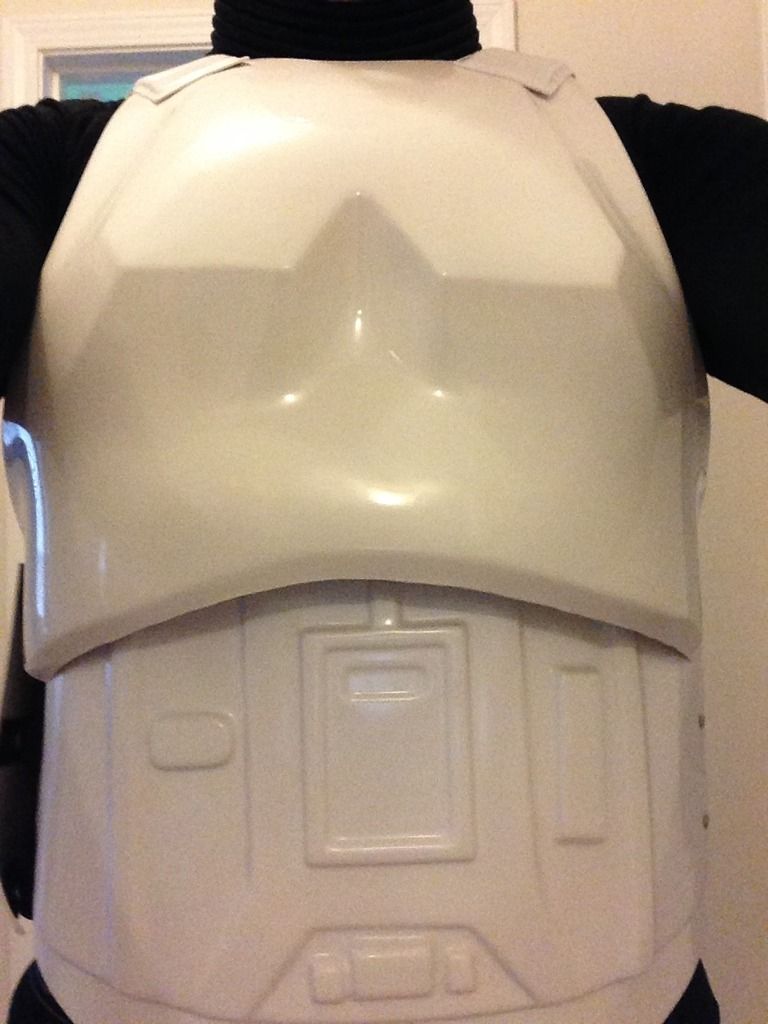
CO of the garrison was thoroughly impressed with the build, which highlights the knowledge of this site and all those willing to help and share it. The kit survived the evening.....mostly: sniper plate popped off, butt kept popping free, and undersuit stained almost every part of the armor. I've got some minor touch up work to do on the buttons and some modifications to the helmet, but the two main sticking points going forward are the stains and the gap between my back and kidney. Undersuit is made by tesla.<br><br>
On the stains: I've used mineral spirits, bleach pen, and even a magic eraser. Nothing has sufficiently removed it. Any suggestions here?<br><br>
On the back gap: I know I can realign the shoulder straps, but then I risk losing contact with the shoulder bridge and back via the 1/4 elastic. I've got some extra strap canvas on the way, with the hopes of finding a nice medium to close that gap.<br><br>
Hoping to submit my app this week and finally get that TK number.
-
Sniper knee looks great from the side. Just a lot of daylight under the front. Probably not a big deal. (:
Yes, the black stripes are meant for around the ear. But since you have to paint them grey anyway... May as well paint the black too. I don't care for the decal look anyway. (:
What are the black straps sticking out at your elbows?
I'll probably end up gluing the front down to the front of the knee, if it doesn't warp it too much.
Thought so. I don't mind the decals for everywhere else! Hopefully I can get them on soonish, once I get more feedback on the ears. If they're ok, then I'll begin finalizing the bucket build with the lens and decals/paint.
Those straps are for my super secret squirrel armor disassemble latches! Nah, just keep forgetting to the finish off the bicep straps. Speaking of which, I think I can just close the diameter of the biceps a bit to fix the bicep and shoulder strap issues.
Thanks for the feedback Kredal!
-
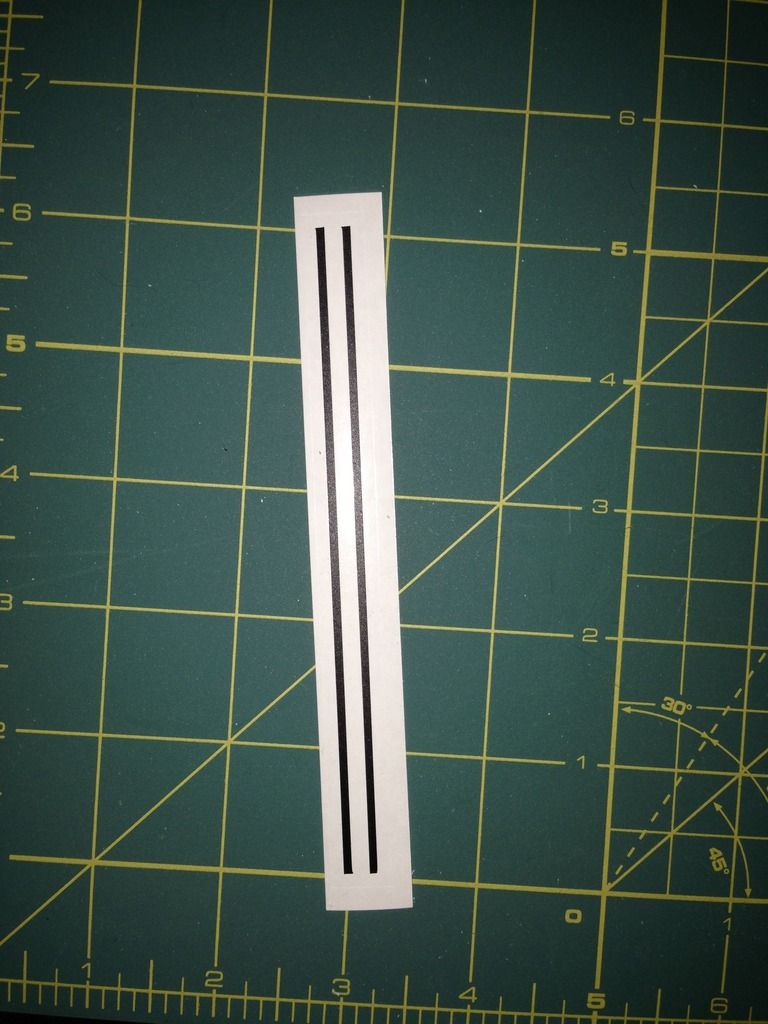
The pinstripes are for the ears. I used decals on my tube stripes but found out I put them on incorrectly so I ended up painting them on.
Just to double check, these are the stripes i'm referring to and guessing that they provide the border on the ear
I imagine, how to apply them correctly is in one of his videos that I haven't seen yet, but i'm leaning towards painting the border at the moment.
You should take off the S-trim until the ears are in place and finalized. Then fit the S-trim over the bottom part of the ears... after trimming down any pokey bits.
For the sniper plate, if possible, I would keep the inside edge glued, and re-do the outside edge, pressing it further back on your leg.
Yeah, I just wanted to try it on and see how it went together/looked.
Here is a side view of the sniper plate
(Excuse the mess of a work station; I was in an all out trimming and snapping mode to get the thighs finished and strapped on.)
Josh, are you suggesting that I move the side over to that next ridge? I believe that was my original goal, but it contributed greatly to the lean and getting it to stay there while gluing with the E6 was a nightmare.
I finally had the thighs finished and strapped to the kit.

Few things to work on: I believe i've got too much tension on the bicep strap which is pulling them down and causing the shoulder canvas to pull out from underneath the bridge; I've also got a gap between the back and kidney that will need some tuning; going to have to find a good way to keep the boot tops from popping out from underneath the calves. (The thighs are about even when standing normally; it's overlapping due to the stance.)
Took the picture with a timer, so that's the best i've got today.
-
Thanks, Jason. I'm a bit worried they may not even bit salvageable if that gap can't be resolved.
Also, what did you do with the decals with yours? I understand the obvious ones, but there's a set of the long black thin lines... Not sure if that's supposed to be the border for the ear buttons or what.
-
Ha yeah I started cutting with my exacting knife and my wife asked if I was going to work all night too. I realized I've been working all day and Mythbusters was on. Back on it tomorrow asking for more advice. One thing is sure, it sucks being short and having manly sized thighs. Wish I could be a skinny British man so I didn't have to make so many adjustments
Ahaha glad to see I wasn't the only one marathoning the Mythbusters while working on my bucket!
-
As if you won't already, take your time on them. I mention simply because I butchered my belt covers....
-
Spent the majority of the day tackling the bucket and am pretty happy, at least with the progress. My ears have the ever popular gap and whereas I know there is going to be some, I feel like more can be done to get mine to fit closer to flush. I fitted them by marking and affixing the top two first and then finding the best placement for the bottom screw. It may be just a matter of playing with the tension on each to get it to fit better, as it was right about on the money when I drilled the bottom hole. I may also need to simply lower the ears all together, but before I go further, I seek the wisdom of the masses.
As you can see, the gaps are rather pronounced in this shot. And obligatory 'try it on' shot...
Rear view
Left Profile
Left Rear
Left Front
Right Profile
Right Rear
As you could see from the first couple of pictures, I already put in the mic tips and also decided to test fit the S-trim strip.
I can trim them here or there or move them down to fit the tube coming up, but I decided to take a break to check with others online here as well as for feedback.
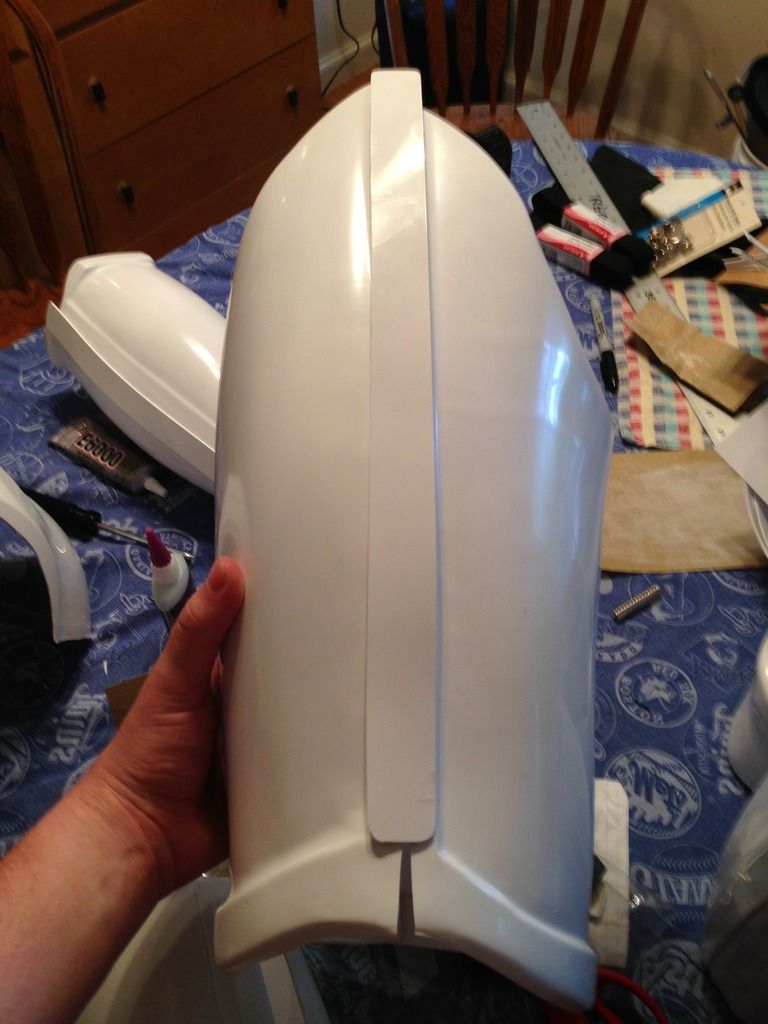
In other news, my sniper plate has dried and looks alright, as long as the 'lean' is ok. It's on with E6000 so I can try again if necessary.
At the very least, it'll need some reinforcement to make sure it doesn't come loose.
Hoping to paint tomorrow. A few final cuts on the thigh, their snaps and attachments, the ab buttons painted and applied will round out the main suit. Awaiting rivets from Echo to attach the battery pack.
-
Keep at it Jason! It didn't seem logical to me when I tried mine on, but the shins just rest on the boots.
-
Thanks Tony and Jason and good call Josh.
I didn't get around to any work yesterday, but managed to get a lot of things going this evening. It started with the delivery of my HWT oil pan base from Bavarian Autosports (9qt). That'll be for Phase III of the build, Revenge of the Upgrades, after Phase II's tweaks and polishing.
The oil pan:
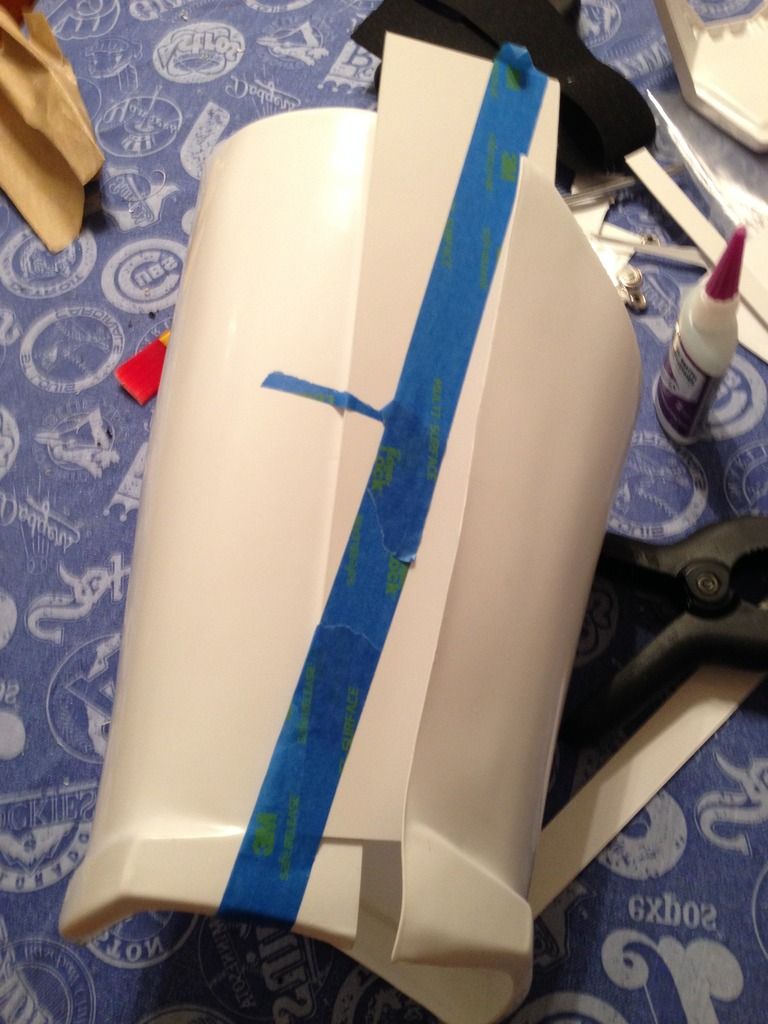
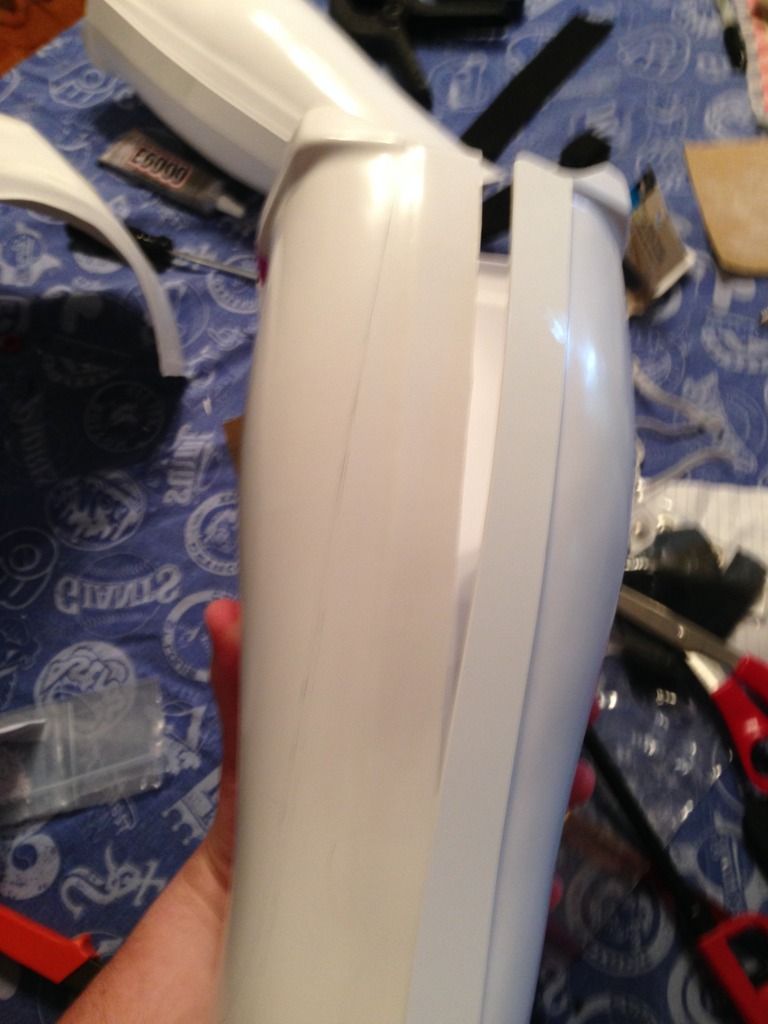
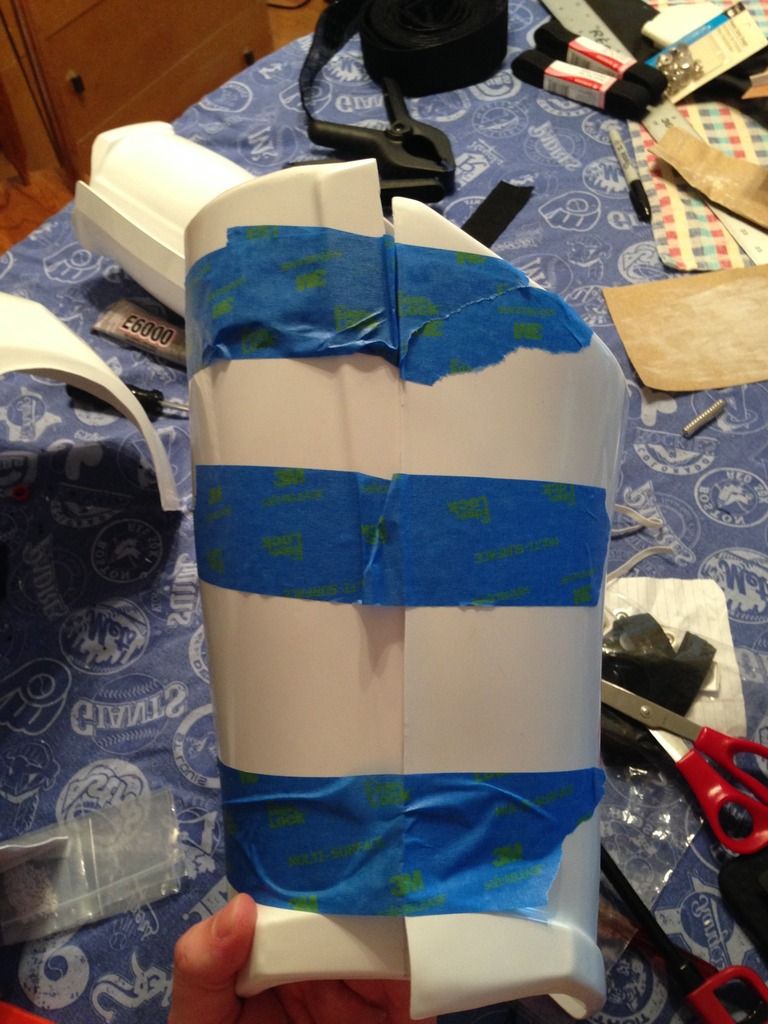
I also began work on the sniper plate, first by aligning it to its best possible position without glue:
And then deciding to glue one side. I started off with E6000 then added some CA glue to the mix when I got a good clamp on the center to hold everything in place. I'll review the hold tomorrow evening and hopefully complete the other side.
I also lined it up to not bend outward so much as in the 'aligning' picture, despite having seen a few in a similar position on a few threads.
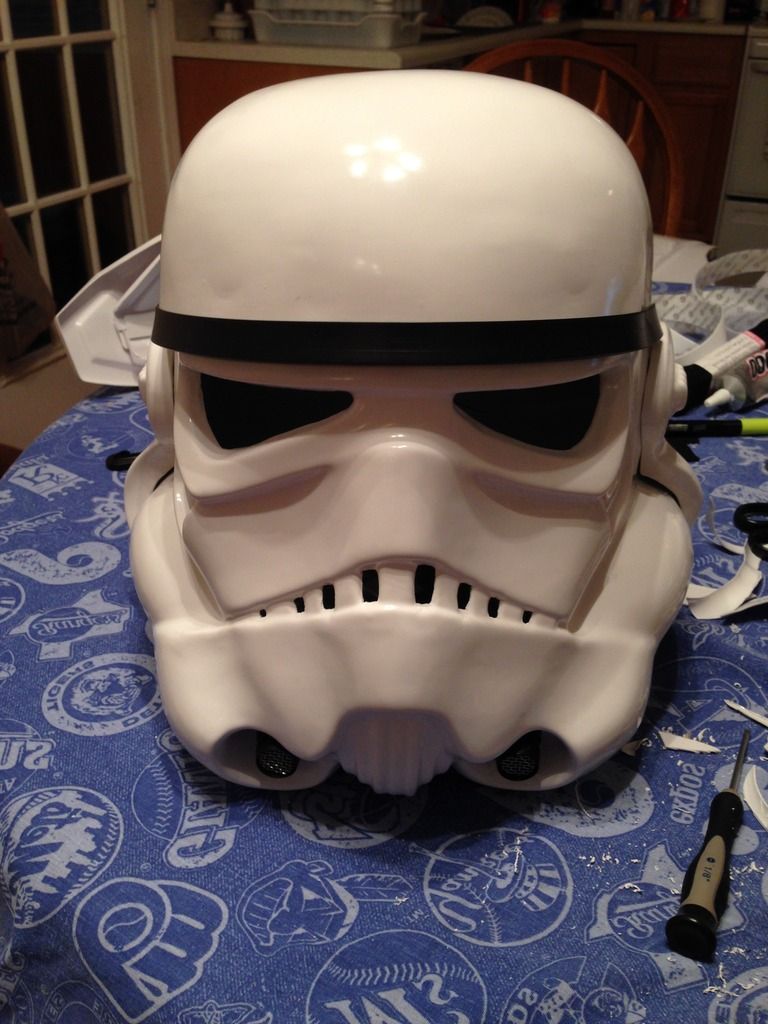
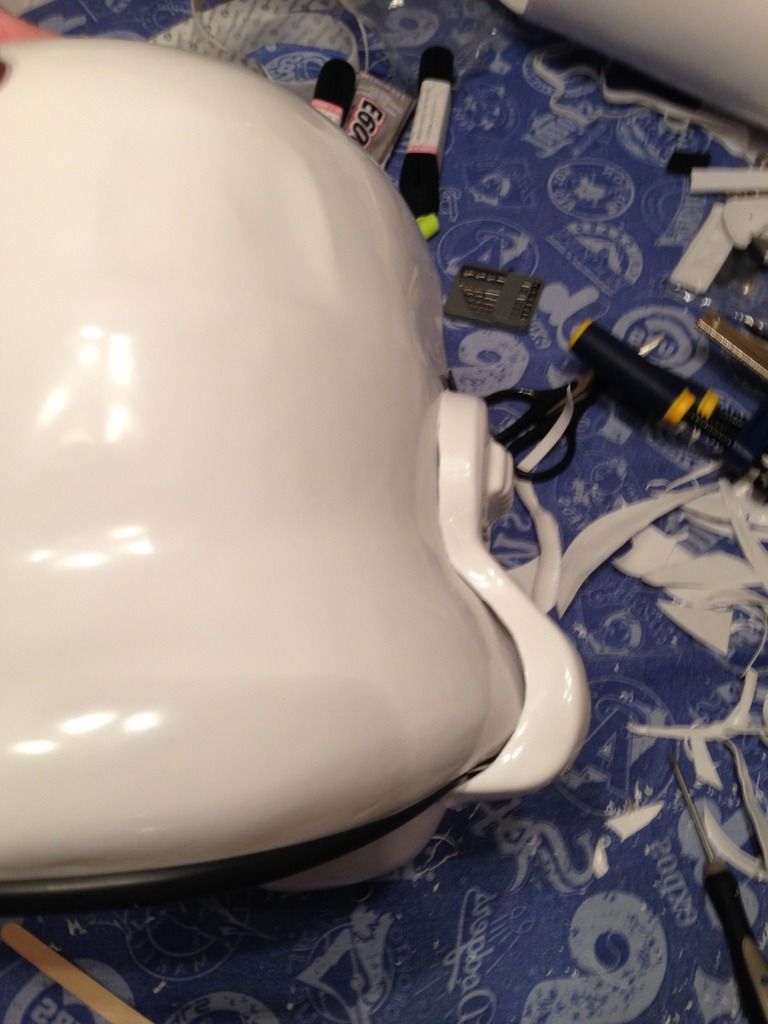
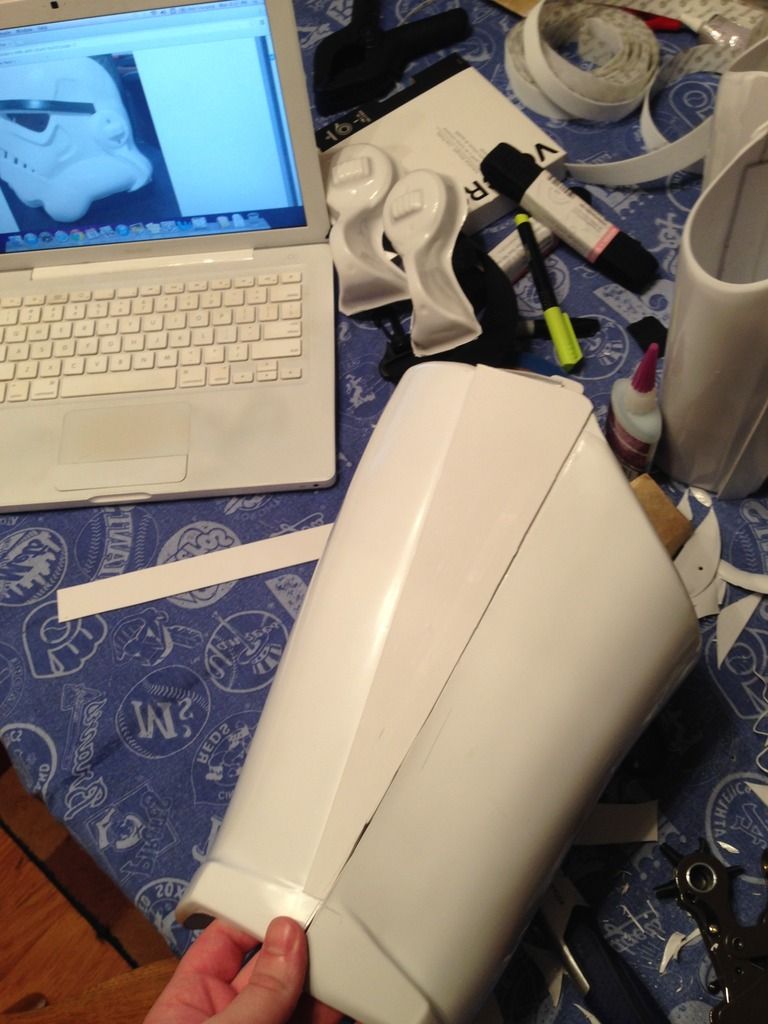
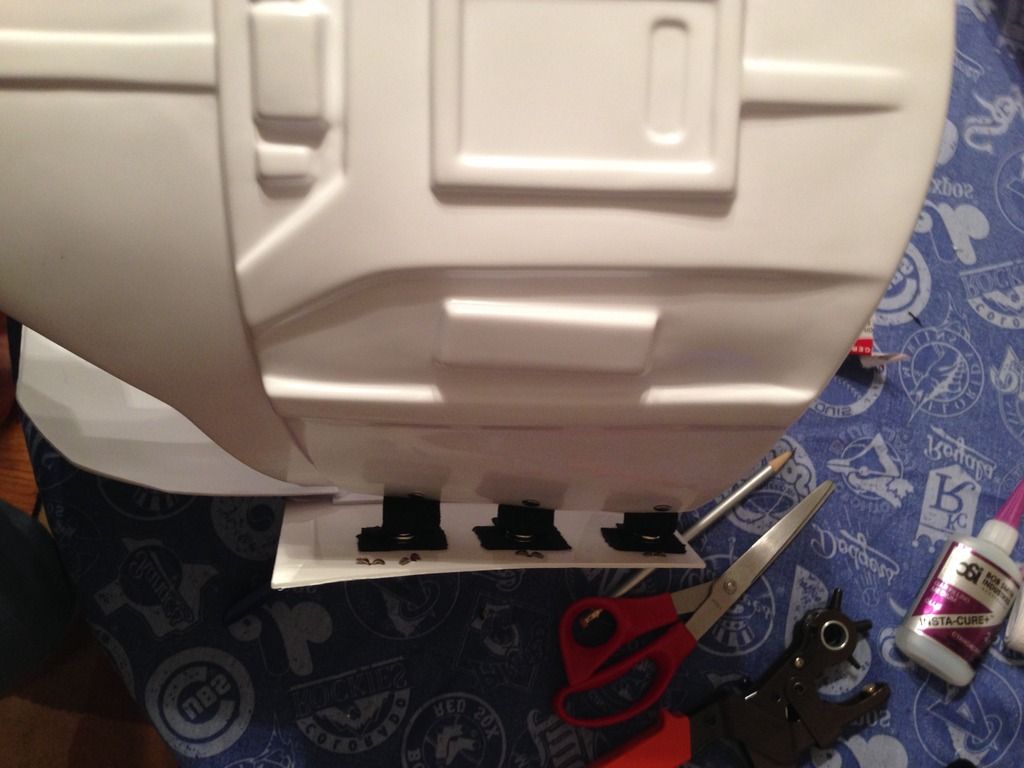
With the hopes of getting to attach the bucket halves together, I worked for at least a couple of hours on the teeth. I tried various tools at my disposal and finally got a combination of them to produce some positive results. Between the xacto knife and whatever the spinny tool thing with cutting teeth that came with my lexan scissors is, I got a good start on it. Thoughts and suggestions here are most welcome.
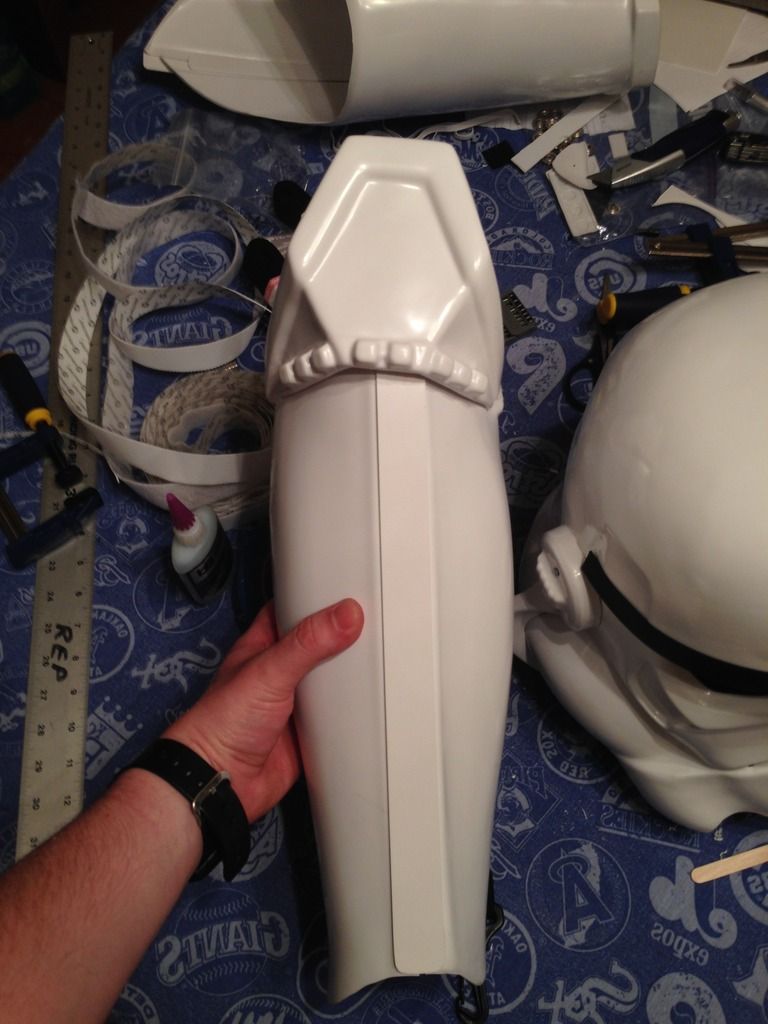
Also put on the outer cover strip to the completed thigh:
I'll have to do some yoga poses to get the other thigh measured properly or await extra hands over the weekend.
Lastly, I did some more bending on the shoulder bridges; they straightened out a bit over the past few weeks and so I reboiled them and am leaving them bound with tape overnight.
Still lots to do, but it's looking better and better. I see a TK Saturday on my horizon!
-
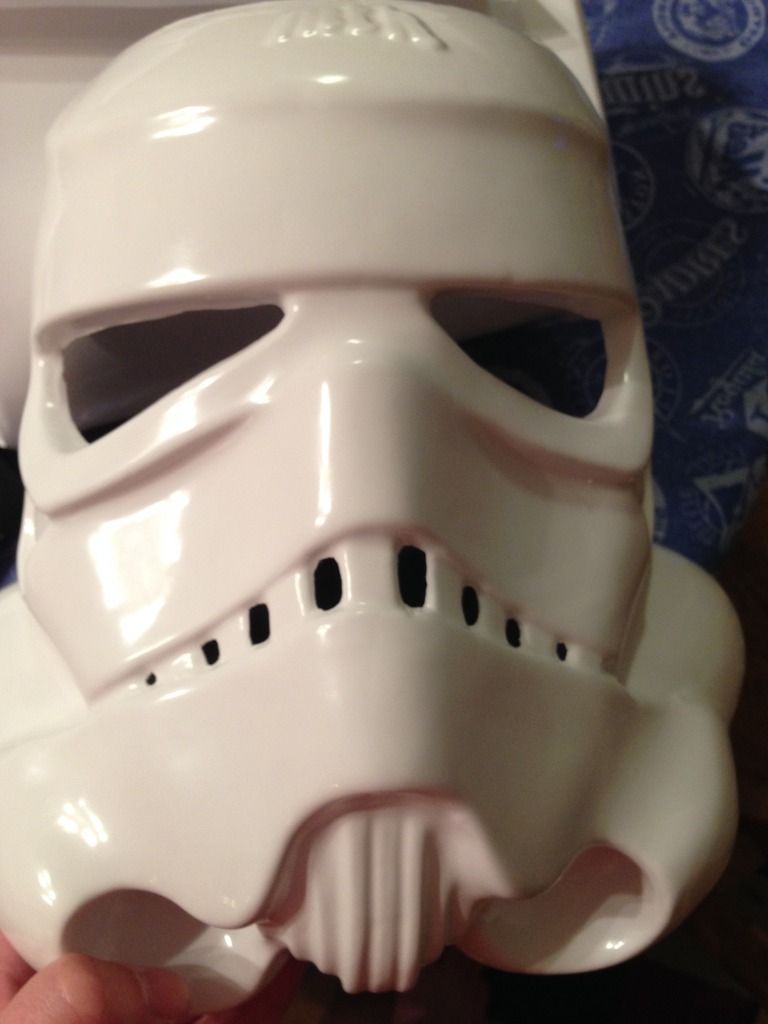
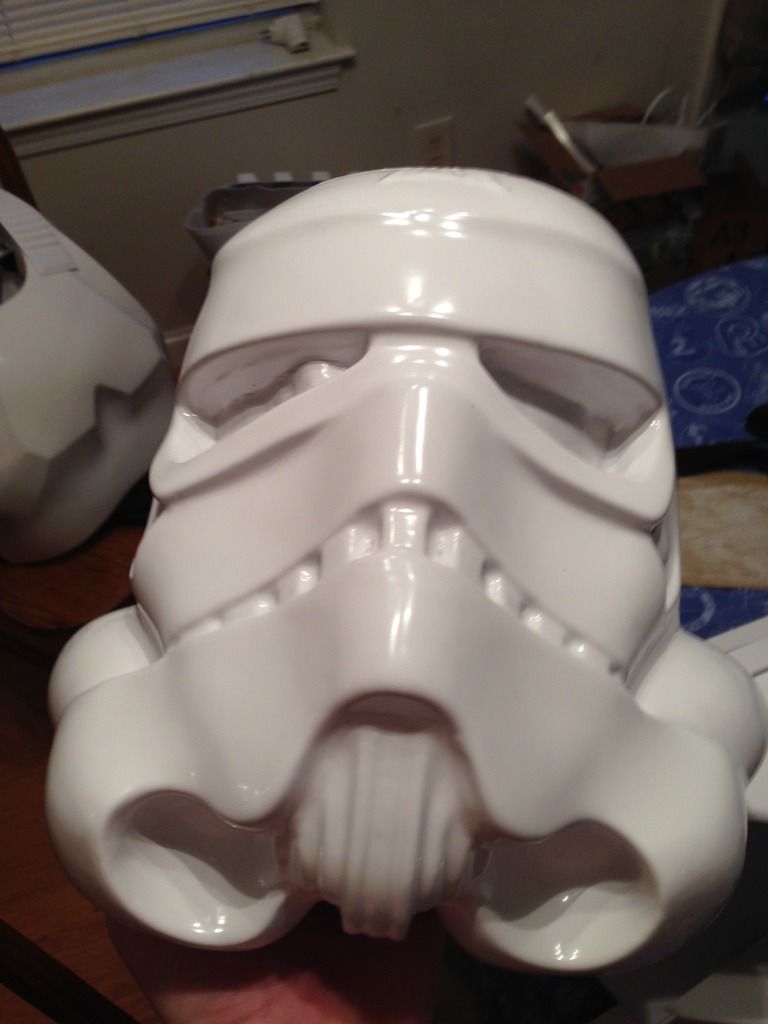
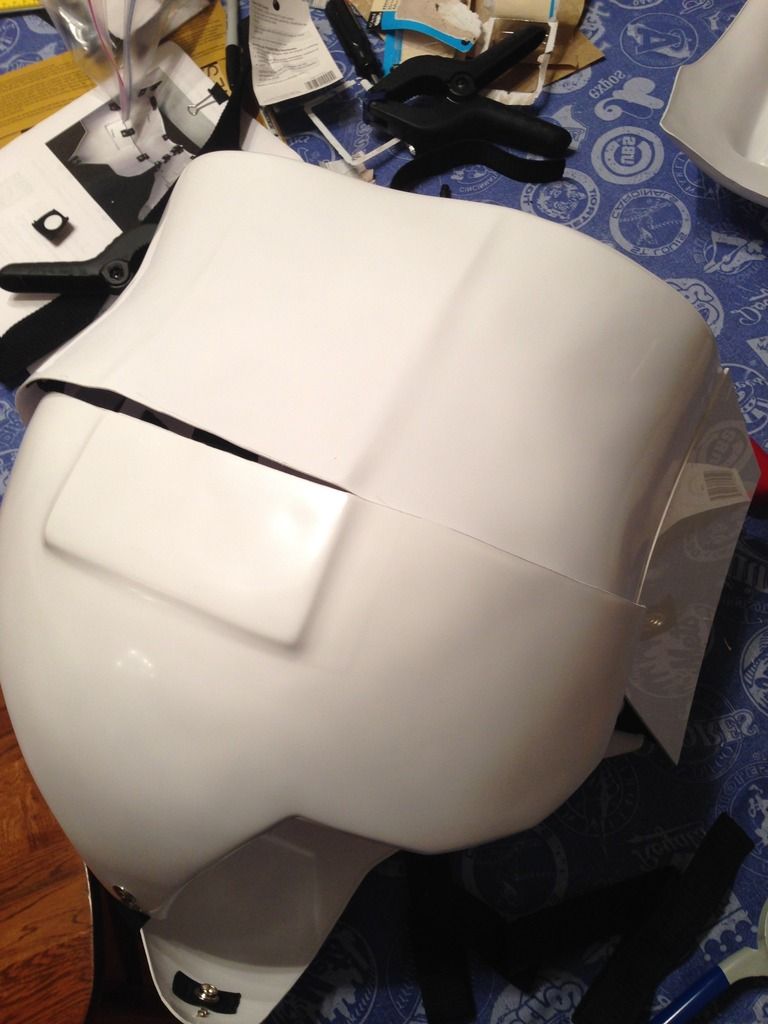
Went to work on the bucket this evening; started the day with looking over a few builds and TrooperBay's videos, but that hasn't kept the Dark Side from gaining control of me on this thing. The eyes were difficult to trim out properly due to the angles but I think I got it to a good status. Was going to begin dremeling the teeth to get them started but thunderstorms in the area thought differently.
An updated picture on the thigh shim work, as I forgot to add one on the last update. It still needs its coverstrip, but I walked away from the work zone to take a break from the bucket.
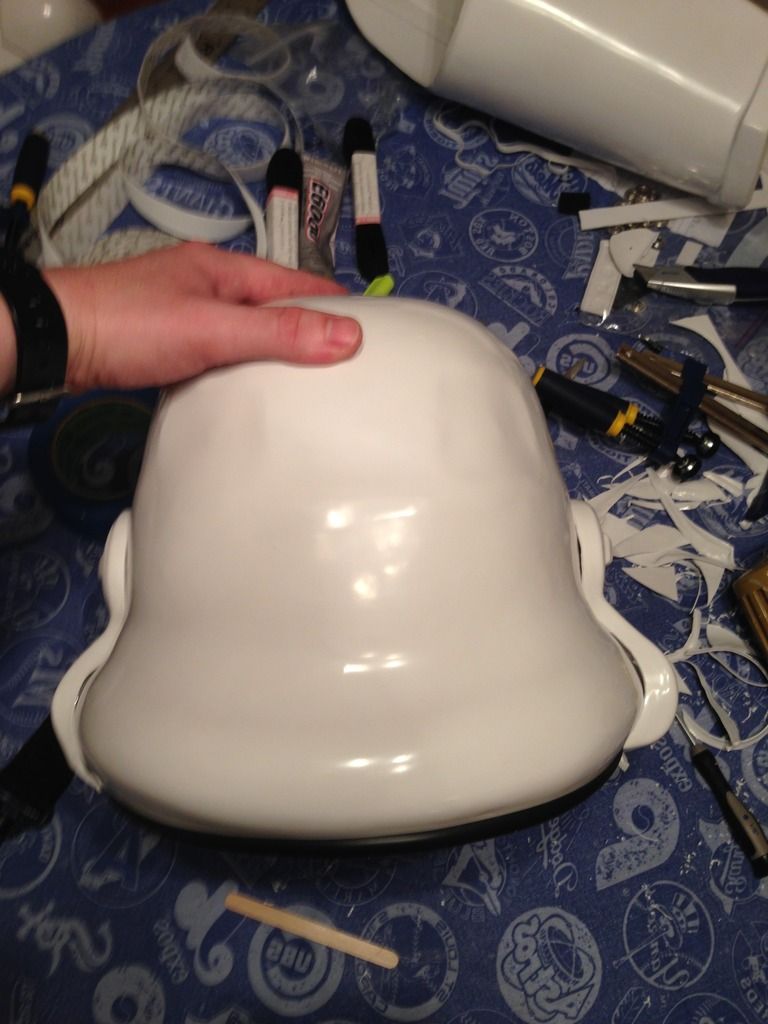
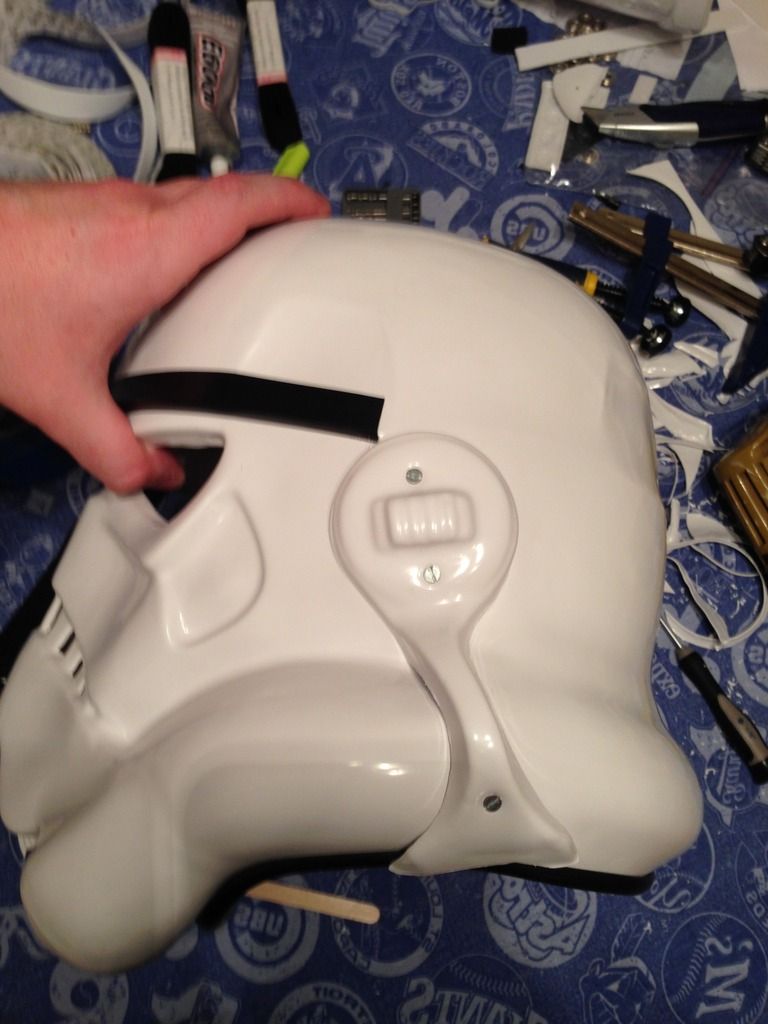
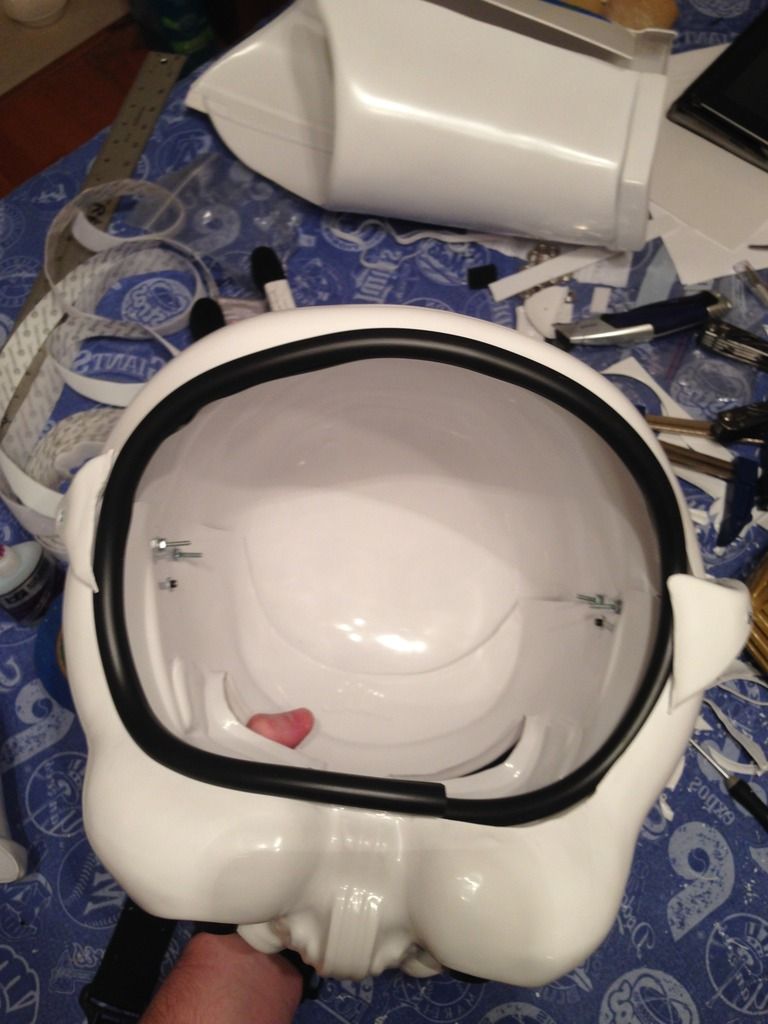
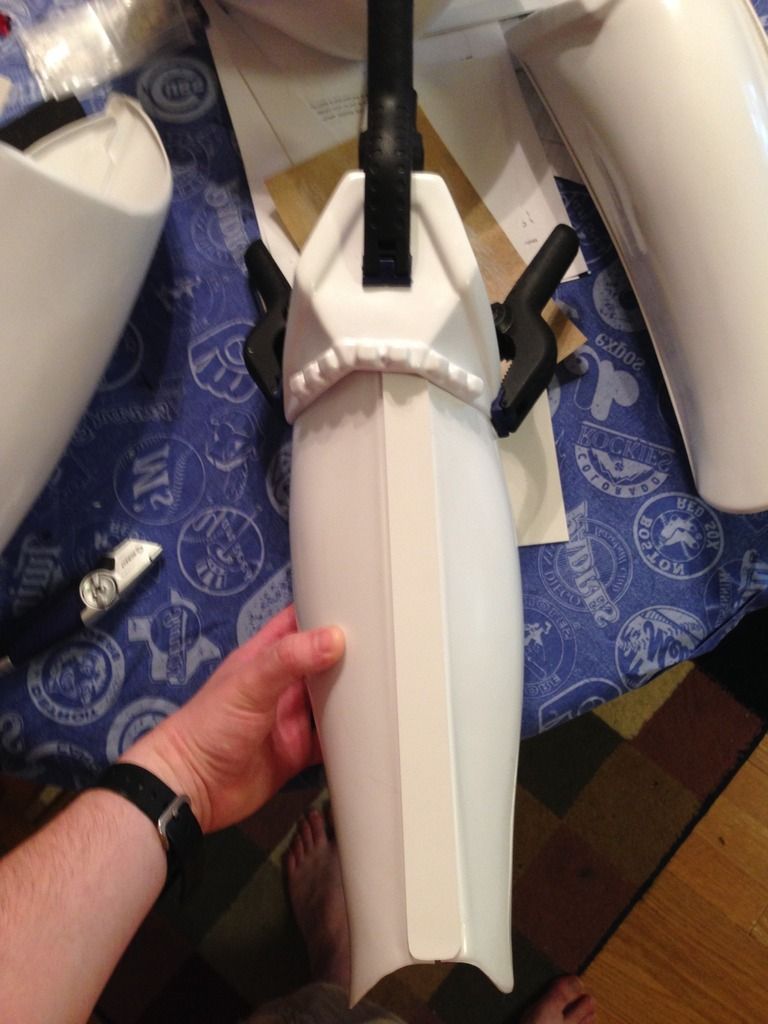
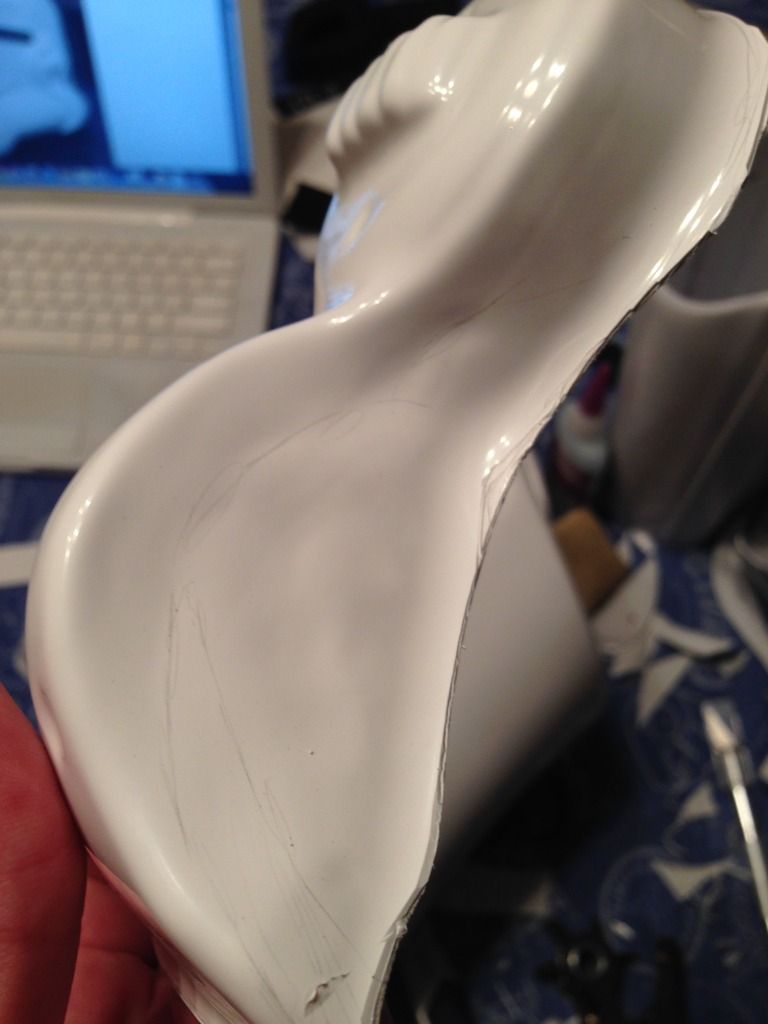
Trimmed the sides on the faceplate and 'hood' of the helmet...
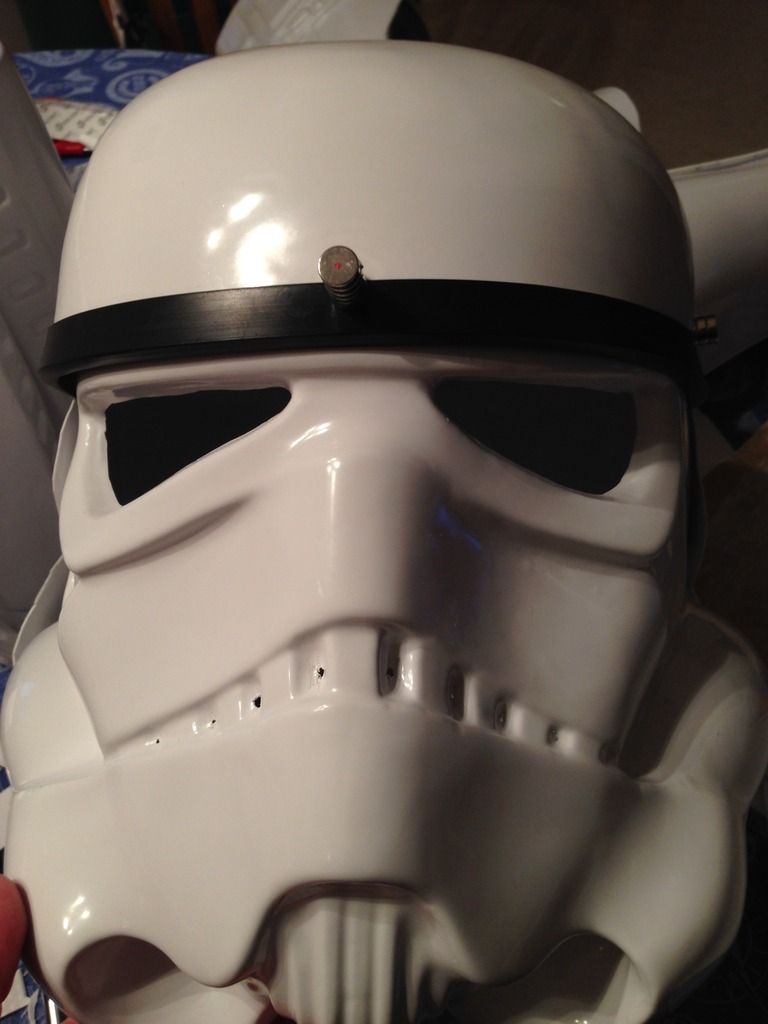
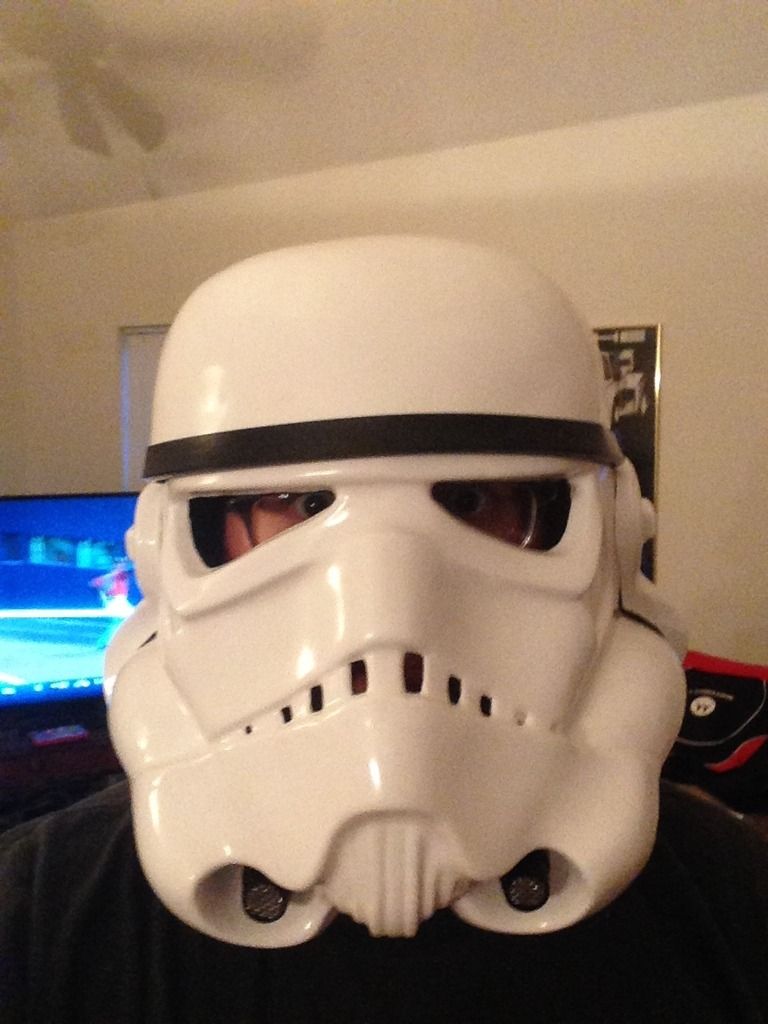
And just had to try it on.
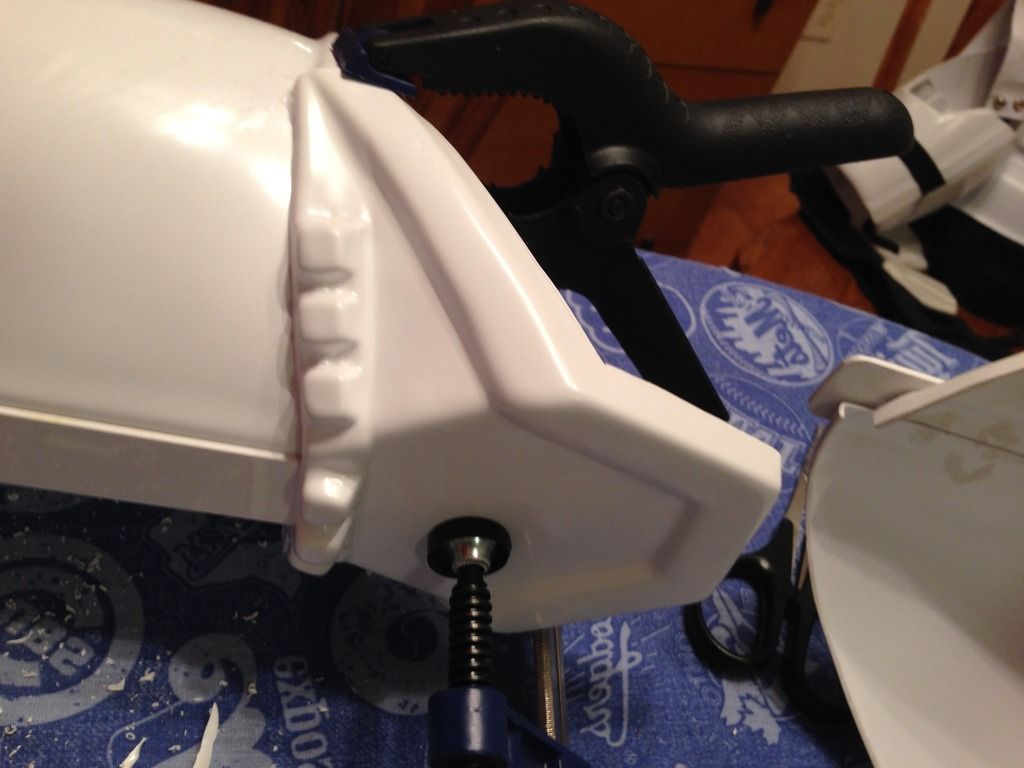
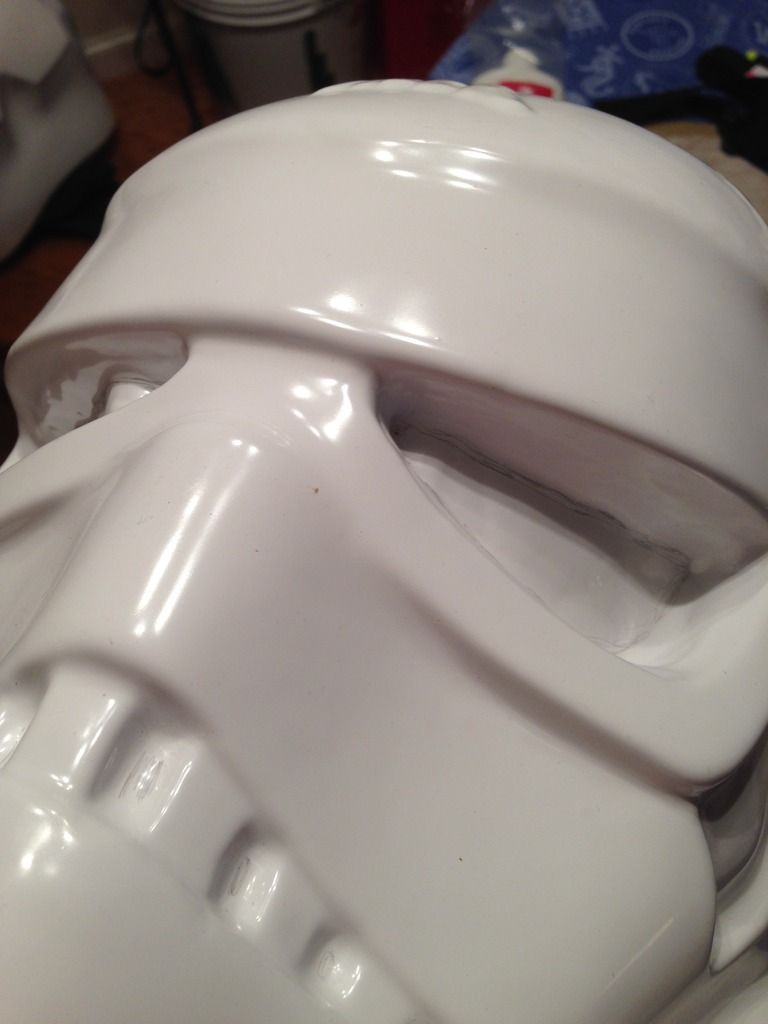
Attempted to get a good lineup across both sides to get ready to rivet once I had the teeth together, but I couldn't get it the way I liked it with the available tools. My clamps that I attempted to use on the inside of the eyes to hold the brow in place like in the TrooperBay videos were too big, while my magnets were breaking left and right. A lot of firsts on this part of the build: first injury when I was cutting down the inside of the eye to my thumb; first magnet break (x3 as it turned out); and first overwhelming urge to throw a piece of armor against the wall when the bucket moved on the 28th attempt to align it.
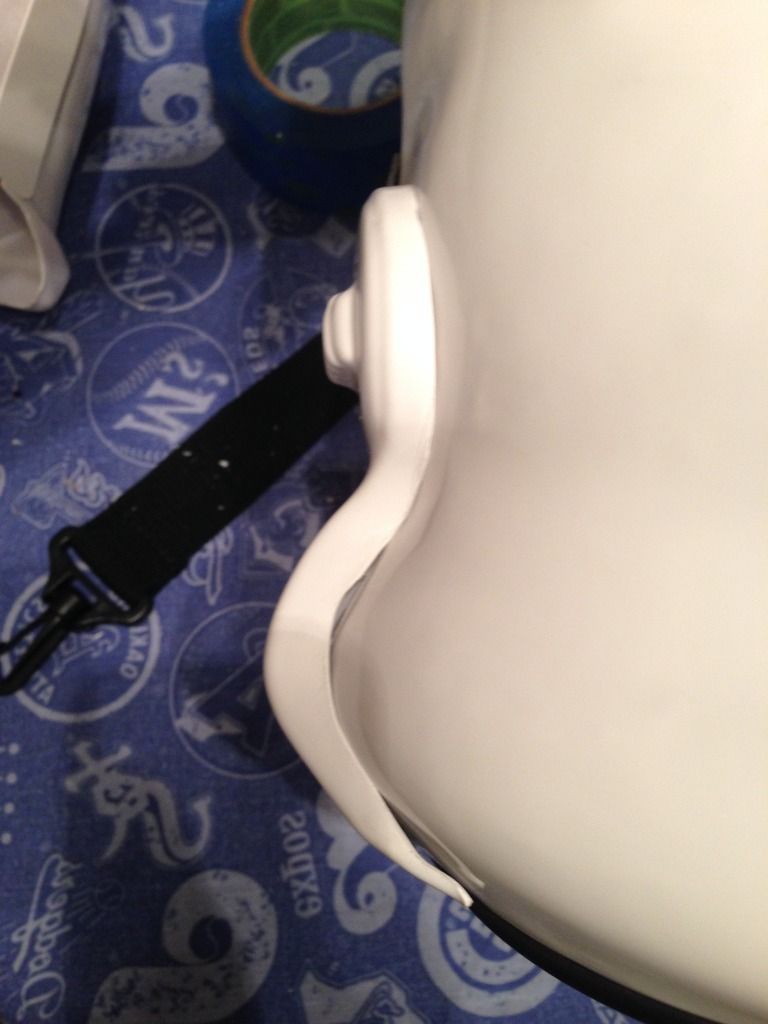
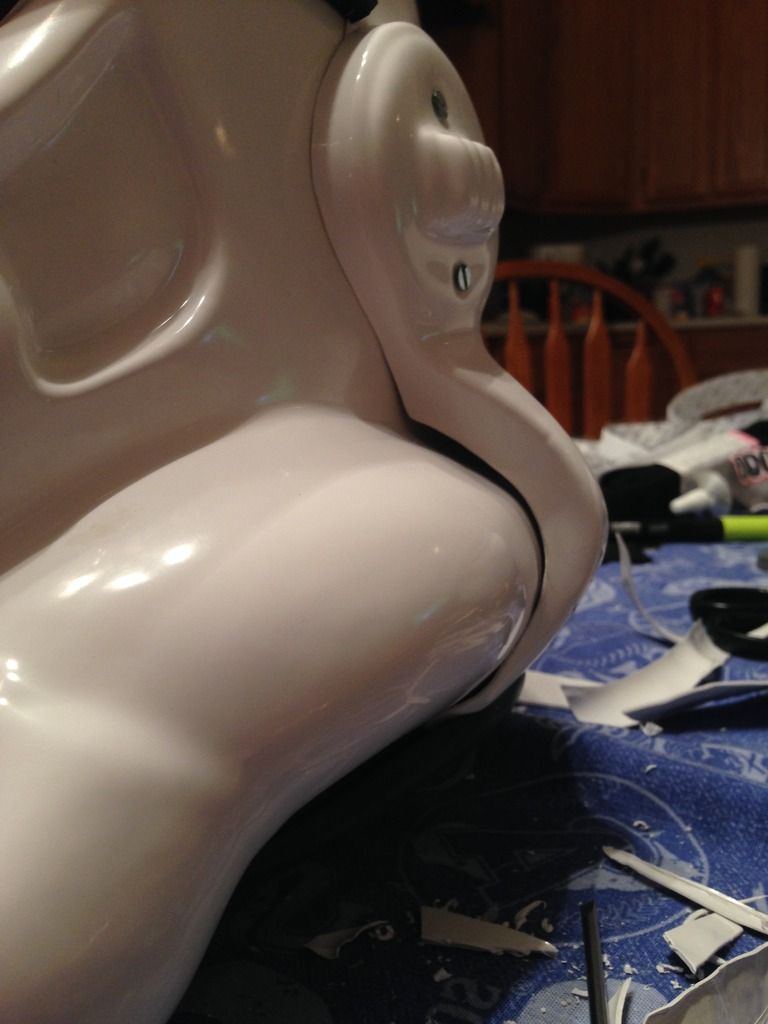
So I moved onto trimming the ears. First one was great, I could clearly see the indentions on where it needed to be trimmed to.
But the otherside was not as forthcoming:

This bucket will take some work. Shout out to, I believe, Altair's build thread that I was looking at while working on the helmet.
I'll soon be back at the helmet, but there are other areas that still need attention on the rest of the suit. Goals for tomorrow will include the thigh outer strip, sniper plate, trimming of the battery pack, and dremeling of the teeth and ears. I've also entered into a contest to enter my application for approval by Sunday, so miles to go before I sleep!
-
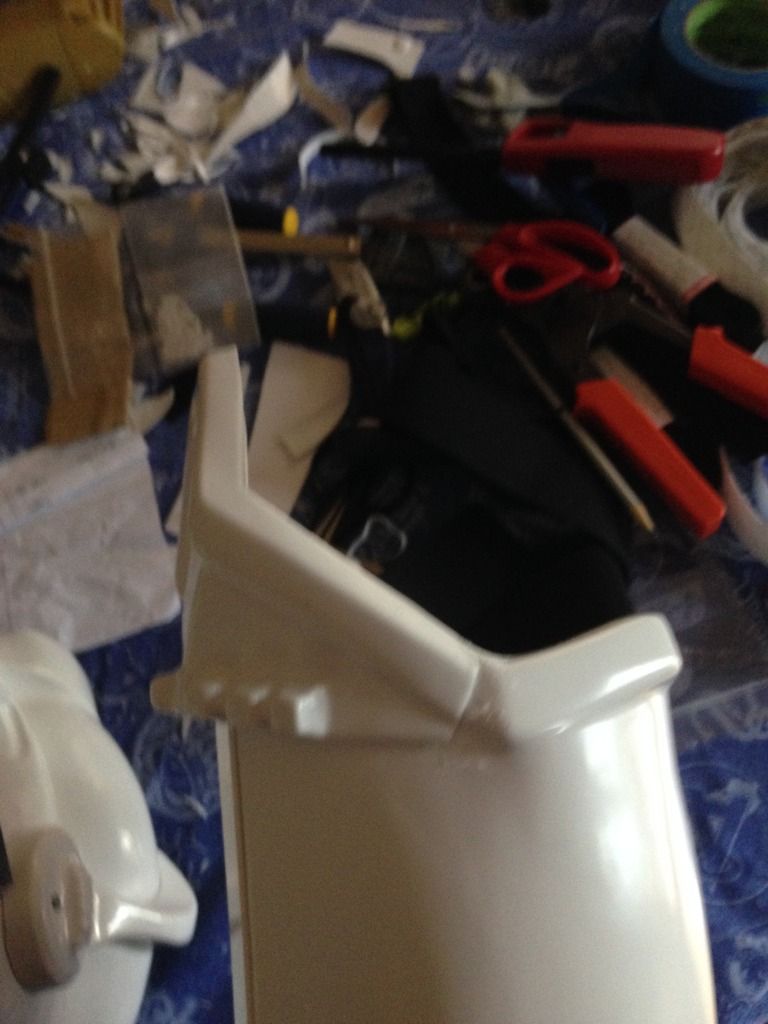
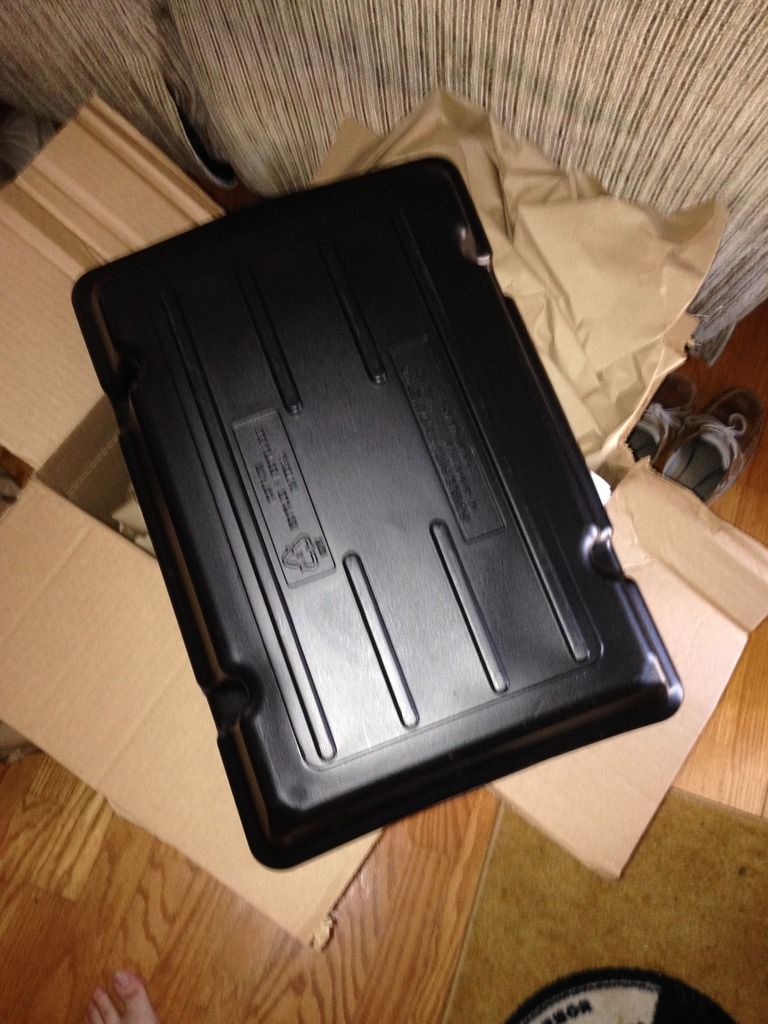
Came home this evening to a small brown box! Thought it might be the oil pan I'd ordered for my HWT but as it turned out.......
A wild Bucket appeared!!
Super psyched about it and pretty happy in the my build timeline that it arrived; already having experience now with the armor, I dove right in and marked the areas to be trimmed while the inner cover strip on my thigh dried.
Gotta check the CRL's to make sure I get the teeth number right, but I'm thoroughly looking forward to this part of the build.
-
Make it happen, Jason! It'd be great having you there; the parade on Saturday is awesome, at least from a spectator standpoint (till I get to troop in it!).
I'm confident the thigh will turn out pretty well. I had a Centurion thigh on hand, which is being converted to a Deathtrooper, that was a physical reference, along with the photo above, and you can barely notice the shim. I'll be waiting to do all my abs pasting till I complete it; I'm pretty sure I can get basic 501st approval to start trooping with just a few seams and then begin making upgrades to the armor to make it look better. I'm keeping an eye on yours to see how it turns out, so keep them updates coming!
-
Remaining to-do list:
1.
Shimand coverstrips on thighs2.
Connect completed arms to shoulder bridges3. Connect thighs to supporting belt
4.
Place velcro on shins5. Mount sniper plate
6. Mount batter pack
7. Glue cover buttons to belt
8. Paint rivet heads
9. ab buttons and apply
10. Find that
elusive bucket11. Apply to 501st
Bonus levels
11.
Open brown box containing DLT-19 when it arrives12. Complete HWT pack and order pauldron
13. Apply abs paste to shim ridges and paint tabs black on kidney
14. Apply for EIB
15. Apply for Centurion
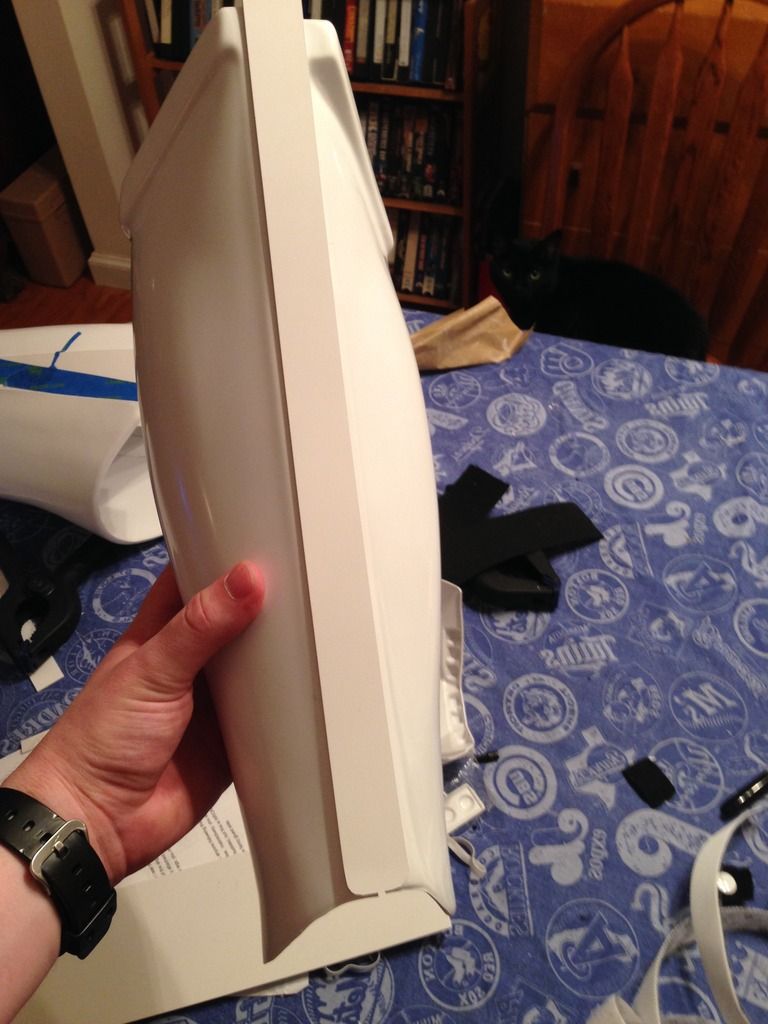
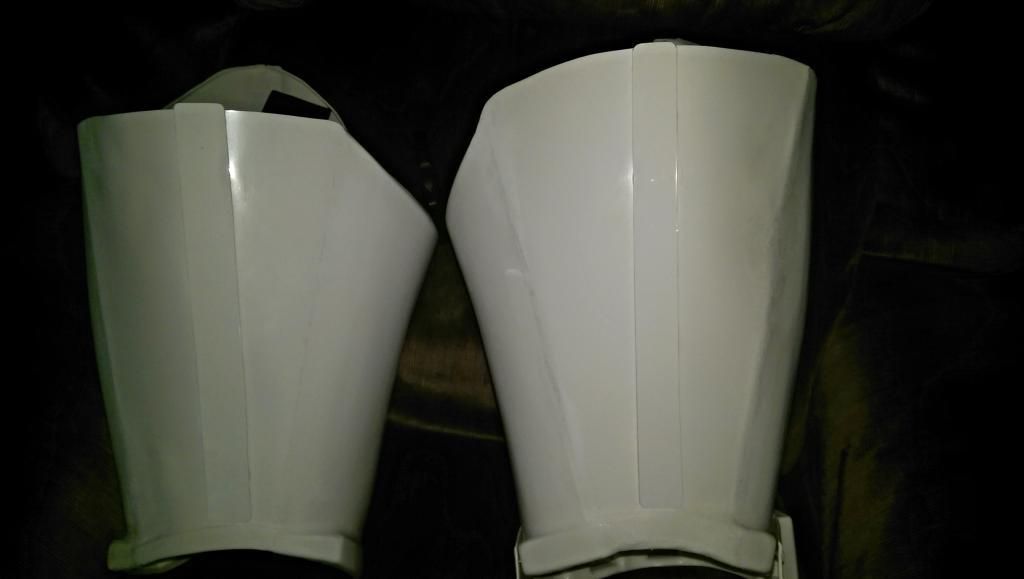
Another mini armor party has led to the completion of the shins proper, with velcro added to both and front cover strip added to the remaining shin.
The DLT 19 came in on Monday and I could not be happier with it. It's extraordinary! I have a pic of it, but it doesn't do it justice, so i'll have to take another soon. We also were able to come up with a good solution for shimming the thighs. I didn't think I'd need to on the left one, but the right was definitely going to need it.
Using this Centurion's approval photo as a basis, we applied a shim to the edge of one side to then meet the other flush.
The Reference:
The Result:
The tape marks where the shim will meet the thigh. A cover strip will cover the diagonal cut and be strengthened by a larger inner cover strip. Completion of that thigh will probably occur tomorrow evening. Once they are both completed, some trimming to make the pieces meet and not poke or snag will finish them off.
Inching ever closer. Hopefully the bucket comes in soon, as I hope to be done by Dragon Con. It'll depend on if I can get the bucket completed fast enough, I think.
-
Ha, I just ran into and came to the same solution as you, tonight. I've got a shim overlapping one edge and then I'll be meeting the butt joint cover strip at the other edge. Can hardly tell its there as is and I have faith that the abs paste will hide any seams that may be visible.
Keep up the good work!
-

Well, now theres a definitive one stop manual for putting a kit together. Great work Tony!
-
Thanks, Tony.
Not sure why the pictures don't show up as well as they do in photobucket... I plan on using velcro to attach the belt. Haven't gotten to that just yet, hence the fallen belt in the pic.
-
Remaining to-do list:
1. Shim and coverstrips on thighs
2.
Connect completed arms to shoulder bridges3. Connect thighs to supporting belt
4. Place velcro on shins
5. Mount sniper plate
6. Mount batter pack
7. Glue cover buttons to belt
8. Paint rivet heads
9. ab buttons and apply
10. Find that
elusive bucket11. Apply to 501st
Bonus levels
11. Open brown box containing DLT-19 when it arrives
12. Complete HWT pack and order pauldron
13. Apply abs paste to shim ridges and paint tabs black on kidney
14. Apply for EIB
15. Apply for Centurion
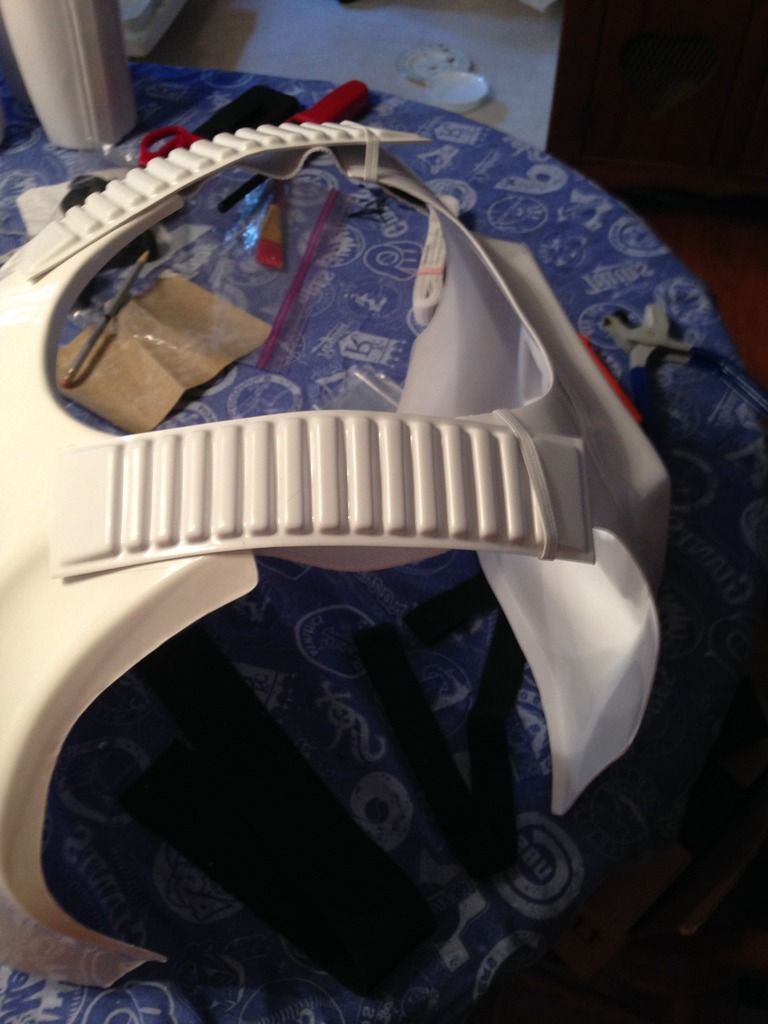
Slight update to the to-do list as I put in the shoulder bell connections to the shoulder bridges on Wednesday.
Love having it on and can't wait to knock out more this weekend. As evident in the pic, I still need to put in the tab on the left side (picture's right) to close up the gap and limit the protrusion. Forearms will need disassembling and some trim to make smaller, but i'll still put foam in it to help keep it from moving.
Saw on a few other threads that the coverstrips can be a little wider to enable closure, especially at the top of the thighs. I believe this will be the best course of action in completing them.
I also have ordered an MTK bucket. Hopefully it arrives soon and I can knock it out pretty quick.
-
Welcome Mike.
As a fellow newcomer in GA, I strongly suggest you join the GA 501st Forums and look for them on FB (if you haven't already.) They'll definitely help get you started and pointed in the right direction for local stuff while you find all your TK info here.
-
I've only used my dremel for shaving down my ears, as a drill to do holes for the kidney/ab, and drilling holes for snap plates. If I had a real cordless drill I would have put the dremel up a long time ago. For long straight cuts, get yourself a long metal ruler and clamp it down. I use my exacto knife to score and snap. On items with lots of curves, e.g. the chest plate, I trace a line with a pencil then follow it up with my exacto knife. I go back maybe 2 or 3 passes then follow it up with my scissors on the trim portion. I'm able to go along and pull off piece by piece of the material I'm getting rid of. I've been working on my build for months and you'll get more confident as you go along. If you make a minor mistake, it's nothing a little ABS paste can't fix.
This.

-
I started off with the lexans and they were good for big pieces, but I wish I had the confidence earlier on to use the box cutter for scores and snapping it. That's what i've been using for the finer trimming and detailing. It's worked like a dream. That being said, I was thankful for the dremel at the armor parties to make quick work of my TD panel and caps. I just didnt have the foresight to trim a bit of the pipe to make the caps fit a little better.
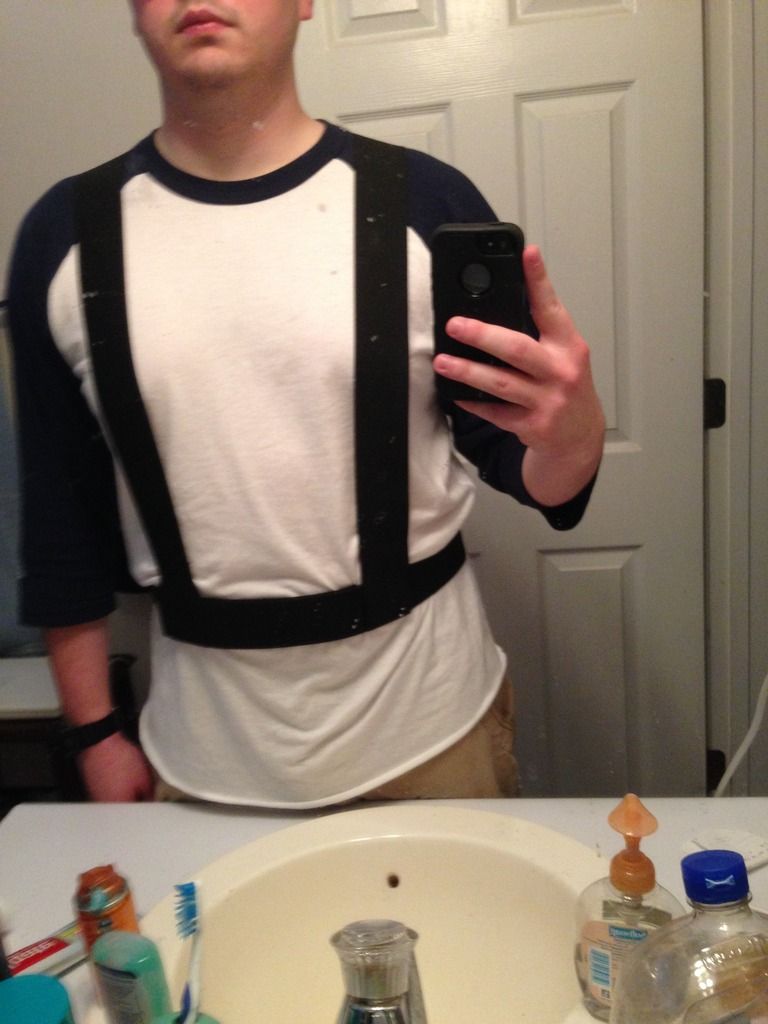
Keep at it! I got my upper body snapped together and it's an amazing feeling being close to the finish line!
-
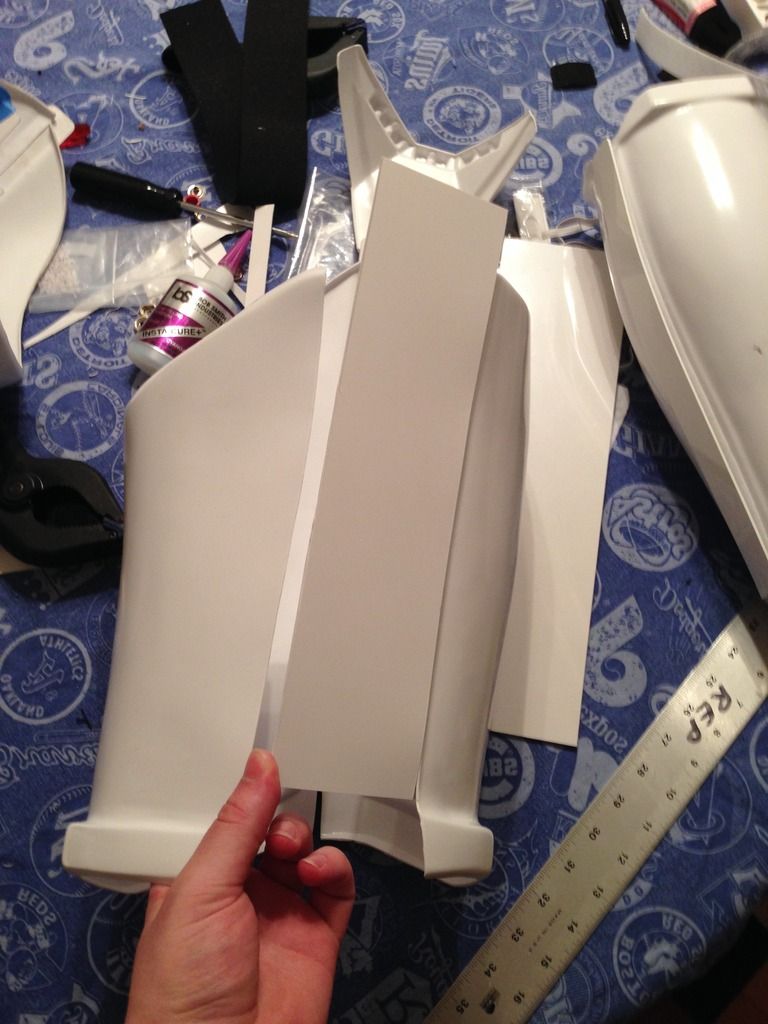
Lots completed over this weekend. I was able to get my brother to help me align and glue the shoulder bridges on, which allowed for the completion of connecting the back and the front. I got the cover strips on all but my left shin, as it was drying from the e6000, and marked where my shin velcro needed to be and where the thighs needed to be cut/shimmed; more on the thigh at the bottom.
Picture time!
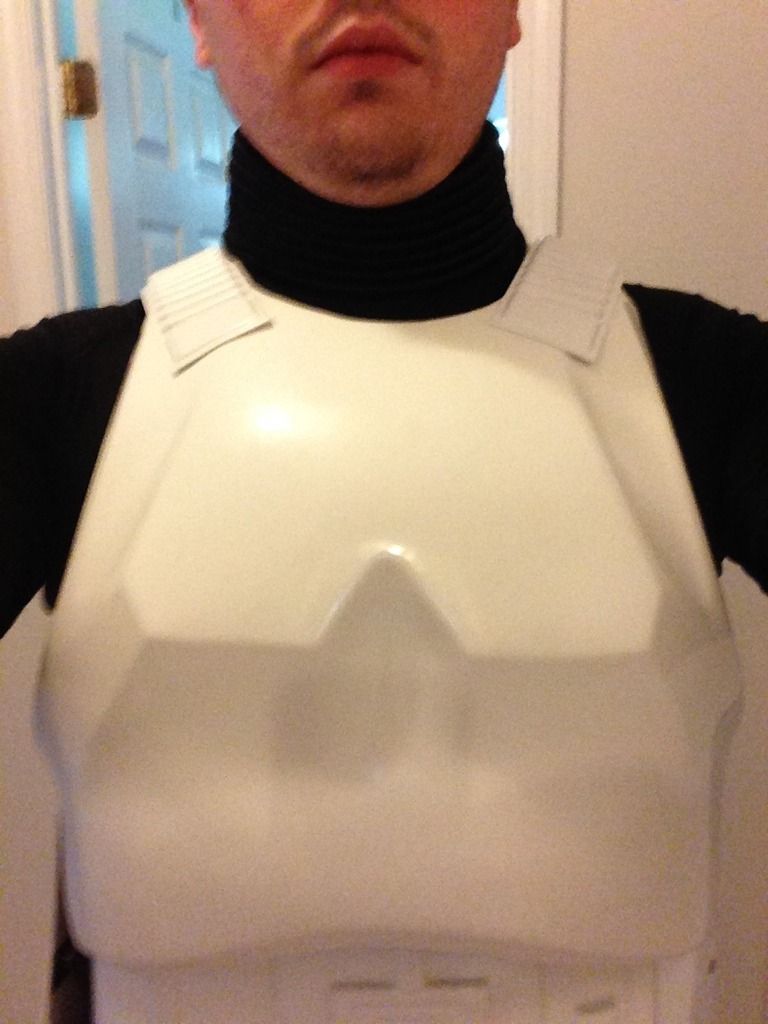
Complete with floating bridges
Picture looked better on my phone, but you can still make out the pencil line for the velcro. Comes over pretty far...
The thighs are taped shut where they fit pretty well; you can see that the bottom overlaps to reduce the wide open knee issue, but will require shims going up. I am at somewhat of a loss on how best to go about doing the shims; the ridge line proposes the most vexing issue, along with having the shims match the contour of the original shape of the thigh. Advice here is most welcome.
The fronts look amazing, though, with the cover strips!
Remaining to-do list:
1. Shim and coverstrips on thighs
2. Connect completed arms to shoulder bridges
3. Connect thighs to supporting belt
4. Place velcro on shins
5. Mount sniper plate
6. Mount batter pack
7. Glue cover buttons to belt
8. Paint rivet heads
9. ab buttons and apply
10. Find that elusive bucket
11. Apply to 501st
Bonus levels
11. Open brown box containing DLT-19 when it arrives
12. Complete HWT pack and order pauldron
13. Apply abs paste to shim ridges and paint tabs black on kidney
14. Apply for EIB
15. Apply for Centurion
-
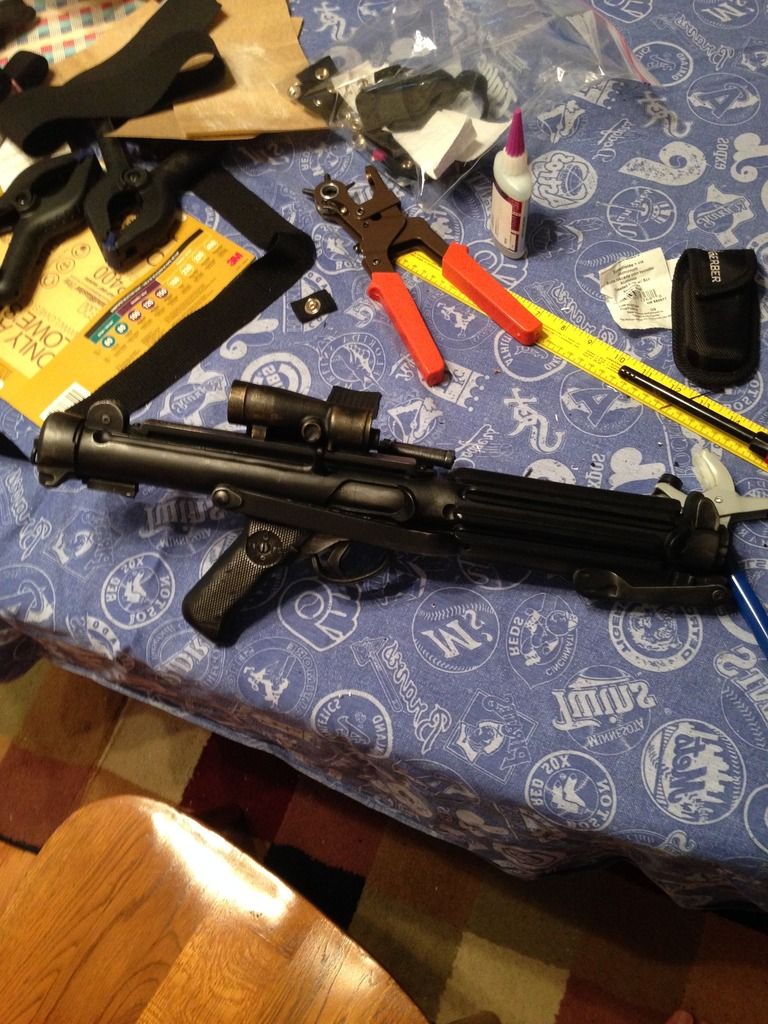
Not a lot of photo evidence of major work done today as it was mostly all logistical, but I did connect my holster to the belt via Chicago screws.....
And just in time to, as this beauty was delivered just minutes later!
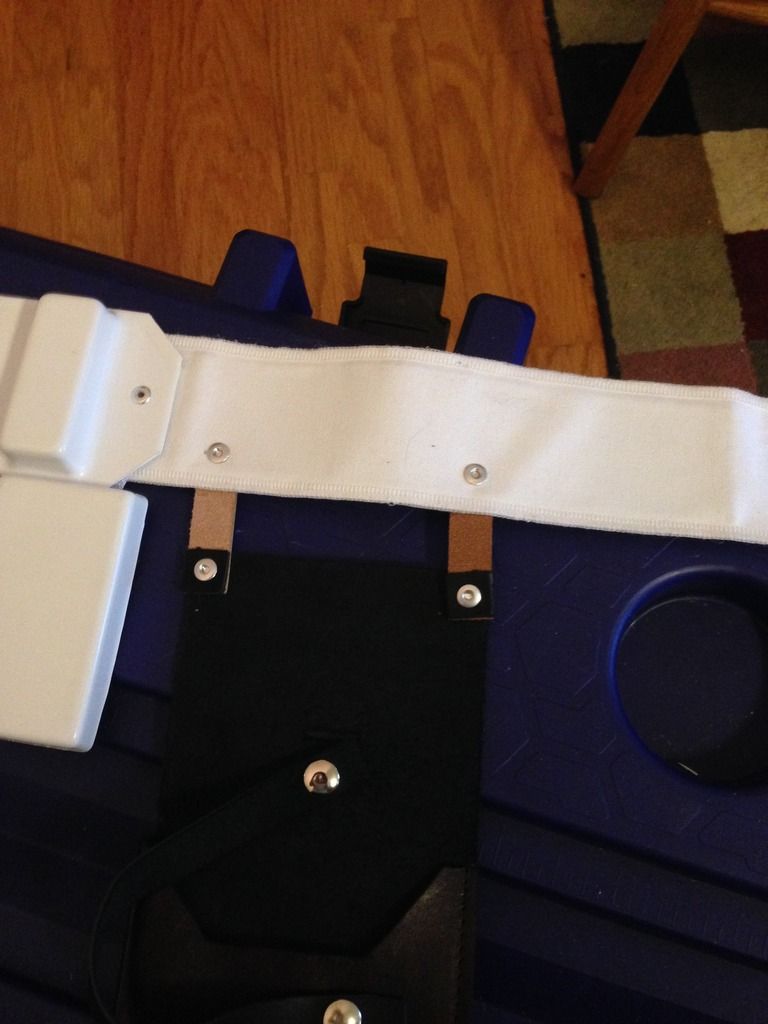
I also made another run to get more black elastic and decided to try my hand at making some suspenders for the bottom half and thighs, as well as a way to mount my speaker system.
Very happy with how it came out and i've already applied some snaps to the inside of the ab. I'll wait to have an extra pair of hands to put in some on the kidney.
Dilemma at the moment is to either:
A. Begin making tabs and corresponding 'locks' to finish off the torso, or
B. Begin making shims and cover strips for the legs
A good problem to have, either way.
Cheers

-
Ahaha, that pic is perfect, Jason!
Incidentally, after I took the pictures of the snaps and was uploading them to photobucket/here, I was reading his thread. I was referencing those fixes at the end of my last update along with Tusken's ABS paste fixeroo. Can't hurt to have more reference pics to look at; i'll look for your thread this afternoon Jason.
-
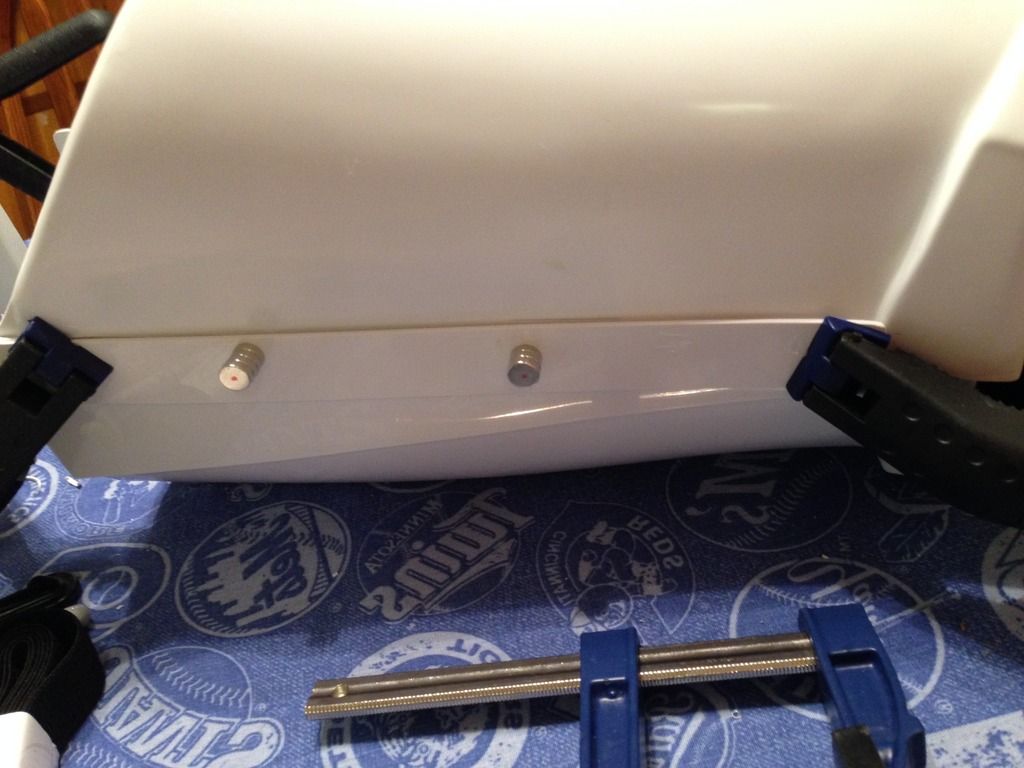
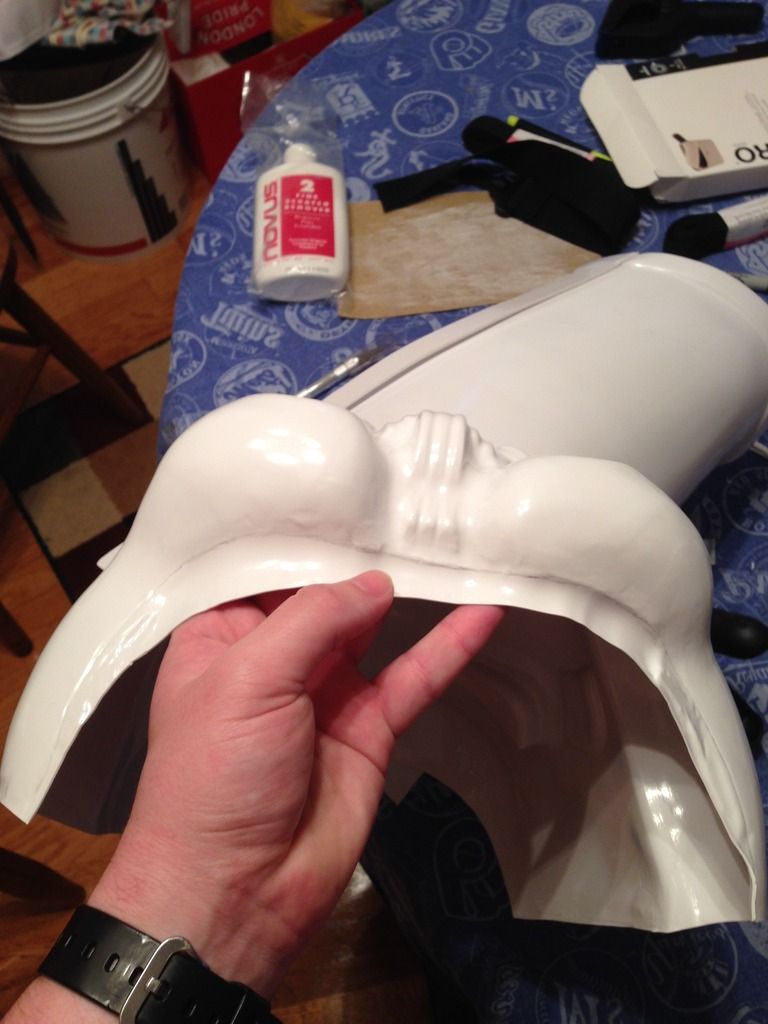
Almighty work was accomplished this day!
Laid in snaps for the Ab/Cod, Kidney, and Butt pieces with elastic based snaps. Also utilized some webbing material for the butt joining the kidney snaps, but may have to redo them in favor of elastic, as it sides a bit off to one side.
Here is an inside look:
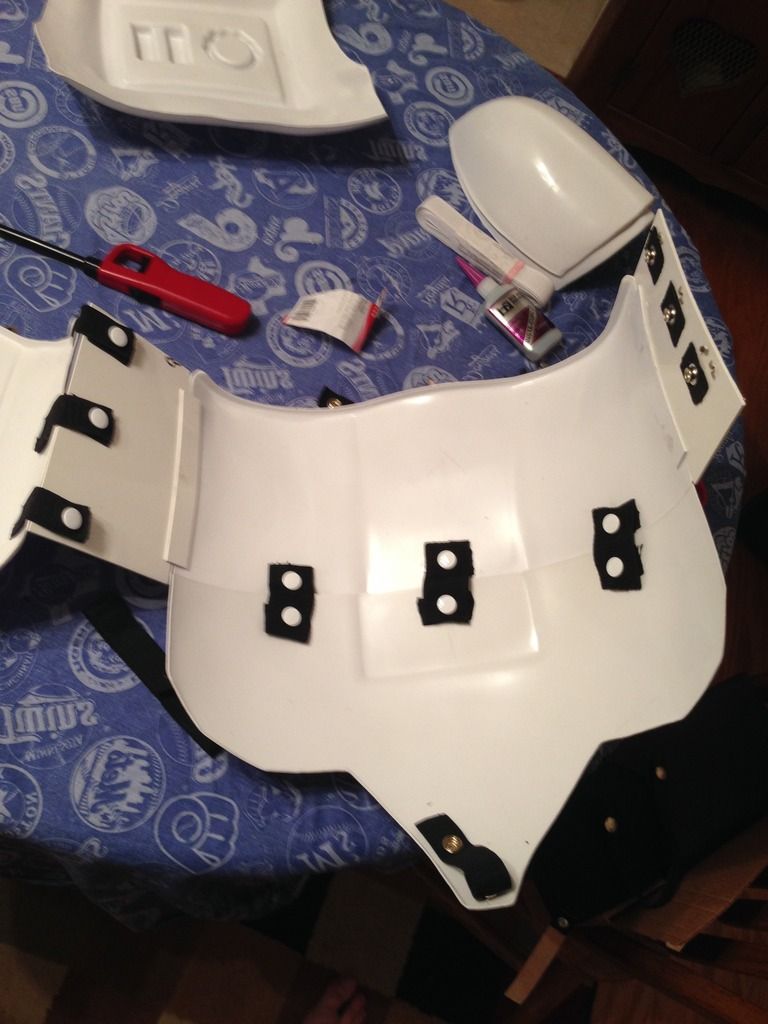
Now, it feels great to have something to try on, but there are some issues to resolve. The butt does flair a bit on the sides, but as i've mentioned, I may be able to resolve that with some longer elastic straps on one side. Also, the kidney rick flairs a bit; I will first treat it with water and probably finish it off with the "tabs" to keep it locked on the inside of the ab.
The butt rick flair issue
It isn't that bad when i'm wearing it; I accentuated the overlap and gap a bit to give a better idea of the issue in the photo. Same goes with the sides below:
I'll probably close shop for today. I need to finish off my belt, thighs, calves, shoulder bridges, and TD. Still a long list, but it grows shorter.
Until next time
WooooooOOOOOOO!


501st Trooper Status Requests (Include link to your 501st profile in your request!)
in 501st and Detachment Access Requests
Posted
Requesting 501st access.
TK 40259
http://www.501st.com/members/displaymember.php?userID=19785&costumeID=124