


EDaniels
-
Posts
40 -
Joined
-
Last visited
Content Type
Profiles
Forums
Gallery
Articles
Media Demo
Posts posted by EDaniels
-
-
Eric, your armor looks great. Congratulations on finishing it.
Looking good there bro!

Thank you so much guys.
-
I'll have to throw it all back on again when I get a chance. There may be some adjustment there. Could be they fell a little for the picture.
-
I got that same response on the Garrison boards that my thighs should come up higher. I used Zap a Gap glue so pulling them apart to let them out a bit might prove difficult.Looks amazing!
I would just try to pull up your right thigh, but that's all. Everything else is perfect. And i guess it's not a surprise as i can see on your test fit pics that the Big Boss was overseeing your work (Mickey Mouse
 )
) -
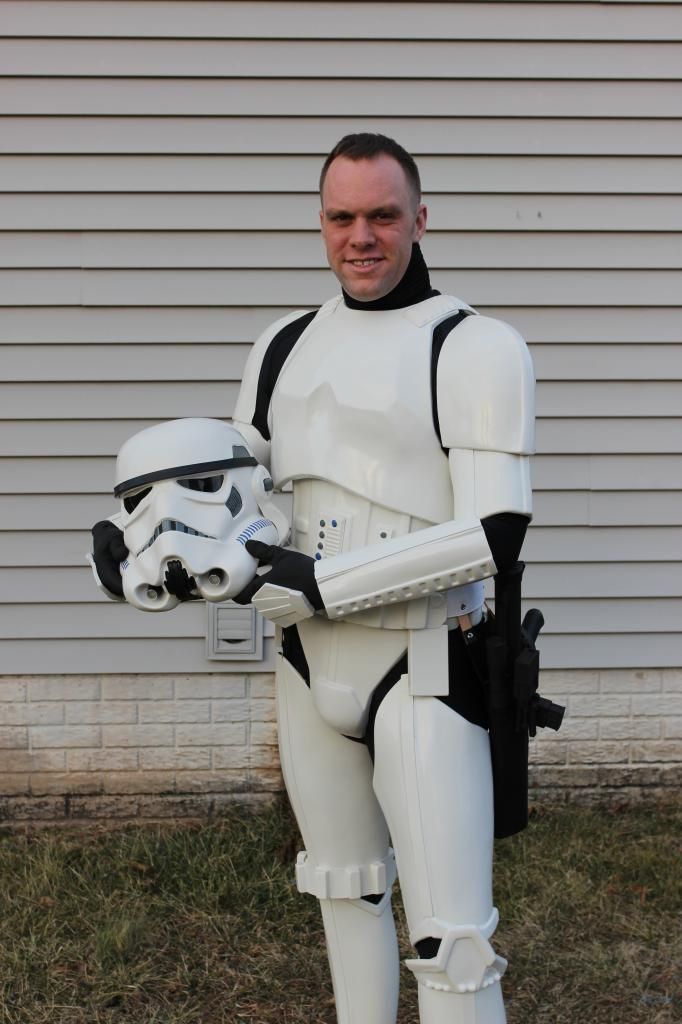
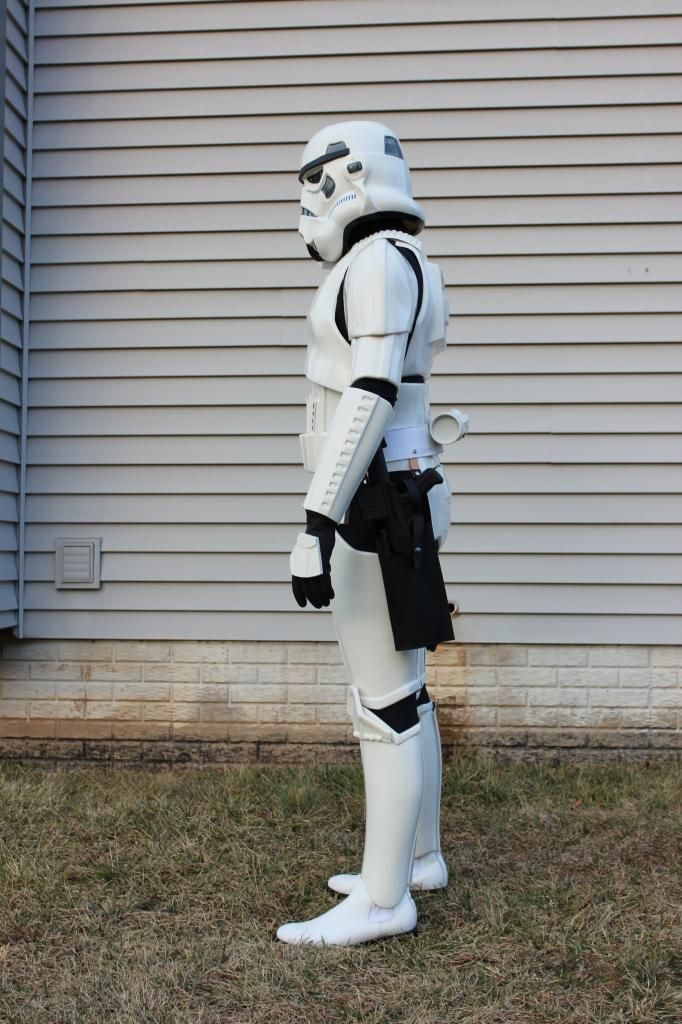
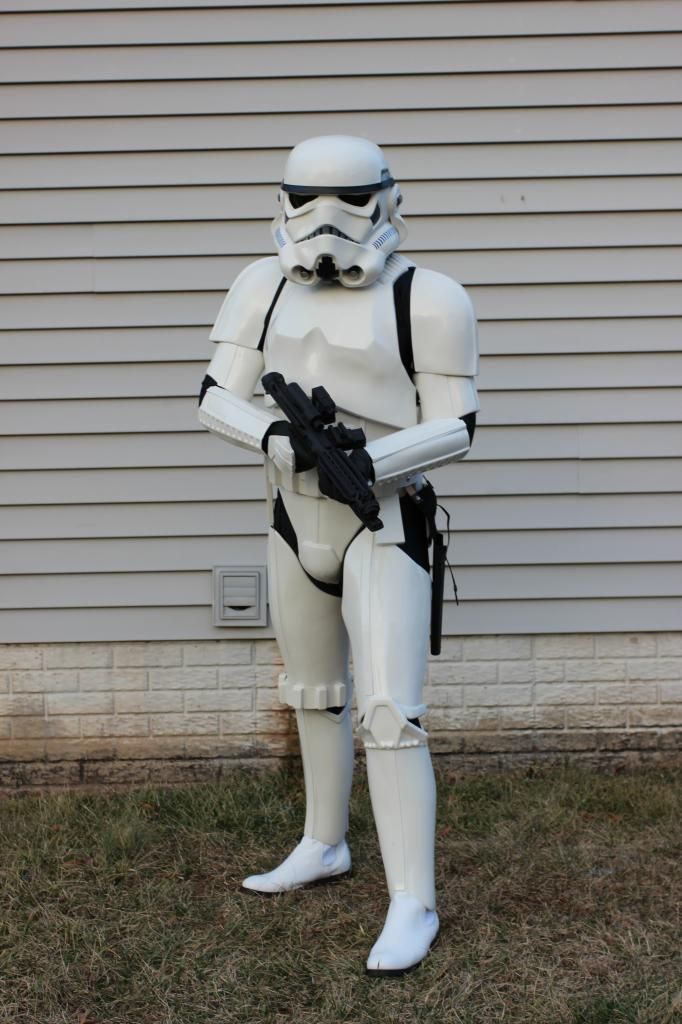
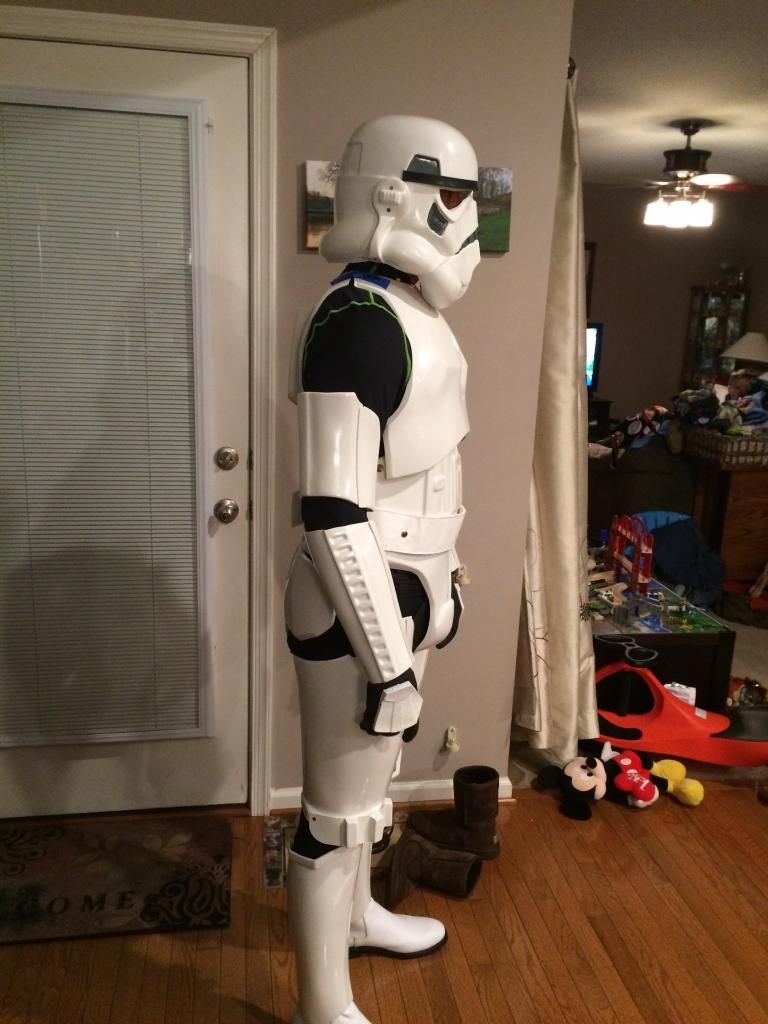
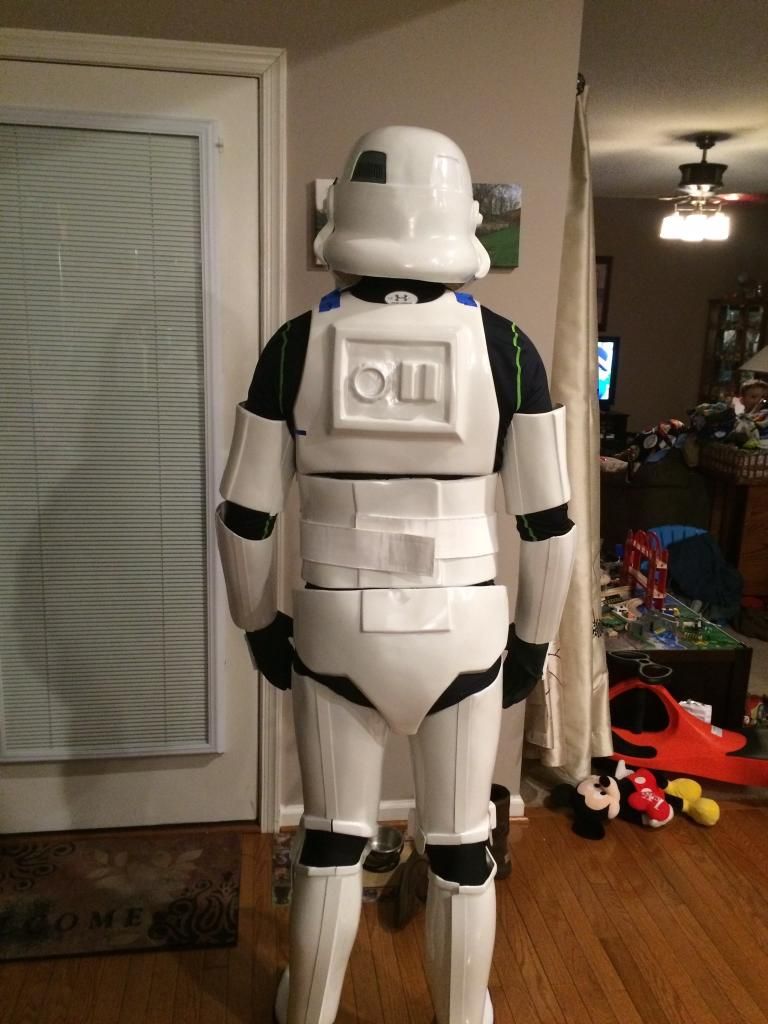
Well guys I'm all finished(for now). Here are my 501st application pics. Just submitted them today. Thanks guys for all the research sources on this forum. Between that and all the comments I couldnt have done it without any of you.


-
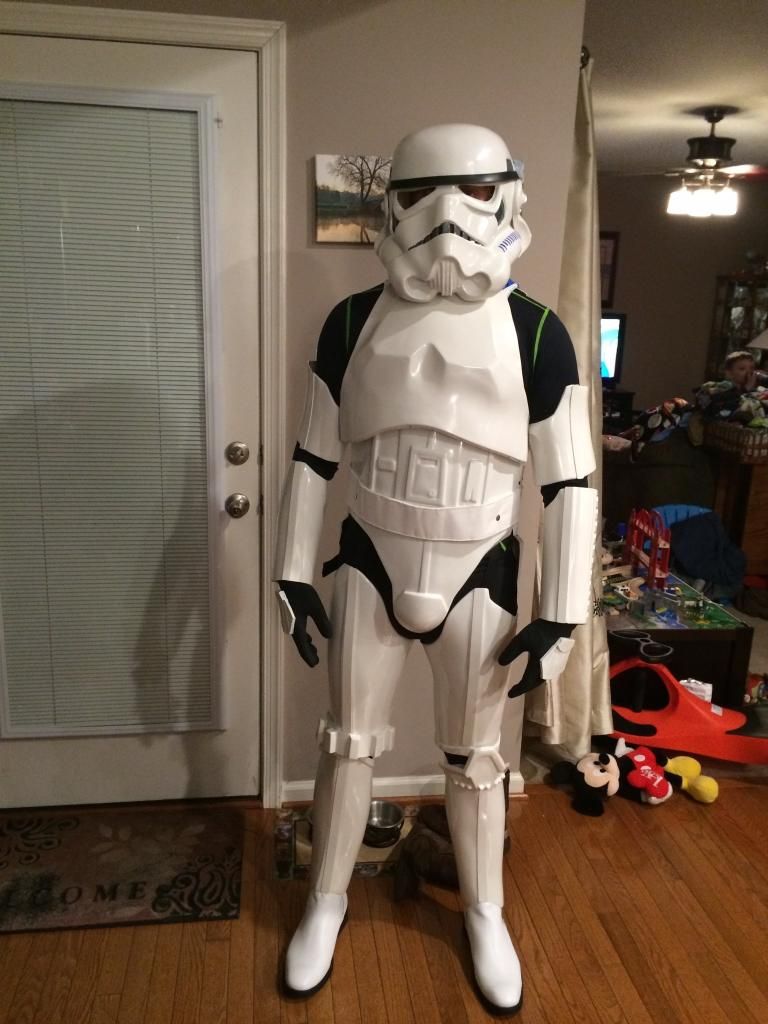
Well here is where I'm at so far. I finished the side webbing on the torso. Still need to do the shoulders and crotch. I have been hand painting the buckets so as you can see some areas are missing. I just finished the Thurman detonator and one drop box last night. Everything is fitting quite well. Can't wait to get these final odds and ends finished.

-
Impressive work patching up the ears. Very brave for trying it and its looking good.
Thanks Bulldog. It's been a lot of work but I think I'm done. It was probably more work than just ordering new ones. I don't like how some of the colors of the sand paper I used left very tiny specs in the abs. Not noticeable unless you look close. The pits did not really go away either. Again not noticeable unless you look close. I'm thinking of painting them but not sure what shade white matches RS abs. Most likely a bunch of trial and error. Anybody have any insight on this?


-
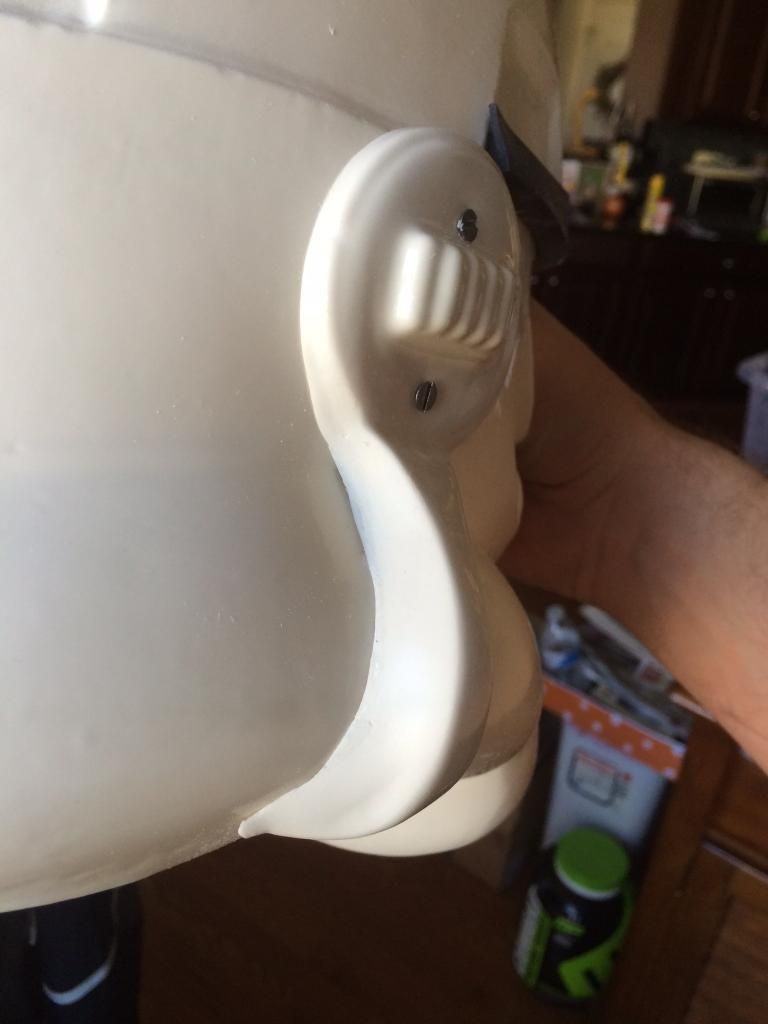
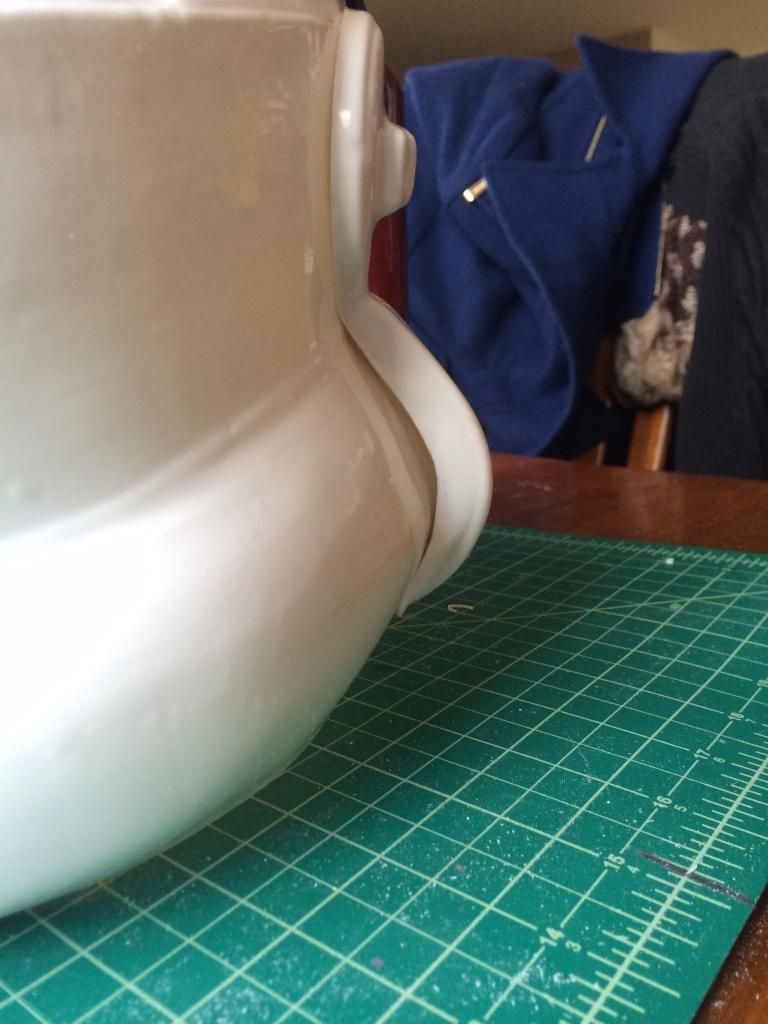
Finally got a chance to sand down my fill job. This is the left ear mostly done. I just need to hit it with a thin layer of paste to fill in the air holes. I find if you put abs paste on thick there will be a lot of air holes. I'm pretty happy with the results. I'm glad I was able to save the ears.
-
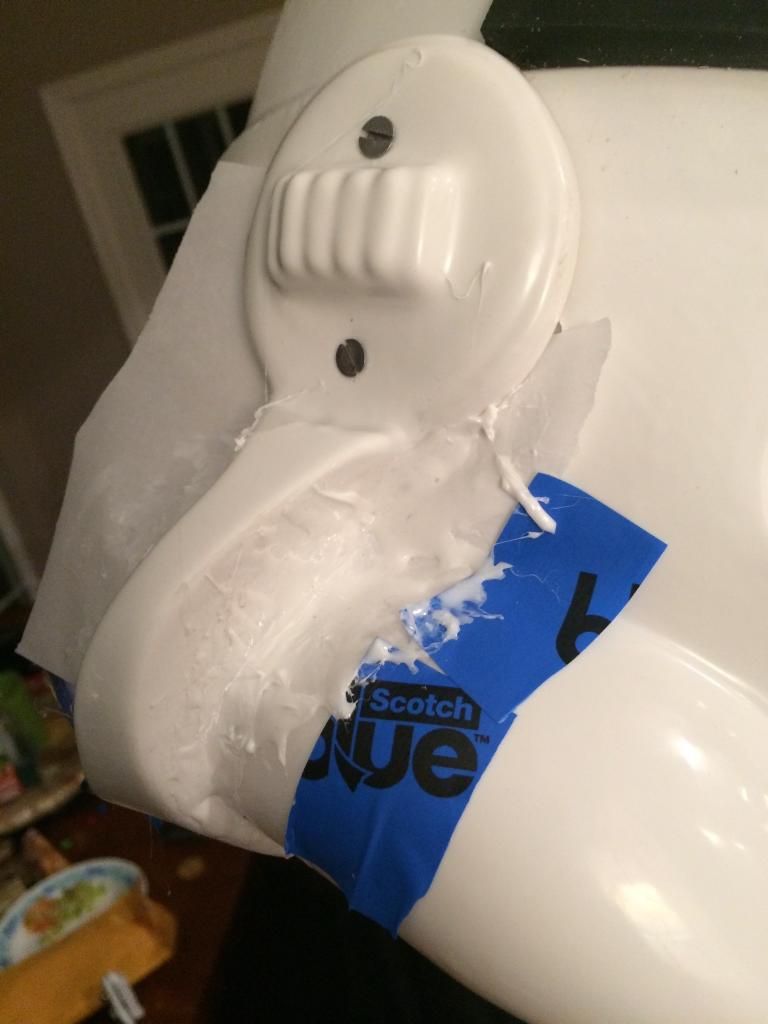
Yeah the brow closed up pretty nice. As for these ears my paste seems to be working. I took some shots of the process. It looks pretty messy now but it will clean up after sanding. I have quite a bit of experience building plastic models so this is nothing more than filling gaps with putty. I just wish abs paste has the consistency of putty. As for the round part of the ears I will go back and try the same process. I'm just trying to get the bigger bottom gap sealed up right now. And hey if it doesn't turn out I'll just scrap it and get new ears.
Here is the before shot with the parchment paper

And here is after pasting


-
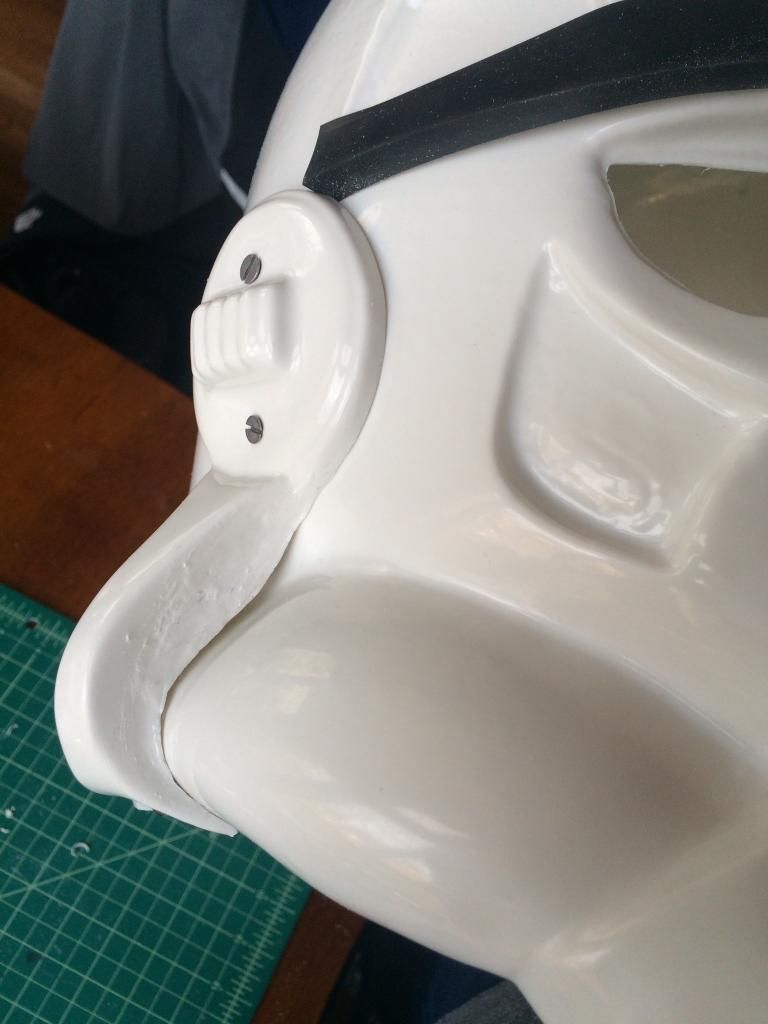
I ended up drilling the rivets and moving the face plate forward. Looks much better now. I just finished filling in the ear gaps with paste. Now I wait till tomorrow to sand them down and trim them.
-
 1
1
-
-
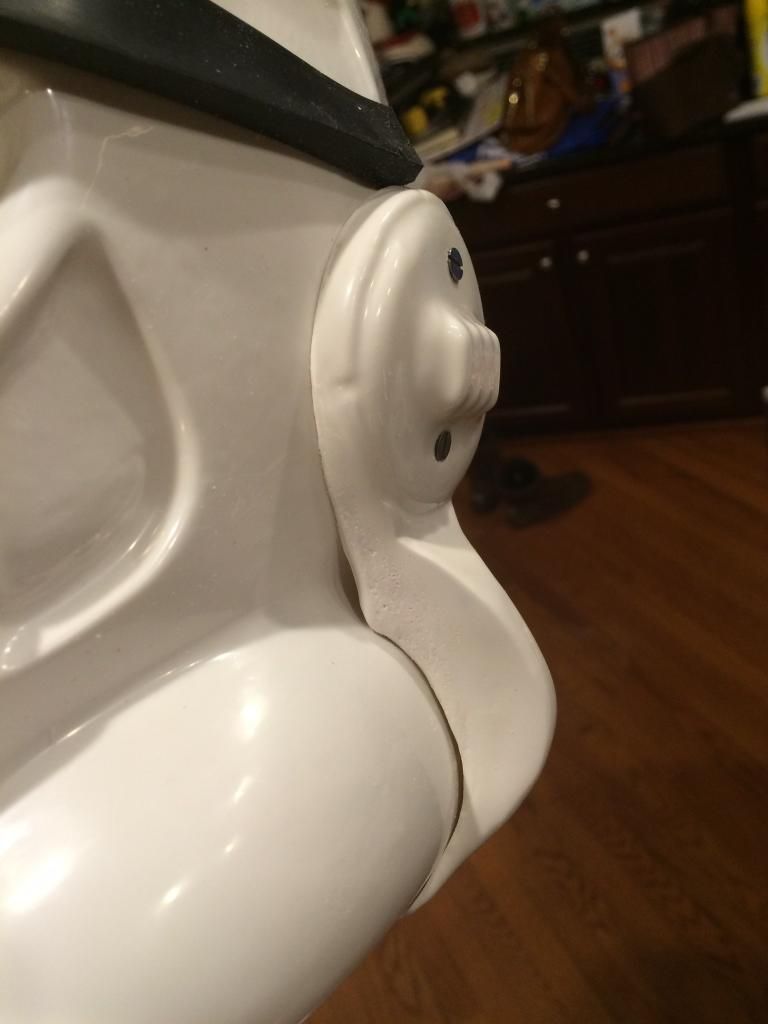
Here is a shot of the brow in a side shot. Does it stick out to far?

-
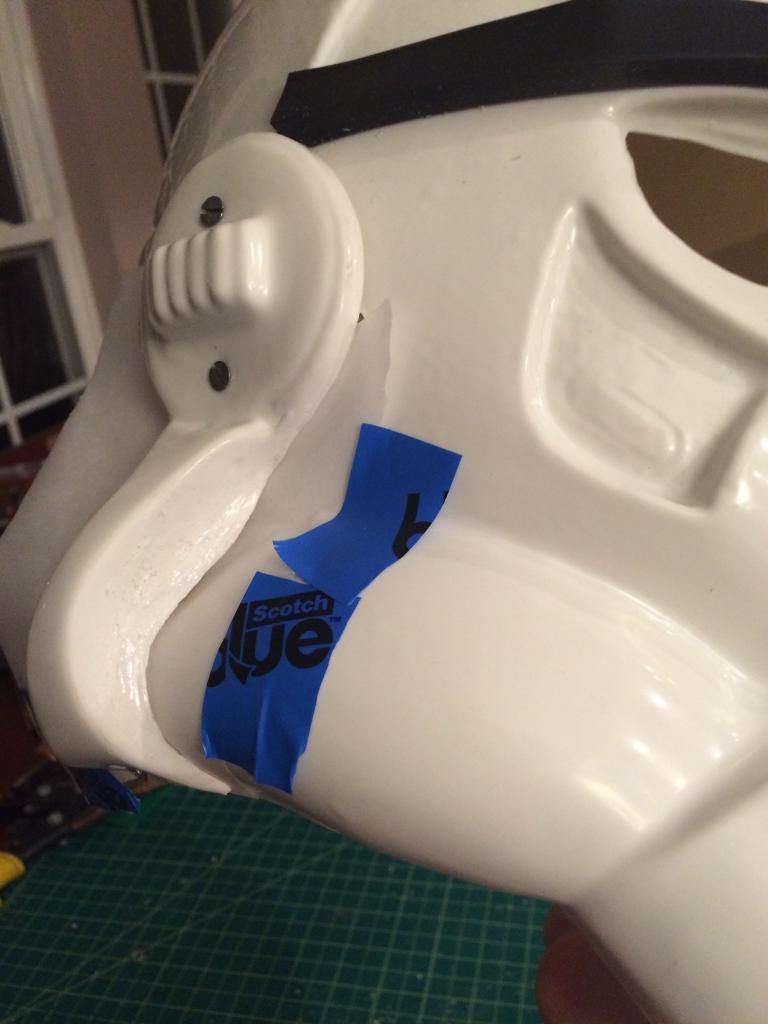
Now as for the ears I went in very confident. Probably to much confidence. I started fitting the right one and I think I cut a little to much. I was furious. At first I was thinking I would have to get new ears but then started to think if I cut new pieces of ABS I could glue that in to the cut areas and ABS paste the rest to fill it in. I don't have any before pictures of the cut because I was flipping out and not really feeling like taking pictures but I can show the after. It seems to be working. I took some parchment paper and sealed it behind the ear and bolted it to the helmet. This would keep ABS paste from adhering to the helmet. I then smeared paste ino the gap and let it dry over night. Though it's rough looking it filled in the gap nicely. I will next sand it down and polish it to make it shiny but not until I work on the gap a little more. I want to do the same process to the back of the ear. The left ear turned out much better but I may even fill that in with the paste process.
Her is the back of the right ear I will fill in tonight.
-
Now that the holidays are over I'm going into full swing on the build. Since I'm waiting for some new rivets in the mail I decided to start work on my bucket. I wanted to wait till the end to work on it but it's literally staring at me. All the cuts went well but when it came to fitting it was a much more difficult process. I followed pandatrooper's tutorial and it was a big help. First I'm not happy with the brow. I feel it comes down to far. It's right even with the eyes. I might be able to trim back the plastic a bit to bring the brow trim up but I find if I try to fix things sometime I just make it look worse. There is also a bit of a gap between the brow and the face plate if you look underneath. I think that will just help with ventilation so I'm just going to leave it. Why things went a little asque is the helmet and the face were not exactly flat and when rivets and screws started pulling thing together where I wanted things to go kinda moved out of place.
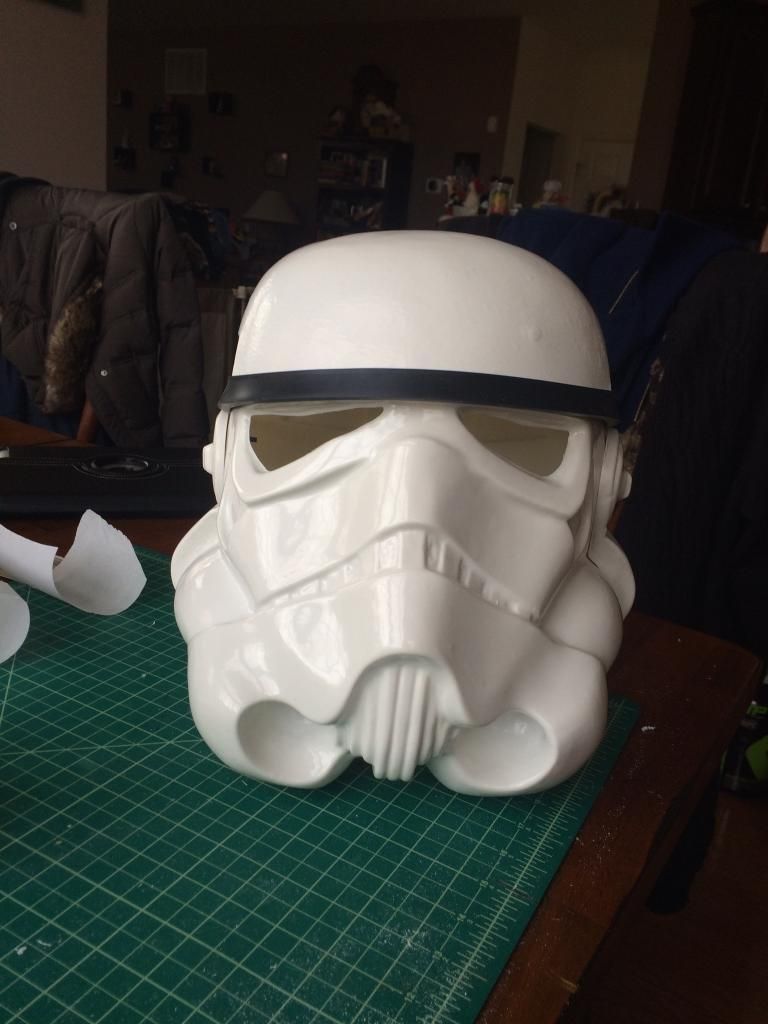
-
Originally the rivets that went there were CAP rivets with a 7mm head. If you can find some that could be nice. You can see what they look like in this thread:
http://www.whitearmor.net/forum/topic/23970-fs-centurion-level-rivet-sets/
Yeah. I found this thread last night. Thanks. My strapping kit came with split rivets. I already put it back together with the brass split ones. I guess I wasn't aware they were cap rivets. I'm sure it won't hinder my from centurion status. It just might get recommended to change. Maybe I will order those along with new split rivets. It wasn't that bad to drill them back out. Anyone have issues with the brass ones on that thread being to long?
-
Well I made my first boo boo. I went and put the leg ammo pack on the left thigh. Now I'm making some ABS paste to fill the holes. I also need to get 2 more split rivets.
-
I got a chance to install the hardware to the torso last night. Found I am missing one of the tall metal chest brackets so that will have to be on hold. I put on the front and back to see how everything lines up. It all looks good. Just a little cutting on the torso to kidney area. I don't like how the butt plate flares out a bit at the sides. I might have to heat bend that a bit but not till I get all the strapping on. It may set itself right when everything is together. Pictures to follow soon. I've been home alone so no one to take pictures. I hate doing mirror selfies. Makes me feel vain.
-
Welcome Dar. I'm working on an RS right now. You'll love it. Really study what goes on the left and the right. They are completely different. And set the helmet aside till you are ready. It's thin as egg shells but sturdier when it's all together.
-
1
-
-
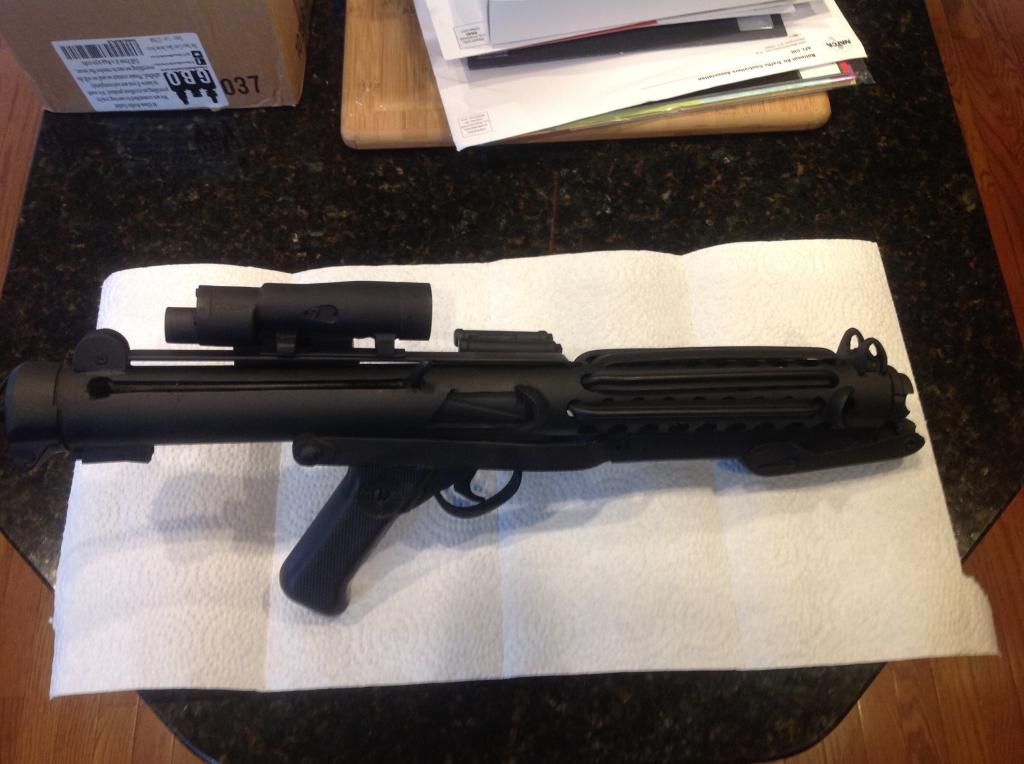
Yeah. Looking at it I realised that was how it's designed. The small end would be quite difficult to look through as a usable optic.
-
Ha! I fixed it all. I grew up with guns all my life and it's just habit to put the big end facing down the barrel.
-
Oh! You're right. It's screwed on. No problem.
-
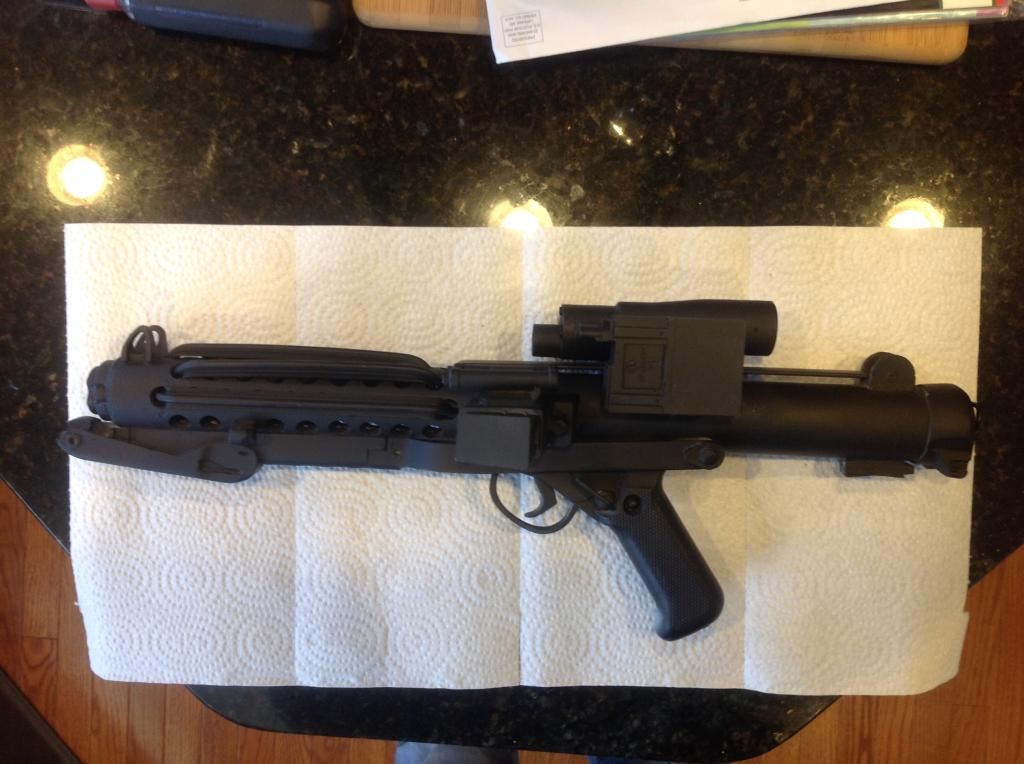
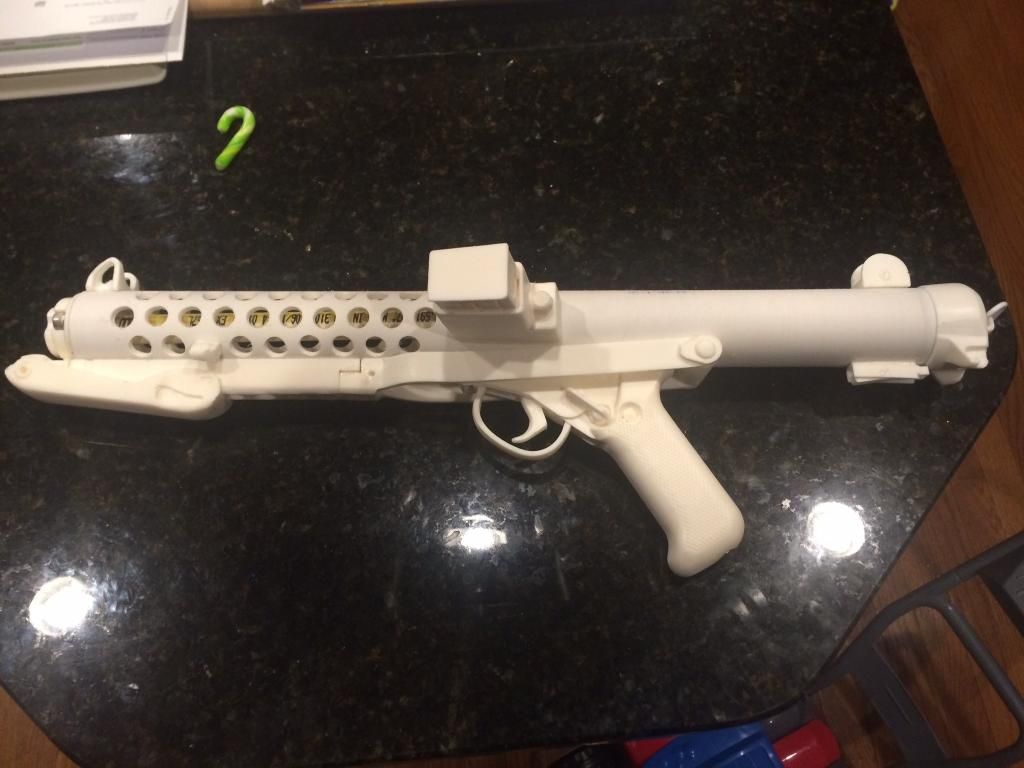
It's a pipe build I made out do a 1.25" PVC pipe. It sucked drilling all those holes and stepping them up. Not to keen on doing that again anytime soon. The Sterling parts are from Doopy's and the E-11 parts I got on eBay from a guy in England username TrickyDicky. What is with all these trooper parts being made in England. I have the blaster painted black now and just need to weather it next. Sorry this thread is going off subject from my RS armor but I should be posting more about it in the next couple days. The T handle I need goes on the bottom right as you can see pictured. I understand there isn't one on the bayonet lug side.

-
Thanks again. Everything is going quick and smooth. I got all the torso pieces trimmed. It really helped to go off of someone's completed armor. Now I just need to sew up some elastic loops for the clips and install them so I can put front and back together.
I seem to be missing one T track for my blaster. I'm not sure if they only sent me one or I misplaced it. Are there any sellers willing to sell just one?
-
Thanks. I am hoping to keep it clean throughout the build. A couple spots where I got some ca glue on my fingers and touched but I plan to buff them off.
I took a break from armor the last couple days since my E-11 blaster parts came in. Here is my progress so far.

-
Thanks a bunch. I'm going to a members house this Monday. He has an RS that was assembled by them so I'm going to measure and take some notes.
-
Wow. That's a big cut on the left. I don't think I'll go that far.


New Recruit from VA
in New Member Introductions Archive
Posted
Welcome Fellow Virginian. Thumbs up on going RS. I just finished mine and waiting Garrison approval. It's a blast to build. If you haven't gotten on the Garrison boards yet do it now. It took me about a month the get approved there. Good luck on the build.