

askernas
-
Posts
36 -
Joined
-
Last visited
Content Type
Profiles
Forums
Gallery
Articles
Media Demo
Posts posted by askernas
-
-
Indeed the holes do go all the way through =)
... another reason why I've been gouging out the innards of the stock with my dremel ... to put a very strategically placed piece of styrene on the inside! =)
-
So, Time to start my pipe kit DVH E-11 blaster! =)
I've started with a normal DVH Kit, ordered Marv's Tracks (yet to arrive), and awaiting a D-ring from Karin!
I am following Nicky's build and others to see what they did, and what mistakes to not repeat =)
Since we already have great guilds on these, I have not really taken that many pics on the build as of yet, but got a few =)
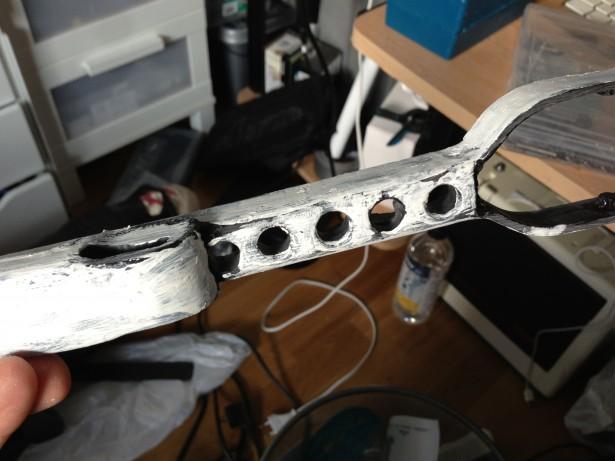
I started with cleaning up the folding stock. I cleaned up the sides, cut away the pour spout towers and got rid of the residue from the making.
Then time to bring out the dremel! I gave the stock a proper sanding, and started cutting pieces out.
I looked at some reference pics of the folding stock, and dremeled out the area in the front, and also drilled out the holes in the folding stock.
Once that was done, I also dremeled out parts of the stock to make it more hollow and allow for the stock to get closer to the barrel.
Did some sanding of it all, and ended up covering it in bondo, to get it real smooth and also to fix some flaws caused by bubbles when this was poured.
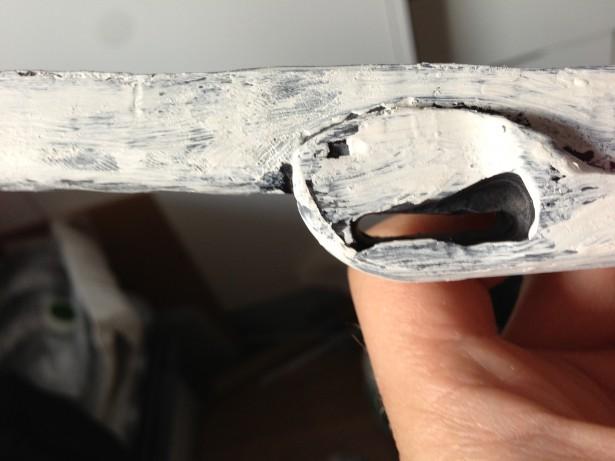
A little putty got inside the dimple here, but that will be removed later before painting.
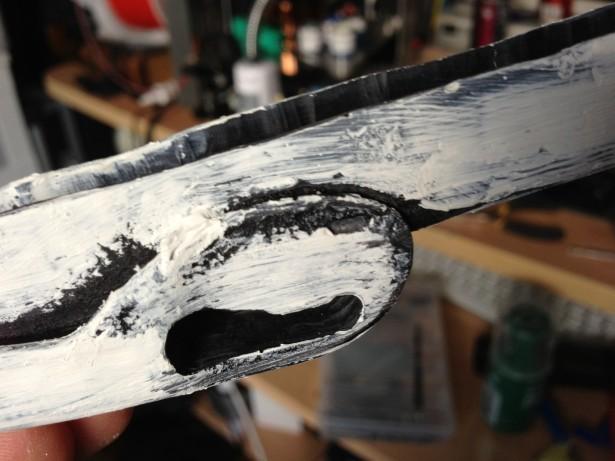
Here you can see the dremeled out inside hinted...
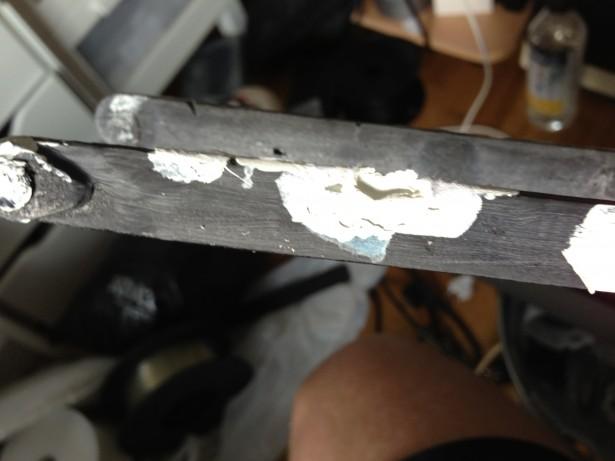
Bubbles in the making are being covered in layers of putty... if this isn't strong enough, I've found a tube of milliput laying around that I'm not afraid to use..
When this was put to rest, it was time to shift my focus to the pipe.. Barrel to be!
First off, I realized that the max length I can get out of my barrel is 17 1/4", which means that it is 1.5" too short for the length indicated on the template.
I'm not worried at this point. I will see what I can do with the end cap, and possibly extend the pipe with some styrene I have laying about since my R2 build.
Anyway, I printed out the templates, cut them to size and sprayed them with repositionable glue to stick to the barrel.
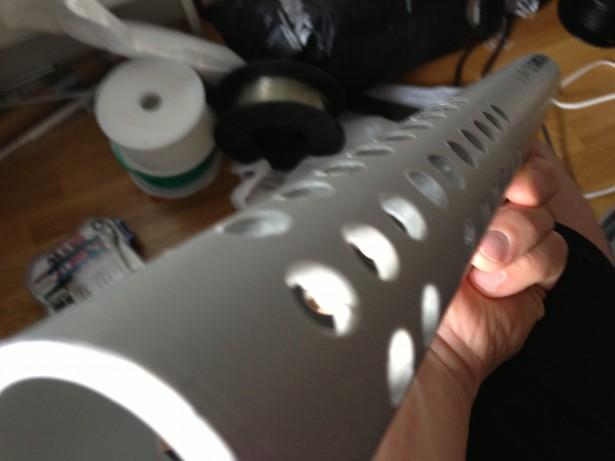
I then marked all the holes with awl, and use my cone shaped roter bit on my dremel to drill the basic holes in the barrel before I took my step drill and drilled to size.
Being in Europe, I opted for 10mm on the main holes and 12 mm for the 1/2" holes.
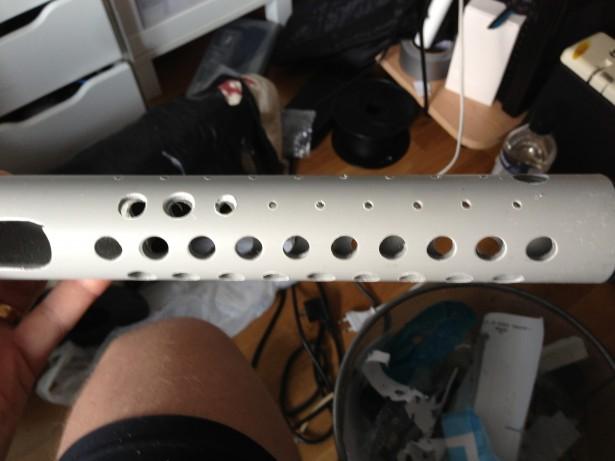
Pipe in the drill phase... the small holes are from the dremel, and this is how far I got before my cordless ran out of batteries..
Looks pretty good so far =)
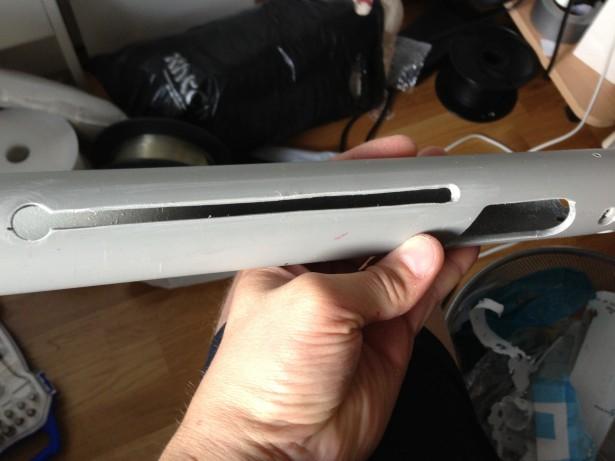
It was then time to do the scary bit: To cut out the long straight pieces with the dremel. I think it worked out quite well, after all:
-
So, after finding textile colour, I painted the elastic band on my shoes:
 I also added two more layers of paint, and spent a good 20 minutes removing hairs form my brush that evidentally got stuck in the leather paint.The last two layers, I've put on with a sponge.After removing the tape (I will still go over the textile one more time when it has dried) this is what it looks like:
 Once that was done, it was time to do the dreaded stripes.They are all done freehand. 7 stripes in the tears, 12 in the rear traps, and one stripe on the ears painted.I think it came out pretty ok, what do you guys think?I tried to not be too precise with the length of the stripes in the rear, as I've seen them vary slightly..

-
 1
1
-
-
Wow leaps and bounds, doing really well, it is amazing how much can be achieved when everything falls in to place. I used the Dave M hand painted decals so I didn't have to find how many stripes where needed, counted 12 on mine, here they are
I have used a tshirt latex paint for my hand guards it does give some flexability, not sure if it would be good enough for the elastic on your boots. Other than that you could try standard spray paint, I have used it on material before and has worked.
You will have fun with the blaster build, you can do some nice mods to them too, just depends how far you want to go, I do like being able to see lights and hear sound, so do the kiddies

Thanks, I went with 12 stripes.
The blaster build will be a lot of fun, but first I plan on getting the trooper done.. we'll see.. I tend to jump inbetween projects =)
-
Well, today was much too hot and nice to actually do anything on my TK!Besides, I still haven't found out the exact amount of lines on the back trap.From the screen used helmets it seems that 12 is the number to go, even though I have counted 13 on a screen used helmet.I did do some painting today, though.I took out my black jodphurs and figured I could at least start on doing something with them...Before starting:
 I then used paper and acetone and started rubbing the outermost coat off. The perfect place to do this was on the stove with the fan going. I am normally quite sensitive to glue and paint smells and almost always use a respirator, but with the stove fan on full, I didn't even smell the acetone.Rubbing off just fine...
 When I started, the protective layer on the shoes was very hard and glossy, and very "slippery" to touch. After removing the protective layer and most of the colour, the boot is now quite dull and feels almost rubbery to touch.see the difference?
 So why remove the coat with acetone? Well, I read somewhere that it helps the paint to adhere a lot better, and even though the screen used boots were in quite various shapes, I still figured I'd do it proper.Both booths cleaned up as much as I could with a 150 ml bottle of acetone all gone...
 Once this was done, I masked the sole of the boot with masking tape, and took out my paints:Angelus Leather Paint it is!
 Once I was finished with both boots, the paint had dried up enough for me to put on a new coat.It is a bit late, so I stopped at three full coats tonight. I may do some fine sanding tomorrow and get a bigger paint brush to get the last layers smoother and more even, but for now, doesn't look too bad, I think =)
 Today also marked the arrival of my Blaster Kit! Woohoo!Earlier this week, my Silicone handguards arrived, but no D-ring in the package.. Now I got to figure out a good way to glue the silicone to the plastic back on the gloves I have..Tomorrow will most likely be the second to last last day of painting. I will add the bucket stripes and ear stripe ... and some minor touching up.. but apart from that I think I'm good.Apart from the screws that holds the ears in place... I forgot to buy humbrol white... I must do something about that.Also: I need to pick up a good paint for the elastics on the boots. Seems the Leather Paint doesn't work there... (I tried...)All in a day's work!
 -
Tonight will be the day where ol' stripey will get painted!Been such an awesome weather today, so I haven't touched the helmet at all!7 stripes on the front it is. I've been looking at screen used ref pics, and I've seen pics of screen used buckets with 13 stripes and 12 stripes on the rear traps.This was on two separate helmets, and it was 13 stripes on the rear left and 12 stripes on the rear right. Not sure if it was different on some helmets, or just a mistake =)
-
Looking good, you have much steadier hands than I, nice work

I wouldn't bet on that ..
I'm just taking things slow, allowing things to take time.
I did start with painting the black outlines, spent some time with a toothpick and paint thinner afterwards to remove some of the tiny mistakes I didn't like, and then when I started painting in grey, I just painted not fully out to the black line.
If I made a mistake (and I did) I could simply wipe off that bit with a piece of tissue and try again.. and the more I was painting, the better the results =)
-
man i need to start working on mine again! good work
I'm having a lot of fun making the helmet so .. get cracking

thanks
-
Looking good so far, I would try to square the corners of your teeth a little, but apart from that you are going great guns
Thank you for the tip on the teeth. Got that from TK-54321 as well on our garrison forum.
The teeth holes have been squared a little before the second coat of paint was done =)
-
nice work so far.
Thank you!
I do have an approved TB already, so my plan is not to rush this build, but letting it take its time.
I'm going for quality and trying to get the details done on this build =)
-
Painting Day #2:After filing my teeth a little more square (on the helmet, not in my face), I've managed to find time to paint the helmet twice today.The bucket is now drying until tomorrow, but here's a teaser pic..

-
Paint Session #1.I started doing a bit of painting on my bucket today.My plan is to outline the tears and traps with black and then fill them from inside with grey. It is easier to get a smooth line this way instead of painting it in grey first and then try and get a smooth painted outline in black.While doing that, I also painted the vocoder and the frown.. and also outlines for the ears ..Please note that this is only the first coat. I will be making a second coat as well to get it nice and smooth, and will smooth out some of the lines while painting.I'll be bringing out my fine detail brushes, that I used to paint eyes on my old warhammer figurines with..'Nuff talking, let's see some pics!


 ... and the final picture..
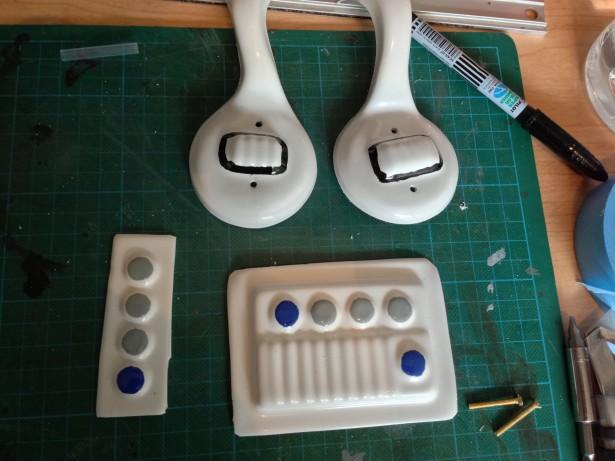
-
I found an instructable for painting boots white that I was going to try.
This is for the leather part, obviously, but the elastic will be painted afterwards:
http://www.instructables.com/id/Painting-Leather-Shoes-or-other-leather-stuff/
-
So, this build day still hasn't ended.. well it has now =)I did start working on them ears, and wanted to share the progress...My first ear from the front:
 and from the back:
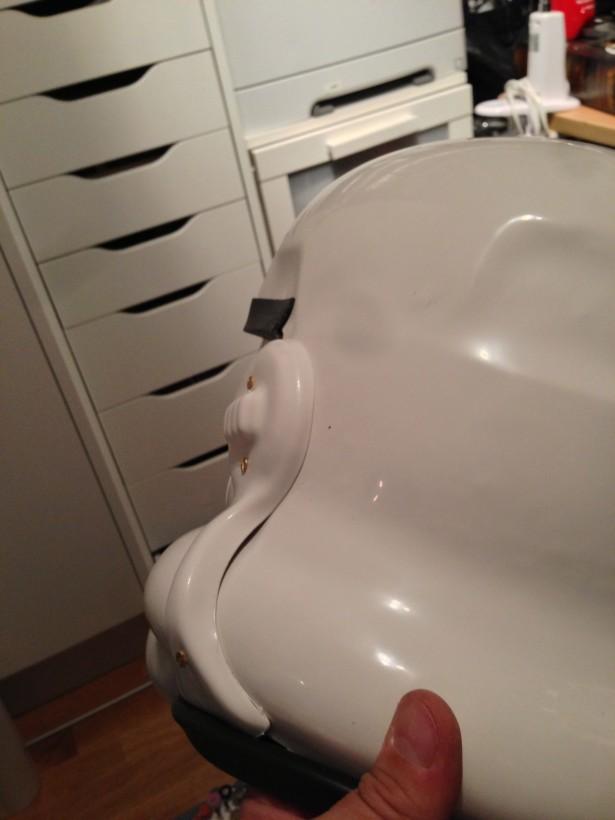 The second ear from the front:
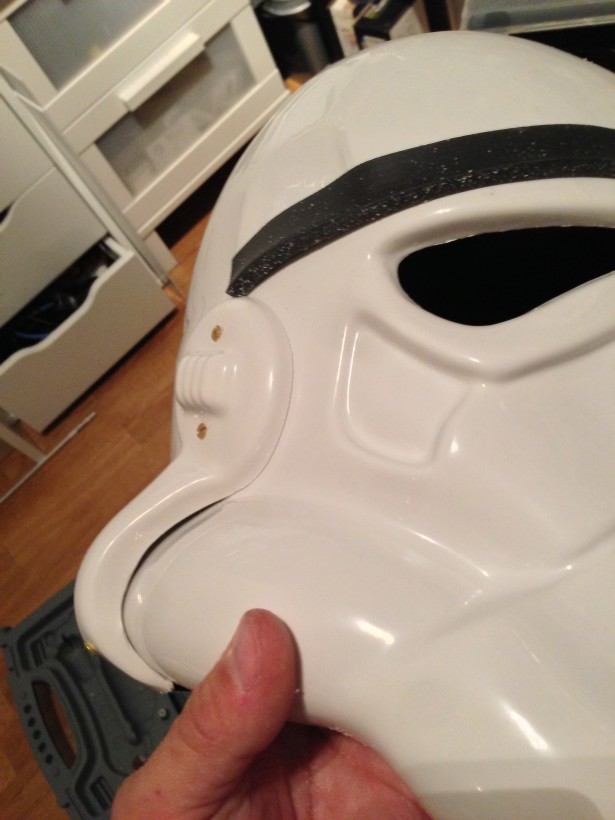 .. and from the back:
 A face pic with both ears attached...
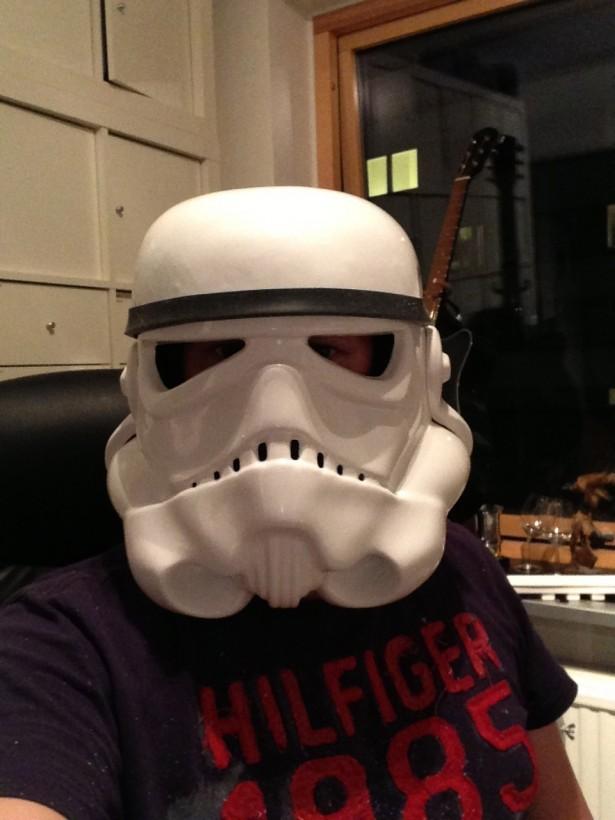
-
More helmet workI cut out the holders for my helmet lining from my hard hat..
 After this was done, I now had the lining and the holders loose. Time to set the lining to fit my head...
 Test fitting in the helmet...
 Them gluing the guides in place. Very quick and easy with the CA glue and accelerator..
 Installing the lining...
 Since I already had my dremel out, I also sanded out the openings in the frown and files them smooth...
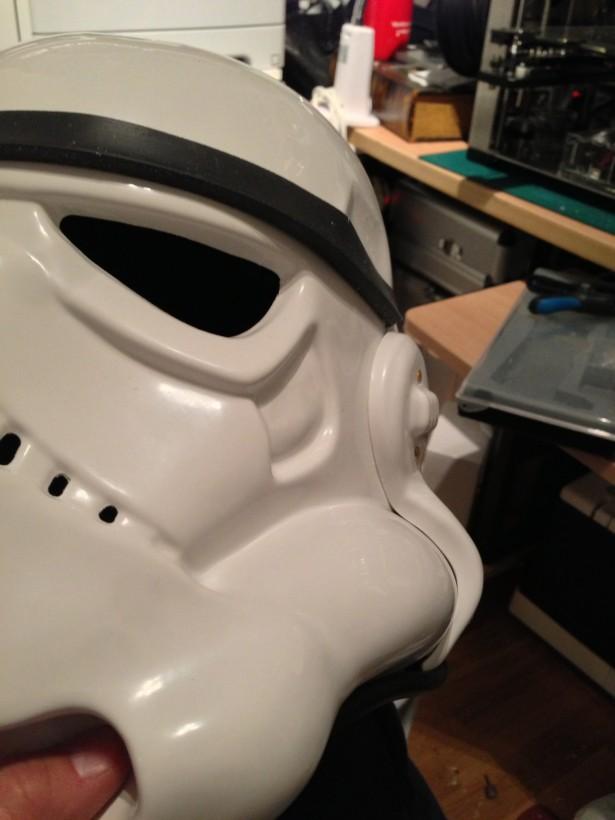
 Once that was done, I did the daring task of riveting my faceplate and cap and bucket together... And tested the helmet...It took a little while of moving the faceplate around to get it alignez. No pics during this process, but once it was riveted, this is what it looks like:
 It is a little crooked, but that can be fixed by moving the eyebrow bit slightly...So far so good.Next up is painting the white bits on the inside with some black humbrol paint, and some other modifications I want to do on the helmet before final assembly and paint job!Tonight... starting the paint job.. ?
 -
Well, I've started the build proper now..
 The bucket has been painted on the inside, and I've cut the basic shape after looking at various build threads.
 In addition to cutting out the bucket, I've started working on mounting a helmet liner inside. I've had a hard hat laying about for a year and never used it. It was a gift to me after a gig and I finally found good use for it. I will fix that this evening so pics will follow!In the mean time, I've turned my attention to my fore arms...
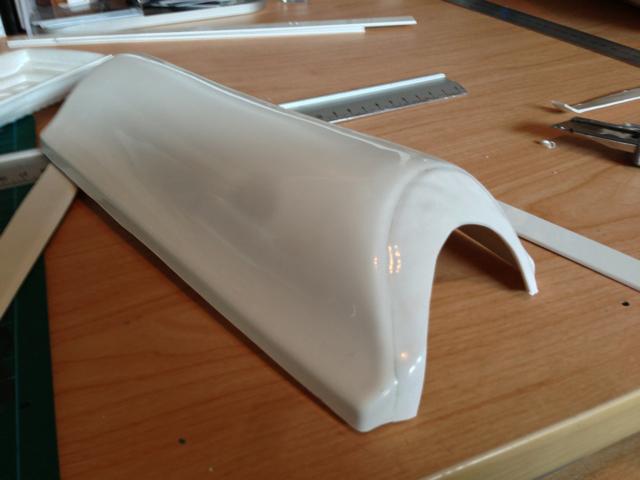 Cutting... Then cutting out the strips and glueing..
 I used super glue for attaching the strips. Works like a charm.
 Interestingly enough, the inner right arm has less of a curvature than the right arn, making the left arm nice and snug and the right arm more roomy!I will also send out measurements for a new undersuit, and to continue my work tonight I've also invested in a CA accelerator
 Humbrol paints are bought and ready as wellTo be continued...
 -
A quick teaser of what came next...

-
I¨ve ordered and received these as well:
 Right now I'm looking to find 16-16.5mm round mylar speakers....
I have received a Zentai undersuit, but it was way, WAY too small for me, even if I was in the correct size bracket!
Negotations with the supplier is under way, but I will get another suit made for me with better fitting!
-
Hello!
A few months ago, I finished my Biker Scout, which was great fun, but back in September I had this idea that it would be kind of fun to have a Stormtrooper as well..So, impulsive as I was, I placed an interest in a vacuum formed ABS plastic kit, that contained all the hard parts needed for a Stormtrooper armour, and then the waiting game began.About two months ago, all that waiting paid off.This package arrived: Weighing in at 7.2 kilos, I had my suspicion on what it was... and once the box was open... this is part of what I found inside:
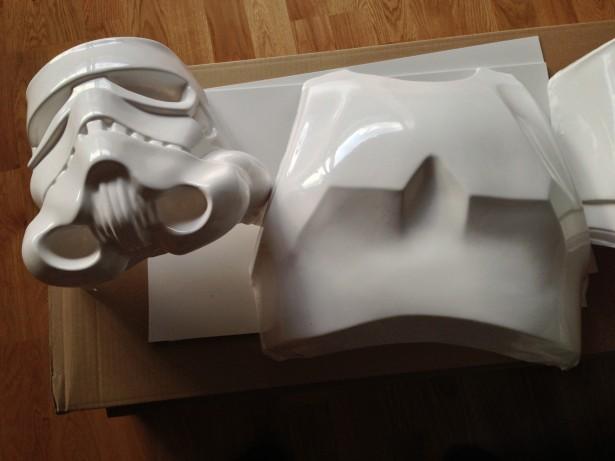 A lot of plastic, and untrimmed pieces that will kill all spare time I may or may not have for a while to come!Also today, I got the boots needed for making a real Stormtrooper armour. These Jodhpur style boots will be cleaned with acetone and have the leather painted white with proper paint for painting ... well ... leather =)
 I haven't decided yet if they might be a tad too small or not, but only time will tell. They were really cheap, so I'm not too bothered about it. In worst case they'll be an excellent pair of boots to try out the painting methods on!The game is afoot. I have no deadline set, I will let this one take a bit of time. Before even beginning on the costume, I have a few domestic things to take care of first.. Clearing out my work area, assembling new living room furniture, things like that ! =)
 -
Hello!
Please add me to the 501st trooper status request =)
http://www.501st.com/members/displaymember.php?userID=15203&costumeID=6
thanks,
Micke Askernäs
CR 501st, Sweden
-
Oh, hello again.
I'm back, hopefully this time to get some more work done towards getting myself a TK.
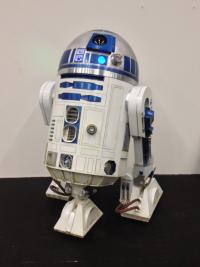
It was a loooong time ago my R2 looked as crappy as that.
I therefor present you a new picture:

Since my last few posts here, I've trooped as a Biker Scout, visited sick children with R2, and become the CR for 501st in Sweden
-
Welcome Micke. If that's how well you built an R2 I can't wait to see you armour build. That droid looks fantastic!
Thank you, but I wouldn't go as far as "fantastic" yet. Maybe when it is finished! Too many small things that I notice all too much that I'm fixing, one by one..
At least, this droid build has taught me a lot about working with plastics! =)
-
Uuuh, another R2 in Stockholm! Nixon will be happy!
Welcome from another local Swede.
Well, Nixon has seen it and we've been talking about it, so no problems there
I have got a second dome for my R2, to give him an alternate persona on events where we both will be =)
-
Hello!
My name is Micke Askernäs, from Sweden, and I thought I'd start by saying hello!
Currently, I'm an R2 builder, almost finishing up on my droid, and got a Biker Scout armor coming (eventually).
The droid needs to have a new paint job, and there are always small things that needs to be fixed, but it is getting pretty close to ready (minus proper paint)....
However, I figured I couldn't just be happy with the droid and a Biker, but seriously contemplating putting together a TK as well!
So: a little about me!
I'm 39, grew up with Star Wars and the Kenner plastic toys, never had enough of them, for some reason. I live in Stockholm with my fiancee, and since a year ago, stopped my career as IT Consultat, as I really had other passions that I had to explore, professionally.
So, I've got tons of IT knowledge in the back of my head, trying to surpress it as much as possible and instead follow my passion.
I'm now a full time mentalist. No, I don't have any special powers, it's all entertainment, and a lot of fun at that!
I'm guessing this forum will be relatively quite this week since a lot of you (I suppose) are in Florida for CVI, wish I could be there, but no time!
Anyway, I wanted to say hello before I just started asking silly questions!
After building an R2, I figured putting together a TK would give different challenges, and a lot of fun!
cheers,
Micke

Micke's DVH E-11 build
in Build Threads Requireing Maintenance
Posted
Now, how often you have people looking on the underside of your weapon is another thing ...