-
Posts
69 -
Joined
-
Last visited
Content Type
Profiles
Forums
Gallery
Articles
Media Demo
Posts posted by Tsalagi
-
-
Hi Nicky- Funny I have a friend from Gothenburg and another close close friend from Grums.
Thanks for the compliments, I've been trying to do a good job on this. Originally I had planned to use the coverstrips, but the guy who made the armor suggested the overlap method which is what he did. I do think the hard edge would look better at those joints. I'll probably turn this kit into a TD and get another one for secondary TK where I can use the coverstrips. I need to post some pics of my helmet work which is what I've been working on lately.
-
Good luck on the build Dustin. I'm also in process on a T/MC kit, you can check my build thread at the link below
http://www.whitearmor.net/forum/topic/21694-tsalagis-tk-anh-stunt-build-tmc/
-
Welcome and add to as many discussions as you can.
-
The torso and other connections were next up. The the snapping and strapping took tons of time, thanks to all who came before me on that front with all the examples.

Used Split rivets on the ab to add an elastic connection on the left side

The kidney to bootie connection

The whole shebang

Still have a couple things to sort out, namely the kidney to ab "GAP"! It's not much but still not quite the 1/2" for EIB. Trying to locate some ABS or like material that can help me close the gap. Now I'll need to back out the split rivets on the kidney side, make some ABS paste and fill the holes and sand.... ugggg.
-
Excellent, would love to put one of those together
-
Awesome and welcome. Can't wait to see some more TK commander pics
-
Here's what I did over the weekend. Used Plasti-Dip and cut eyes teeth prior to painting, just taped thoroughly.


-
Juan - That pic of your TD is awesome!
-
Aloha and welcome
-
I Will be one of the next 23
-
What he said ^. Fwiw I'm going TD I'm my first build for two reasons. They are totally BA and my armor is not as white as I would like it for TK. It's more off white and dull compared to other pulls. Not sure if the novus will just make it shiny but not whiten
-
-
What is the latest update on these? These look awesome
-
What is the official EIB count now?
-
The scraps from trimming are not smooth so it would look odd with my smooth kidney slapped up against an irregular shim
-
The shim to the kidney is my plan to close my gap. Only issue us marching the color. All my scraps are lumpy and new abs or styrene is a little too white??
-
I have the same issue and was wondering how to shim it and make it look good. I'll have to do some research here, but I was attempting to close the left side with the split rivets using a piece of elastic fabric to join the ab/kidney. The gap is over 1/2" maybe an inch or so.
-
Last night got the left arm assembled and strapped up. Sometimes these snap plates are a PITA. One on my shoulder bell popped off, so need redo that one tonight.

Notice the clamp casualty, i put a little too much pressure on the clamp to get a snap plate to hold down and that thing exploded!
-
I was recently with the T/MC maker and watched a lot of the pieces being pulled. We talked about the forearms specifically and he just bent them over and held for a minute to shape. The put more curve into the edges, so they weren't so flared out. Don't be afraid to bend on them, I bent my over in half almost to get them in the shape I needed. Check my build thread too, just did my other forearm last night
-
Congrats! Hope to get my done soon. The disc with the T/MC kit is so helpful, lots of reference pics in one place
-
Chest to Back and the Right arm is assembled and strapped up. Still not sure on the webbing from chest to shoulder bell, may need to change that to elastic so there is some flexibility. Any thoughts?

Suited up, the one armed bandit

Feedback, how's it looking?
-
Good luck! I recently got the same armor kit and have been working on the build. It's going good, but not making as much progress as I'd like
-
Made some more progress on my strapping system and the beginning of the getting the arms connected.
Adding the snap plates to the chest and back to create those connection points

Lots of snaps in the shoulder bell to get this hooked into the chest. I've had some shoulder injuries over the years and this just goes to show how the shoulder floats and is connected primarily through muscle and tendons

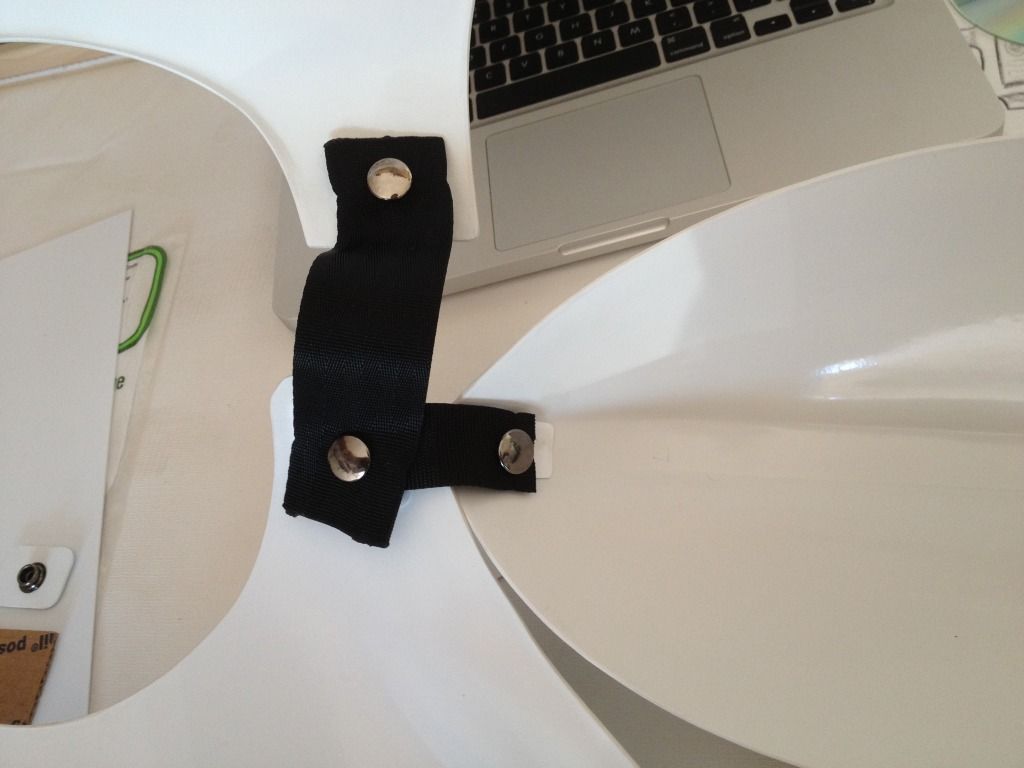
I used a seatbelt strap from one of my kids old car seats (works perfect) to connect chest to back and added the spur over to the shoulder.

This is my bicep strap made of the non-roll elastic, the ends where snaps are located are reinforced with webbing sewed on (std block X)

I'm not sure on the use of webbing to connect my shoulder bell to the Chest snap, I like how it keeps the bell forward, but it seems too tight... Do most use elastic or webbing for this connection?
-
Welcome and thank you for your service. Stay safe! Are you based out of JBLM? I moved from there to CO last year. Take care


Tsalagi's TK ANH Stunt build [T/MC]
in Build Threads Requireing Maintenance
Posted
The next installment of progress on the TK kit..... "The Helmet"
Getting overworked with cutting, scoring, snapping, gluing, creating snap plates, setting snaps and REPEAT, so moved over to the long anticipated work on the helmet. Many hours have been spent gathering reference pics, staring at movie stills, handling the untrimmed helmet, and envisioning how all this is going to manifest itself into one of the most recognized and feared "Faces" on the planet. Awesome.
Being that this part of the project was so critical and Fun, I took lots of pictures along the way. The helmet is a very integral and standard part of the TK Armor, yet lends itself to interpretation, creativity, and individual vision. Of course I goofed some things up along the way, did some back tracks, and its not perfect.
1. Prepping the Helmet with Pencil
On the teeth I went for a rough cut look with some irregularities and un-uniformity
2. Making first cuts, with power
3. Bag over my head
Painting on my smile
Vocoder
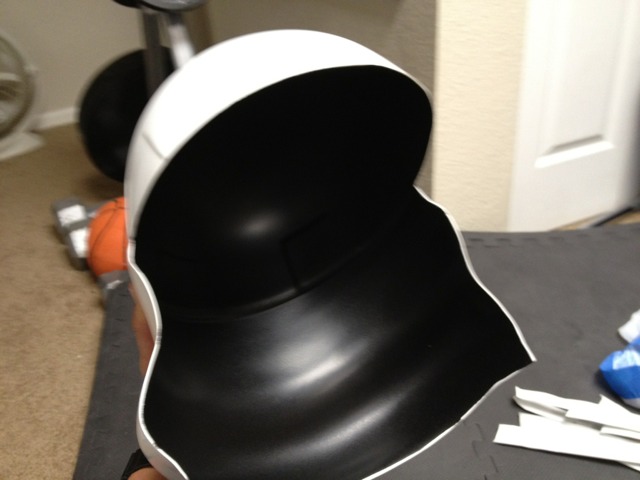
4. Applying the DARK SIDE
Using lots of electrical tape to mask off the teeth and eyes
Almost ready for paint
Dark Side Treatment (Plasti-Dip)
Removed all the Tape
6. Getting the lenses put in... Didn't come out clear as I'd like.
Used a heat gun to soften the lenses then hot glued them into the socket
There are several very blurry spots in my lens and if cleared up would make it very easy to see out of (relatively of course)
Got more done just need to get some pics uploaded