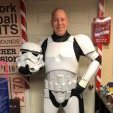
michmalo[501st] Posted April 16, 2018 Report Share Posted April 16, 2018 Greetings Troopers! I've been a member of the Rebel Legion for about a year now and I built an R2-D2 that I "finished" almost 2 years ago. I've been wanting to join the 501st since I first heard of it and should've jumped in years ago! I've been building for a few months now but I've only recently started stepping things up to try and get done for some personal events and to start trooping as a TK for a change instead of always having to drag R2 to events. I've got a WTF kit, I actually bought a helmet about a year ago and just got a full B kit so I have two helmets now. My helmet is nearly complete, I just need to Plasti-Dip the inside and figure out how I want to add the fans and battery pack, I've been researching what I want to do about other electronics as well, sound, Tramp, hearing aids etc. This pic was before I painted the screw heads white and I still need to glue my mic tips in, I tried the highlighter method but couldn't get them to stay in place because I think the screen I have was already cut too small. I used Trooperbay decals for the traps and tears and hand painted the rest. I'm still trying to figure out or decide if I want to go for Expert Infantryman or Centurion and I've been toying with doing a Sandtrooper or becoming a Heavy Weapons Trooper but I think it would be best to just start off basic and then decide if I want to spend the extra money and take the time to change something out later. So for now I'm starting with ANH Stunt and then we'll see how it goes. 1 Quote Link to comment Share on other sites More sharing options...
michmalo[501st] Posted April 16, 2018 Author Report Share Posted April 16, 2018 Hopefully once everything is trimmed and assembled it takes up less room than this! I trimmed and assembled the forearms this weekend. I'm hoping to have everything rough trimmed this week and then get to assembling more this weekend. Quote Link to comment Share on other sites More sharing options...
Neb Sgird[TK] Posted April 16, 2018 Report Share Posted April 16, 2018 Mmmm shiny white armor. Definitely do aim for centurion! It's easier to do the first time through, that's for sure. I just got my HWT approved this week, the nice thing is (assuming you do your weathering the right way) you can actually go back and forth between ANH stunt and HWT with minimal effort. I plan to get centurion approved on both stunt and HWT (just need to finish my E-11, it's taking forever!) Let us know if you have any questions as you go along, we're here to help! 1 Quote Link to comment Share on other sites More sharing options...
michmalo[501st] Posted April 17, 2018 Author Report Share Posted April 17, 2018 Mmmm shiny white armor. Definitely do aim for centurion! It's easier to do the first time through, that's for sure. I just got my HWT approved this week, the nice thing is (assuming you do your weathering the right way) you can actually go back and forth between ANH stunt and HWT with minimal effort. I plan to get centurion approved on both stunt and HWT (just need to finish my E-11, it's taking forever!) Let us know if you have any questions as you go along, we're here to help! Congrats on your HWT and thank you for the offer to help!Sent from my iPhone using Tapatalk Quote Link to comment Share on other sites More sharing options...
michmalo[501st] Posted April 17, 2018 Author Report Share Posted April 17, 2018 I spent some time tonight doing some more trimming, I got the chest and abdominal plate trimmed and trimmed out the shoulder bells as seen above. I think I’ll have to clean up the return edge and get it as tight as I can because at 6’2” and close to 230 lbs the chest piece looks small on me, I’ve read getting the shoulders trimmed tight helps with the screen accuracy.Current problem is that now that both of my forearms are built with 5/8” coverstrips im realizing that I need 7/8” strips on my biceps. I posted about it on the board and hopefully I’ll get an answer soon.Right bicep, it’s snug but it fits. I shaved down the return edges to nothing to help make it more comfortable.Sent from my iPhone using Tapatalk Quote Link to comment Share on other sites More sharing options...
michmalo[501st] Posted April 18, 2018 Author Report Share Posted April 18, 2018 I got some more parts trimmed and I built the biceps (thanks Sebastian!).I found this posted which I found REALLY helpful;All return edges average 1/4 inch(6 mm) but can be up to but not much more than 3/8 inch (9 ish mm)Chest: bottom edge against ab. Sides but taper down as you get closer to shoulders. Minimal to none around neck.Back: bottom against kidney. Sides but taper down as you get closer to shoulders. Minimal around neck.Kidney: top, bottom and slight in kidney notch. None on sides.Butt: all sidesAb: top under chest, lesser return edge around cod area. None on sidesShoulders: none on edge against chest. Return edge against arm.Biceps: minimal to none. Some leave return edge some remove it all together.Forearms: none at wrist opening even up into the square indent ridge. Minimal to none at elbow side. Your choice.Thighs: return edge on tops and bottom.Shins: return edge on top. None against boots.Leg cover strip sizing info:Thigh cover strips are 7/8” front and backCalves 7/8” front but back can be 1” or as large as 1 1/4”Sent from my iPhone using Tapatalk Quote Link to comment Share on other sites More sharing options...
michmalo[501st] Posted April 19, 2018 Author Report Share Posted April 19, 2018 I’ve got the legs started, both shins are done except for trimming the cover strip on the front and the backs are still open for now until they’re properly sized.The thighs are trimmed and taped up for sizing, I know I need to size them with my Under Armor on but this gives me a good indication. I’m pretty sure 7/8” cover strip will work but it may be tight. We’ll see how it goes tomorrow.Sent from my iPhone using Tapatalk 1 Quote Link to comment Share on other sites More sharing options...
michmalo[501st] Posted May 2, 2018 Author Report Share Posted May 2, 2018 (edited) --------I grabbed a HFX Productions E-11 and also a holster from Darmans props, really loving the blaster already and the holster is a solid fit. I’ve been spending a lot of time getting my droid up and running for some Tripp’s this week so Armor building has stalled but I want to push on next week and make as much progress as quickly as I can. Sent from my iPhone using Tapatalk Edited May 11, 2022 by gmrhodes13 link removed no longer working 3 Quote Link to comment Share on other sites More sharing options...
TheSwede[TK] Posted May 2, 2018 Report Share Posted May 2, 2018 Looking good so far, nice blaster Quote Link to comment Share on other sites More sharing options...
michmalo[501st] Posted June 11, 2018 Author Report Share Posted June 11, 2018 Looking good so far, nice blaster:duim: Thanks!I finally got my Mic tip screens in and attached them (after painting them).I also painted a rank bar finally! Not pictured is a lot more trimming and sanding I got done on the rest of my kit. I did manage to Plast-Dip the inside of my helmet black and started planning out some padding. My head is too big to use a lot of the recommendations for 3/4” replacement pads I’ve seen others use. When I put one at the top it immediately makes it impossible to see through the helmet so I went ahead and ordered some thinner pads.I did use some EVA foam and some felt to make a nose bridge, it’s not attached yet but I can already tell it’s going to add a little extra comfort and keep me from scratching my big nose on the lenses.Sent from my iPhone using Tapatalk 1 Quote Link to comment Share on other sites More sharing options...
ukswrath[Staff] Posted June 15, 2018 Report Share Posted June 15, 2018 Looking good Michael. If I may suggest something, the Hovi tips (aerator) screens should reside inside the tips as seen in the following reference photo. Keep up the good work Quote Link to comment Share on other sites More sharing options...
michmalo[501st] Posted June 22, 2018 Author Report Share Posted June 22, 2018 On 6/15/2018 at 10:17 AM, ukswrath said: Looking good Michael. If I may suggest something, the Hovi tips (aerator) screens should reside inside the tips as seen in the following reference photo. Keep up the good work Thank you! I did realize AFTER I had glued them on that they were supposed to sit inside... I'm debating if I try and get them off (CA glue is often unforgiving) or if I just start over with a new set. Frustrating when you make mistakes like this and have to redo things instead of moving forward! Quote Link to comment Share on other sites More sharing options...
hollowbodies[TK] Posted June 22, 2018 Report Share Posted June 22, 2018 14 minutes ago, michmalo said: Frustrating when you make mistakes like this and have to redo things instead of moving forward! We've all been there, but in the end it's really worth it! ^^ Quote Link to comment Share on other sites More sharing options...
ukswrath[Staff] Posted June 22, 2018 Report Share Posted June 22, 2018 34 minutes ago, michmalo said: Thank you! I did realize AFTER I had glued them on that they were supposed to sit inside... I'm debating if I try and get them off (CA glue is often unforgiving) or if I just start over with a new set. Frustrating when you make mistakes like this and have to redo things instead of moving forward! As stated by your fellow troopers, this stuff happens and we've all been there. You can do it. Quote Link to comment Share on other sites More sharing options...
michmalo[501st] Posted June 22, 2018 Author Report Share Posted June 22, 2018 38 minutes ago, ukswrath said: As stated by your fellow troopers, this stuff happens and we've all been there. You can do it. Thanks guys, ukswrath I'll be using your build threads for help and inspiration! So thanks for that too. Quote Link to comment Share on other sites More sharing options...
ukswrath[Staff] Posted June 22, 2018 Report Share Posted June 22, 2018 5 hours ago, michmalo said: Thanks guys, ukswrath I'll be using your build threads for help and inspiration! So thanks for that too. Glad to be of assistance, please take at look at other build threads as well. We have a multitude of talented builders here on whitearmor. Quote Link to comment Share on other sites More sharing options...
michmalo[501st] Posted July 9, 2018 Author Report Share Posted July 9, 2018 Almost done with this monster, scratch built DLT-19, started with Happytroopers plans but made lots of modifications along the way to get it as accurate as I could.It’s a little thicker than some builds but I’m a big guy so I don’t think anyone will notice, I was worried it might be too heavy but I think my ten year old daughter proves it’s manageable I’m working on adding a front sight as well as some ideas for a scope and maybe a flashlight and laser dot to it as well.Sent from my iPhone using Tapatalk Quote Link to comment Share on other sites More sharing options...
ukswrath[Staff] Posted July 9, 2018 Report Share Posted July 9, 2018 Looking good. My only concern is the sections from the barrel towards the stock and the muzzle appear a bit wide. Modeled after the German MG 34 here's a photo what it should look like. Quote Link to comment Share on other sites More sharing options...
michmalo[501st] Posted July 9, 2018 Author Report Share Posted July 9, 2018 Looking good. My only concern is the sections from the barrel towards the stock and the muzzle appear a bit wide. Modeled after the German MG 34 here's a photo what it should look like. Thanks I know that’s why I said it’s thicker than most in my post but I did lots of research and actually bought hand grips from a real MG34 and modeled the stock slightly larger than the Bakelite stocks on the MG34 to fit me. The flash hider is slightly wider as well but I like the look of it and it fits in better with the size and with some of the Battlefront screen grabs. Sent from my iPhone using Tapatalk 1 Quote Link to comment Share on other sites More sharing options...
ukswrath[Staff] Posted July 9, 2018 Report Share Posted July 9, 2018 3 minutes ago, michmalo said: Thanks I know that’s why I said it’s thicker than most in my post but I did lots of research and actually bought hand grips from a real MG34 and modeled the stock slightly larger than the Bakelite stocks on the MG34 to fit me. The flash hider is slightly wider as well but I like the look of it and it fits in better with the size and with some of the Battlefront screen grabs. Copy Worth mentioning, if you choose to shoot for the higher levels of accuracy with your armor you'll most undoubtedly be requested to update the DLT-19 if it's your primary weapon Don't want you to be surprised later. 1 Quote Link to comment Share on other sites More sharing options...
michmalo[501st] Posted July 9, 2018 Author Report Share Posted July 9, 2018 Copy Worth mentioning, if you choose to shoot for the higher levels of accuracy with your armor you'll most undoubtedly be requested to update the DLT-19 if it's your primary weapon Don't want you to be surprised later. Thanks, it’s neglibly wider, maybe 1/2” I’ve been debating just putting it on the table saw and/or taking the belt sander to it but I have a lightweight Hyperfirm E-11 that will likely be my primary and trooping weapon. Sent from my iPhone using Tapatalk 1 Quote Link to comment Share on other sites More sharing options...
michmalo[501st] Posted February 9, 2019 Author Report Share Posted February 9, 2019 I’ve finally gotten back to building my armor. I still have a long way to go and I’ve done a terrible job updating photos.So far I’ve got the Chest and back connected, the ab and kidney plates all strapped together and I’m on to working on strapping up the arms. Strapping the arms up by yourself is tough!You can see here I need to tuck the bicep up under the shoulder more and I definitely need to lengthen the elastic between the bicep and forearm.Lots more to do but the fact that I’m wearing some of the armor gives me hope!Sent from my iPhone using Tapatalk Quote Link to comment Share on other sites More sharing options...
ukswrath[Staff] Posted February 10, 2019 Report Share Posted February 10, 2019 Getting there Quote Link to comment Share on other sites More sharing options...
michmalo[501st] Posted April 4, 2020 Author Report Share Posted April 4, 2020 It's been a long road and I've done a terrible job at keeping this build log updated. I finally finished my armor up a few months back but was not approved because my chest piece was too small for my frame. I have a WTF kit and I stand at 6'2" tall and weigh in at around 225lbs. I was able to get a larger chest piece from Walt and after trimming and restrapping etc. I was finally able to submit new pics and get approved this morning. It's been a long road but I'm happy as can be! Next up will be building the HWT backpack, I already have some of the parts including the base so since we're in quarantine now's as good a time as any to start building something. Quote Link to comment Share on other sites More sharing options...
magni[TK] Posted April 4, 2020 Report Share Posted April 4, 2020 Congratulations! Looking forward to another Heavy coming up soon. Quote Link to comment Share on other sites More sharing options...

Recommended Posts
Join the conversation
You can post now and register later. If you have an account, sign in now to post with your account.