Jyanixqel Posted July 19, 2016 Report Share Posted July 19, 2016 I have been lurking and reading the whitearmor.net forums for a few years. I finally got of my duff and ordered my AP kit and have slowly been working on it as time has allowed. I must admit that its been a slow process, but my goal is to have everything submitted and to gain approval before the end of 2016. Since I knew this was going to be a slow process for me, I had not planned on doing a build thread because I am pretty sure I dont have much new to add that hasnt already been illustrated by those far more talented than I am. However, I sort of came to the conclusion that in the process of doing a build thread I might be able to gain some constructive criticisms to help me make my armor the best it can be. I apologize if the first few posts are pic heavy and dont define a lot of what I am doing, I'm just trying to get the thread up to where I currently am in my build. Along the way I would welcome any advice on how to improve what I have and what I plan to do. Thanks. Scott. 1 Quote Link to comment Share on other sites More sharing options...
Jyanixqel Posted July 19, 2016 Author Report Share Posted July 19, 2016 At this time I have, what I think, are a completed left arm and a nearly completed right arm. I opted for the inner strip as well as the outer cover strip method as I think this will improve the strength of the pieces. 2 Quote Link to comment Share on other sites More sharing options...
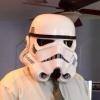
Jyanixqel Posted July 19, 2016 Author Report Share Posted July 19, 2016 Bucket Progress... Currently my bucket is back in pieces as I have decided to incorporate the fan system during the initial build process and I am awaiting a few last minutes parts, including the USB battery pack I have ordered from Amazon. I am going to try something a little crazy and line the helmet with the loop side of Velcro rather than the typical Plasti-Dip method. This way I can position, and re-position, components like fans. I am also planning to eventually incorporate Ukswrath's audio system. 2 Quote Link to comment Share on other sites More sharing options...
Snaps[TK] Posted July 19, 2016 Report Share Posted July 19, 2016 (edited) Looks like your off to a great start. I have AP and love it. I would recommend adding a second snap to the shoulder bell / bicep strip. I had problems with just one and it becoming unsnapped and then the bicep going out of place. Haven't had the problem since adding a second. Good luck and have fun! Edited July 19, 2016 by Snaps 3 Quote Link to comment Share on other sites More sharing options...
Jyanixqel Posted July 19, 2016 Author Report Share Posted July 19, 2016 Thanks! That's good to know. A second snap on the Bicep side or on the Bell side, or both? Quote Link to comment Share on other sites More sharing options...
gmrhodes13[Staff] Posted July 19, 2016 Report Share Posted July 19, 2016 Thanks! That's good to know. A second snap on the Bicep side or on the Bell side, or both?Both wouldn't hurt, they take a bit of strain in you are an active trooper 2 Quote Link to comment Share on other sites More sharing options...
Snaps[TK] Posted July 19, 2016 Report Share Posted July 19, 2016 What Q said 1 Quote Link to comment Share on other sites More sharing options...
Jyanixqel Posted July 20, 2016 Author Report Share Posted July 20, 2016 I know I'm going to need to do some shimming and then fill/cover with ABS paste. I swear I saw a "recipe" somewhere, but I can't seem to find anything now. Are there any rough guideline about the ratio of ABS to acetone as a starting point? Sent from my iPad using Tapatalk Quote Link to comment Share on other sites More sharing options...
Snaps[TK] Posted July 31, 2016 Report Share Posted July 31, 2016 Here's link. Scroll down and you'll see how to make it. I would just add a little bit, let it melt the abs, then add more, mix, add, mix, etc until have a good mixture. You don't want it to runny so the acetone doesn't melt surrounding material on your armor http://www.whitearmor.net/forum/topic/2041-howto-make-your-own-abs-repair-paste/ Quote Link to comment Share on other sites More sharing options...
Jyanixqel Posted August 14, 2016 Author Report Share Posted August 14, 2016 Here's link. Scroll down and you'll see how to make it. I would just add a little bit, let it melt the abs, then add more, mix, add, mix, etc until have a good mixture. You don't want it to runny so the acetone doesn't melt surrounding material on your armor http://www.whitearmor.net/forum/topic/2041-howto-make-your-own-abs-repair-paste/ Thanks! Sent from my iPad using Tapatalk Quote Link to comment Share on other sites More sharing options...
Jyanixqel Posted September 6, 2016 Author Report Share Posted September 6, 2016 Shins.... Shins... damn if they are frustrating me heck out of me! Ok, so my problem seems to be that my shins are a bit larger than the armor is designed for... go figure.. LOL What is an acceptable width for the back cover strip on the shins? When I fit the the pieces together, I ended up with about 35mm for the front cover strip, but the back cover strip needs to be much wider, like twice as wide... Suggestions??? Quote Link to comment Share on other sites More sharing options...
Jyanixqel Posted October 24, 2016 Author Report Share Posted October 24, 2016 Back at it, after a bit of an unintended break... I knew it was going to be a slow build, but I'm moving so much slower than I intended! Been working on the shins for a while... much trial and error, but I think I may have it. To this point I have the left shin, without the sniper plate attached. It took some work in figuring out how to bend some of the plastic safely... Apparently my shins are a bit thicker than what the armor was designed for, I am hoping my solution to the problem is acceptable... I have some clean up to do and I still need to attach the sniper plate... Quote Link to comment Share on other sites More sharing options...
Jyanixqel Posted October 24, 2016 Author Report Share Posted October 24, 2016 I have dry fit the sniper plate. It seems to require some "twisting" to fit correctly, which seems to be common from what I have read. With the modifications I have had to make already, I am hoping it fits well enough.... Quote Link to comment Share on other sites More sharing options...
Jyanixqel Posted October 24, 2016 Author Report Share Posted October 24, 2016 I took a bit of a break from the shins to start working on the belt. I decided to use snaps to attach the ammo boxes to the canvas. I liked the idea of being able to disassemble it if needed by unsnapping the ammo boxes. I still need to enclose the drop boxes and get them attached and I need to do some modifications on my holster as it came with black straps instead of brown ones. I'm also still waiting on the arrival of an order from Trooperbay of Chicago screws to attach the holster. Quote Link to comment Share on other sites More sharing options...
Haso[TK] Posted October 25, 2016 Report Share Posted October 25, 2016 Hey mate. Good progress so far. I have an AP kit and love it. Also check with your GML about the rear shin cover strip and what they'd suggest to get you over the approval line. I didnt have that same issue so can't offer practical advice on that one. Sent from my SM-J100Y using Tapatalk Quote Link to comment Share on other sites More sharing options...
Jyanixqel Posted December 21, 2016 Author Report Share Posted December 21, 2016 (edited) So, I'm taking a step back from the shins...thank god for E-6000! In the mean time I have been working on my belt, holster and blaster. Here is what I have completed at the moment. I plan to replace the drop boxes with enclosed ones before I submit for final approval. I am also considering replacing the Chicago screws that attach the holster to the belt with snaps/poppers. Thouhts? How's it look? Any suggestions? Edited December 21, 2016 by Jyanixqel Quote Link to comment Share on other sites More sharing options...
Haso[TK] Posted December 21, 2016 Report Share Posted December 21, 2016 Are you going for a hero TK based on the holster screws? I'd be incluned to stick with chicago screws with the holster unless there's a compelling reason otherwise. The snaps for the ammo belt to canvas belt connection are good, thats how i have mine. Did you get any advice on the shins? Sent from my SM-J100Y using Tapatalk 1 Quote Link to comment Share on other sites More sharing options...
Jyanixqel Posted December 22, 2016 Author Report Share Posted December 22, 2016 Ok. I'll stick with the Chicago screws on the Holster. The only reason for snaps would have been for ease of storage. I did use snaps for the ammo belt to attach to the canvas. Yep, going for Hero. I got some advice from the local garrison on my shins. They are in a bad way as is, so Ill pull them apart and start over. Before I get going on them, and the rest of the build, i need to hit the gym and drop a few inches. This will provide me with some great motivation to get myself back into shape! Thanks Kris!! Quote Link to comment Share on other sites More sharing options...
Haso[TK] Posted December 22, 2016 Report Share Posted December 22, 2016 Great! For belt storage i remove the ammo belt from the canvas belt (snap connections), place the ammo belt in the holster then just coil up the canvas belt with holster still attached. Then just store alongside the bigger pieces. Sent from my SM-J100Y using Tapatalk 1 Quote Link to comment Share on other sites More sharing options...
Jyanixqel Posted June 25, 2017 Author Report Share Posted June 25, 2017 I am finally back at it. The build is going slowly, but eventually I will get there! I think I got my shins back on track and I will post pics once the E6000 dries. Now onto the Ab button plates. Do these look trimmed OK, should they be trimmed up a little more? Quote Link to comment Share on other sites More sharing options...
Jyanixqel Posted June 25, 2017 Author Report Share Posted June 25, 2017 Another quick question... Does the ab piece and the cod piece need to separated or can they be left as one piece like this? Quote Link to comment Share on other sites More sharing options...
Haso[TK] Posted June 25, 2017 Report Share Posted June 25, 2017 Hi mate. I'd leave the button panels as is, and trim only if directed during your submission by the GML. Keep ab and cod pieces joined together. Sent from my C6603 using Tapatalk 1 Quote Link to comment Share on other sites More sharing options...
Jyanixqel Posted June 25, 2017 Author Report Share Posted June 25, 2017 Current state of the shins... How do they look? 1 Quote Link to comment Share on other sites More sharing options...
Jyanixqel Posted June 25, 2017 Author Report Share Posted June 25, 2017 Hi mate. I'd leave the button panels as is, and trim only if directed during your submission by the GML. Keep ab and cod pieces joined together. Sent from my C6603 using Tapatalk Thanks!!! Quote Link to comment Share on other sites More sharing options...
ABS80 Posted June 25, 2017 Report Share Posted June 25, 2017 (edited) do not seperate the cod plate you can trim the 4 button plate a bit more. Mark (AP) Edited June 25, 2017 by ABS80 1 Quote Link to comment Share on other sites More sharing options...

Recommended Posts
Join the conversation
You can post now and register later. If you have an account, sign in now to post with your account.