Pyrates[TK] Posted May 3, 2016 Report Share Posted May 3, 2016 Right on! Quote Link to comment Share on other sites More sharing options...
TKZombie[TK] Posted May 5, 2016 Author Report Share Posted May 5, 2016 (edited) Got back to some building on my TM, still can't do much with my rib injury just need more time for that to real up. But I did get all the cover strips cut to width and rough cut to length. Clamp the cover strip, then score and snap. Based on Paul's directions for cover strip sizes here is what I have: Biceps - 15 mm Forearms - 15 mm Thighs back - 22 mm Thighs front - 22 mm Shins front - 22 mm Shins back - 25 mm I also got the hand plates trimmed and added strapping. I initially left about a 7 mm edge but had to trim down the front and back as they were pressing too much into my hand as well need to curve those ends to conform to the shape of my hand better for comfort, so the edge is close to 5 mm now. Cut line draw Trimmed Straps glued on and clamped to dry, I also did my Sandtrooper cheese grater hand plates at the same time as this. The finished hand plates, for the strap I use a 8" elastic strap, the front strap is glued with a gap of about 3/4" (the width of the raised edge in the middle) this helps with the hand being wider where that strap rests. I prefer to use the abs hand plates for most troops that I slip over top of Nomex gloves as they are much more comfortable then rubber gloves with a cotton liner glove. I do have a pair of screen accurate rubber gloves with glued on rubber hand plates for photos though. Finishing the torso is up next for this weekend. Its already for the wire strapping. Edited May 5, 2016 by TKZombie Quote Link to comment Share on other sites More sharing options...
Pyrates[TK] Posted May 5, 2016 Report Share Posted May 5, 2016 Ladies of the Legion never cease to amaze - great work Christina! Quote Link to comment Share on other sites More sharing options...
TKZombie[TK] Posted May 9, 2016 Author Report Share Posted May 9, 2016 This weekend I got back onto building with the torso assembly and got through almost 90% of it. I've sure you've seen a lot of various armors builds so I'll just try to focus on what I did my own way or where I ran into challenges and how I worked through them. I laid out all the wire strapping brackets and strap and screws, i posted earlier that I pre-painted all the screw heads and split rivets as its a pain to paint them after the fact. Just a few touch-ups are needed once they are in so I find that's a big time saver. One thing I added is an extra plastic shim of ABS between the armor and the wire strapping. Its a personal choice and I know its not screen accurate but I've talked to several people who have RS and TM armour that have had their armor crack around the wire strapping points. I glued in a scrap ABS piece cut off from the excess of the cover strips. Honestly its really a pain to add these as they need to be cut curved to fit the return edge, so you have to modify each one and there is 18 of them. Then using e6000 glued each one and clamped in place. The people that I've talked to that have added this reinforcement haven't had any crack in these areas. I know Paul at TM doesn't encourage this and is a fan of cracks that occur from wear as its considered screen accurate but I want this beautiful armor to last a long time and try to look like it was on day 1 of filming not on day 90 after weeks of abuse. So Paul forgive me for the slight accuracy modification for longevity. I used magnets to hold the wire bracket in place to help mark the drill holes. Here is two sections completed and strapped together. 1 Quote Link to comment Share on other sites More sharing options...
TKZombie[TK] Posted May 9, 2016 Author Report Share Posted May 9, 2016 (edited) The torso assembled...right side Close up of the Han snap and the belt snap The left side The side split rivets The back Screws on the back plates. You can see how little scratches there is on the painted screws after installing. I can't image trying to paint these on the armor afterwards such a huge time save to pre-paint these!! The brass split rivet on the cod and 2 male snaps on the butt plate. I modified the connecting on the cod to the butt plate, typically the connecting strap is secured under the split rivet than attached to the butt plate with snaps. I've tried that on my AM armor and really not a fan of having to reach back behind to snap the armor closed. So what I did on that armour which I copied here is added a connection on the cod glued inside. The back still snaps onto the male snaps on the butt plate but the front snaps on, I've used the sew on type of snap used on the shoulder strap here in place of a snap. I find its more secure and snaps don't pull through the elastic material. Again a personal preference and not screen accurate but for me way easier to connect the 2 pieces of armor together. Here is the inside of the full torso, I've sine glued the left strap to the front chest and added the connector glued to the right side those are clamped and drying now, tonight I'll glue the side strap on the right side ab to the kidney plate The chest/abdomen plates The butt plates The kidney plate The back Adding the split rivets and elastic strapping between the ab & kidney plates The split rivets placement Edited May 9, 2016 by TKZombie Quote Link to comment Share on other sites More sharing options...
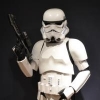
TKZombie[TK] Posted May 9, 2016 Author Report Share Posted May 9, 2016 (edited) Did a test fitting with the torso. Taped and clamped in place the shoulder straps to the chest and the right side. Taped closed till I can glue the strap in place The other side This armor fits be perfectly I'm 6'2" and 170 lbs if you are curious... Christina Edited May 9, 2016 by TKZombie Quote Link to comment Share on other sites More sharing options...
Airborne Trooper[501st] Posted May 10, 2016 Report Share Posted May 10, 2016 Beautiful armor and fantastic work! Quote Link to comment Share on other sites More sharing options...
TD42115[501st] Posted May 10, 2016 Report Share Posted May 10, 2016 (edited) Damn you been busy lol.. Love that armor.. Edited May 10, 2016 by TD42115 Quote Link to comment Share on other sites More sharing options...
illusionz_09[TK] Posted May 10, 2016 Report Share Posted May 10, 2016 Love the armor!!! Quote Link to comment Share on other sites More sharing options...
TKZombie[TK] Posted May 12, 2016 Author Report Share Posted May 12, 2016 (edited) Did some sewing last night for the leg straps, I used 75 mm (3") wide heavy duty black elastic. The regular fabric stores don't carry extra heavy elastic I searched many small family run stores and found one that has industrial grade elastic its well worth the search! I have a thigh garter belt system that I bought off the FISD forum ( http://www.whitearmor.net/forum/topic/29991-thigh-garter-system/) for my AM armour that I'm using the belt from with my hand sewn leg straps sew to loop over it. I folded over the belt the elastic and hand sewed a 4 cm or 1 1/2" section together to create the loop to go over the belt. Edited May 12, 2016 by TKZombie Quote Link to comment Share on other sites More sharing options...
TKZombie[TK] Posted May 12, 2016 Author Report Share Posted May 12, 2016 The chest to back connections are done, glued the strap to the chest on the left and added the connector for the snap on the right side chest strap Shoulder bridges are attached, had to one a day as the clamps overlapped each other to do both at once. I went with 5 ridges glued to the chest this leaves 3 ridges over the back plate when its on. Have some e6000 to clean up around the bridges. The left side glued and clamped Quote Link to comment Share on other sites More sharing options...
TKZombie[TK] Posted May 12, 2016 Author Report Share Posted May 12, 2016 Over the last few days I've been able to tackle the forearms. The right in process of trimming. The left forearm I found a easier way to trim the wrist end of the forearms to remove all the return edge I marked a cut line inside the armor of where to cut and then cut it from the inside this took all the return edge off. Just a few minor trims near the edges t make once I line the 2 pieces up. The left and right trimmed and fitted to my arm size. I really had to trim very little off to fit me about 5 mm of each side was all. I took most of the return edge off the tops of the forearms. When you line up the 2 halves the one side was always wider so I trimmed them to match. The wrist ends of the forearms, a little trimming of the edge on the right forearm and more sanding and they are ready to be glued. The raised armor edges sized for the 15 mm cover strip, I laid the cover strip over top to fit as best it could you'll find some of the ridge is wider and peaks out under the edge of the cover strip at the top but that's okay the armor ridges aren't straight. They warp and curve. Paul explained the proper way to fit the cover strip is to lay it against the armour to fit the best it can along the full length of the ridge, not to measure from the ridge outward to the edge a cut line as the ridges aren't straight. I drew a pencil line on the under side of the covered strip to indicate middle and once I lined up to strip taped it down on the front and flipped the armor over. The cover strips aren't cut down to size yet so they extend a bit over each end I can then see the middle line and I mark the center line against the back of the armour and that is where I cut. You can see below on the bottom forearm how much the top ridges flare out at the top of the forearm. Quote Link to comment Share on other sites More sharing options...
TKZombie[TK] Posted May 16, 2016 Author Report Share Posted May 16, 2016 (edited) The weekend came so I thought I'd get a jump on more building unfortunately Saturday Night I slipped in the middle of the night going to let my dog out and fell down the stair way, not fun! Nothing broken but lots of sore strained muscles all over. My injuries seem to be piling up this year. Despite that still pushing on with some building. Hopefully I'll be healed enough to wear it one day! So onto drop boxes and the belt... Here are the outer boxes face down and the inner box. I marked and trimmed the outside box down to 15 mm. Once the outside is trimmed I laid them on a sheet of sandpaper and sanded all the edges. Then lay the inner box inside and draw a line around where they line up against the top box. I actually inserted a scrap of my shoulder straps under the inner box which raised it up about 2 mm. So when I trim the inner box line these then fit flush inside the outer box. With the boxes trimmed I set them aside and started on the belt. Trimmed all the flashing and sanded the edges down. The outer corners I trimmed the angle cuts, measured in 10 mm on the bottom or horizontal and 12 mm on the ends or vertical sides. The belt cover squares I cut down to approx 1". I find the placement for the 3 rivet holes on the belt and drilled those (sorry didn't do photos of that step) Once the ammo belt was trimmed and prepped onto attaching it to the fabric belt. I lined up the fabric belt over the armor. I stuff my armor with pillows to make it hold its shape then I can fit the belt to the actual curve of the armor. I lined the belt up and then rub a pencil over the two male snaps on the ab plate this way when you press the belt onto the snap it leaves a mark where to make the snap button hole. Attach one snap at a time, test that it works then repeat for the other side. Then its time to attach the ammo plate, I start on the outside and mark that hole thru the ammo plate drilled hole and put a hole thru the belt for the rivet I do that with the belt snapped onto the armor so i can get the exact position of where the ammo belt goes, only mark one hole at a time then attach it and move on. I attach the ammo belt with a speed rivet (also known as a semi-tubular rivet.) same rivets used on the knee ammo pack. Once the end is secured I put the belt back on the armor snaps and mark the outside hole you need to have the belt on the armor so the ammo plate is secured in its curved position not lying flat or the rivets will be under stress when you do bend the belt. When the belt is off the armor it doesn't lie flat it has a curve from the curve of the ammo pack. The TM armor is very flexible no heating of the armour belt it just bends to the shape of the torso. Lastly I attache the center rivet I know some people start in the middle and work out I find it easier to mark the outside and go opposite I know where I want the end of the ammo plate to be so starting that guarantees its in the right spot and its easier to center on the belt. Do what you are comfortable with but that's my approach. Here is the back and front of the belt with snaps added and riveted in place. I have an extra rivet in the upper left corner of the belt for my commlink. The commlink added. The rivet covers are placed, glued, taped down and clamped. I'll add the elastics to the drop boxes next and attach those once the rivet covers are dried. The E-11 holster will be the very last thing I add as I'm using that on my AM armour. Once this build is done I'll remove the holster and attach it with 4 Chicago screws. The AM is going to be a Sandtrooper so no need for a holster. Edited May 16, 2016 by TKZombie 1 Quote Link to comment Share on other sites More sharing options...
Pyrates[TK] Posted May 16, 2016 Report Share Posted May 16, 2016 Keep rocking Christina - stellar work! Quote Link to comment Share on other sites More sharing options...
TKZombie[TK] Posted May 17, 2016 Author Report Share Posted May 17, 2016 Here's the torso, almost wrapped up, the ab plate buttons are in painting progress once they've dried I'll glue those on and the torso is done! The forearms and biceps are all trimmed to size and in the various stage of gluing. Here is the right forearm under clamp-ageddon with tape and magnets. 2 Quote Link to comment Share on other sites More sharing options...
Wipeout Posted May 17, 2016 Report Share Posted May 17, 2016 Looking amazing!! Quote Link to comment Share on other sites More sharing options...
Cricket[TK] Posted May 17, 2016 Report Share Posted May 17, 2016 Looks fab! Beautiful work. ☺ Quote Link to comment Share on other sites More sharing options...
68Brick[TK] Posted May 20, 2016 Report Share Posted May 20, 2016 Looking Good! Quote Link to comment Share on other sites More sharing options...
TKZombie[TK] Posted May 20, 2016 Author Report Share Posted May 20, 2016 Gluing is slow but ongoing, the 24 hour wait time with E6000 stalls everything as well i have only a certain amount of clamps and magnets so I'm limited to what I can glue at a time. The forearms and biceps will be fully finished this weekend and trimming and fitting of the shins and thighs will be done this weekend too then its however long it takes to glue all those pieces together. Another exciting clamping photo! Quote Link to comment Share on other sites More sharing options...
TKZombie[TK] Posted May 24, 2016 Author Report Share Posted May 24, 2016 (edited) It was a long weekend here in Canada so I got through a lot of building finally. The forearms and biceps are finished, the halves have been all glued up. I've added the 2" elastic strap to the forearms its glued and dying I'll connect it to the bicep tomorrow then the arms are fully done along with the whole upper torso from the waist up! The thighs are up next, trimmed and fitted to size and in various stages of gluing. Warm weather meant I can sit on my porch and trim armour! They both don't line up correctly, remember the right thigh has the ammo knee pack that covers the bottom edge so line up the tops of the right thigh when assembling and leave the bottom off. I trim the return edge off the tops of the thighs at the back tops so they sit flush and don't have a sharp edge sticking me in the back on my leg. The shins were up next. The right trimmed to size and left ready to trim The backs... Here is a BIG REMINDER! This armor is not symmetrical left and right pieces are quite different so take extra care trimming don't assume what you trim on the right is the same on the left. I had to trim 3/4" of the right shin and when trimmign the left shin I trimmed generously on the flash edging and then when i sized it it fit perfect. Thankfully I averted needing to order a replacement piece. Both trimmed to size, again these pieces don't line up the left one side sits higher, so line up the bottom as the sniper knee covers the misaligned parts. The backs I took almost all the return edge off the bottom of the shins no need for it there and it will just impact and rub you boots and likely provide a cracking spot so best to remove it. Cover strips being added to the thigh and shins. Here's a tip use the metal spring clips to glue on cover strips to one side, they provide equal pressure across the full length of the strip so you can a perfect sealed strip. Up next was back to the belt to finish it with drop boxes. White elastic strap, rivets, washer and pre-drilled holes in the back drop box. Made one mistake where I attached a strap and riveted the loop to the box but didn't have it looped over the belt, Aaarrrggghhhh!!! Break out the drill and slowly drilled out a rivet, took about 15 minutes but it came free and didn't heat up to damage the plastic drop box while drilling, disaster averted. Washer on the inside of the box. The finished drop boxes lined up, the ends of the boxes to the end of the ammo belt. The back of the belt finished. Notches cut in the elastic for the ab plate snaps. Don't forget to heat up the cut edges so it doesn't fray and run on you later. I see many people glue the elastic straps to the canvas ammo belt so they don't move on you. I sewed the top and bottom of the elastic loop to the edge of the canvas belt. Same job, I think easier than gluing, and I've had enough with gluing and clamping. Edited May 24, 2016 by TKZombie 2 Quote Link to comment Share on other sites More sharing options...
TKZombie[TK] Posted May 26, 2016 Author Report Share Posted May 26, 2016 Well the end of the build is in sight! Helmet, torso, belt, shoulders and arms are fully finished. One thigh and one shin are completed, the other two are in the gluing stage. Once those are done on Friday it's just attaching the shin bra straps, the sniper knee, thigh ammo pack and gluing the leg elastic straps on and then the build is done! I'll need to do a cleanup pass on any leaked out e-6000 and probably a sanding of a few spots along some edges. Then it will be giving the armour a cleaning and polish to get ready for photo submission for approval. Next Saturday the 4th there is the Niagara Falls comic-con that I plan to premier the build at so no time to waste in finishing this build, ti will be a busy weekend! Then I can rest for a bit before tackling my AM stunt TK conversion into a Sandtrooper TD. 1 Quote Link to comment Share on other sites More sharing options...
68Brick[TK] Posted May 26, 2016 Report Share Posted May 26, 2016 NF Comic Con should be a good break-in for your armor. Quote Link to comment Share on other sites More sharing options...
Clamps[TK] Posted May 26, 2016 Report Share Posted May 26, 2016 We're looking forward to the premier of this great looking build! Quote Link to comment Share on other sites More sharing options...
TKZombie[TK] Posted May 27, 2016 Author Report Share Posted May 27, 2016 One more shin front to glue together then all the armor is together! Sniper knee goes on tonight! And thigh straps get glued in place tonight too. I think I need to add biceps hooks the biceps sit low on my long arms and right at the edge of popping out from under the shoulder bell, so going to try making one and see, if I do need them I'll likely need to replace the shoulder elastic as its fairly tight and will need to hang a little looser to get the bicep in the right spot. Minor tweak but still a pain... I've ordered this fabric paint to paint over the black elastic straps glued on the armor like in the original where the white glue used on them left them white, Paul recommend this brand, its due to arrive next week from the UK. A extra finishing touch to the screen accurate look. Quote Link to comment Share on other sites More sharing options...
TKZombie[TK] Posted May 30, 2016 Author Report Share Posted May 30, 2016 (edited) So this weekend was a lot of final gluing and assembly. This wraps up the thighs with this gluing. The final gluing on the shin. Sniper knee plate added. White rubber handplates from AP added to rubber gloves, I used LePage 2 stage super glue to attach these. I've tried e6000 and zap-a-gap in the past and they didn't hold but a fellow TK tipped me off on this glue it has a activator you use on both pieces then after a minute add glue on one side and set and hold for 30 seconds and they are done. My arms are long and because of this my biceps sit low and kept popping out from under the shoulder bells so I added the biceps hooks to keep them up and under the biceps. Works great and a easy mod to make with some scrape ABS 20 mm wide. Installed The shins needed the bra hook closures added. Paul provided dimensions but those were for standard size shins and I have Pauls XL shins so I used the top 30 mm and bottom 40 mm hole placement and then eyeballed the middle hole as close as it is on a standard shin which turned out to be 210 mm from the bottom of the shin top lip. When I marked the holes to drill I drew a circle the size of the hole and tested to make sure when closed the cover strip hides it. So these range from 5-8mm from the edge of the armour to the edge of the hole. Clamps and magnets hold the straps while drying. Back to the belt to attach the holster. 4 Chicago screws hold the holster in place. Onto the thigh ammo pack. You can mount it two ways center the middle pack under the cover strip or offset with 2 packs on the outside and 3 on the inside. I choose the later. Marked the end and drew the curve to cut then attach with cap rivets. I don't want to discuss the frustration of these cap rivets but OMG that was the worst thing I've ever done. First testing fitting just a few tweaks after this. Edited May 30, 2016 by TKZombie Quote Link to comment Share on other sites More sharing options...

Recommended Posts
Join the conversation
You can post now and register later. If you have an account, sign in now to post with your account.