charlesnarles Posted January 22, 2016 Report Share Posted January 22, 2016 Greetings! Officially stoked about getting my BBB today, tho without any shipping notifications or signature at drop-off like they said to expect. Oh well! So far I've looked at the helmet and a few of the arm pieces and they are SHARP with very clear guide-lines. They didn't utilize the ear notch trick, and the ear tube curves could use a sanding. I also noticed that since the parts come in slippery plastic bags, the glossy plastic shakes around which caused one of my bicep halves to get scratched. I think I have polish somewhere, so it's no biggie but it is something to watch out for. The eyes and teeth need to be opened and/or sanded slightly. The mouth is airbrushed and so looks more like ESB in grey, and lacks the corner/outside little dabs. The traps and tube stripes seem like decals but they look great and don't have big edges or any flaws. More to come (including pics!) 2 Quote Link to comment Share on other sites More sharing options...
Daetrin[Admin] Posted January 22, 2016 Report Share Posted January 22, 2016 Pix! Quote Link to comment Share on other sites More sharing options...
poscidiongamer Posted January 22, 2016 Report Share Posted January 22, 2016 (edited) Hey buddy check your biceps for a clear plastic coating. May not be damaged at all just the protective plastic coating Sent from my SM-N920R7 using Tapatalk Edit: I don't know if all of the armor is like this but this person said theirs is. This is not my picture Edited January 22, 2016 by poscidiongamer Quote Link to comment Share on other sites More sharing options...
Kredal[TK] Posted January 22, 2016 Report Share Posted January 22, 2016 Congrats on being the first build thread! Now everyone is going to follow you, so no pressure at all. (: Hey, wait, you have an ATA thread open too, don't you? Now you've got TWO sets of armor to build! Get back to work! 1 Quote Link to comment Share on other sites More sharing options...
Enthus Posted January 22, 2016 Report Share Posted January 22, 2016 I'll be living vicariously through this thread until mine ships, so I can't wait for your updates! Quote Link to comment Share on other sites More sharing options...
PGHtrooper21 Posted January 22, 2016 Report Share Posted January 22, 2016 So it begins!!!!! Andy Quote Link to comment Share on other sites More sharing options...
CRISTONAMO Posted January 22, 2016 Report Share Posted January 22, 2016 Pics or it didn't happen!! haha Quote Link to comment Share on other sites More sharing options...
xanthis02 Posted January 22, 2016 Report Share Posted January 22, 2016 Can we get detailed pics of the helmet outside/inside i plan on modifying mine into a hero helmet please Quote Link to comment Share on other sites More sharing options...
Clamps[TK] Posted January 22, 2016 Report Share Posted January 22, 2016 is your holster mounted with 4 rivets like the one I saw unboxed on YouTube yesterday? Quote Link to comment Share on other sites More sharing options...
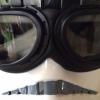
charlesnarles Posted January 22, 2016 Author Report Share Posted January 22, 2016 (edited) I'll unbox the armor completely soon, but here are some of the helmet. ANOVOS on left, ATA on right. Then some detail shots I haven't shown anyone else yet BBB: Front: 3/4: Right: Left: Back: Frown is sloppily airbrushed, but should be easy to fix: No ear step trick, so one side has a pretty big gap for my OCD: Kinda rough ear trimming in general: One ear has the very bottom (3rd) screw half-showing, and the other is completely hidden: Airbrushed glossy vocoder: Not sure if this "S" trim is good enough, its pretty squared if that matters: Fairly accurate trim length/placement tho: Lenses are pre-cut with Velcro attachment. Velcro for the head strap too. Frown mesh held on by double-sided sticky foam (technical term): Very flush tube overlaps, I could hardly believe it : Mic tips look good to me. Very fine mesh and nice ...nipples: Eyes could use some reshaping and sanding, but they left some meat on there so we can keep the screen-accurate look. Brow trim seems fine and is glued on just like the neck trim: Here are some close-ups of the decals. They did such a great job of getting the hand-painted look that I suspect they're direct copies of the real deal: Edited January 22, 2016 by charlesnarles 5 Quote Link to comment Share on other sites More sharing options...
Daetrin[Admin] Posted January 22, 2016 Report Share Posted January 22, 2016 Love seeing the comparison photos - thanks! Overall it looks good and should be fine for 501st I would think, even though as you point out some details are different from your expectation. Personally to me they don't look much different from most fan-builds though I would say the frown paint is a bit over done for my personal tastes. As for the belt, my understanding is that all belts will have 4 rivet attachment. This is again fine for 501st base acceptance, you'd need to take out two Chicago screws to go EI/Centurion if you want to stay stunt. 2 Quote Link to comment Share on other sites More sharing options...
Kredal[TK] Posted January 22, 2016 Report Share Posted January 22, 2016 As for the belt, my understanding is that all belts will have 4 rivet attachment. This is again fine for 501st base acceptance, you'd need to take out two Chicago screws to go EI/Centurion if you want to stay stunt. I hate to be that guy, but no, it isn't fine for base acceptance. The CRL says 2 fasteners on the base level... (there actually isn't any Level 2/3 notes on the holster portion) Holster is made of black leather or leather-like material. Holster is worn on left side of belt and is attached via two leather or leather-like material straps to the belt from behind instead of front.No loops cover the outside of the belt. The holster is affixed with only two fasteners at the bottom (one per strap).The fasteners may be rivets, snaps, or Chicago screws. Quote Link to comment Share on other sites More sharing options...
ANHWannaBe Posted January 23, 2016 Report Share Posted January 23, 2016 any updates?? Quote Link to comment Share on other sites More sharing options...
charlesnarles Posted January 23, 2016 Author Report Share Posted January 23, 2016 Just got some tin shears today so I'll be cutting soon, I swear Quote Link to comment Share on other sites More sharing options...
=Sv3=[TK] Posted January 23, 2016 Report Share Posted January 23, 2016 Favorited your build. I'll be following with great interest! You should be close to done by the done I find courage to start Quote Link to comment Share on other sites More sharing options...
kman[TK] Posted January 23, 2016 Report Share Posted January 23, 2016 Looks like you're first to start an Anovos build thread, well done! I'll be watching eagerly while I await my shipment... Quote Link to comment Share on other sites More sharing options...
Darth Aloha[Admin] Posted January 23, 2016 Report Share Posted January 23, 2016 Love seeing the comparison photos - thanks! Overall it looks good and should be fine for 501st I would think, even though as you point out some details are different from your expectation. Personally to me they don't look much different from most fan-builds though I would say the frown paint is a bit over done for my personal tastes. As for the belt, my understanding is that all belts will have 4 rivet attachment. This is again fine for 501st base acceptance, you'd need to take out two Chicago screws to go EI/Centurion if you want to stay stunt. Actually the CRL states 2 for stunt and 4 rivets for hero in the base requirements. I hope the top two rivets come out of the belt painlessly. I'll be trying it when I get my kit . -Eric Quote Link to comment Share on other sites More sharing options...
Sly11[Admin] Posted January 23, 2016 Report Share Posted January 23, 2016 Glad that these are finally in hand and a build thread has been started. Finally an end to the speculation and controversy. Now maybe we can get back to being plastic spacemen, feeling excited and seeing some great builds. Now where is that kidney notch!! Sent from my iPad using Tapatalk 2 Quote Link to comment Share on other sites More sharing options...
themaninthesuitcase[Admin] Posted January 23, 2016 Report Share Posted January 23, 2016 Glad that these are finally in hand and a build thread has been started. Finally an end to the speculation and controversy. Now maybe we can get back to being plastic spacemen, feeling excited and seeing some great builds. Now where is that kidney notch!! Sent from my iPad using Tapatalk its there. I got a photo from someone on the Facebook group. Quote Link to comment Share on other sites More sharing options...
Al- Posted January 23, 2016 Report Share Posted January 23, 2016 Can you take a picture of the inside your helmet? More specifically the hat liner. Mine seems off. Wanted to compare. Quote Link to comment Share on other sites More sharing options...
TK 2759[501st] Posted January 23, 2016 Report Share Posted January 23, 2016 Can you take a picture of the inside your helmet? More specifically the hat liner. Mine seems off. Wanted to compare. Take the two parts that aren't attached at the back, and adjust to fit your head... Quote Link to comment Share on other sites More sharing options...
Al- Posted January 23, 2016 Report Share Posted January 23, 2016 Take the two parts that aren't attached at the back, and adjust to fit your head...With the double sided adhesive came apart Quote Link to comment Share on other sites More sharing options...
TK 2759[501st] Posted January 23, 2016 Report Share Posted January 23, 2016 With the double sided adhesive came apart It looks like that's the part to adjust it to the size of your head... I'm guessing here, as I do not own this kit... Or that hard hat liner, but do use a variant of such... Quote Link to comment Share on other sites More sharing options...
Al- Posted January 23, 2016 Report Share Posted January 23, 2016 It looks like that's the part to adjust it to the size of your head... I'm guessing here, as I do not own this kit... Or that hard hat liner, but do use a variant of such...Thanks for your help. It is for adjustment but it uses velcro tape for thr adjustment. When ever you pull away to make an adjustment it pulls off the velcro tape. Quote Link to comment Share on other sites More sharing options...
kman[TK] Posted January 23, 2016 Report Share Posted January 23, 2016 The guy who posted the first unboxing video had the same issue on his. Looks like they didn't give quite enough time for the glue or tape to fully bond, so it came loose. Just needs to be glued back down and should be fine. 1 Quote Link to comment Share on other sites More sharing options...

Recommended Posts
Join the conversation
You can post now and register later. If you have an account, sign in now to post with your account.