cjdesign[TK] Posted October 13, 2015 Report Share Posted October 13, 2015 (edited) On October 5th, 2015 i received my big brown box. My first steps... Filing and trimming: You will be removing/cleaning up lots of return edges and trim lines, so do yourself a favor and purchase a "large coarse half round file". 90% of all my filing has been done with the large half-round file. Create nice curves and remove material quickly. I used a dremels for hard to reach details but it can melt the plastic quickly, so be careful. I used small needle files to square off teeth and forearm details only. Finishing the edges: Use 100 grit sandpaper to clean up file marks, 320, and wet sand, buff with Novus Plastic Clean #3 then followed by #2 (this stuff should be in your arsenal) Gluing: You will need lots of e6000 glue (4-5 tubes). I've been using the "white" for the armor and "clear" to attach the nylon snaps. Use a respirator or glue outside - this stuff is nasty but very easy to work with. The glue will cure differently depending on how much airflow. I found that plastic parts should cure for 24 hours before unclamping and cleanup. The snaps cured within 12-24 hours. When the glue dries. Score the edge with an knife and buff/rub/peel off the remainder with a towel or micro fiber cloth. During this process you will create lots of heat, so don't rub in one place too long or you will melt the armor or cover strip. Clamps and Magnets: This will determine how many pieces you can glue and work on at the same time. I had.. Clamps: (7) small clamps Magnets: (14) 1/2" rare earth magnets for the cover strips and (10) 1.25 for the support strips on the inside. TOC: Helmet Trimming: http://www.whitearmor.net/forum/topic/33463-cjdesigns-am-20-build/?p=438097 Bi-ceps/Forearms: http://www.whitearmor.net/forum/topic/33463-cjdesigns-am-20-build/?p=438298 ESB Hand Covers/Plates http://www.whitearmor.net/forum/topic/33463-cjdesigns-am-20-build/?p=436879 Kidney/Posterior plate alignment: http://www.whitearmor.net/forum/topic/33463-cjdesigns-am-20-build/?p=436885 Posterior/Butt Plate Snap Position: http://www.whitearmor.net/forum/topic/33463-cjdesigns-am-20-build/?p=436883 Belt: http://www.whitearmor.net/forum/topic/33463-cjdesigns-am-20-build/?p=437202 Thermal Det. Clips: http://www.whitearmor.net/forum/topic/33463-cjdesigns-am-20-build/?p=435613 Shins: http://www.whitearmor.net/forum/topic/33463-cjdesigns-am-20-build/?p=438089 Helmet Exterior: http://www.whitearmor.net/forum/topic/33463-cjdesigns-am-20-build/?p=438079 Helmet Inside: http://www.whitearmor.net/forum/topic/33463-cjdesigns-am-20-build/?p=478950 501st Submission: http://www.whitearmor.net/forum/topic/33463-cjdesigns-am-20-build/?p=438126 Edited April 21, 2016 by cjdesign 1 Quote Link to comment Share on other sites More sharing options...
cjdesign[TK] Posted October 13, 2015 Author Report Share Posted October 13, 2015 (edited) bicep strap hooks are not required for esb build. All pictures including some screen grabs from the movie, show the biceps lower then the bells and no hooks, therefore shoulder bell straps should not be visible. Edited November 20, 2015 by cjdesign 1 Quote Link to comment Share on other sites More sharing options...
cjdesign[TK] Posted October 15, 2015 Author Report Share Posted October 15, 2015 (edited) Is there a left and right shoulder bell on the am 2.0? I notice one has a vertical stripe and other a more diagonal (top mid to bottom right) How do I differentiate the shoulder bells? Response from TG: The shoulder bells are not symmetrical, by design. The one with the "swoop" is worn on the left shoulder. Here is a thread you can look at. http://www.whitearmor.net/forum/topic/29031-shoulder-bell-inquiries/ Edited May 3, 2016 by cjdesign Quote Link to comment Share on other sites More sharing options...
cjdesign[TK] Posted October 22, 2015 Author Report Share Posted October 22, 2015 (edited) Thermal Detonator brackets installed... I created a custom set for esb tk. The TD sits higher on the belt and brackets are nearly invisible. Edited October 27, 2015 by cjdesign Quote Link to comment Share on other sites More sharing options...
cjdesign[TK] Posted October 23, 2015 Author Report Share Posted October 23, 2015 (edited) Day 14 since the brown box arrived.... finished the arms and helmet sans details/decals. Legs curing. Starting the belt today! Edited October 27, 2015 by cjdesign Quote Link to comment Share on other sites More sharing options...
cjdesign[TK] Posted October 24, 2015 Author Report Share Posted October 24, 2015 (edited) Gluing on the shoulder straps The e6000 needs to cure a very long time (48 hours +) or the strap will lift from the front. Even thought I filled the underside gaps with pieces of extra pvc, the air trapped inside the ribs can keep the glue from curing. Be patient. Looked at many references of shoulder strap placements and determined that at least 5-6 ribs are visible on the front chest plate before the gap. [/url] Edited May 3, 2016 by cjdesign Quote Link to comment Share on other sites More sharing options...
cjdesign[TK] Posted October 24, 2015 Author Report Share Posted October 24, 2015 (edited) Are bicep strap hooks required for esb build. All pictures including some screen grabs from the movie, show the biceps lower then the bells and no hooks. not necessary for esb. the biceps are lower thus not needed them. Edited October 24, 2015 by cjdesign Quote Link to comment Share on other sites More sharing options...
cjdesign[TK] Posted October 27, 2015 Author Report Share Posted October 27, 2015 (edited) The gloves and hand covers: After trimming the cover to fit my hand better After drilling the holes (5mm from edge and 7mm apart) I stitched the 5 points of hand cover independently and Velcroed to the glove. Stitching the velcro to the glove is a lot easier then stitching each hole to the glove in my option. The silk/lycra gloves can rip at the seem fairly easy so switching out another pair is a breeze. Edited November 27, 2015 by cjdesign Quote Link to comment Share on other sites More sharing options...
cjdesign[TK] Posted October 27, 2015 Author Report Share Posted October 27, 2015 (edited) Posterior Plate Snap Positions: Placement for these two snaps are up to the builder. mine are 20mm apart. 15mm from the back return edge. The AM posterior has a flat flap that should be cut off and rivets should be placed on the curve. This is the correct am2.0 placement for the snaps. Edited April 20, 2016 by cjdesign Quote Link to comment Share on other sites More sharing options...
cjdesign[TK] Posted October 27, 2015 Author Report Share Posted October 27, 2015 Last snap in place... Quote Link to comment Share on other sites More sharing options...
cjdesign[TK] Posted October 27, 2015 Author Report Share Posted October 27, 2015 (edited) Kidney/butt plate alignment: first make sure the kidney plate is positioned the correct way. the center trim should be the same height as the butt center trim. Correct alignment: Wrong alignment: Cut the 22mm x 22mm square notch out of the kidney. I lined up and taped the butt and kidney plate together and continued the 22mm cut vertically down the butt plate - so everything lined up. The final 45 degree cut was made to complete the butt plate. Edited November 3, 2015 by cjdesign Quote Link to comment Share on other sites More sharing options...
cjdesign[TK] Posted October 29, 2015 Author Report Share Posted October 29, 2015 (edited) Day 20: Finalizing the belt with the proverbial e6000 icing on the cake - I mean rivet covers. Thanks "TKittell" out of Colorado for the awesome belt. Highly recommended. The rivets ane snaps I used: Dritz Mini Anorak Snaps & Tools Kit - Blk Oxy -12mm -10 Ct http://www.amazon.com/Dritz-Mini-Anorak-Snaps-Tools/dp/B00CO67CA4/ref=sr_1_2?ie=UTF8&qid=1448646106&sr=8-2&keywords=mini+anorak+snaps JoAnn's Fabric store or any other fabric store should have them as well.. good luck. FYI they come in Black onyx, chrome, and few other finishes. I used gun metal/dark on all snaps. I also used these cap rivets to attach the canvas belt to the front ammo piece and cod. 7mm Gunmetal Round Double Cap Rapid Rivet https://www.etsy.com/listing/87374880/50pcs-7mm-gunmetal-round-double-cap?utm_source=google&utm_medium=cpc&utm_campaign=shopping_us_supplies-commercial-low-other&utm_custom1=a5137673-8567-4bbc-ae9e-0129ba31243b&gclid=Cj0KEQiAm-CyBRDx65nBhcmVtbIBEiQA7zm8lSgCV3d3CcvCRfPvCe_FY796Ke0a8l2jtIEIeaY_jUEaAvzV8P8HAQ I purchased a 100 count bag on ebay. you'll need extra to practice with - trust me! Belt? Check! Ab buttons painted? Check! Important Note: Trooperbay's youtube example of measuring and placing the snaps in a predetermined position on the ab plate first will not work with the AM 2.0 armor configuration. It may work for another manufacturer's armor but not mine. Make sure the female snap is placed somewhere within the first ammo indentation/recession OR the belt will not sit flat against the plastic ammo piece. Trooper bays' example had me outside the sweet spot and I had to re-drill the holes and set new snaps once again. Complete the snaps on the belt first, then transfer the placement of the snaps over to the AB plate. The dropbox strapping should loop around the belt and align between the 7mm rivet and mini snap. Don't forget to feed the dropboxes through the belt before setting the outer rivets. Wear the respirator when gluing e6000 Edited November 27, 2015 by cjdesign Quote Link to comment Share on other sites More sharing options...
cjdesign[TK] Posted November 1, 2015 Author Report Share Posted November 1, 2015 (edited) It took me three weeks to complete my am 2.0 build. i've learned so much over that coarse. My first night of trooping didn't go without a hitch. My left side belt rivet busted, the shin cover strip was pulling away at the bottom, my Helmet fan battery died premature ( hot and foggy all night )... but it was well worth it. I will be posting more of my build soon. Edited November 2, 2015 by cjdesign 1 Quote Link to comment Share on other sites More sharing options...
cjdesign[TK] Posted November 2, 2015 Author Report Share Posted November 2, 2015 (edited) Here are the final helmet details... Edited November 20, 2015 by cjdesign Quote Link to comment Share on other sites More sharing options...
cjdesign[TK] Posted November 2, 2015 Author Report Share Posted November 2, 2015 (edited) Shins: Important: Please read this thread on the correct placement of parts: http://www.whitearmor.net/forum/tutorials/article/44-howto-assemble-am-armor-shins/ Install outter cover strips... it time to Install the sniper plate... the top of the plate kept pushing against my knee cap on my first install, and there was a large gap in the front. out of the box this piece is very stiff and doesn't sit flush against the shin cover stripe. ...so this time I heated up with a heat gun (always heat the back of the piece) and shaped it to the shin first. much better results. glue the area with e6000: Clamping... I used multiple stacked 1.25 rare earth magnets to create more pressure on the center area. I have multiple blood blisters on my finger tips from these magnets accidentally snapping together - so be careful. Not to mention you'll need the finger strength of a mountain climber to get them apart afterward. LOL. Looks better, less gap... and angle of the plate feels better on the knee cap. Edited November 17, 2015 by cjdesign Quote Link to comment Share on other sites More sharing options...
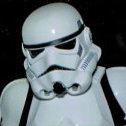
cjdesign[TK] Posted November 2, 2015 Author Report Share Posted November 2, 2015 (edited) Trimming and shaping the eyes and removing most of the return edge to be more authentic to esb. I left 4-5mm or so... Edited November 2, 2015 by cjdesign Quote Link to comment Share on other sites More sharing options...
cjdesign[TK] Posted November 3, 2015 Author Report Share Posted November 3, 2015 (edited) sent my application off to the local gml today... woot woot. Edited November 4, 2015 by cjdesign Quote Link to comment Share on other sites More sharing options...
cjdesign[TK] Posted November 4, 2015 Author Report Share Posted November 4, 2015 (edited) This question was asking by a new member... How do I go about fitting the forearms and biceps? Alignment: You are keeping the return edge on the tops of the bi-cep and forearm, so align the tops first before taping. The bottoms will most likely NOT line up. That's OK. The bottom return edges will get trimmed off and you can file them even later on.... I preferred removing and trimming the return edges before actually making any fittings or cuts. I think you get a better sizing when the return edges are actual size and have less overlap. Fitting: Wrap the Left & Right pieces together, secure with blue tape. Adjust as needed. The armor should fit snug but not tight and have a nice taper. Don't forget to leave enough room to squeeze your hand through the wrist opening. Keep in mind the pieces should be large enough to accommodate flexed muscles. During this process, you may get abrasions on your hands from putting the armor on and off. Marking & Cutting: Once you are satisfied with the fit. it's time to make the cut line with a pencil. The final cuts will be positioned inline with the center line of your forearm and or bicep. You may need to angle the cut (center to center) to match the taper of your piece. Error on the side of making the cut too big. You can always file down for a perfect fit. I made a single pencil mark on the outer edge of both pieces, simultaneously, to indicate the cutting mark locations. I lined up the pencil marks with my metal ruler and taped the ruler in place. Using the ruler as a guide, gently make the first pass with the blade - I used an Ex-acto blade for all my cuts. I repeated this process 2-3 times to assure a deep enough cut and clean edge. TIP: For a cleaner final edge... gently bend the abs along the entire cut/seam, and then snap apart as one piece. Separating the plastic in sections will create a jagged edge. Other notes: • The cover strips for the forearm and bicep should be around 15mm wide. • The bicep with the spoon is the left. • The forearm with the curve and 12 dimples is on the right. • The biceps are shaped like a race track and may need heat (via a heat gun) to shape better. Edited November 20, 2015 by cjdesign Quote Link to comment Share on other sites More sharing options...
cjdesign[TK] Posted March 22, 2016 Author Report Share Posted March 22, 2016 (edited) Helmet Fans and PaddingFinally finished the helmet upgrade. Goodbye 9v and AAs. Hello USB. Hopefully no more foggy interiors. It felt like Dagobah inside my helmet. featuring...Echo style fan bracket (black anodized aluminum)button switches (rubberized covers)Anker 10000 powercellThree 5v fans (2 front. 1 back)adjustable x-liner helmet padnew single open visormetal meshplastidip finish Continued Here: http://www.whitearmor.net/forum/topic/36631-usb-helmet-fans-no-more-9v-or-aas/ Edited April 21, 2016 by cjdesign Quote Link to comment Share on other sites More sharing options...
zv288bot[TK] Posted March 22, 2016 Report Share Posted March 22, 2016 Finally finished the helmet upgrade. Goodbye 9v and AAs. Hello USB. Hopefully no more foggy interiors. It felt like Dagobah inside my helmet. featuring... Echo style fan bracket (black anodized aluminum) button switches (rubberized covers) Anker 10000 powercell Three 5v fans (2 front. 1 back) adjustable x-liner helmet pad new single open visor metal mesh plastidip finish Looks fabulous. Did you make the fan bracket? Sent from my LGLS740 using Tapatalk 1 Quote Link to comment Share on other sites More sharing options...
cjdesign[TK] Posted March 22, 2016 Author Report Share Posted March 22, 2016 Yes. still waiting for a an echo bracket, but made one in the interim. Quote Link to comment Share on other sites More sharing options...
cjdesign[TK] Posted April 11, 2016 Author Report Share Posted April 11, 2016 Looks fabulous. Did you make the fan bracket? Sent from my LGLS740 using Tapatalk Yes, Here is the thread. http://www.whitearmor.net/forum/topic/36631-usb-helmet-fans-no-more-9v-or-aas/ Quote Link to comment Share on other sites More sharing options...
cjdesign[TK] Posted April 20, 2016 Author Report Share Posted April 20, 2016 Looks fabulous. Did you make the fan bracket? Sent from my LGLS740 using Tapatalk http://www.whitearmo...more-9v-or-aas/ 1 Quote Link to comment Share on other sites More sharing options...
AWOL Posted April 20, 2016 Report Share Posted April 20, 2016 Have to ask, where did you get the helmet padding? that's no moon, Kim Kardashian is bending over again... 1 Quote Link to comment Share on other sites More sharing options...
cjdesign[TK] Posted April 21, 2016 Author Report Share Posted April 21, 2016 The x-liner. Adjustable, Removable and Washable. 2 different thicknesses and many different sizes. Quality military product - worth every penny. Also wanted a liner I could use for multiple helmets if needed. http://www.gibson-ba...u55-Xliner.html Quote Link to comment Share on other sites More sharing options...

Recommended Posts
Join the conversation
You can post now and register later. If you have an account, sign in now to post with your account.