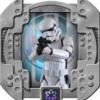
It's_a_troop Posted December 1, 2014 Report Share Posted December 1, 2014 (edited) Name : Jason Howard 501St ID : TK11128 Garrison : Terror Australis Garrison FISD Name : It's_a_troop Armour : AP Helmet : AP (combo hand painted and hand painted replica decals) Boots : TK Weapon : Hand to Hand Combat Expert / Hasbro conversion as back up Neck Seal : Veedox Hand Guards : Sonnenschein Canvas Belt : Trooperbay Holster : Trooper Bay / Custom Thank you for your consideration TK-11128 Edited December 5, 2014 by It's_a_troop Quote Link to comment Share on other sites More sharing options...
I'm Batman[501st] Posted December 1, 2014 Report Share Posted December 1, 2014 Hey Jason. Armor looks great, however you might want to check out this thread. Weapons are mandatory unfortunately. http://www.whitearmor.net/forum/topic/18412-blasters-optional/ 1 Quote Link to comment Share on other sites More sharing options...
It's_a_troop Posted December 1, 2014 Author Report Share Posted December 1, 2014 Cheers bro, i'm running a concept character here, but I'll post my E11 anyway. Quote Link to comment Share on other sites More sharing options...
Sly11[Admin] Posted December 1, 2014 Report Share Posted December 1, 2014 Looking good, only one suggestion. Can you move your drop boxes so they align with the edge of the ammo belt, yours look like they are sitting in from the edges a little where the angle is cut. Sent from my iPad using Tapatalk 1 Quote Link to comment Share on other sites More sharing options...
It's_a_troop Posted December 1, 2014 Author Report Share Posted December 1, 2014 Done mate. Cheers Quote Link to comment Share on other sites More sharing options...
Tusken RTT Posted December 1, 2014 Report Share Posted December 1, 2014 Looking great! 1 Quote Link to comment Share on other sites More sharing options...
It's_a_troop Posted December 2, 2014 Author Report Share Posted December 2, 2014 (edited) Thanks Scott Edited December 2, 2014 by It's_a_troop Quote Link to comment Share on other sites More sharing options...
Sly11[Admin] Posted December 2, 2014 Report Share Posted December 2, 2014 That's better, your armour looks great, good luck. Sent from my iPad using Tapatalk Quote Link to comment Share on other sites More sharing options...
It's_a_troop Posted December 2, 2014 Author Report Share Posted December 2, 2014 Thanks Andrew, I was never sure about which edge of the angle cut the drop boxes were meant to line up with. Thanks for pointing me in the right direction. Quote Link to comment Share on other sites More sharing options...
Dark PWF[Staff] Posted December 3, 2014 Report Share Posted December 3, 2014 (edited) Your armor looks good Jason! You've got the original strapping working really well, as your chest plate sits very nicely over the top of your ab plate. Just a few things that I see that might need adjusting: The top and bottom edges of your belt could be trimmed down to even with the top and bottom edges of the ammo boxes on the belt. Perhaps tighten up the connecting straps on your shoulder bells, they look like they are pushing up away from your actual shoulders. See if you can get your undersuit to smooth out a bit, it is clearly bunching up at your elbows. Just a reminder should you be planning to submit for Centurion, the Hasbro conversion is not approvable for that level, so you'll have to look into an additional/different weapon for that submission. Good luck! Edited December 3, 2014 by Dark CMF Quote Link to comment Share on other sites More sharing options...
It's_a_troop Posted December 3, 2014 Author Report Share Posted December 3, 2014 Cheers Tim, I noticed the shoulder straps in this shot sitting up like that. I have other shots that have it sitting better (I thinks it's just the way it's sitting in this pic), but I'll look into it... I'm wanting to put together a DLT 19 for centurion, but I don't know if I'll ever achieve it, as I don't think I can full fill the abs/ kidney plate 'gap' ctrl without shims, but in saying that I've tried to build to centurion controls just to make it as accurate as possible, so I'm happy. Quote Link to comment Share on other sites More sharing options...
It's_a_troop Posted December 4, 2014 Author Report Share Posted December 4, 2014 Here's some other shots which show the shoulder bells sitting a lot better Quote Link to comment Share on other sites More sharing options...
gazmosis[501st] Posted December 4, 2014 Report Share Posted December 4, 2014 Hey Jason: Thank you for your application for Expert infantry. I have always loved AP armor and you have a really nice overall build. Well done! So let's look at your armor!! CRL and EIB Application Requirements: Again, you have a very nice overall build. Well detailed at fitted. There are a couple points that, unfortunately that do not pertain to your armor, that need to be addressed before we can move forward with your EIB badge. First off as a couple missing pics. The first one is necessary for the EIB archives. It was brought up that although not required for basic approval, a weapon IS required for accuracy badges here. As a result, your action shot needs to have you holding a weapon if it is going to be added to the archives. As you retake that shot, take and post an additional close-up shot of your hovi tips. The other point has to do with your Hasbro blaster. Although you have the conversion kit in place and added the extra "T" tracks as required, it is also required to remove the lowest "T" track from the magazine side of the blaster to look like you see here: Other-Armor Fit/Assembly: Any suggestions made in this section go towards improving the overall appearance of your armor. Unless specifically stated, these will not affect any application. I really have nothing to add here. Like I said, you have a very nice, detailed build. If I was forced to say anything it would be that the outline on your left side ear rank area is a little thick. You NAILED the right side. Lastly, a couple strategically placed drops of superglue can help keep your mouth screen in place more securely than blue tape. Centurion Suggestions: If there is a Centurion application in your future, there are a couple things that need to be upgraded before that can happen. First is the need to upgrade your blaster to a Sterling based pipe build, or Doopy full Kit. Thank you for posting the pic showing the proper position of your drop boxes. IF you do apply, make sure your full body shots represent your drop boxes positioned with the outer edge aligning with the outer edge of the belt. Next are your shoulder bells. They do look a lot better where they are on your latest pictures rather than the earlier ones where they are being pushed up. But in those top pics, it shows that the straps connecting your bells are really long. The shoulder bells should be very close if not touching the ribbed shoulder bridges. A little adjustment to the length of these straps and you are there. Lastly are your side shims. AP is definitely armor for the exceptionally thin trooper so many who choose AP need to install side shims. I see two things that need repair. Although I can't clearly see your left side, the right side shows that your shim was glued to the inside of the kidney. To greatly improve the look of this, your shim should be trimmed to create a nice butt joint seam with the surface of the kidney then glued from the back so the surface of both the kidney and shim are the same. See this diagram: Once the shim is in it's proper place, the seam can be filled with ABS paste, sanded and polished smooth. The next thing are your left side split rivet locations. You have the rivets on your kidney mounted to the original ab location and not on the shim making the rivets way too far apart. See the before and after pics; Before: After: Please contact me should you have any questions. With your talents, that blaster repair should take you 30 minutes and with the added pics we can move on to your badge!!! Quote Link to comment Share on other sites More sharing options...
It's_a_troop Posted December 4, 2014 Author Report Share Posted December 4, 2014 Cheers Steve, I'll get onto those recommendations asap, I'm away this weekend , but I'll have it sorted early next week. Cheers Jay PS thanks for the tip on the side shims 1 Quote Link to comment Share on other sites More sharing options...
gazmosis[501st] Posted December 4, 2014 Report Share Posted December 4, 2014 There is no rush and we aren't going anywhere. !! Good luck! Quote Link to comment Share on other sites More sharing options...
It's_a_troop Posted December 5, 2014 Author Report Share Posted December 5, 2014 (edited) OK, got a chance to fix the E11, and have added other photos. My mesh is glued on, I used the tape to hold it place and just left it there. I'm about to deck out the helmet interior this week, (I have evilboys helmet fans and helmet new padding) getting it ready for my first troop next weekend. Cheers Jay Edited December 5, 2014 by It's_a_troop Quote Link to comment Share on other sites More sharing options...
gazmosis[501st] Posted December 6, 2014 Report Share Posted December 6, 2014 Thank you for the quick follow up, Jason!!! All requirements have been met so I would like to congratulate and welcome you to EIB!!!!! Nice work! Quote Link to comment Share on other sites More sharing options...
It's_a_troop Posted December 6, 2014 Author Report Share Posted December 6, 2014 Yes yes yes,,, thanks mate and thanks to everyone who jumped on the thread and gave me some tips 1 Quote Link to comment Share on other sites More sharing options...
I'm Batman[501st] Posted December 6, 2014 Report Share Posted December 6, 2014 Congrats Jason Quote Link to comment Share on other sites More sharing options...
Dougal[501st] Posted December 7, 2014 Report Share Posted December 7, 2014 Congrats Jason! Sent from my iPad using Tapatalk Quote Link to comment Share on other sites More sharing options...
Snaps[TK] Posted December 7, 2014 Report Share Posted December 7, 2014 Congrats and welcome to the EIB ranks! Quote Link to comment Share on other sites More sharing options...
It's_a_troop Posted December 7, 2014 Author Report Share Posted December 7, 2014 Thanks Sith Lord congrats to you too mate and thanks Dougal. 2 Quote Link to comment Share on other sites More sharing options...
It's_a_troop Posted December 7, 2014 Author Report Share Posted December 7, 2014 Thanks slagen Quote Link to comment Share on other sites More sharing options...
Sly11[Admin] Posted December 7, 2014 Report Share Posted December 7, 2014 Congrats Jas, welcome to the ranks. Sent from my iPad using Tapatalk Quote Link to comment Share on other sites More sharing options...
Sly11[Admin] Posted December 7, 2014 Report Share Posted December 7, 2014 Congrats Jas, welcome to the ranks. Sent from my iPad using Tapatalk Quote Link to comment Share on other sites More sharing options...

Recommended Posts
Join the conversation
You can post now and register later. If you have an account, sign in now to post with your account.