heradox[TK] Posted September 13, 2013 Report Share Posted September 13, 2013 (edited) Armor = TM Helmet= TM/handpainted myself with masking templates from trooperbay Blaster= doopydoo complete kit Height = 189cm Weight = 76kg Boots = TK Boots Canvas belt = trooperbay Hand Plates = TM Electronics= Aker Amp (Model 1506) & IComm Neck Seal = Darman Holster = made myself Armor Photos Full Body Front Full Body Back Full Right Full Left Armor Detail Photos Right Side Detail Left Side Detail Abdomen Details Interior Strapping Arms Strapping Helmet Detail Photos Front Side Back Hovi Tip Lenses (backlit) [old tube stripes] Tube Stripes Accessory Photos Neckseal Ammobelt Back Thermal Detonator Back Gloves Blaster Right Blaster Left Blaster Back (D-Ring) Action Shot I'm looking forward to your opinions and advices. I have changed the photos in this post and deleted the outdated ones in order to keep everything clear. Edited October 6, 2013 by heradox Quote Link to comment Share on other sites More sharing options...
The5thHorseman[TK] Posted September 13, 2013 Report Share Posted September 13, 2013 What an impressive armor you have here !! It's very pleasant to see a so well fitted armor (except the biceps a bit too wide). BTW everything looks so accurate that i've been surprised you installed a mesh on your lid. Also, your helmet stands very high on your head, maybe too much padding inside. Still your armor is wonderful ! Good luck! Quote Link to comment Share on other sites More sharing options...
gmrhodes13[Staff] Posted September 13, 2013 Report Share Posted September 13, 2013 Looking good, the only thing I would comment on is position of some of the armor, your back plate seems to be squashing out a little, perhaps some padding behind the ab plate to help push it forward, the gap around your elbows is a little large, could bring your biceps down a little, also the ab plate and belt are on an angle, just try to straighten everything up a bit. Good luck with approval Quote Link to comment Share on other sites More sharing options...
heradox[TK] Posted September 13, 2013 Author Report Share Posted September 13, 2013 Thank you guys. Well TM Armor is just a charm to work with. I want to thank Paul as well. He always answered swift and helpful to my noob questions. I can't really recall if the pictures were taken before or after I made some modifications to the padding inside the helmet (like making it thinner). Without padding it would fit the best (in terms of height)...but then the padding would be gone. Yes, the mesh...it's kind of silly, but i just wanted to prevent people from seeing into my helmet. Of course, adding some padding to the ab plate...thanks, I will definitely try that. Since I'm a bit too skinny for my torso armor, I was already thinking of trimming a bit off at the side of the kidney and ab plate. But with padding I don't have to alter these parts (what I didn't really wanted to). That is also the reason for the angle of the belt and ab plate. Since the blaster is in the holster on these pics, the additional weight was pulling down on these parts... Quote Link to comment Share on other sites More sharing options...
gazmosis[501st] Posted September 13, 2013 Report Share Posted September 13, 2013 I can't wait til I have the pleasure of working with TM armor. Yours looks incredible. The only thing I noticed is that you might have your tube stripes on backwards. It looks like you used the hand painted templates. The last tubes strip towards the front of the helmet is supposed to bend outward. You have it bending inward. Although Trooperbay doesn't mark the stripes (or templates) left and right, he has them on the sheet positioned per the side they go to. (IF YOU USED TROOPERBAY"S TEMPLATES) Quote Link to comment Share on other sites More sharing options...
troopermaster Posted September 18, 2013 Report Share Posted September 18, 2013 Great job on the build! Considering your height, I think everything looks awesome. Well done Quote Link to comment Share on other sites More sharing options...
Locitus[Admin] Posted September 18, 2013 Report Share Posted September 18, 2013 The ejection port protector sits a little too much forward. But other than that you look great. Quote Link to comment Share on other sites More sharing options...
heradox[TK] Posted September 18, 2013 Author Report Share Posted September 18, 2013 (edited) Now I see it with the tube stripes...you're right. I must have mixed up something in the heat of battle...or I just didn't saw it back then. As for the ejection port protector: I realised it as soon as everything was glued together and fully dried. I didn't manage to get it apart and stopped trying because i feard breaking it. I know it's a heretical question (but before I risk destroying or scratching something and bevore I "attack" my helmet with paint thinner): Are the tubestripes and the ejection port protector a show-stopper for EIB or Centurion? Edited September 18, 2013 by heradox Quote Link to comment Share on other sites More sharing options...
Arnie_DK[TK] Posted September 18, 2013 Report Share Posted September 18, 2013 I believe the ejection port is a show stopper yes. Tube stripes... Ask Mathias. Otherwise I really love your build!!You should be able to "wipe" off the tube stripes with a cloth and a bit of acetone. However be very carefull, as the acetone really could ruin your helmet if left on. I suggest you try on a scrap piece of plastic first, just so you get the feeling for it Quote Link to comment Share on other sites More sharing options...
FunkyTrigger[TK] Posted September 23, 2013 Report Share Posted September 23, 2013 Your pictures are not showing in this EIB application.I have not seen your tube stripes pictures, but if they were the wrong way round, they would indeed be a show stopper Quote Link to comment Share on other sites More sharing options...
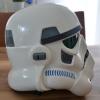
heradox[TK] Posted September 23, 2013 Author Report Share Posted September 23, 2013 Here is a close-up of the unaltered tube stripes. But the way it looks, it would only be necessary to change the first 3 to 4 stripes? Quote Link to comment Share on other sites More sharing options...
Arnie_DK[TK] Posted September 23, 2013 Report Share Posted September 23, 2013 Seems like it. The rest of the stripes look fine to me Quote Link to comment Share on other sites More sharing options...
heradox[TK] Posted September 23, 2013 Author Report Share Posted September 23, 2013 In order to speed things up a bit here are the pictures of the fresh painted tube stripes. (I know I still have to clean them up. But I won't be able to do so until they are dried) Quote Link to comment Share on other sites More sharing options...
Arnie_DK[TK] Posted September 23, 2013 Report Share Posted September 23, 2013 Looks better already Quote Link to comment Share on other sites More sharing options...
FunkyTrigger[TK] Posted September 25, 2013 Report Share Posted September 25, 2013 I've been waiting to see if you were going to submit pictures of you with your helmet sitting lower at the back of your head and with your blaster ejection port moved back. It doesn't appear forthcoming I am happy with your hand painted tube stripes. Happy with your backplate and wonky TD on your belt. Your biceps look fine to me in size, proportionate to the rest of your build and body. All I'm all, there is nothing here really to prevent you from an EIB award. Congratulations. If you have time to correct your blaster and post up new pics of you with your helmet padding corrected then please add them to this thread. Quote Link to comment Share on other sites More sharing options...
heradox[TK] Posted September 25, 2013 Author Report Share Posted September 25, 2013 Thank you. I was planning on taking a whole new set of photos with all the corrections (I'll be needing them anyhow for centurion application). But since I won't be able to work on my armor for about two weeks I can't promise anything. Thank you in advance for your patience. As for the blaster...any recommendations on how to dissolve zap-a-gap without breaking everything [i'm kind of desperate because I don't want to destroy my blaster]? Quote Link to comment Share on other sites More sharing options...
Arnie_DK[TK] Posted September 25, 2013 Report Share Posted September 25, 2013 I think you can do it with a hobby/xacto knife, and some carefull work. Then sand, attach and re-paint Quote Link to comment Share on other sites More sharing options...
FunkyTrigger[TK] Posted September 29, 2013 Report Share Posted September 29, 2013 EIB Banner, title and number assigned today. Quote Link to comment Share on other sites More sharing options...
gmrhodes13[Staff] Posted September 29, 2013 Report Share Posted September 29, 2013 Congrats and welcome to the ranks trooper, all the hard work paid off Quote Link to comment Share on other sites More sharing options...
Scorch1978[TK] Posted September 30, 2013 Report Share Posted September 30, 2013 Congratulations Trooper RegardsStephan Quote Link to comment Share on other sites More sharing options...
heradox[TK] Posted October 6, 2013 Author Report Share Posted October 6, 2013 Thanks everybody. I was kind of surprised when I got back from my holidays and already received EIB status. I thought you needed to see my updated pictures first. But hey, it doesn't really matter, I'm just so happy to be centurion status a step closer. I have updated the pictures in my first post. I hope this is okay for you? Quote Link to comment Share on other sites More sharing options...

Recommended Posts
Join the conversation
You can post now and register later. If you have an account, sign in now to post with your account.