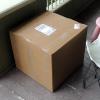
Techne[TK] Posted June 22, 2013 Report Share Posted June 22, 2013 Alright, I am very excited to start on my ATA ANH stunt build. I will be making it with the intent to go for EIB and Centurion. Here's the obligatory "brown box" and "all spread out" pics. It was very cool to see it like this. Intimidating but fun. Like everyone else, I am wary, to say the least, about making my first cut, but I know I just have to do it. Since I have all my other supplies, like the holster, belt, and gloves, I may actually do one of those parts first, just to feel like I got something done. Probably I'll attach the latex hand guards I got from Trooperbay to my gloves--that should be an easy first step! (I won't be using the plastic ones that came with the armor.) Right now, I am feverishly looking back through all the build threads, tutorials, and EIB and Centurion posts I've been reading over the past several months, taking notes! I'll probably actually start work in a couple days but wanted to get this thread started. One question for everyone before I start trimming: I know there's no return edge at the wrist and ankles. However, it's a little unclear to me how many parts actually REQUIRE a return edge. It seems to me that for many parts of the armor it is sort of up to the individual trooper's taste. So which parts MUST have a return edge? My impression is that the kidney plate (top and bottom), the top of the ab plate, the bottom of the chest plate, and perhaps the bottom of the back plate should definitely have returns. Is this correct? Anywhere else that needs one? I'm still looking at pics of the original screen armor but figured I'd ask now. Onward and upward! Quote Link to comment Share on other sites More sharing options...
ravinousbunny[TK] Posted June 22, 2013 Report Share Posted June 22, 2013 Someone correct me if I am wrong, but I do believe that no parts REQUIRE return edges, it is all personal choice and a matter of comfort and if you are using the original style strapping with the hooks and loops on the armor. I would say since I am not 100% sure you can always leave on a little bit of an edge and trim it later. Though on my build thread a guy made the comment saying that it was a matter of choice. I actually trimmed of all the return edge on the tops of biceps and both ends of forearms. I left it on the chest, ab, back, kidney, and butt. Might trim some around the neck for comfort though. Have not started on the thighs or shins. Quote Link to comment Share on other sites More sharing options...
Techne[TK] Posted June 24, 2013 Author Report Share Posted June 24, 2013 Someone correct me if I am wrong, but I do believe that no parts REQUIRE return edges, it is all personal choice and a matter of comfort and if you are using the original style strapping with the hooks and loops on the armor. I would say since I am not 100% sure you can always leave on a little bit of an edge and trim it later. Though on my build thread a guy made the comment saying that it was a matter of choice. I actually trimmed of all the return edge on the tops of biceps and both ends of forearms. I left it on the chest, ab, back, kidney, and butt. Might trim some around the neck for comfort though. Have not started on the thighs or shins. Thanks Austin. What you did sounds about like what I was planning to do. Anyoen else with input on this question of return edges? Quote Link to comment Share on other sites More sharing options...
The5thHorseman[TK] Posted June 24, 2013 Report Share Posted June 24, 2013 (edited) My impression is that the kidney plate (top and bottom), the top of the ab plate, the bottom of the chest plate, and perhaps the bottom of the back plate should definitely have returns. Is this correct? I'd say correct ! You can add the top of the butt plate too. But you can trim these a little if you need to gain some flexibility, especially with the kidney plate to help preventing the sides to pop out. Preserve the return edges at the top of the thighs (You can trim the inner if you need it though). You do not want any return edge on the inner top of the forearms (it avoid pinches), and also, don't leave too much at the shoulder bells bottom for the biceps to fit in. The rest is really all yours to decide Edited June 24, 2013 by The5thHorseman Quote Link to comment Share on other sites More sharing options...
Techne[TK] Posted June 24, 2013 Author Report Share Posted June 24, 2013 I'd say correct ! You can add the top of the butt plate too. But you can trim these a little if you need to gain some flexibility, especially with the kidney plate to help preventing the sides to pop out. Preserve the return edges at the top of the thighs (You can trim the inner if you need it though). You do not want any return edge on the inner top of the forearms (it avoid pinches), and also, don't leave too much at the shoulder bells bottom for the biceps to fit in. The rest is really all yours to decide OK, thanks. Yes, I forgot about the butt plate. OK, I think I'm pretty much ready to trim. Next post should have some actual results! Quote Link to comment Share on other sites More sharing options...
Techne[TK] Posted June 30, 2013 Author Report Share Posted June 30, 2013 Trimming trimmming trimming, keep that dremel trimming, trimming trimmming trimming, plasTIC! (sung to the tune of Rawhide) I've been trimming a while now. It was difficult to figure out exactly what to cut and where, so I am very thankful for all the build and EIB/Centurion threads out there to look at for help, not to mention of course the great collection of movie stills on here. I've been worried about this step since I ordered my armor, and it was no surprise that it wasn't easy. But eventually I figured it out. What I was surprised at was how difficult the actual trimming process has been. I'd read up and watched videos on the various processes and tools people use, including score and snap, scissors, and dremel. I tried each one, and had difficulties with each one. However, I eventually settled on some that worked for me. This thread, by the way, will probably be a lot like my blaster thread, in that I expect to make a lot of mistakes, and plan to document them well, so that others can avoid them! In other words, this will probably be less of a "look at this awesome thing I did" kind of thread, and more of a "don't do this!" kind of thread. So first I tried just doing the straight-up score and snap. It worked fine on straight lines, but on curves, you're supposed to put these sort of "feeder lines" (that's what I call them, I don't know if they have a real name) that go from the outside up to the score line, whereever the score line changes direction or curves. That way the plastic breaks off at both the main score line and also at the feeder line. But those feeder lines pretty much have to be all the way through, not just scored, as far as I can tell, and that's a pain in the butt to do with a utility knife. So I eventually stopped that and switched to cutting everything with scissors. When I got them, I saw that tin snips seemed to be popular, and got some. However, I got them at the hardward store, and couldn't find any with curved blades, so I just got the straight ones. This turned out to be a mistake. The tin snips cut through the ABS just fine. However, the thick blades are hard to get in there when you're turning a tight corner, and it made some nasty looking cuts (below)--stuff I can sand out, especially since I was just doing a rough cut, but still annoying. The curved, thinner blades of lexan scissors seem like they would work much better. Also, and worse, the tin snips I have (something like this) have a big nut on the outside of the joint, and that nut has sharp edges that put some royally big gouges on the other side of the armor while I was cutting (below)--which was unfortunately on the outside of the armor. I was not so happy to see this. I guess I will have some fun with ABS paste when I'm done. I tried to find some of the curved lexan scissors, but couldn't find any for sale around me, and didn't want to wait while I ordered a pair. So I moved on to another technique. I tried a dremel next. I was pretty happy with my dremel usage when I made my blaster, so I figured this would work out decently. However, I was out of practice and made some crappy cuts with the cutting disc. I was a little too loose with it and got close to screwing up some sections, and quit while I was ahead. I went back to score and snap, but this time I cut the feeder lines with my scissors. This turned out to be a good technique (and may be what most people do when they score and snap, I just didn't think of it right away). The snips cut the feeder lines easily, and the rest of the scoring and snapping finally went well. Here's an example, showing a slightly-curved area. Through all of this, I tried to be very conservative in what I actually cut off, under the theory that it's pretty hard to add new plastic back on if I make a mistake. I basically did a rough cut, then a more precise cut. Then I dremeled or sanded it down. This means that I trimmed the whole darn thing two or three times each, which made for a lot of extra work. But it was a learning experience, and now at least I know what I'm doing. If I ever make another suit of armor for some reason, I will be ready! When it came to the final dremeling down to the actual line, I used a sanding cylinder. I'm more of a shaper than a precise cutter, and the sander worked better for me than a cutting disc. (This is kind of an aside, but I first started thinking about how some people are slow shapers and some are precise layout people when I read How to Draw Comics the Marvel Way back as a kid. Stan Lee and John Buscema talked about how some people draw comic characters by sort of loosely scribbling out the shape and slowly refining the details, while others start in one spot, draw that part exactly, them move on the the next part, draw that exactly, etc. I'm the first type; I can't cut a precise line right off the bat, but I can smooth one out after repeated applications of my tool. So the sanding cylinder is my friend.) Anyway, I got back on the horse when it came to my dremel, and I shaped all the rest of the lines down to their final point. Now it's time to hand-sand them down so they're smoother. I did make an annoying number of slips with the dremel, so there are a lot of small scratches I need to sand and/or fill in. I'm not going to do a complete finishing-level sanding/polishing until I get further on in the build, however, in case I have to make new cuts for some reason. I'm also skipping the helmet for now, I'll do that last after I've got my techniques all down. It's the part people will focus on the most, so I want to make sure I get it right. I expect I'll spend a few more days sanding, then it's time to connect the arms and legs. Just keep trimming, just keep trimming, just keep trimming.... Quote Link to comment Share on other sites More sharing options...
meanders[TK] Posted June 30, 2013 Report Share Posted June 30, 2013 Just keep trimming, just keep trimming, just keep trimming.... Yep! There's a lot of that. You should go ahead and get a pair of curved Lexan scissors before you tackle trimming the helmet. The tin snips would be definite overkill there! The sanding or grinding tool on the Dremel works well for smoothing out the lot of the curved edges. Quote Link to comment Share on other sites More sharing options...
Techne[TK] Posted July 7, 2013 Author Report Share Posted July 7, 2013 (edited) I'm mostly done with the trimming and sanding now. I'm skipping any filling-in/sanding of scratches and gouges on the outside of the armor until I get farther along, so I can do it all at once. Next up will be putting my arms and legs together. Before I do that, I want to make sure I know which parts are which, especially which pieces are the right arm and which are the left arm. Below I've put together what I believe are, in this order, the right forearm pieces, the left forearm pieces, the right bicep pieces, and the left bicep pieces. Does it look like I have the correct pieces together, and that I have correctly identified the right vs the left? Right forearm (straighter sides): Left forearm (curvier sides): Right bicep (straight edges in underarm area): Left Bicep (curvy underarm area): Hmmm, now that I look at these pictures I may do more sanding after all. Anyway, does it look like I have correctly identified the right vs left pieces? EDIT: Whoops! I just realized the two Tutorials sections on this site are not the same, and the one I hadn't looked at has a lot of very useful info (not surprising!). So I guess, based on the arms tutorial, I do have them paired up right. Edited July 7, 2013 by Techne Quote Link to comment Share on other sites More sharing options...
gmrhodes13[Staff] Posted July 7, 2013 Report Share Posted July 7, 2013 Yup looks good to me, great work too btw, research is the best help with building armor. Keep it up Quote Link to comment Share on other sites More sharing options...
Techne[TK] Posted July 14, 2013 Author Report Share Posted July 14, 2013 Yup looks good to me, great work too btw, research is the best help with building armor. Keep it up Thanks Glen. They really need to give you an official "upkeeper of morale" award! It helps to have your positive comments around. So, I finished putting the arms together. This went reasonably well although there were small hiccups along the way. I was nervous about making sure they fit snugly, but not too tightly. I cut the sides of the arms down a few times to make sure I didn't go too far. The first one I did was my right bicep. I cut its pieces down pretty close to the width of the canon cover strip size of 5/8" in the front, and it seemed like it might be too tight, so I was more careful with the others. At one point I considered adding an extra strip of plastic between the two halves of the back seam of the first bicep, to make the bicep larger again, but in the end it didn't need it. I did end up going back in and removing all the return edges on both biceps so it would fit more easily. It's snug, but not too tight even when I'm flexing. I made the back strip of each bicep 3/4" so they could fit. I have to say, my guns aren't exactly howitzers, so I do recommend that you be careful and cut the biceps down a bit larger than necessary at first to check the size. I cut 5/8" cover strips for both sides of both forearms. The left one is semi-loose on my arm, but the hole at the end is just big enough to fit my hand through (I do have big hands), so it couldn't be smaller. The right one is easier to fit my hand through, and is also way looser on my arm, which I understand is a standard characteristic of ATA armor. I'd like to cut it down a little more, but I couldn't, without removing the current bends/edges or making the cover strips too small. When it came to making the final cuts for the edges of each arm piece, I wanted to make sure they were pretty even. Measuring from the bend in the plastic was hard, because the arms curve along their length. I wanted to make sure the measurements were even all along the length. So I cut a strip of paper that was half of the width of the cover strips--5/16"--and laid that on the inside of the arm's edge. Then I traced along it to get the proper distance. First I tried to use a razor, but it was a little inexact so I eventually went with scissors. Here I am trying to cut it with a razor from a hand-drawn line. Then I switched to using a piece of paper to make the line and cut it with scissors. All taped up and ready for the final fitting. I used the strips of plastic I cut off the edges of the forearms and biceps as the interior cover strips. I cut the outside cover strips (again, mostly 5/8") from one of the rectangular sheets of ABS that come with the ATA kit. Since the sheet is nice and flat, it was much easier to use a ruler and do the score-and-snap to cut them to size. Here are both the interior and exterior strips, all labeled. Here's the process I used to glue the strips on. First I measured them again against the arms to make sure they were the right size. I clipped off the corners of the strips with scissors. I taped the two pieces of the arm together on the side I wasn't gluing. Then I put E6000 on the inside of both cover strips, plus on the surfaces of the arm that I was going to be gluing the strips to. I used a scrap piece of ABS to smear the glue. This process gave the E6000 a few minutes to dry, as the instructions suggest. Then I held the open side of the arm pieces together and placed the outside cover strip on top as closely as possible, but not worrying about being perfectly exact yet. I loosely put a couple pieces of tape on top of the cover strip, which also held the pieces of the arm together. Then I carefully moved the strip around into exact position, lifting sections of the tape when necessary. Once it was in position, I resmoothed the tape and got it tight, so the strip could no longer move. Then I put on more strips of tape, really pulling down to keep the strip against the arm. Then I put the inside cover strip in place, and taped it with two pieces an inch or so from each end. I figured the inside didn't need quite so much taping. Then I put a thin strip of tape over the ends of the arm, going from the outside to the inside, so that it snugly held down the ends of both the inside and outside cover strips. Then I used magnets and clamps to secure it all in place for 24 hours. All kinds of random clamping and magnets! Here you can see the tape I wrapped around the edge from the outside to the inside. All done! The E6000 worked just fine. I thought it was pretty easy to work with, both in application and clean-up (I got a few teeny bits that squeezed out, and was able to rub or slice them off). It seems like a pretty decent bond. When it came to magnets, I quickly discovered, as others have mentioned, that there is no such thing as too many. I had gotten some earlier, but ended up going out to get more. I had gotten some small rare earth magnets, but they were too small to help much, even when stacked. I couldn't find any other rare earth ones around me, but I found a bunch of ceramic ones at RadioShack. Out of these, some worked well and some didn't. The ones that did work were about 2" long and 3/4" wide. They were sold individually and were very strong. They can break, and they're dirty, so I wrapped them all in painter's tape, which worked well. The other ceramic magnets I got, including some thinner square ones, some wide circulars ones, and some small circular ones, weren't really strong enough. I wouldn't bother getting them. The good magnets are in the picture on top, the less useful ones below. I also had purchased several small clamps months ago, but their tips were too wide to fit in the cover strip channel inside, so I couldn't use them. For clamps, I mostly used a few C-clamps I had. I tried some larger clamps (yellow, below), pressing them against both sides of the arms, but that didn't really work, they slipped off pretty easily. Here's me trying them on. The shoulder bells didn't seem to fit well over the edge of the biceps (you can't really see it in the pic), so I'm going to need to look back at the pictures of how that's supposed to work. But generally speaking, they felt good. Wearing the underarmor actually helps compress my arms a bit and makes the biceps fit better too. I also tried on the chest plate and abs. I didn't take a picture, but it all started to look very real and I was excited. I also tried to see if my kidney plate would reach all the way forward to my ab plate, but it looks like I'll need a shim, which is annoying. I had been hoping to go shim-less. I've got a moderate gut, but even sucking my belly in so it's flat, the pieces were about an inch apart. Apparently I've got big ribs or something! Next up, the legs. I feel pretty confident about this having finished the arms. I just need to decide how I'm attaching the back of the calves--with velcro or hooks. I'm leaning towards hooks. Quote Link to comment Share on other sites More sharing options...
gmrhodes13[Staff] Posted July 14, 2013 Report Share Posted July 14, 2013 Thanks Chris I did receive an FISD achievement award only last month LOL, came as I shock, as far as I am concerned I am only giving back the I received when I first started. Everything is looking good ATA do have a large right forearm, I used some heat on mine to change the shape from round to oval, it made a nicer tighter fit, see how you go when you are all kitted up. Only other advice is to try round the corners on you're cover strips, will just stop them from catching on anything. Keep up the good work, you are going great Quote Link to comment Share on other sites More sharing options...
meanders[TK] Posted July 14, 2013 Report Share Posted July 14, 2013 (edited) Looking good. You could probably take a bit more off the return on the shoulder bells to get it sitting closer to the bicep. I also faced the same questions about how to secure the shins at the back. When I had the front strips on the shins they were wide open at the back. But I put them in some hot water to tighten them up and now they close on their own so I probably won't need velcro or hooks. I added some pics to my build thread. Edited July 15, 2013 by meanders Quote Link to comment Share on other sites More sharing options...
Techne[TK] Posted July 16, 2013 Author Report Share Posted July 16, 2013 Thanks Chris I did receive an FISD achievement award only last month LOL, came as I shock, as far as I am concerned I am only giving back the I received when I first started. Everything is looking good ATA do have a large right forearm, I used some heat on mine to change the shape from round to oval, it made a nicer tighter fit, see how you go when you are all kitted up. Only other advice is to try round the corners on you're cover strips, will just stop them from catching on anything. Keep up the good work, you are going great Oh hell, somehow I got in my mind that the edges of teh cover strips were cut at a 45 degree angle, but I see they are rounded instead. Oh well. More sanding! Looking good. You could probably take a bit more off the return on the shoulder bells to get it sitting closer to the bicep. I also faced the same questions about how to secure the shins at the back. When I had the front strips on the shins they were wide open at the back. But I put them in some hot water to tighten them up and now they close on their own so I probably won't need velcro or hooks. I added some pics to my build thread. I think I probably will cut more from the shoulder bell return like you said. It seems to be getting in the way. I like the water-bending technique you used on those calves, I noticed that mine were going to be angled out in the same way. I think I will go for hooks as insurance to keep them closed though. Hopefully I'll get a chance to work on this this weekend. Ah, real life, how you get in the way. In the meantime, I saw this article on the 501st on NPR! Quote Link to comment Share on other sites More sharing options...
Techne[TK] Posted July 22, 2013 Author Report Share Posted July 22, 2013 I rounded the ends of the cover strips on the arms and reduced the return edge on my shoulders. I also got some work done on the legs. I cut down the fronts, using a 7/16" strip of paper to measure out the correct distance on both halves of the legs. (7/16s being half of the total cover strip width of 7/8".) It went pretty smoothly. I cut four cover strips (one each for the fronts of both thighs and shins) for the inside and outside, using scrap for the insides. As I understand it, the shin cover strips go all the way from the top to the bottom, while the thigh strips go from the top down to the top of the bump at the bottom (i.e., not to the bottom of the bump). Hopefully this is true, since that's the way I did it. Here they are gluing up with their ridiculous jumble of random clamps and magnets. I'll do the backs once they are dry. When I was doing a very basic test fit, it seemed like I may need really huge cover strips in the back, which surprised me. I don't think my thighs are particularly thick. But it looked as though I may not cut off any of the extra material off the backs, which would give me a cover strip of about 2 inches or so. Maybe it will be different when the fronts are really attached. The shins look like they'll be more of a normal fit. Interestingly, I noticed that one thigh piece is an inch longer than the other one. Which leads me to a couple questions-- Do most people even out the length of the thighs? If so, I assume I would cut off the top and make a new return edge. Do you size your thighs so you can sit in them? Again, just with a very simple test fit, it seemed like the tops were going to jam into my hips pretty hard, and they would need to be somewhat wider than they need to be if I'm just standing. I'm 6'1", so I'm surprised the thighs jammed into me like that; I figure if they jam into me, they must be really bad on most people. I'd obviously like the ability to sit if possible, but I'm not sure if that's within normal parameters. Thanks for any answers. Quote Link to comment Share on other sites More sharing options...
gmrhodes13[Staff] Posted July 22, 2013 Report Share Posted July 22, 2013 I did make the tops match but screen versions had both, to me it just looked more finished. I made my thighs fit my legs, I can't fully sit down but can perch my back end onto a corner of a table or sit backwards on a chair. I also did not cut sections out of behind the thighs and tops of the calves and can still get up and down stairs. Keep up the good work Quote Link to comment Share on other sites More sharing options...
Techne[TK] Posted July 23, 2013 Author Report Share Posted July 23, 2013 I did make the tops match but screen versions had both, to me it just looked more finished. I made my thighs fit my legs, I can't fully sit down but can perch my back end onto a corner of a table or sit backwards on a chair. I also did not cut sections out of behind the thighs and tops of the calves and can still get up and down stairs. Keep up the good work Being able to walk on stairs and lean back on stuff...those sound like good goals! I think I'll go for that. I've spent the last few hours looking for good illustrations for attaching the backs of the shins using hooks instead of velcro. 5th Horseman and Evan_Loh had some that helped. Are there any other good ones out there that anyone would recommend? Quote Link to comment Share on other sites More sharing options...
TMacken[TK] Posted July 23, 2013 Report Share Posted July 23, 2013 Since this is ATA armor, you're most likely going to have to heat bend the left Ankle, it is extremely tight, and will give you problems every time you troop, if you don't stretch it out a bit. That was my experience, and I have 3 other garrison members with ATA that had to do the same thing. Quote Link to comment Share on other sites More sharing options...
Techne[TK] Posted August 19, 2013 Author Report Share Posted August 19, 2013 (edited) Since this is ATA armor, you're most likely going to have to heat bend the left Ankle, it is extremely tight, and will give you problems every time you troop, if you don't stretch it out a bit. That was my experience, and I have 3 other garrison members with ATA that had to do the same thing. Thanks for the tip. I don't have a heat gun and haven't tried any bending yet, but it seems like I'm going to have to go for it eventually. I haven't posted anything in a while but I've been getting a lot done. I feel like I'm getting close to the end. Not actually the end, but it's in sight! I'm going to break up my work into a few posts for the sake of time, so there will be one or two others soon after this. I finished the thighs, using enormous back cover strips--2"--and normal size fronts. It looks kind of silly, honestly, and I don't really understand why they're so huge. I don't think my legs are particularly large in girth. I used Glen's idea (above) of leaning/climbing stairs for fit. They're fairly tight. I was going to cut down the top of the right side to match the left, but for now I've put it off. I just got a gig in September I want to wear my armor to, and I want to finish the basics now, then do details after that. Then I finished the backs of the calves, using the hook technique. I covered the outside-half of each back with a cover strip. Then I made 3 straps out of white elastic, and folded over and sewed down the ends in a loop, then sewed a hook on the end. Then I made holes in the side that does not have the cover strip, underneath where the strip will come over and cover it. I glued down the straps with E-6000. It worked pretty well, although the strips do stick out fairly wide from the shins--you can sort of see it in the second picture. I know someone else mentioned this problem in their own build, but I have to find the thread again. Here are some threads that I used and looked at for ideas and help: http://www.whitearmor.net/forum/topic/16324-shin-closure-discussion/ http://www.whitearmor.net/forum/topic/7123-fbjs-new-armour/page-3?p=142828#entry142828 I attached the thigh ammo pack and the sniper knee plate. The thigh ammo pack went on fairly easily. I had read that its bumps are off-center--3 to the inside and 2 to the outside. When I placed it against the leg, it was clear that this was true--the pack runs neatly from one bend/corner in the bottom of the thigh to the bend/corner on the other end, so it obviously is supposed to fit in that space--and if you do fit it in that space, then the bumps are off-centered just as described. I cut the bottom corners of both sides using a spray paint can, as described in the How-To. Then I riveted the ends to the thigh using split rivets and washers. This was the thigh ammo pack thread I used the most: http://www.whitearmor.net/forum/topic/19085-where-should-i-attach-my-thigh-ammo-belt/ I was surprised how easy it was to fold down the legs of the split rivet. I've read how a lot of people had to really whack them down, but it wasn't too hard. I put the corner of a flathead screw driver in there, and just bent it to one side and then the other, giving me a pretty solid 45 degree angle on the legs of the rivet. Then I knocked them down the rest of the way with a small hammer. The sniper plate was more trouble. There's not a lot of surface contact area between the plate and the shin. I managed to glue up the back face of the plate and the very ends of each arm, then clamped it all down. Hopefully it will stay put. I think it's probably enough. But it was hard figuring out exactly how to fit it. There's a gap at the bottom center, and annoyingly the two arms look uneven. They're actually the same length, but one goes all the way to the corner angle of the shin, and the other doesn't--because the shin's sides are themselves uneven. I think I cut the sniper plate arms down a while ago, long before I tried to fit it to the shin, and it was probably a mistake to do this. I should have fit it, then cut the arms to fit, instead of just making them equal lengths. Overall, its fit doesn't look perfect--the angle of the plate and the angles of the shin don't quite match, which you can barely see in the pics below--but it's the best fit I could come up with, and couldn't be any better than it is, at least from what I could figure out. The Sniper plate threads I used the most were http://www.whitearmor.net/forum/topic/19178-sniper-plate/ and http://www.whitearmor.net/forum/topic/20782-sniper-plate-for-centurion/ I also glued the buttons onto the ab plate and I glued the plastic shoulder straps on. I've seen people mention that it's ideal to have 5 or 6 bumps on the front, but the curve didn't seem to fit the chest right that way, so I made it 3, which also makes it more evenly divided between my front and back. More to come later... Edited August 21, 2013 by Techne Quote Link to comment Share on other sites More sharing options...
Techne[TK] Posted August 19, 2013 Author Report Share Posted August 19, 2013 (edited) I made my snap "plates" out of elastic. Now that I've done it, clearly I should have used weaving instead, because it does retain a bit of stretchiness. But they're alright as is. The snaps (Dritz, which I got from Trooperbay...I know the Tandy snaps are supposed to be better but I got them before I found that out) were originally not too bad to put together. But I ran out of them and had to get more, and for some reason, the Dritz 24s that I got at the store were slightly different, and were more of a pain to put together, and eventually I realized I had to get a different tool. I tried the technique of riveting through the back of the snap in addition to using the normal snap back, as seen in the pic below, and sometimes this worked (mostly with my originals) and sometimes it didn't. I didn't want to just rivet it, without the snap back, because I was worried the rivet back was too small and might pull through the elastic. Some of them have come apart and I've had to redo them. Long story short, they do all work now. I've glued most of the snap plates into place on the armor. I put tape on the back of the snaps since I've heard that E-6000 can react badly to metal and heat up. I don't know if that's true, but figured I wouldn't take a chance. The elastic is a bit hinky to work with. I've been pretty careful about measuring the lengths I need, but it stretches more than I expected and now it's all off a bit. Some of this is OK, but some I'm going to have to fix. I suppose if I had used double-thicknesses of elastic it might have worked better and stretched less. I think my fix is going to be either sewing a second thickness onto the center of each strap (instead of making them all over again, since those snaps are expensive), or folding the straps up a bit in the middle and sewing them, essentially shortening them.If I did it all over again, I probably would have made some adjusters for several of the straps, as many people have done. All this has made me realize why so many people seem to make more than one set of armor...I kind of want to make another one just so I can apply everything I've learned the first time around! For snaps and straps, these are the threads I used the most: http://www.whitearmor.net/forum/topic/21578-nylon-snap-plates-w-tandy-line-24-snaps/ http://www.whitearmor.net/forum/topic/20999-howto-make-snap-plates-3-different-ways/#entry260207 http://www.whitearmor.net/forum/topic/24134-howto-make-easily-removable-snaps/ I attached the tops of my thighs to a piece of elastic that loops up around normal belt around my waist. Forgot to take a pic of this. I'll do one of all my strapping (which is fairly conventional) when I'm done.I've made almost all the straps except the sides of the chest and the crotch. I may also add a strap between the bicep and shoulder bells. Ideally I'd like to use a bicep hook instead, but they way they fit on me the bicep hook may not quite reach where it needs to. I'm going to work on this later. I've been trying to figure out which way is up for my kidneys for a while. After I got the return edges all cut down to the size I wanted, I was able to figure it out. As seen here, if it's placed against the butt plate, the two are pretty evenly matched (right picture), but if it's upside down, there are two bumps on the sides that stick out from the butt (left picture). There is a weird fit thing going on between the back and kidneys though. On ATA armor, the lower corners of the back plate end up in points. It doesn't really lay flush against the kidneys--the points either hang past the kidneys, or you have to lift it up and leave a gap. The picture on the left shows the points, which are actually even bigger than they look here. You can technically get it to lay flush--as in the second picture--but in order to do so you have to angle the back plate way out in an unnatural fashion (third picture). This doesn't seem to be true for most other armor types, from what I can tell. I've been going through Centurion applications, and I've only noticed it on ATA (although I may be wrong). From the applications I've seen, it looks like people do not let the points overlap the kidneys, they leave a gap instead, so that's what I'll do. I made some side shims, which I really didn't want to have do. Unfortunately my ribs seem to be too wide to fit it otherwise. The shims are only 1" wide on either side. I made them out of the 2mm plastic that came with the kit. I attached them to the kidneys by gluing them to a wide flat piece that goes inside, then gluing that to the kidneys. Since they're 2mm, they project a bit thicker than the surrounding armor. I guess I'm going to cover this difference, and fill in the crack, with white silicone or something. The top two pics show the inside of the two shims, and the bottom pic shows one from the outside. I drilled the holes for the rivets into the shim, but since they're 2mm, and the other piece of flat plastic is behind them, the rivets only go a bit beyond the inside of the plastic (middle pic above). I couldn't use the rivets to attach the side straps, which I had wanted to do. So they're nonfunctional. This was the most helpful side shim thread for me: http://www.whitearmor.net/forum/topic/21690-side-shims-for-eib-and-centurion-question/ The fitting process was kind of an ordeal, I was happy to have the help of my wife and brother otherwise it would have been nigh-impossible to do on my own. I basically taped it in place, then measured the straps to fit. Getting the torso more or less fitted was a big step though--very exciting. It's starting to look like armor! Again, more to come... Edited August 21, 2013 by Techne Quote Link to comment Share on other sites More sharing options...
Techne[TK] Posted August 19, 2013 Author Report Share Posted August 19, 2013 (edited) OK, this installment gets me up to date. And it's almost all temporary screw-ups and backtracking. Oh well. I had originally planned on making my gloves/handguards first, just to get something easy out of the way. But it turned out that I had the wrong size gloves, and it took me forever to find some that were actually black and not just dark grey or blue-grey. Eventually I did, but then I noticed that my hand guards (the white rubber ones from Trooperbay) were actually off-white, and didn't really match the white of my armor. I researched how to paint them, and found some rather warmly-argued threads that debated whether or not it was possible. Looking out into the extended internet, most people agreed that for silicone (which I'm not totally sure they are), there's no good permanant painting solution. I decided to try mixing clear silicone with oil-based wood-block ink (on the supposition that the silicone would stick to the rubber, and that kind of ink is flexible and intended for use in fabrics etc). I sanded the rubber first. Unfortunately it didn't stick very well-- I could rub it off if I put a bit of effort into it. I eventually decided to just stick with the original color. Then I tried to glue them on. I tried a Loctite "vinyl, plastic, and fabric" glue, but it didn't work. Then I tried plain old superglue, and it has seemed to work so far. I'm not sure if I glued enough of the surface--should it stick out when I clench my fist like this, or should I glue more? Anyway I put them away in the "done" pile. Then I looked at them a few days later, and one of them had a mysterious light blue stain in the rubber--the same rubber I have heard can't be painted or stained! I have no idea where it came from, but it was really in there, it won't come out. So now I really had to paint them. I tried the straight-up woodblock ink (pic above) this time, and it seems to have actually worked reasonably well. I'm sure it will come off over time, but for right now it seems good. I left brush marks, so I'm going to sand back in and do another coat. The top pic shows the stain, and the bottom pic is my new painted version. Here are some of the various hand guard painting threads. Glen's gave me the idea to go with printing ink. http://www.whitearmor.net/forum/topic/24528-how-to-paint-flexible-latex-hand-guards/ http://www.whitearmor.net/forum/topic/24545-how-to-paint-handguards-another-option/ http://www.whitearmor.net/forum/topic/24531-how-to-repair-and-repaint-flexible-stormtrooper-handguards/ http://www.whitearmor.net/forum/topic/20828-howto-paint-accurize-and-weather-latex-hand-guards/ Then it was on to the thermal detonator. I painted a 2" tube with grey primer (except the part the caps cover, since they fit very tightly) and glued on the control panel. I also drilled a small hole in the back, which I saw someone else do somewhere--basically it keeps it from making a vacuum so it's easier to get the caps off. Then I started making the metal clips. I used the measurements in TK-Leper's thread, making them about 10" long--knowing I would cut them down later, this is much more than necessary. I drilled in the holes, 1" and 2.5" from the top as in his video. I burnished them with steel wool--I also used a bit of metal sandpaper, but this seemed to not be very necessary. I have to say, I've never used steel wool on metal like this before, and I was really impressed, it really buffed it up nicely! Then I attached them and bent them around as necessary. (Using slotted, pan-head, black-painted screws since I can't find any actual black ones around me.) However, I realized that when I did, the second screw was under the bent-over clip part, and I knew that wasn't right. So I looked back at pics of the detonators used in the movies, and realized that the first screw is actually almost right at the very end, not an inch from the end. It ended up being a good lesson in paying attention to the original suits vs other builds. I had been looking at those same pics before, and even drew it out in a sketch the correct way ahead of time, but somehow that all went by the wayside. The pics below show my incorrectly-placed screw holes. The pics below are from FISD's photo references and show the correct screw placement: So I made another set with the correct screw placements and attached them. I also switched to a slightly smaller screw from what you can see in my own pictures above, in order to match the pics from the FISD archive. Except this time I was an idiot and attached them going in the wrong direction. So I have now taken them off, filled in the holes, and am waiting to paint them and attach them again in the right direction.Meanwhile I managed to scratch up the control panel and get steel wool filings in it, making it look dirty. Sigh. Anyway, besides these screw-ups it's been coming along well. After this, I have to finish the side and crotch straps, fix the thermal detonator, do the belt and holster, and then of course the helmet. A fair amount of work, but I'm feeling close! Also, like I said above, I'm going to come back into these last few posts soon and add links to the threads that I used for help and ideas. Edited August 21, 2013 by Techne Quote Link to comment Share on other sites More sharing options...
Techne[TK] Posted August 21, 2013 Author Report Share Posted August 21, 2013 (edited) Alright, I tried to sand down the handguards's brush strokes, but that didn't really work. It pulled it off the rubber to an extent. But I am actually kind of liking the look of the strokes now. I did another coat and it looks pretty decent. I also finished the thermal detonator. God almighty I hate that accursed thing, blackest of all the foul objects in the galaxy. I last left you with my having first screwed the clips with the screws in the wrong place, and then having made a second set with the rest of my aluminum, I went ahead and put them on upside-down. So I fixed all the holes and paint, and put them on right side up. But this time I wrestled with the bending more than the first time for some reason and couldn't get it right. And when I was trying to fine-tune the bends, I again broke one of them. Son of a motherless goat. Anyway, I went back to the hardware store for the millionth time and got another piece of aluminum. I made a third set of clips. And they worked. In the process, I have managed to get steel wool dust everywhere, and my t-det is dirty as hell. I am going to have to scrub like crazy later. Here it is in all it's "glory." Oh, and TMacken was totally right, I tried on my shins with my boots and I am definitely going to have to heat-bend my left ankle. And, I also decided I might have to move my plastic shoulder straps forward (to more like 4 or 5 bumps on the chest) after all. The way it sits it's cutting into my throat. And...any opinions on any of this would be happily received. Especially on the weird points at the bottom of the ATA back plate, the way I did the side shims, or the sniper plate. Edited August 21, 2013 by Techne Quote Link to comment Share on other sites More sharing options...
meanders[TK] Posted August 21, 2013 Report Share Posted August 21, 2013 I've been trying to figure out which way is up for my kidneys for a while. After I got the return edges all cut down to the size I wanted, I was able to figure it out. As seen here, if it's placed against the butt plate, the two are pretty evenly matched (right picture), but if it's upside down, there are two bumps on the sides that stick out from the butt (left picture). There is a weird fit thing going on between the back and kidneys though. On ATA armor, the lower corners of the back plate end up in points. It doesn't really lay flush against the kidneys--the points either hang past the kidneys, or you have to lift it up and leave a gap. The picture on the left shows the points, which are actually even bigger than they look here. You can technically get it to lay flush--as in the second picture--but in order to do so you have to angle the back plate way out in an unnatural fashion (third picture). This doesn't seem to be true for most other armor types, from what I can tell. I've been going through Centurion applications, and I've only noticed it on ATA (although I may be wrong). From the applications I've seen, it looks like people do not let the points overlap the kidneys, they leave a gap instead, so that's what I'll do. This looks OK to me. I set up the kidney plate as you have it in the top right photo, so the curves of the top of the butt and bottom of the kidney match. There's also a slight groove on the kidney so the butt plate sits nicely in place. There is a bit of an angle between the back and kidney plate. This is how mine turned out. I've got the back of the kidney sloping out top to bottom. That's how it fitted after a lot of trial and error and masking tape to see how everything fitted. I ended up trying to fit as best as possible before trimming the kidney sides and gradually taking off the kidney and ab sides until it all came together. The right side photo you have above has the kidney back more vertical. But its how it fits on you that's important. Its hard to see from simply just looking at the pieces by themselves. Quote Link to comment Share on other sites More sharing options...
Techne[TK] Posted August 22, 2013 Author Report Share Posted August 22, 2013 This looks OK to me. I set up the kidney plate as you have it in the top right photo, so the curves of the top of the butt and bottom of the kidney match. There's also a slight groove on the kidney so the butt plate sits nicely in place. There is a bit of an angle between the back and kidney plate. This is how mine turned out. I've got the back of the kidney sloping out top to bottom. That's how it fitted after a lot of trial and error and masking tape to see how everything fitted. I ended up trying to fit as best as possible before trimming the kidney sides and gradually taking off the kidney and ab sides until it all came together. The right side photo you have above has the kidney back more vertical. But its how it fits on you that's important. Its hard to see from simply just looking at the pieces by themselves. Hmmm, I see what you mean. If you angle the kidney plate, the back plate doesn't need as much of an angle. It does look good on yours. I'm not sure I can do that now that I've added the shims, but I'll play around with it. Thanks. Quote Link to comment Share on other sites More sharing options...
Techne[TK] Posted August 26, 2013 Author Report Share Posted August 26, 2013 I finished all the strapping in the body. As I've said before I may shorten some of the straps later on, but they're at least OK now. The sides don't pull together quite as much as I'd like, but with the belt they're not bad. (note to self--I still need to take a picture of the strapping!)I made the belt. First I riveted the plastic part onto the canvas part, then I attached snaps onto the canvas part and the torso armor so the belt will stay in place. This was probably the backwards way to do this; I should have done the armor snaps first, then attached the plastic belt, as you'll see, but it all turned out fine in the end.To attach the plastic belt, I put rivets through its center and sides. The side rivets lined up with the top of the beveled corners of the plastic part of the belt. I just measured their location on the plastic belt, then found the center of the canvas belt and lined it up correctly with the plastic, and drew the lines onto it where the rivets should go. I clamped them together, then carefully drilled holes through both layers at once. Then I just put in the rivets. Canvas clamped to plastic, and rivets inserted: I lined the belt up on the armor, and drew a pencil line on the armor where the top of the belt was, and the side-to-side location where the snaps should go (in the middle of the first box on either side, as based on Billhag's schematic). It was clear from looking at the armor that I couldn't put the snap halfway down the belt because of the shape of the armor. So I put the snap only an inch from the top of the belt--I measured an inch down on the armor and drilled a hole there. I put the male snaps in the armor. Then I measured an inch down from the top on the belt itself to attach the female snaps. Belt clamped to torso, then mark made on torso: Putting the female snap on the canvas belt was a problem, because you normally have to pound the two halves of the snaps together on a hard surface, and since the canvas belt was already on the plastic belt, and that spot on the plastic belt was hollow, I couldn't really pound the snap pieces together--there was nothing to pound against. But I was able to fit a piece of scrap metal in between the canvas and plastic and pound against it, and it worked. (Actually the metal was so-so, and I substituted a piece of wood, which worked better--but I didn't take a picture of that.) Metal strip under canvas so I could hammer the snap: I hammered the rivets flat, as seen below, so the squares would fit over them later. Here's the snap locations, and the belt snapped in place: Just in case it helps anyone, I made this simple diagram. I've been confused for a while as I've looked at various people's back-of-the-belt pics, trying to figure out what attachment device was for what. So this is how I did it. I'm sure there are other ways too. Then I glued on the squares over the squashed rivets on the front. I attached the drop boxes so there's about a quarter of an inch of elastic visible between them and the belt, and so that their exterior sides were lined up with the ends of the plastic belt.I made a loop with the elastic and looped it over the top of the canvas belt, then glued the top layer of the elastic to the belt so they would stay in place. I riveted the tips of the straps to the back of the boxes.To make the backs of the boxes, I just cut out a flat piece the size of the hole in the back. But I was worried the back plate wouldn't have enough surface area to attach--especially since the edges I cut weren't perfect matches to the hole. I know some other people have made sides to support the back so becomes like half a clamshell box, and then inserted the whole thing into the front boxes, but since the sides of my boxes aren't perpendicular to the front (they're angled towards the front), that wouldn't work. So I cut up a stack of flat pieces of ABS and made a column of them, gluing them all together and then to the center of each box. Then I glued the back plate to this column so it would stay at the right height, plus I glued around the edges as well. That seems to have worked quitel nicely. Top: the stack of ABS I put in the center of the box to support the back plate. Bottom: all clamped up. Belt done! On to the helmet! (I've wanted to use that icon for a long time!) Any comments or critques on any of this, or anything before, are welcome. Quote Link to comment Share on other sites More sharing options...
Rezablad3[TK] Posted August 26, 2013 Report Share Posted August 26, 2013 Looking good....keep up the great work... Quote Link to comment Share on other sites More sharing options...

Recommended Posts
Join the conversation
You can post now and register later. If you have an account, sign in now to post with your account.