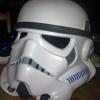
roony2311 Posted February 22, 2012 Author Report Share Posted February 22, 2012 Well,here`s my helmet :-) Its almost finished now..Just have to adjust the vocoder..Thank you all for the help you guys have given me with the helmet :-D Quote Link to comment Share on other sites More sharing options...
Sparrow Posted February 22, 2012 Report Share Posted February 22, 2012 Ears are such a challenge Quote Link to comment Share on other sites More sharing options...
NewTrooper2 Posted February 27, 2012 Report Share Posted February 27, 2012 (edited) And for filling in "spaced" ear gaps, I reccomened white tub and tile silicone in a squeeze tube like plumbing supply or Home Depot type stores sell. Won't shrink, dries very easily and smooth, can be worked into place with a wet finger, and is fully paintable. I used it on my wonky ears, and it blended them perfectly. I posted finished pics of my helmet in a few discussions on FISD...not too hard to find. Just a helpful hint, if you want smooth, flush, blended in ear caps. Some don't like them, and some do. Personal choice. Hope this helps. Anyways, here's a link to my final helmet pic. http://forum.whitearmor.net/index.php?app=core&module=attach§ion=attach&attach_rel_module=post&attach_id=3011 Sincerely, NewTrooper2 Edited February 27, 2012 by NewTrooper2 Quote Link to comment Share on other sites More sharing options...
Sparrow Posted February 28, 2012 Report Share Posted February 28, 2012 (edited) I did the same with mine. I botched one of my ears and then decided to flush the ear to the helmet, eliminating the seam. I really like the look of it. But I went for an idealized look as opposed to screen accurate. It is all personal taste. ----------- Edited January 17, 2021 by gmrhodes13 link not working, removed gmrhodes13 2021 Quote Link to comment Share on other sites More sharing options...
skyone Posted March 4, 2012 Report Share Posted March 4, 2012 (edited) right ear trimmed and installed, such a pain! i drilled three times before getting the best fit without ears my helmet would look like a groviera cheese ----------- now it's almost ready to get painted and stickers applied Edited January 17, 2021 by gmrhodes13 link not working, removed gmrhodes13 2021 Quote Link to comment Share on other sites More sharing options...
Mopar McNeer Posted March 5, 2012 Report Share Posted March 5, 2012 Nice Save!!! Quote Link to comment Share on other sites More sharing options...
skyone Posted March 31, 2012 Report Share Posted March 31, 2012 (edited) edit. Edited March 31, 2012 by skyone Quote Link to comment Share on other sites More sharing options...
ABS80 Posted April 1, 2012 Report Share Posted April 1, 2012 Thats why my AP helmet kits come with premarked holes, this simplifies the assembly quite a bit, people can still drill new holes to position ears and face plates to there prefference, but having premarked holes they have a good base to work with, my ear pieces also come with marked lines and with just a bit of sanding here they fit pretty good. Mark Quote Link to comment Share on other sites More sharing options...
skyone Posted April 1, 2012 Report Share Posted April 1, 2012 Thats why my AP helmet kits come with premarked holes, this simplifies the assembly quite a bit, people can still drill new holes to position ears and face plates to there prefference, but having premarked holes they have a good base to work with, my ear pieces also come with marked lines and with just a bit of sanding here they fit pretty good. Mark yep, i remember that, it was much easier to assembly Quote Link to comment Share on other sites More sharing options...
skyone Posted August 19, 2012 Report Share Posted August 19, 2012 (edited) this month i finally had time to finish to assembly my ATA armor actually at this time i am working on the helmet, armor and pvc blaster, included arduino electronic inside this is the helmet update ------------ i stil have to paint vocoder, add lenses, add the button on ears to paint the vocoder i will apply a mask and use spray gloss black Edited January 17, 2021 by gmrhodes13 link not working, removed gmrhodes13 2021 Quote Link to comment Share on other sites More sharing options...
Locitus[Admin] Posted August 19, 2012 Report Share Posted August 19, 2012 Nice job Manuel! Quote Link to comment Share on other sites More sharing options...
skyone Posted August 19, 2012 Report Share Posted August 19, 2012 thanks Quote Link to comment Share on other sites More sharing options...
Darth Ramsey Posted October 24, 2013 Report Share Posted October 24, 2013 To me the problem seems to be that your face plate to low. If you could remove ears and rivets, then position the face plate to where the eyes are just below brow trim it would fit the ears a lot better. Quote Link to comment Share on other sites More sharing options...
SCTrooper[TK] Posted October 26, 2013 Report Share Posted October 26, 2013 (edited) On 10/24/2013 at 9:19 AM, Darth Ramsey said: To me the problem seems to be that your face plate to low. If you could remove ears and rivets, then position the face plate to where the eyes are just below brow trim it would fit the ears a lot better. I think the brow is fine. In ANH the brows were higher on some of the stunts. This shot shows off the sexy face plate. Oh I almost forgot, Welcome Will. ---------- I am am big fan of the low brow, but when it comes to the stunt helmets the higher brow is it for me. Edited January 17, 2021 by gmrhodes13 link not working, removed gmrhodes13 2021 Quote Link to comment Share on other sites More sharing options...

Recommended Posts
Join the conversation
You can post now and register later. If you have an account, sign in now to post with your account.