Search the Community
Showing results for 'Hasbro' in content posted in ANH BlasTech E11.
-
Started to post some picks of my blaster build on the Terra Australis Garrison forum and thought I should post some here for outer towners Purchased my blaster a while ago, just got my doopey add on bits. Got most of my blaster bits together and separated the blaster with not a lot of damage. Going to put a few trick light bits into the blaster try to make it look more realistic when it fires. Also thinking of changing a few bits, length of barrel, trigger and guard. Got a couple of bits done, trying to make the hasbro look more realistic, more for me than anyone else. End of sight done still needs final paint, trimmed down blaster, made new trigger and cover, glued on one side so I can still separate if I need to Trimmed off old pipe, cut and drill the correct size one and glue it into the Hasbro housing. And here fitted with a few of the doopy resign parts. Just waiting for my laser pointer to finish assembling the blaster then on to paint. After finding power from the switch on the Hasbro was not as much as I wanted I decided to add and aditional swith which can take the full 3 volts and change the lights I was going to use highbright led's. Next after pulling apart my laser pointer I was left with the part identical size to what I needed to fit into the end of the blaster tip. This is the lights and you can just make out the laser light on the board, works great in the dark, will give the illusion that who ever you are firing at has the blast showing on them. A couple more bits made and glued on the blaster, next it's time to fill, sand and get to painting. Now in primer Next silver. Waiting for armor is like watching paint dry lol Still have to bend the ends of the T Track before I can apply the black
-
I recently recovered my son's Disneyland E11 blaster that he was about to sell in a garage sale and decided to mod it with a Doopydoo's conversion kit to make it a little more accurate looking and use it as my initial trooping blaster. Eventually I'd like to do a full kit and do an accurate ANH build, preferably one with a working folding stock, inner bolt and ejection port. But in the meantime I wanted to post what I had done with this conversion. Here we go... Here's the toy my son was getting rid of
-
 Hi brothers, after obtaining my EIB I decided to share my build of E-11 blaster. I had an old Doopydooed' Hasbro that I decided to rework as a heavy duty blaster while I was working on the main one (Doopydoos classic resin kit). Of course ma main reference for information and tips was this thread: https://www.whitearmor.net/forum/topic/ ... reference/ That's the Hasbro after I covered the screws, engraved the charging handle track and inserted the aluminium bar: Doopy's kit after the standard modifications on front sight, folding stock and engraving on the bolt. Bolts for the kit and for the Hasbro Counter on Hasbro was a printed one (calculating lens magnification and distortion) glued on a small tube. Counter on the kit was a real one. I used my son's birthday (that's also my TK id, sorta). The glorious power cylinders mod! On the paintjob: galvanized effect paint for the body, bronze for the scope, flat black for the counter: Final look of the blasters with a flat black over the previous hand, a bit of orange rusty effect and additional semi-gloss black on the handle. Some details: d-ring and spring Scope lenses were adapted from a small binocular that had cool red lenses. Hasbro has the usual trigger inside, the kit has a full free view (altough not useful as the binocular lenses were mounted reversed) Gli otturatori: Power cylinders! Top
 -
 So while I’m waiting on my armor, I decided to jump into doing a Hasbro build. This is my very first time doing something like this! I have a Hyperfirm, but I also wanted something with sound and lights for fun. So not only am I doing the Doopy’s kit overlay, but I’m upgrading the guts with a Hyperdyne Labs e-11 Blaster Upgrade, too. I don’t expect my blaster to end up super screen accurate, but I’m going to do my best to improve it as well as I can. Here’s some of my progress so far: I’ve been getting ideas from Pandatrooper’s Hasbro build: http://www.whitearmor.net/forum/topic/8838-pandatroopers-hasbro-build/ I used this youtube tutorial for a Hasbro conversion: https://www.youtube.com/watch?v=IDt7bM2p_3U And this youtube tutorial for the Doopydoos assembly: https://www.youtube.com/watch?v=hEwoSCEWRms Great info here, too: http://www.whitearmor.net/forum/topic/19872-dm101-doopys-e11-blaster-build/page-3?hl=%20dm101%20%20e-11 http://www.whitearmor.net/forum/topic/32111-fisd-e-11-blaster-reference/ To the build! Blaster before the upgrade: First thing, cutting off the ends of the scope to open the blaster up. Opening up my blaster was a royal PITA. I completely mangled the t-track on the top along the seam because it was completely CA glued on. I think it took me about a little over an hour to pry the entire blaster apart because of all the inside areas that had been glued together. I didn’t want anything major to break, so I took my time. It was very frustrating, and I almost gave up a few times. The feeling of victory when the pieces came apart was exhilarating! Here's the blaster after sanding and the scope cutting. Next, I decided that since I’d mangled the top t-track, I would just replace it. Which meant replacing all of them so they would match. I purchased a set of t-tracks from Marv, and will install them soon. Using my Dremel (which is the most amazing tool EVAR), I sanded off all the tracks. While I was at it, I decided that the backwards flash guards had to go. I gently cut them off with my cutting wheel to save as much of the pieces as possible. I will be gluing just one back on in the correct position on the right side only (because there isn’t supposed to be one on the left). I really didn’t like the Hasbro scope/counter combo, so I decided to 86 them entirely. Well, let’s be honest: I had mangled the sight of the scope when taking the blaster apart. I could have limped along and created a something to patch up the ends that I had cut off. But no. I couldn’t do it! I had purchased an extra scope and counter from Doopy’s when I bought my conversion kit, so ultimately, the decision was easy. I had a challenging time getting started with the first cut of removing the scope. There would be no turning back once I started! So, armed with my Dremel fitted with a cutting wheel, I took a deep breath, and…. Cutting the scope off left me with a gaping hole in the top of the blaster. See below. Scary! But, this will be an easy fix. I will cut out a piece of black ABS, carve it to the shape of the hole, and simply glue it to the top. It will be under the scope and painted, so it won’t really be seen anyhow. Pics of that to come soon. Then there was the issue of how to attach the scope and counter to the blaster. Hm. I didn’t want to glue them on because of how they would sit on the blaster. Plus, I didn't feel that they would be all that stable just glued on there. And I really wanted to have a ‘real’ metal scope rail on my blaster rather than the solid plastic piece (sad excuse for a scope rail) that currently exists. After careful examination, I found out that I could completely grind off the plastic scope rail on the Hasbro without losing integrity to the main housing of the blaster. So off it went. I wasn’t as terrified of this kind of slicing and dicing of the blaster as I was when chopping off the scope. It seems that the first cut is always the most difficult to do, right? I was about to drop yet more money on a pre-made scope rail when I discovered that I could easily (and inexpensively) make my own. Bill Hag is a god! http://www.whitearmor.net/forum/topic/4697-howto-make-a-metal-scope-rail-counter-bracket/ So off to Home Depot to pick up a few pieces of aluminum. I think both pieces cost me less than $10, and I’ve got enough material to make at least 2 scope rails with counter brackets. Sweet! Progress pics of that to come soon. I made some mods to the Doopy’s pieces. I cut off the pre-formed ‘button’ on the ammo box, and glued on a button that was included with the upgraded magazine (also purchased from Doopy’s). The e-11 Conversion Kit has a magazine that fits best with the Hasbro. The ‘Upgraded Magazine’ would fit well on a pipe build, or on something more authentic. I Dremeled out some areas of the folding stock piece to add depth. My carving skills need sharpening, though (see what I did there? Haha…). On a suggestion from Pandatrooper’s build, I added some rivets to the stock, too. Stupid me, I should have just removed the rivet pin first and then glued the rivet in the hole. So the pin is stuck in there now, and I don’t feel like drilling it out (just so my rivet can look a little better). Does anyone really notice rivets, anyways? I also decided to make my folding stock actually pivot off of the blaster so I can remove it if I ever have issues with my electronics. I drilled out this little X on both sides of the blaster. I had to carve out a notch in the handgrip so that the folding stock ends met up perfectly with the X parts of the handgrip. This seemed to take me forever to do! Once everything lined up perfectly, I then drilled holes in the folding stock itself. Using a 2” aluminum screw post, I pushed the post through, and VOILA, fully pivoting folding stock piece. Woo! Once this was installed, I added the front part of the folding stock and lightly glued it into place while it was snugly seated against the blaster. This made sure that there would be no gaps between the folding stock and the blaster once it had dried. The pic below shows that there is no light seeping through between the folding stock pieces and the barrel of the blaster. I will be using Pandatrooper’s method of securing the front of the stock to the blaster with a t-nut mounted inside the blaster and screw through the folding stock. I picked up an upgraded magazine clip from gazmosis. It took me a bit of sanding and shaping, but I got the clip to fit in the Doopy’s magazine nicely. Pics of that to come soon. Oh, and then there’s the Hyperdyne Labs e-11 Blaster Upgrade. So. Much. Pewpewpew! I can’t tell you how much I love this little light/sound setup. And the fact that it vibrates the blaster when fired is such a cool bonus. I took some tips regarding the installation of this kit from this Youtube tutorial for a Hasbro conversion (it’s near the end of the video): https://www.youtube.com/watch?v=IDt7bM2p_3U I Dremeled out some extra areas inside of the blaster so everything would fit better, and I added the popsicle stick for the trigger for extra stability. The kit is very, very easy to install. Even if you don’t know anything about electronics, you can install it within minutes. The only info that wasn’t included with the Hyperdyne kit was where to install the green/yellow/red status LED lights on the blaster. Using the video mentioned in the above paragraph, I saw where he had installed his lights, so I used that as my resource. Using a small drill bit on my Dremel, I gently drilled out three holes until they were large enough to fit the lights snugly near the hand grip. I’m still planning on drilling some holes on the left side of the barrel near the bottom and also adding a bayonet lug. My 7/16” drill bit arrives today, so that work will take place over the weekend. After that, the painting process begins (woo!). Can’t wait to get that started. Aaaand that's all for now, folks! Any tips/feedback is always appreciated!
 -
Hi guys! Like just about everyone else I've seen it's going to be a few months before I can start on my armor. So, in the meantime, I'm going to knock my blaster out. I decided to start out with a lower budget (if there actually is such a thing) build. Although not as screen accurate as the Disney model, I liked the look and feel of the Hasbro model much better (plus there seemed to be a lot more reference material and actual kits specifically for Hasbro). However, the sound from the Disney model was much better AND IT HAS STUN! So I'm going to use the electronics from Disney and mod the Hasbro. I have some basic modelling experience but this will be my first attempt at something of this degree. It's also my very first build thread so any tips, advice, critiques are definitely welcomed! My plan is as follows: Remove light/sound electronics from the Disney model Strip the Hasbro light/sound electronics Strip the Hasbro body of blatant inaccuracies Modify the Hasbro body as much as possible within it's structural constraints Install Disney electronics Utilize various resin pieces from Darth Hair's Etsy kit and 3D printed pieces from the Dsy-E-11 Shapeways shop Many thanks in advance to everyone that has already posted their various build threads. As a new member, this information is proving invaluable. Your Empire thanks you! Also for reference here is a link to Darth Hair's kit instruction video.
-
Hey all, I'm in the middle of a Hasbro DoopyDoos mod, and I've been following Brent's thread as reference here: http://www.whitearmor.net/forum/topic/18583-yahm-yet-another-hasbro-mod/page-2 I am a bit stuck now, though. I have a pipe all drilled out, but I need to know how far the barrel protrudes out of the gun. Does that make sense? Post #31 in Brent's thread is where I'm at currently (for reference): http://www.whitearmor.net/forum/topic/18583-yahm-yet-another-hasbro-mod/?p=228238 Anybody what to measure their E-11 for me? Thanks! SB
-
So I'm doing a Hasbro mod. My goals are to make an ANH EIB acceptable blaster, and learn as much as I can about building a blaster so I can do a scratch built or more accurate kit later. I'm new to most of the tools and techniques I will be using for this build so to a large degree this is a learning experience. I'll post what I've tried in this build thread so I can get some feedback from those that have done this before, and provide another reference to those that still want to try. Thanks to everyone who's posted build threads. I've looked at a bunch of build threads and every one has been an invaluable help for someone who's never done this before. A lot of the stuff on this forum is pretty inspirational and it's got me real excited to get in and start trying things. What I am using: Base: Hasbro blaster Add-ons: Doopydoos Hasbro modification kit (these have apparently changed over time, so I'll point out this one was bought in Jan 2012) Other changes I'm considering: Basic Doopydoos conversion Full set of barrel holes with a better t-track (I've already started cutting so I'm committed to this one now) Hollowed scope rail and sight Reshaping the trigger More lights in the barrel Metal hex screws in the front Some sort of improved rear scope end Helstringer wires Counter decal Reshaping other parts? Extending the barrel? Tools I'm using: Dremel 4000 E-6000 Bondo Sand Paper Spray Paint Exacto Knife Soldering Iron Misc. other (if you see that I'm using something interesting let me know and I'll add it to this list)
-
 Hey all, As a new builder, I thought it might be helpful to document my adventure and hopefully get some sage advice along the way. So here goes! I'll start with my thought process as to how I ended up here. After some research on different types of E-11 builds out there, I decided that I wanted: Something of relative ease for a novice (I'm doing this primarily to build my skillset before receiving my Anovos TK kit later in the year) Could be constructed with limited space/resources Light and not too fragile for future trooping Had electronics/sound (even if it's not the best) Taking all of that into consideration, the classic Hasbro mod seemed to be the best choice. I sourced a nice 1996 Hasbro from eBay with everything in working order, and I also lucked out on a Doopydoos restock and got a conversion kit relatively quickly. Even though the electronics of the Hasbro worked pretty well, one of the primary mods I wanted to do was replace the LED with something bigger and brighter. So, one of the first things I needed to do was crack the gun open. I started off by trying to pry off the ends of the scope with a flat end screwdriver (the results of my early foolhardy efforts are clear in the picture), until I landed upon a more sophisticated method of adding a hammer to the mix. The hammer worked very well for generally loosening it up; for the more stubborn parts of the scope with tons of fused glue, I switched out to an exacto knife which helped really dig into the crevices. For the scope and barrel tips, I used a dremel that I borrowed from a coworker. It made short work to the plastic, and bonus: the LED still worked! After a few hours of work, I was able to get everything out with relatively no damage to the gun. I got pretty lucky, and it came apart without much issue. Well, almost. It turns out that during the hammering process, something got loose and the sound stopped working. If anyone knows if I can repair this, let me know. Moreover, I put some undue pressure on the gun while dremeling and one of the t-track fins received a hairline crack. I have Bondo, JB-Weld PlasticWeld, and superglue at my disposal - would be happy to take any advice on how best to address this. In the mean time, I used 400 grit sandpaper to shave off the legal mumbo jumbo on the sides. It's decently even, but I do notice some scratchy parts that doesn't quite match the smoothness of the plastic - will this show when spraypainting? Should I get a finer grade paper? I think that'll do it for now. I really want to address the electronics and t-track crack first before I move on to larger business like drilling in the extra set of holes on the barrel. Thanks for reading, and appreciate any words of advice that may come!
 -
Hi everybody, I made an order at doopy for an hasbro kit but after 4 month(3rd of may) I haven't recive nothing, I send many and many mails, to different address, but no answer, and my order result ever pending....I need this kit, but I don't know how, an especially when[emoji35][emoji35][emoji35] all the pepole say to my " be quiet" he arrive, but now I've lost the hope Inviato dal mio iPad utilizzando Tapatalk
-
In common with a great many of you now and in the past I am awaiting the arrival of the BBB in Q1 2017 (from ANOVOS) and am going to tackle an initial build of an E11 blaster to practise build skills. I initially bought a Disney blaster from Amazon thinking that would be the easiest base to source....then found a Hasbro blaster in the local Goodwill store for less than $3.00.... Going to work on the Hasbro as the base, and possibly swap out the electronics from the Disney blaster. Using DHPFX kit for the bulk of the add one, but considering swapping the barrel for a full length pipe, and will be putting optics into the sight (bird watching monocular). Also have some thoughts about substituting the power cylinders for working laser dots ($1 from Dollar tree) to increase Stormtrooper accuracy (will inform Lord Vader if they work....!). Finally also looking at automotive LED sets that provide super bright illumination in small units. Hope to use lessons learned here to build a full Pipe build to as high a standard as possible, and to have this Hasbro as a 'spare' for kids to use in photos or to shoot me when Trooping! Grateul for any and all advice as this progresses. Simon
-
Need some advice from the pros here. I have both a Hasbro e11 blaster and a Disney Parks e11 blaster. I love the sound of the Disney Parks blaster and the selector switch for lethal and stun. I am still awaiting my Doopy Doos kit, and planned on modifying the Hasbro blaster but now I am not sure if I should mod the Disney Parks blaster instead???? I am standing here at a fork in the road...Hasbro or Disney? I had even thought of using the elecTrOnics from the Disney Parks blaster in the Hasbro blaster, but which is more screen accurate?
-
I just started a Hasbro doopy E-1 conversion, and it started off well as I used a hammer and screwdriver to get out the rear scope piece pretty much undamaged. I also managed to get the front piece off rather cleanly with a dremel. However, now there are two issues that I need help with: 1. After using a hammer and screwdriver on the scope, the sound stopped working (lights are OK though). Is this easily fixable with a soldering iron? I will have pics of the interior soon, it's still closed up. 2. I was a bit rough on holding the blaster against a surface and now a hairline crack has appeared on one of the t-tracks. What's the best way of fixing this, bondo? Thanks
-
I am modding a hasbro/disney E11. Recently I saw a build thread using a 3 way switch that replaced the stock slider switch. I have scoured the forum and can not for the life of me locate this thread. Can anyone PLEASE point me in the right direction??
-
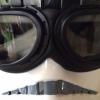
So now the Rubies is finished it's time to move onto the Hasbro. Doopy kit was ordered some time ago. Started off by removing the end caps and cracking it open. Sawed off the barrel tip and scope end I also hollowed out the front sight. I cleaned of all the legal stuff and reworked the trigger a bit Then the dreaded bit .. working down the T track and drilling the holes. I also wanted a gap for a bayonet lug as I don't usually see them done on the Hasbros but it means less holes. Removed the plastic rail in preparation for a ally flat bar being delivered. I'm also considering a inner barrel to give the effect through the lower holes but also to run the LED wires down so they can't be seen. So that is where i'm upto at the moment. I've ordered one of those 8x20 fleabay special monocular to shoehorn into the scope and some socketcap m6 bolts for the front. I was considering doing the bolt and spring but I don't have anything to use for the bolt and handle... after some advice on this one as others have done this to their hasbros but never gave up their secrets?
-
My son is going TK, and he's inheriting my Hasbro E-11 (back from 2002, not sure if Hasbro sculpt has changed). I did a few mods when I was a TK, but nothing major. But now I want to beef it up for my son and wanted to know everyone's opinion on The DoopyDoos Mk2 conversion kit. It's quite affordable... http://www.doopydoos.com/stormtrooper-e ... 2636-p.asp
-
 Not sure how close it is yet but it's way closer! And!! It has a stun setting! Tell me what's wring with it, I'll tell you how well my doopydoo's kit fits on it. I'm excited to find this. Good single accurate blaster and stun fire sound effects too! All I can notice is no power cylinders and the side t tracks are missing while the one that should be missing is there. Pretty decent out of the box!
 -
I built this over a year ago but I never shared. I bought the crazy expensive Hyperdyne upgrade for my Hasbro E-11. I still can't believe I did it. I have to admit, it's really fun to use. Everyone who sees it wants to try it. I know the T-tracks end up not accurate, but the lights and sound are great! The slurping sound in the background on the video is my dog drinking water, lol.
- 1 reply
-
- 1
-

-
Hello everyone I'm a newbie here. I'm working on a hasbro conversion but my battery door has disappeared on me. Anyone know where I can get a replacement or get one 3D printed before I'm out another $40+ just for a little door? Any help is appreciated!!
-
Ok, weighing up options! I know E11 isn't required for 501st approval, but while I'm waiting on my armor...damnit I WANT one! ;-)<br> Narrowed down (don't have time to build myself) to a concerted Hasbro via a local Garrison member on commission, or a B grade hyperfirm. I know one only bounces & the other goes "pew pew pew", but what are thoughts ($ is equivalent) on which is best choice - I'm just doing this to troop and am not super fussed on screen accuracy (please don't stone me!!!)
-
Hello, total noob question, As one of the soon to be Anovos TKs, I have been fortunate to find 2 1996 Habro E-11 Blasters (1 white, 1 black). I couldn't find the specific info in the forums, so I was hoping someone on here could tell me what are the minimum modifications for the Hasbro for basic level TK 501st approval if any? Granted, I realize that a blaster is not required for approval, I will have one. Also, besides Droopy Doos, does anyone know where I can find conversion kits to make the Hasbro more authentic? Thanks, Madighon
-
After seeing some great modded Hasbro's and some great scratch built and Doopey type builds, I decided I would do both. 1 - A very basic Hasbro build to start trooping with and when I'm ready to go EIB or Centurian I'll do up a different blaster. As I said, there's some great Hasbro builds with mods here and there, but I thought I'd document just a basic build gluing the Doopey parts on and painting and seeing how it comes out. That's it (I think, for now, maybe.....) Left side plus Doopey kit Right side First step it to cut the tip off with a dremel. Take it slow and watch out for those wires. If you're not careful, it will end up a lot more than a basic build, or you'll have no light. That's gotta go from underneath Gone I reckon I need to cut the scope along this join Gone. They're the extra scope parts from the Doopey kit My folding stock wouldn't sit flush on the bottom of the barrel, and meet up with the 'bolt holes' at the rear, so I had to cut a bit off the main blaster here: Ok, maybe a bit more than basic build, Sanded off the writing at those two grey bits. Just lots of Hasbro/Lucas Film copyrighting stuff And that's about it. Positioned some parts to see if they would fit and what it will look like. The Ammo box wouldn't go on flush, so had to dremel a bit out of it. Other than that, good to go. So lesson # whatever, test fit every part before applying glue. More to come later
-
Hi guys. I have been searching the galactic interweb for Hasbro blaster since I want to try on the Hasbro/Doopydoo's build. The only problem is that I can't seem to find Hasbro blaster that will ship to me. I have found one on amazon, but with the shipment and customs it will be around $110 and I am wondering if it is worth it. I would like to have a blaster with light and sound, so the Hasbro looked like a good beginning. Do you guys have any better ideas or a good place that would ship worldwide for smaller price? -Tommi
-
Hi all - pending my armor and of course thinking of all the other "stuff" I need/want. I'm in this for 501st and trooping. Be honest with a cash strapped newbie - because blasters are not required for 501 approval, if I buy a hasbro E11 and ONLY paint it (ie no conversion kit), is that any kind of significant issue???
-
I disassembled my Hasbro and misplaced the screws (I know, I know). Does anyone know what size screws will fit?
-
I posted photos of my converted E-11 kit in my ANH Sandy build thread here...<a data-ipb='nomediaparse' href='http://www.whitearmor.net/forum/topic/33004-dans-anh-sandy-build/'>http://www.whitearmor.net/forum/topic/33004-dans-anh-sandy-build/</a><br><br> Ive taken a closer look at the E-11's in here and there are deff, some differences. My question for the 501st weapon experts is, based on what you see in the pics, will my E11 meet 501 standards or did I waste my money on the conversion kit?<br><br> I followed some instructions I found online specifically for attaching the Droopy Doo kit to an old Hasbro Toy Gun that requuired me to cut a new section of holes in the barrel, modify the barrel tip, and clean out the rail track. Looking on the MEPD qualifications (which is the lvl Im shooting for) it says no ESB or ROTJ greeblies allowed,....what the hell are those, and are they present on my gun?<br><br> Any help would be appreciated.