-
Posts
41 -
Joined
-
Last visited
Content Type
Profiles
Forums
Gallery
Articles
Media Demo
Posts posted by jreed1701
-
-
Welcome!
Sent from my Nexus 5X using Tapatalk
-
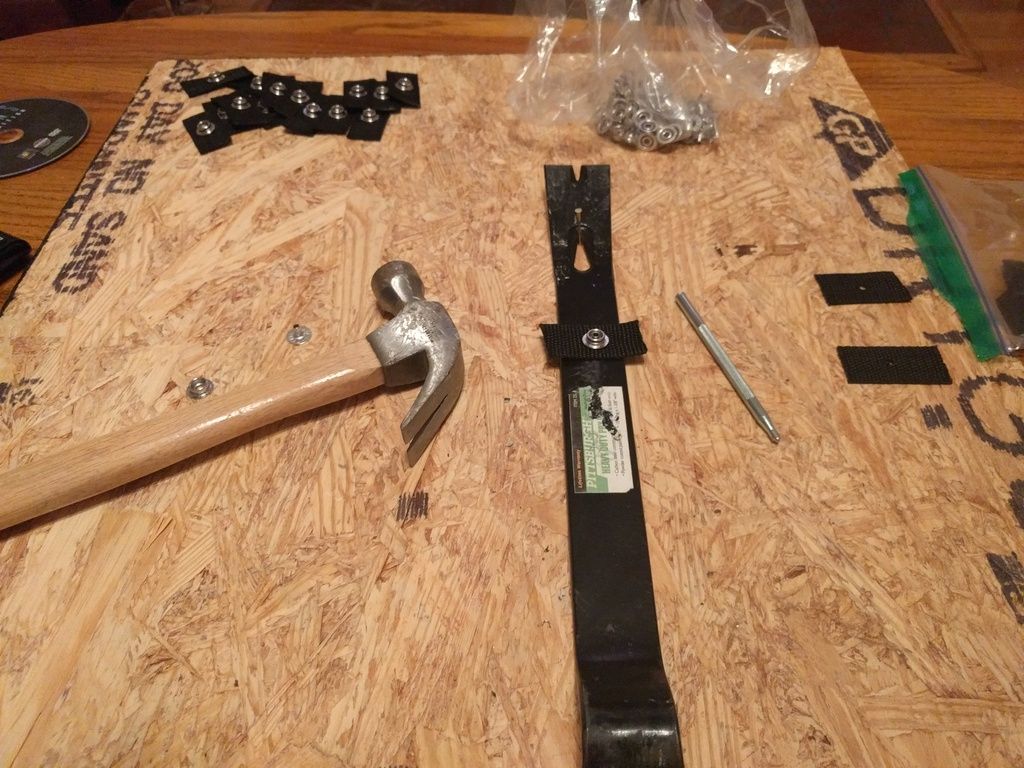
Snaps! Okay, first... don't be a bozo like me and get the wrong size setter. Amazon fails at the suggested items. I ended up with a size 20 setter and size 24 tandy snaps. Also, get the anvil... it's worth it!
I made something like 25-35 snaps overall.. I drew out the kit (which I won't share because I'm not an artist) ... Later on I'll post pictures of where I glued them in.
I also started working on the belt. For the belt, I got my ideal from Evin’s build thread and JAFO’s belt kit. I bought one off of Trooperbay. I ended up cutting up an old foam workout mat and sandwiching that between the nylon and plastic parts.
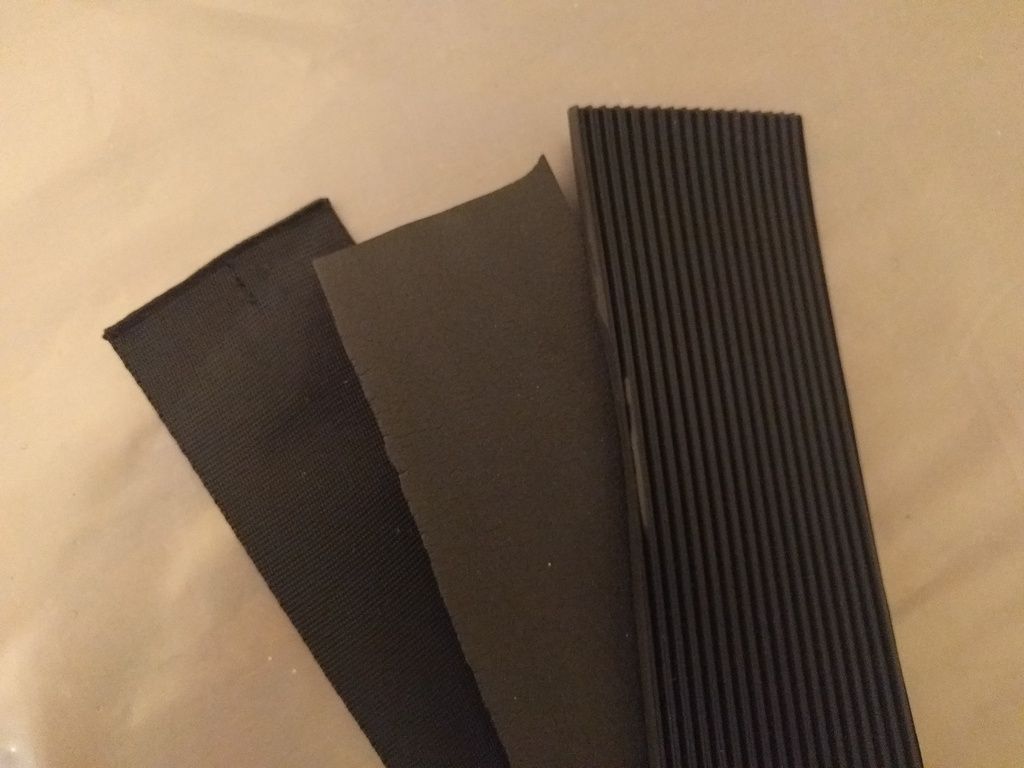
On one end, I sewed on the female part of the latch. Then I measured around my waise with the tmale end not yet sewed. You definitely want to put the codpiece and butt plate behind the belt and make sure you have enough slack that it fits over. After I did that I sewed up the male end.
Next step, using E6000 glue, I glued the nylon to the foam, let that sit. Reinforced with CA glue. Repeat for the ribbed plastic part.
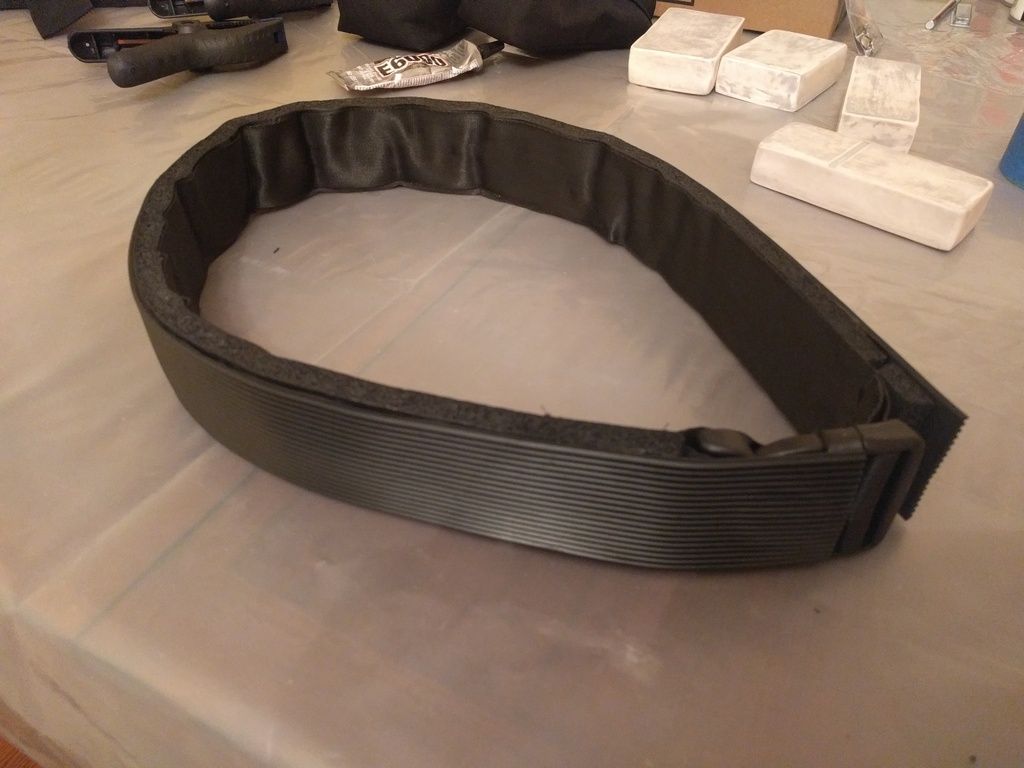
And after all that hard work, it's a little too small... Trust me... save yourself the anguish. Wait until you've rigged the armor to size. I did read Steamboatphans warning and tried to compensate by sandwiching the codpiece and buttplate between the belt and my body when sizing, but it still wasn't the right way to go about that. Now I'm going to have to cut one end and extend it by 4-6 inches. You live and learn...
I've also taken FN Amors Gaskets and sized them. For the arm pieces, I sewed them together and then sized them. Turn the pieces inside out, pin them together, and sew... Afterward, also inside out. Take the pins and pin up the slack, then sew.
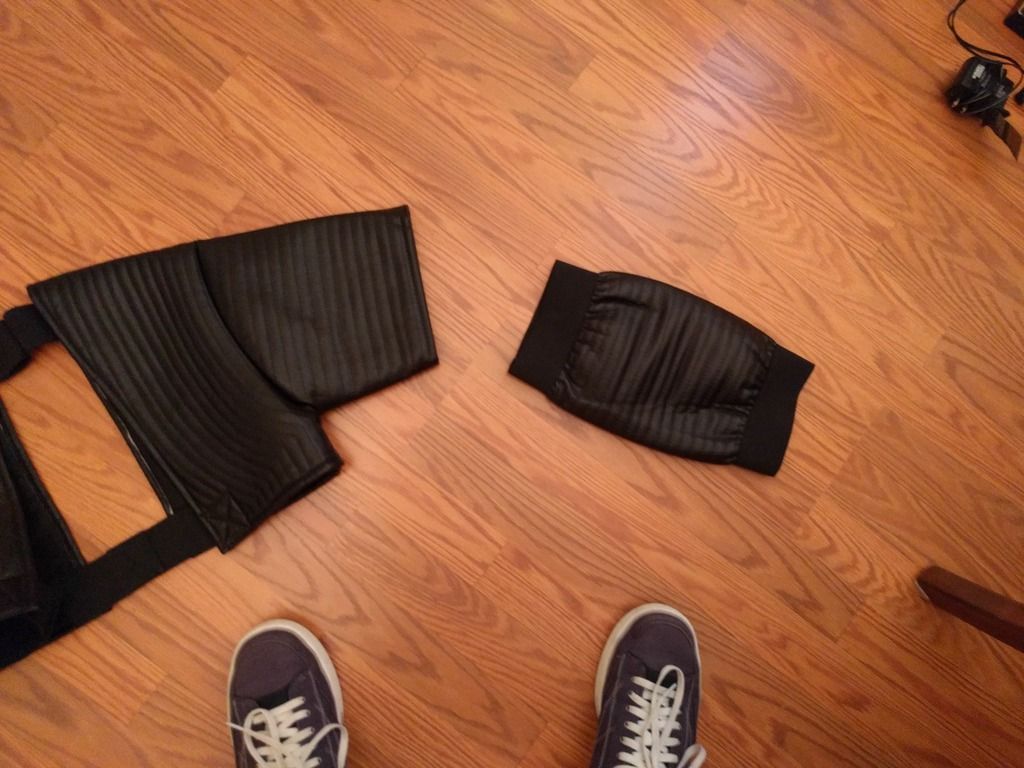
Pinned... The part that goes on your body, not your arm. Pull that inside out, slide in the arm piece (not folded inside out) then pin. Afterward, sew together. Once I was happy with the sewing, I also cut off the elastic bit because it felt strange against my skin when I wore it.
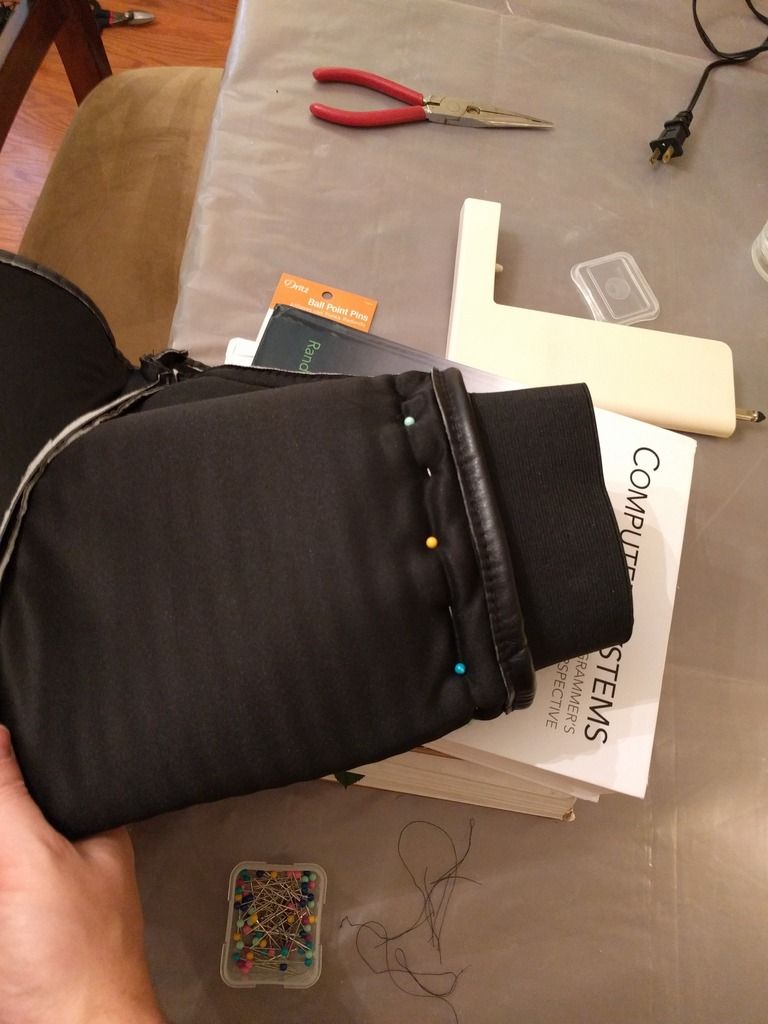
All done! the arms got taken in later, but the process is the same, pin up the slack, sew...
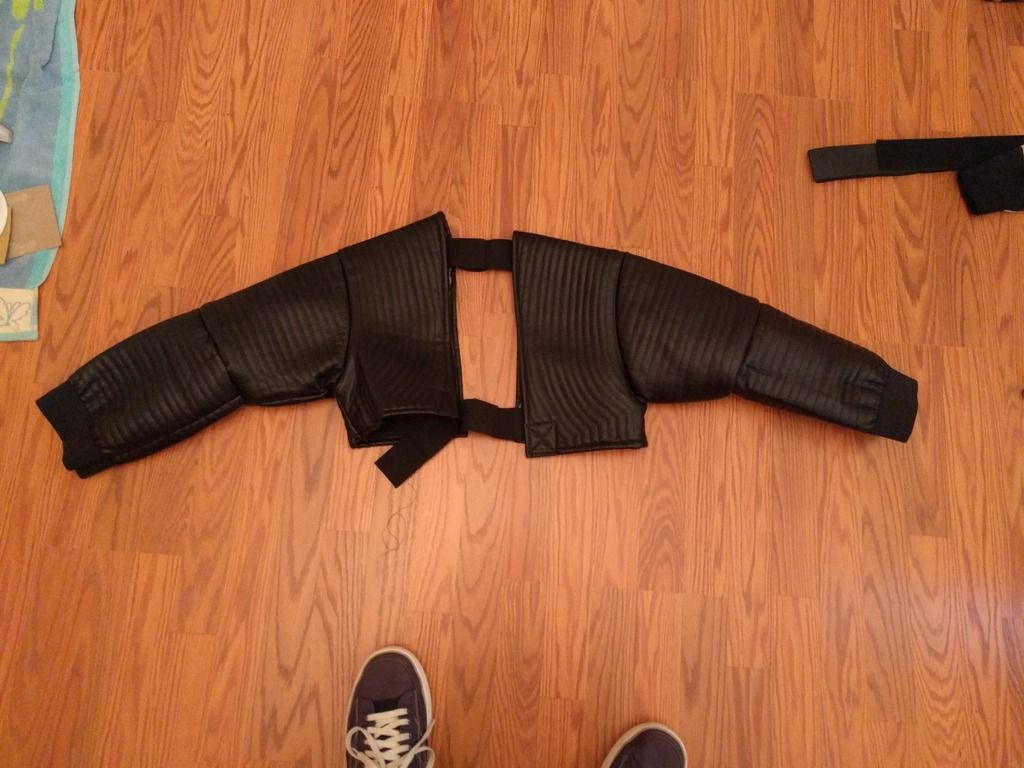
Leg pieces are the same process.
Also, fun fact, if you are like me and haven't sewed in ages slash never have, use a single stitch first... that way, if you take too much in or you mess up then you can take a blade and cut it back out with relatively less pain.
-
 1
1
-
-
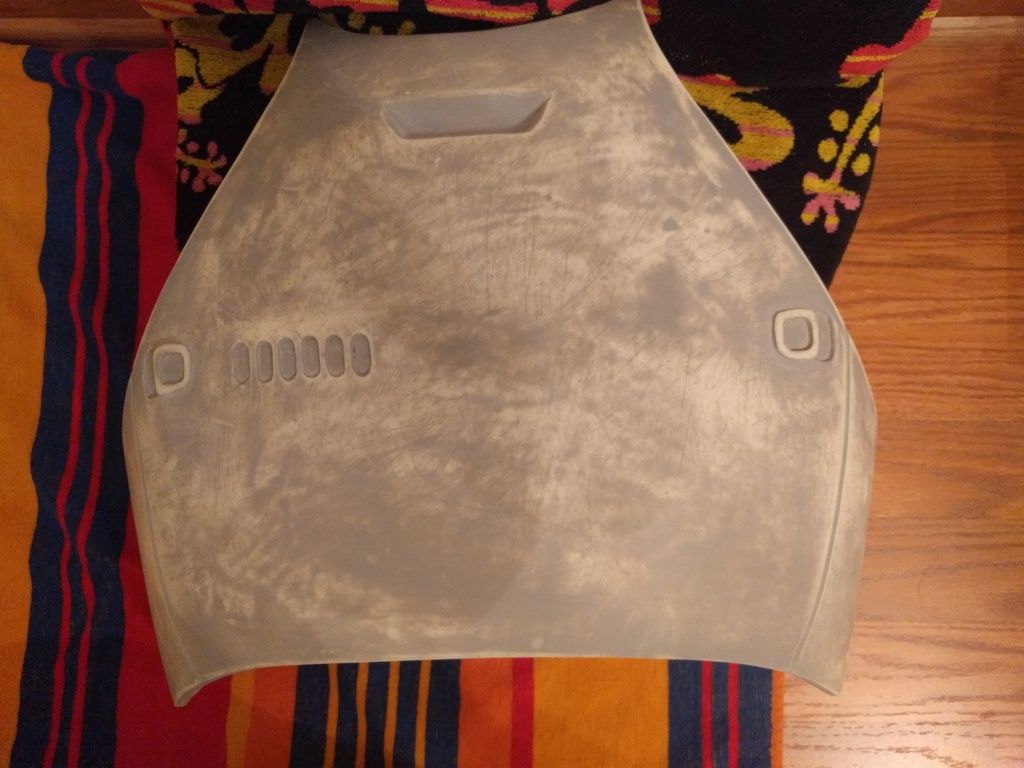
Here's the kit with a first coat of primer using Rustoleum Automotive Primer Filler... Most of it I've hit with a second coat too. I'm leaving the legs alone for that second until I get them trimmed and fitted. Sanded with 400 grit sandpaper. each time. Prep work to prime was sanding with 220/400 grit each. Inside the armor, I used 220.
Also, I wiped down with a wet cloth each time I sanded. Mostly because it's good practice, and if you don't wipe down the inside 1) you'll wish you had because of the itch, and 2) your clothes thank you in advance...
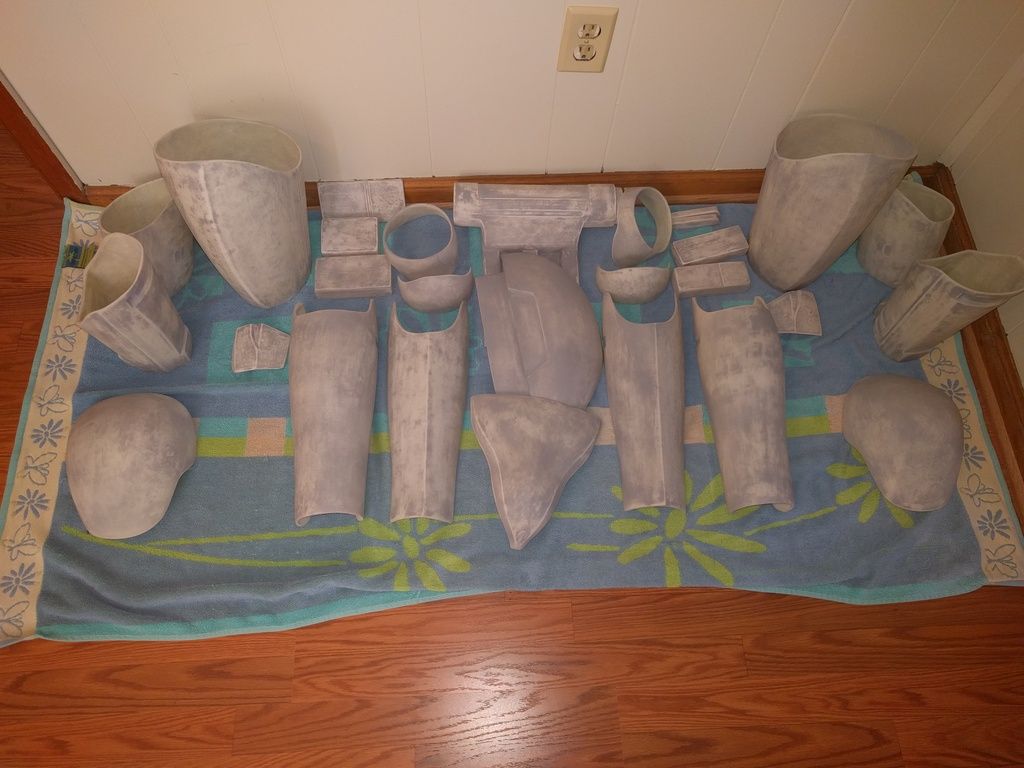
And, the breast plate... I'd put a pic of the others too, but it looks the same.
-
Hello All! This is my first ever build of any sort of costume. I'm not much a forum user, but I thought I should have a build thread like most people do. Passively I have just been reading what others have been doing and doing my best to incorporate their “lessons learned” and “techniques” into my build.
To start off, I want to thank all the people I pestered with questions getting to this point, and those that have built before me from whom I've learned a lot watching and reading your threads. I do not want to come off as copy catting somebody’s build thread, so I will straight up say I got a lot of my ideas from Cookie Monster’s , JAFO’s and Stemboatphan’s threads (no particular order or preference). Thank you guys for awesome details so newbies like me can figure things out. If you’re wondering what I used for glue/paint, it’s very likely I went with the same stuff they did. If anyone has specifics, please PM me and I’ll be happy to tell you what I used.
I actually got my kit a number of months ago, but since things cost money and I’m on a budget I am just now getting around to putting things together. Something about being a full time employee and keeping up with an entire house on my own kinda kills your free time…
I am building one of Jim's Kit. I believe mine is a Version 4 of his armor kit.
Here's a link: http://www.therpf.co...light=TFA armor
Other Items purchased:
Anovos Standard Line Helmet
Trooperbay pouches (AKA MTK)
Trooperbay belt
Trooperbay "Jimmiraquois Decals"
Imperial Boots and Gloves
Extreme Racing Undersuit (stormtrooperundersuit.com)
Extreme Racing Neckseal (stormtrooperundersuit.com)
FN Armor Gaskets (before I learned the truth!)
Custom Greeblies
Things I eventually want to get:
Blaster (not yet decided on where to buy or if I’m going to 3D print it myself)
Ukswrath's Wireless Audio system
Ukswrath's Fan system
I also compiled a wish list of things that I needed to get; supplies etc… If you stick to Jim’s materials list you’re going to be in good shape, but ultimately get what you prefer to work with. I’m happy to share my amazon wishlist with anybody that wants it; just be sure to review it if you ask.
So far, I have already done the following:
An initial rough sanding of the armor (220 Grit inside, 400 outside)
Fixed some cracks on the armor with Apoxie Sculpt.
First prime coat with an automotive primer filler, and hand sanded with 400 grit paper.
I have also repeated a second coat on almost all of the armor.
I painted the
Began making the belt.
Made some snap plates.
Rigged most of the amor to my body.
The next few posts will be details of work I’ve already done with pictures and whatnot.
-
 1
1
-
-
I'm having this issue too. Hammering doesn't work. Do the Dritz pliers work?
-
I ended up getting one from StormtrooperUndersuit.com. Will see how it wears.
Sent from my Nexus 5X using Tapatalk
-
 1
1
-
-
The "new crowd" appreciates your efforts. For those of us whom don't really know what's what coming in, we depend on the community to guide us.
Sent from my Nexus 5X using Tapatalk
-
 3
3
-
-
I have been using the anovos tk neck seal and I love it. Matches the shiny gaskets perfect

They don't sell that separately though...

-
Has anybody followed up on this? I see the last time anybody had input was in Feb.
-
The reason that some paints crack is because most rattle can lacquer paints are not designed to flex very much if at all. You need some kind of flex agent if the surface is going to bend past a given point.
The other issue is some rattle can paints say they have one coat finish, or double coats, etc. This lays the paint on too thick and this can also cause cracking.
As mentioned, prep is a big deal. I've painted plenty of things, props and helmets and costumes with Krylon and never had issues if the prep was done right.
- sand surface down to 400
- clean surface (remove all oils, I find on plastic, resin and fiberglass liquid dish detergent works well. on metal use degreaser)
- use a tack cloth to remove lint
- prime the surface. Several light coats, the first is a dusting coat. Never lay it on heavy.
- after dry, apply top color coat. Several light coats, the first is a dusting coat. Never lay it on heavy
- always start your spray before you pass over the object, end the spray after you pass it
- try to keep one edge always "wet" as you cover your object in left to right rows
- I can't stand Youtube videos where people just "wag the can all over" because this leaves an uneven finish
- do both on the same day, never leave coats too far apart otherwise they won't bond to each other
- let it dry. At least 3-4 days, a week is great.
- never paint in the sun, or on hot humid days, this affects the paint greatly
- never paint in the cold
This is helpful... procedure-wise.
I am hunting for more threads slash info on painting methods. Jim's armor will be my first armor ever and I claim ignorance. And... it seems like there are differing opinions on which brand of paint to go with.
I'm continuing to do research if anybody knows a better thread, let me know. Thanks!
-
Right on. Thanks!Misunderstood again! Yes, it's copper pipe insulation from home depot. Think pool noodle material...it was about $1.94 for 5' or 6'.
Sent from my iPhone using Tapatalk
Sent from my Nexus 5X using Tapatalk
-
Amazon.com...myheartgoon tactical airsoft helmet padding. In the reviews, I read that two other people had used the same padding for their buckets.
Sent from my iPhone using Tapatalk
So, I looked that up and it's showing the padding where the top of the head would go. In the picture, I was referring to the foam on the perimeter by your neck.
-
I went with Jim's kit from therpf. There was some word about fnarmor, but there was some controversy about its validity. One of the guys had a build of Jim's kit (steamboatphan) and I could see that it could work and looked good. If you haven't seen hit thread check it out. Plus the ANOVOS kit is way too expensive. Mine is in shipping now so I'm getting close to starting a build.I'm still trying to figure out a good source to buy armor from. I might wait until Anovos releases the stand alone armor kit in August. Do you have any suggestions?
Sent from my iPhone using Tapatalk
Sent from my Nexus 5X using Tapatalk
-
 2
2
-
-
Thanks. I found out from someone else who had the same padding on the top as you. Are you any closer to getting your armor?Amazon.com...myheartgoon tactical airsoft helmet padding. In the reviews, I read that two other people had used the same padding for their buckets.
Sent from my iPhone using Tapatalk
Sent from my Nexus 5X using Tapatalk
-
Where did you get the foam?
-
I'd post a couple of other photos on here if I could to show the size adjustments I'd need to make, but I can't seem to figure out how to do that. I'm mostly concerned with how much and where am I able to trim on the various parts. For example, the kidney and abdominal pieces go up to almost my arm pits. I don't want to cut off too much in the wrong area and then prevent that from approval.
Measure twice cut once! Don't worry too much. You can always get spare ABS and glue to extend if you had to. Might have a lot of work to blend in but it's doable. If I were you, I'd cut off a bit. Try it out, and then cut more incrementally as necessary.
Definitely study build threads. I'd even go over to the other TK threads and ask guys there too. That's what I'm doing. About to get my set here in the next week! I'll be watching what you do. I'm interested to see how you rig.
-
I've been around for a couple of months now reading the mess out of the forums... Just now getting around to buying stuff. Good luck!
-
Basically my story too, mate.
Sent from my Nexus 5X using Tapatalk
-
Congrats, Evin!
-
 1
1
-
-
I wonder if the bell color actually has any meaning, or if it was a fluke? It's not like you can Google it like the pauldron and learn what the difference in color means with rank.
Sent from my Nexus 5X using Tapatalk
-
Really. This is going to help me out big time when I get all my gear together.
Sent from my Nexus 5X using Tapatalk
-
 1
1
-
-
What everyone seems to really be after is an unbiased comparison with all the details. Like an outsider looking in.
Sent from my Nexus 5X using Tapatalk
-
I don't mean to step on anybody's toes here. I know I'm new, but seriously I can't tell what armor to go with to build a TFA FOTK because of all the mud slinging. I can't be the only newbie either that read this thread wondering what's what.
Regardless, has anyone actually obtained this armor and started building it?
-
 1
1
-
-
I've been toying with ideas all week on how i'm going to attach these boxes to the belt without any drilling... and I think I've got it. This is a "rough idea", but I can't seem to find anything wrong with it so far.
Now, the sticky side of the velcro goes onto the boxes with the help of some CA glue, so that it won't go anywhere. Then, all I have to do is punch holes in my belt accordingly. I can also add soft side velcro to the belt under the boxes.
Lemme know what u think. Gonna start assembly tomorrow.
Sent from my SAMSUNG-SM-G928A using Tapatalk
I am curious why you would choose the rivets (tandy gizmos i think) with velcro? Is it for extra reinforcement? Or, so you can move the velcro around on the belt to adjust?


JREED1701's FIRST ORDER STORMTROOPER BUILD (Jimmiroquai)
in Build Threads Requireing Maintenance
Posted
Thanks! I'm kinda just going for it so I can get this bad boy done by Halloween... I've been taking pictures along the way and I'm just going to do a big post at the end. I really don't see the need to do the same thing that others have already done. At this point, the build thread is mostly to "document" my work.