

Atin
-
Posts
32 -
Joined
-
Last visited
Content Type
Profiles
Forums
Gallery
Articles
Media Demo
Posts posted by Atin
-
-
We just released the teaser for the series. Check it out here:
Always happy to hear feedback and opinions. If you'd like to support the creation of the series, you can help us out on patreon.com/TransmutePictures
")
-
 6
6
-
-
It's been a while, but I thought I'd share this anyway:
The short film was so much fun that we can't stop. Bucketheads is continuing as a mini-series with the help of my Garrison brothers and sisters. Shane Molina from Hawaiian Mako Design created another poster for us.

I'll keep you updated as the project moves on. You can also follow us on the socials @Bucketheadsfilm
-
7
-
-
1 hour ago, Daetrin said:
Production values all around are superb. This is easily network quality material and it all falls to place - yes the effects (which were amazing) are there but so too is the direction, music, camera work, editing, You guys should be justifiably proud of this achievement. Nice 501st on the detonator! I'm sure I missed a few other Easter eggs. The story was well written too. I've done some interesting things in my old FX kit, but the athletics in the suits were cool to see as well. Not sure I'd do that in my current armor ;-)
The closing credits were - beyond good - they were exceptional.
I've seen a lot of fan films, but nothing this good. I hope you received a lot of rewards/recognition.
Thanks Daetrin! That means a lot coming from you!
We did build a specific stunt suit out of B grade pieces for those crazy antics. I would never ask anybody to do that to their actual kit haha.
-
On 12/9/2018 at 10:23 AM, Bud Spaklur said:
You did a great job on this. How long from start to finish did it take you to make this, a year and a half, more or less?
Sent from my iPhone using TapatalkThanks! We wrote the script back in February 2017. Then went to camera in September that same year after scraping the funds together and organizing all the people and parts that are needed to make a film. We filmed for 4 days initially, came back for a day of reshoots a couple of weeks later and eventually added the opening scene inside that spaceship in March 2018. The next 6 months were spent on creating the visual effects, which was almost exclusively done by my fellow garrison member SL-38405. The film was officially finished in June 2018 but we kept working on little improvements until the week before the online release.
-
10 hours ago, Linus said:
Great story line and character development you have going. Keep it up!
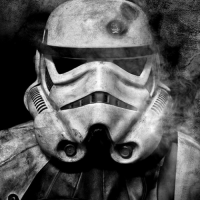
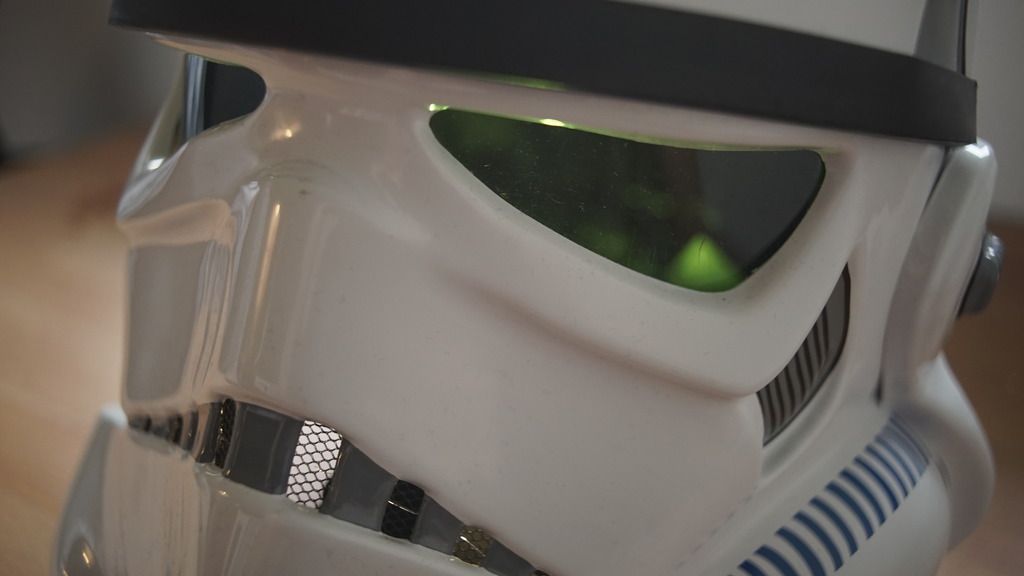
Question on the helmets being put on. I noticed everyone's very precise about placing it on, at an off-angle and then twisting it forward. You can even hear a sound effect as though a seal lock and internal pressure is established. Is the twist a bit of creative license? I've read just about every book in the Star Wars Universe, many about Stormtroopers and have yet to come upon that approach. Definitely a nice touch.
Thanks! It's really the only way to put on the bucket, and the idea of a pressure seal appealed to us, so our sound designer came up with this sound. He worked on Battlefront II so I guess you could say it's canon now?

-
1
-
-
And here it is fellas:
Snuck a little 501 reference in there
-
7
-
-
Glad you're liking it! The film will be premiering on YouTube in one week. We've released a final trailer in the meantime:
On 11/18/2018 at 4:53 PM, ABS80 said:Cool and the main actors are wearing AP (Authenticprops) trooper armors
Mark (AP)
Luckily the main actor was my exact height and fit my own AP kit perfectly. Most of the featured TKs wore APs actually. Some ATAs are in there as well.
-
2
-
-
Hey everyone,
Just wanted to sharea fan film I've been working on for almost a year now with my fellow TKs from the Outer Rim Garrison. Hope you enjoy!
EDIT: We just released a trailer for a follow-up series that we'll hopefully be able to film later this year!
-
7
-
-
Awesome, thanks Tony! I've had help from countless people along the way, both here on whitearmor and from within my garrison, so thank you all so very much for helping me out and being such a great community!
-
1
-
-
No problem Tony. How's this?
If I cut any deeper it'll cut into the first grove.
-
Sorry Tony, had a brainfart there. Here you go:
-
Thanks for the feedback! I took a solid 2 mm off the humps on the wrists:
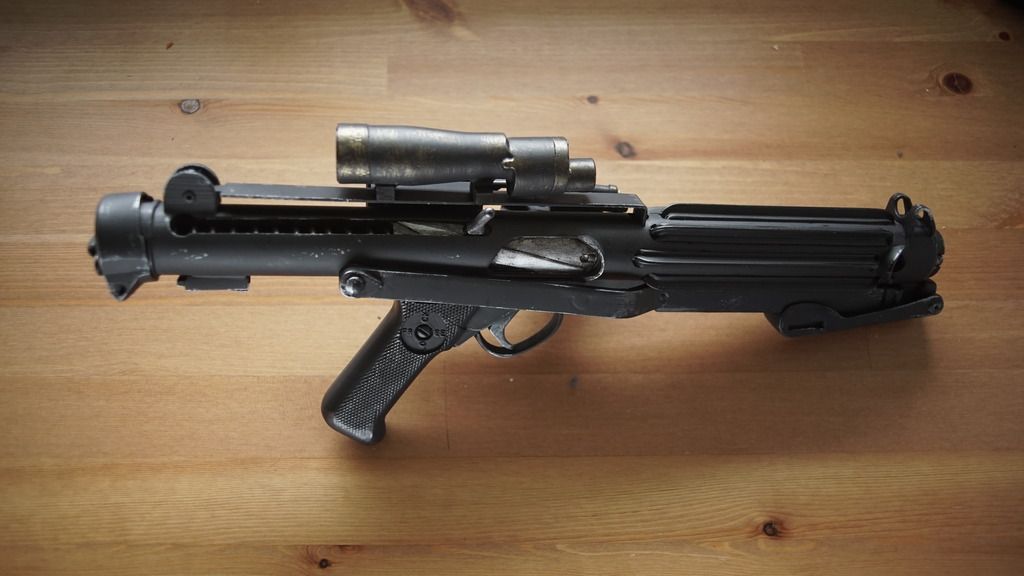
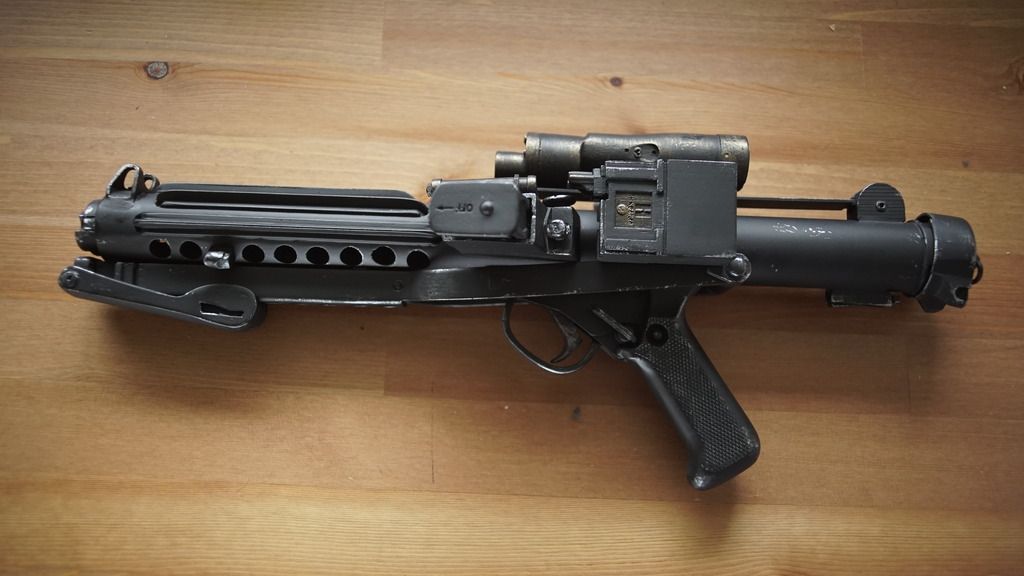
 Also, AWESOME job on that E-11!!!
Sheesh, I can't believe I forgot to give due credit here: Terry/Pandatrooper did a phenomenal job on that blaster indeed!
-
Name: Marco Bossow
Legion ID: TK-62726
Forum Name: Atin
Garrison: Outer Rim GarrisonEIB Submission: http://www.whitearmor.net/forum/topic/39294-tk-62726-requesting-anh-stunt-eib-status-ap-655/
501st Member Page: http://www.501st.com/members/displaymember.php?userID=21341&costumeID=124Armor maker: AP
Helmet maker: AP
Blaster: Quest DesignHeight: 5'8"
Weight: 150 lbs
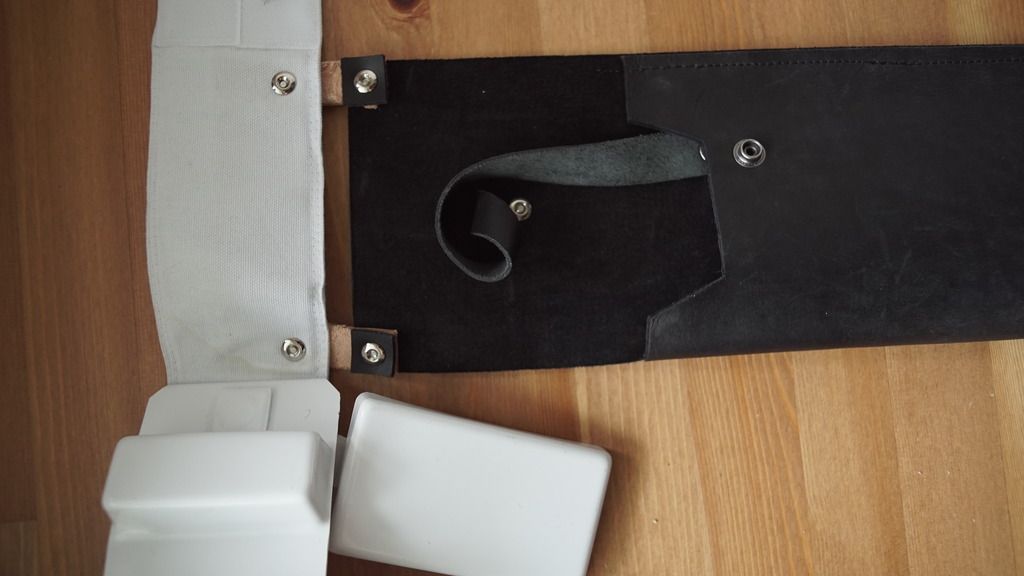
Canvas Belt: Robert Kittel
Holster: Darman
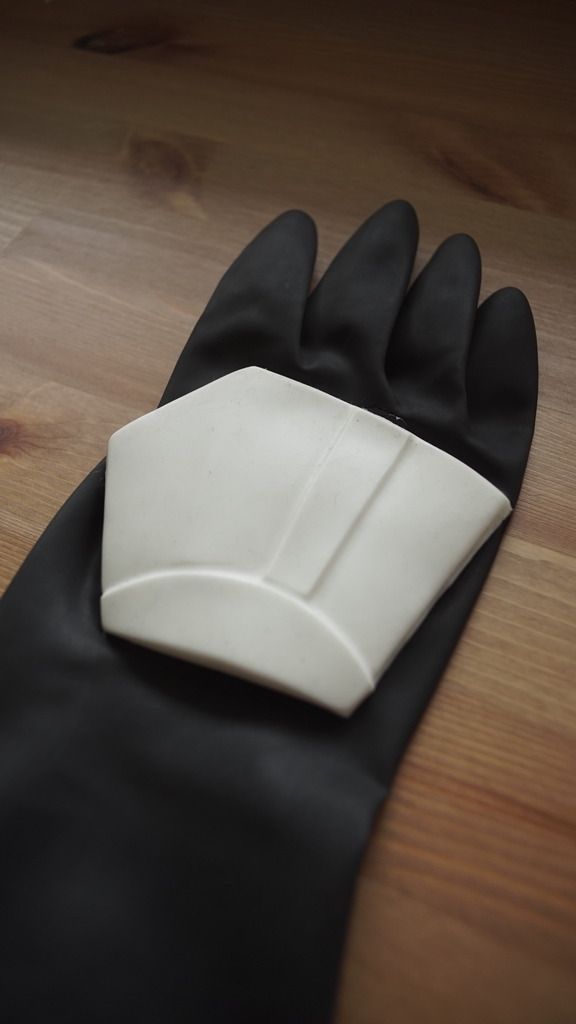
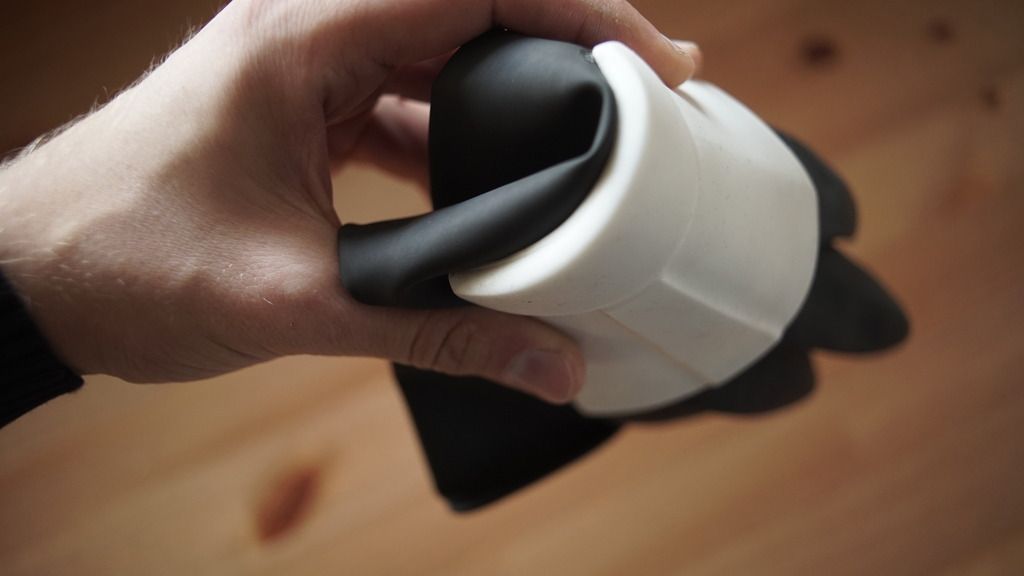
Hand Plates: Sonnenschein
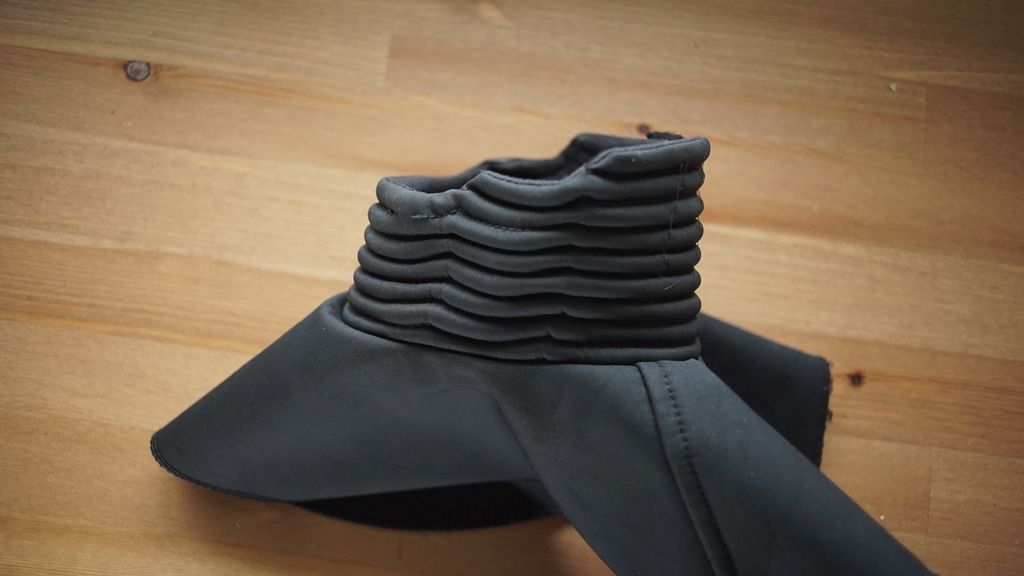
Boots maker: Imperial BootsNeckseal: Own made
Other-Armor Fit/Assembly:
In this section we review observations made by your fellow troopers and ourselves. Some observations may lead to suggestions to improve the overall look of your armor. If any suggestion affects any application, it will be listed separately in the above or below sections.
A great build that's for sure, so we only have a few adjustment suggestions to balance things out and get you looking your absolute best.
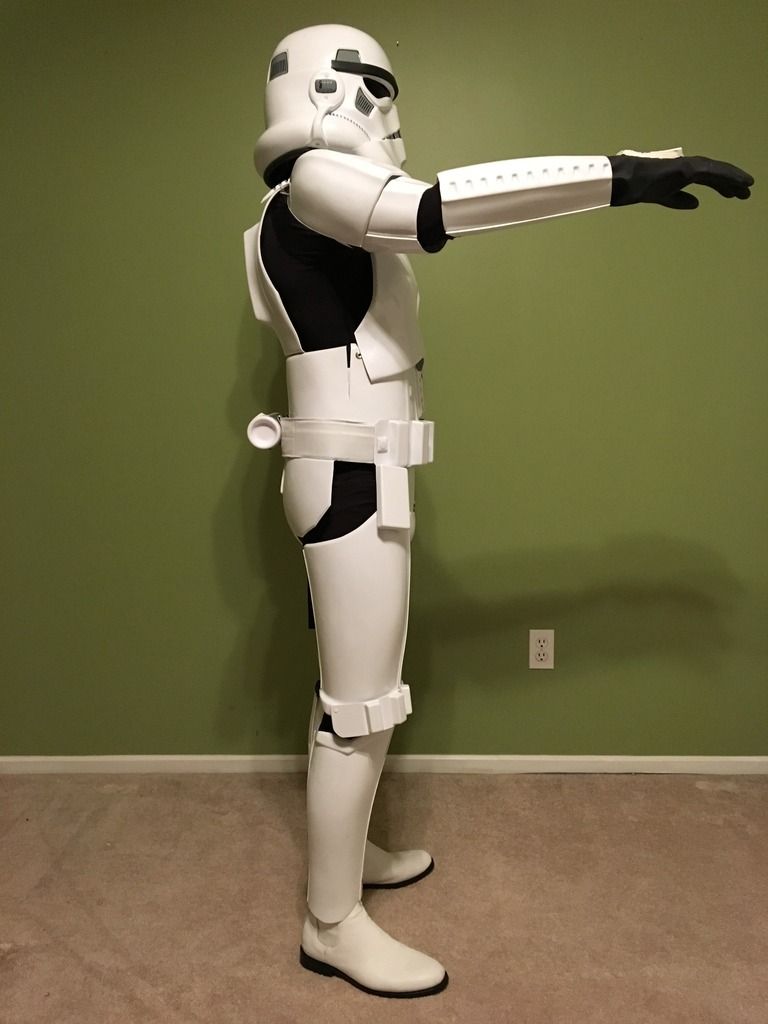
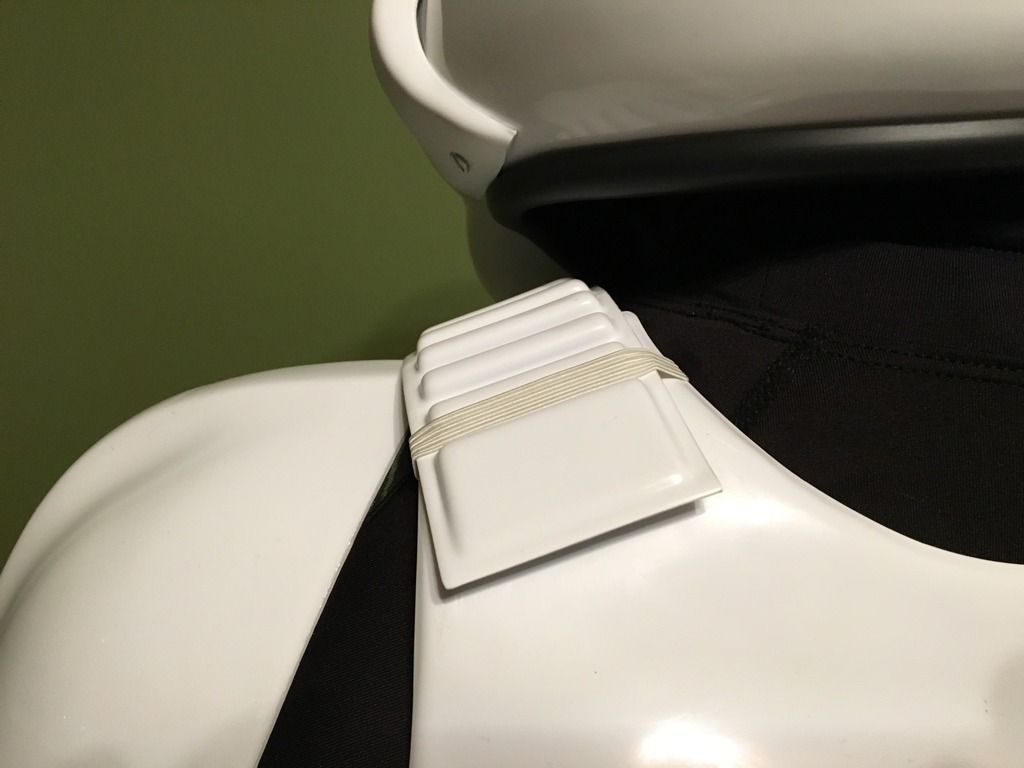
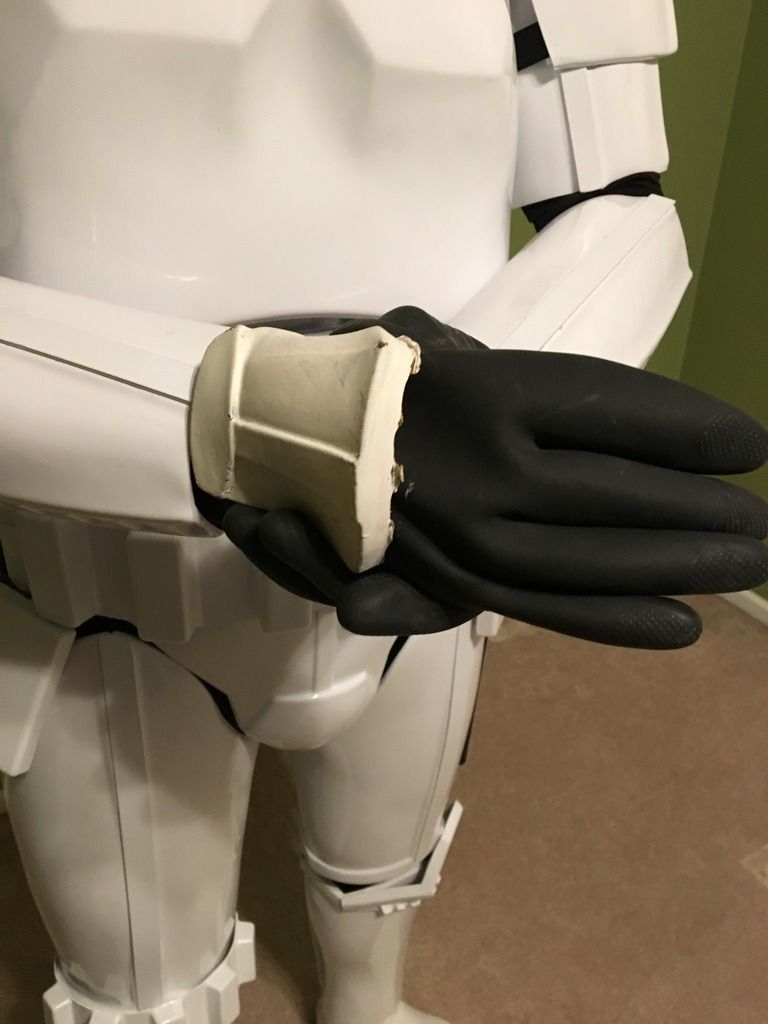
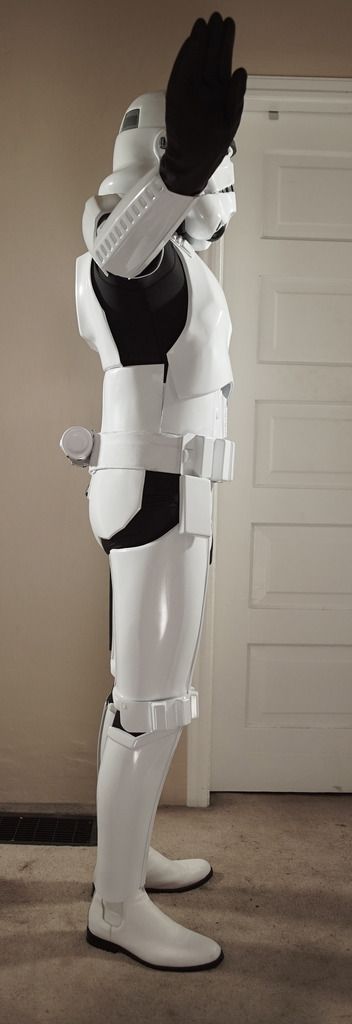
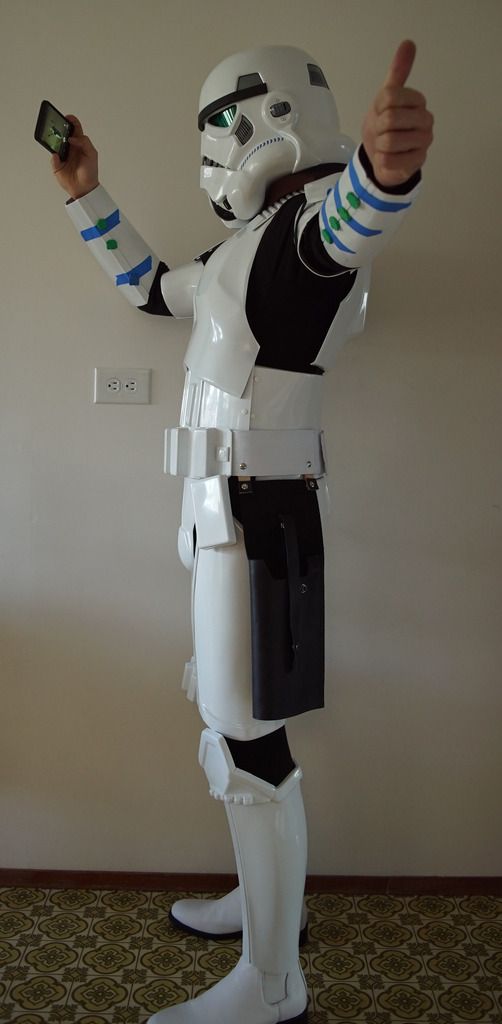
Your shoulder bells need to come in ever so slightly at the top, but also need to be rotated forward to close up the gap between them and the chest plate. I think just a minor strap adjustment and better positioning while you suit up should take care of that.
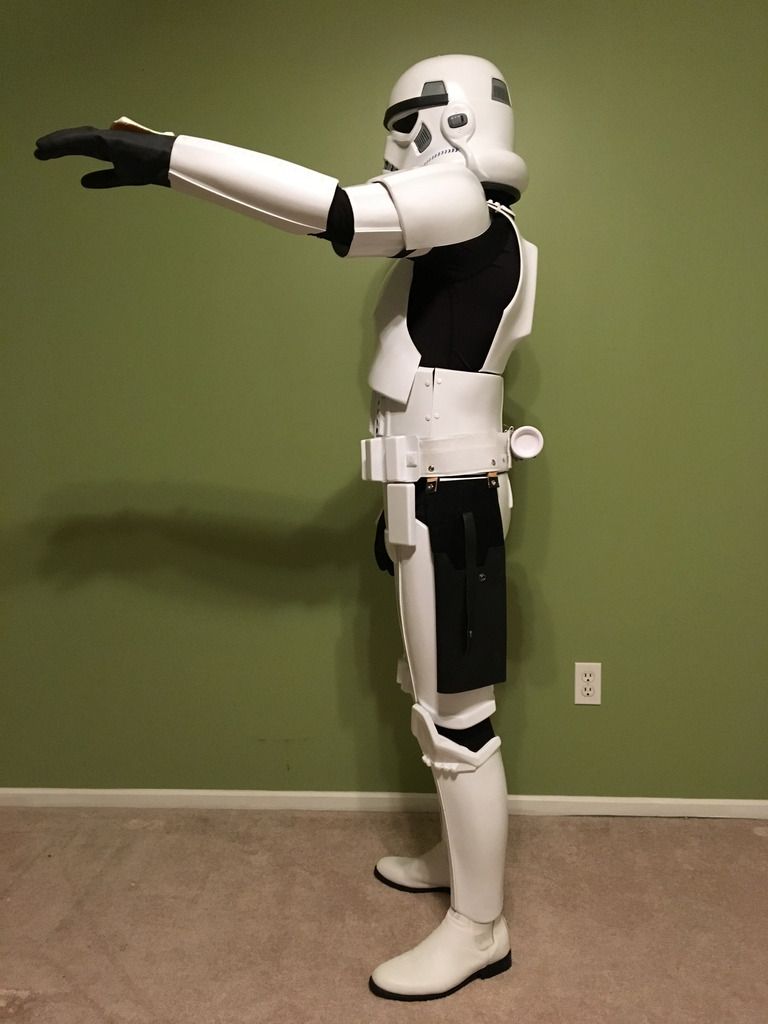
Looking at this image below, I think also if you drop those biceps and fore arms, the gap at the wrist end will be reduced and the look will be more even. Maybe 15mm or so drop should do the trick.
I reworked my shoulder strapping to be tighter and more forward facing. Gaps have been evened out.
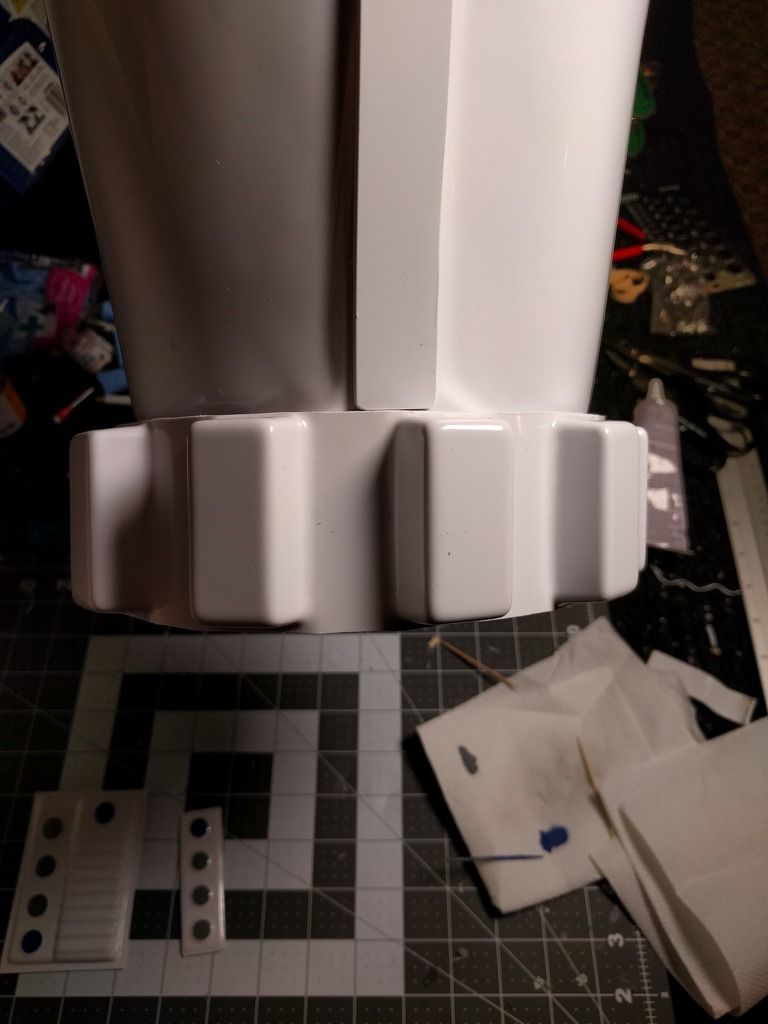
This suggestion is one of comfort more than anything. I know if i attempt stairs and the like, my thighs dig in to me at the top, so taking the protruding corners off the top of the cover strips will tidy them up and give less material to dig in to you.How did I not think of that earlier? So much better now!
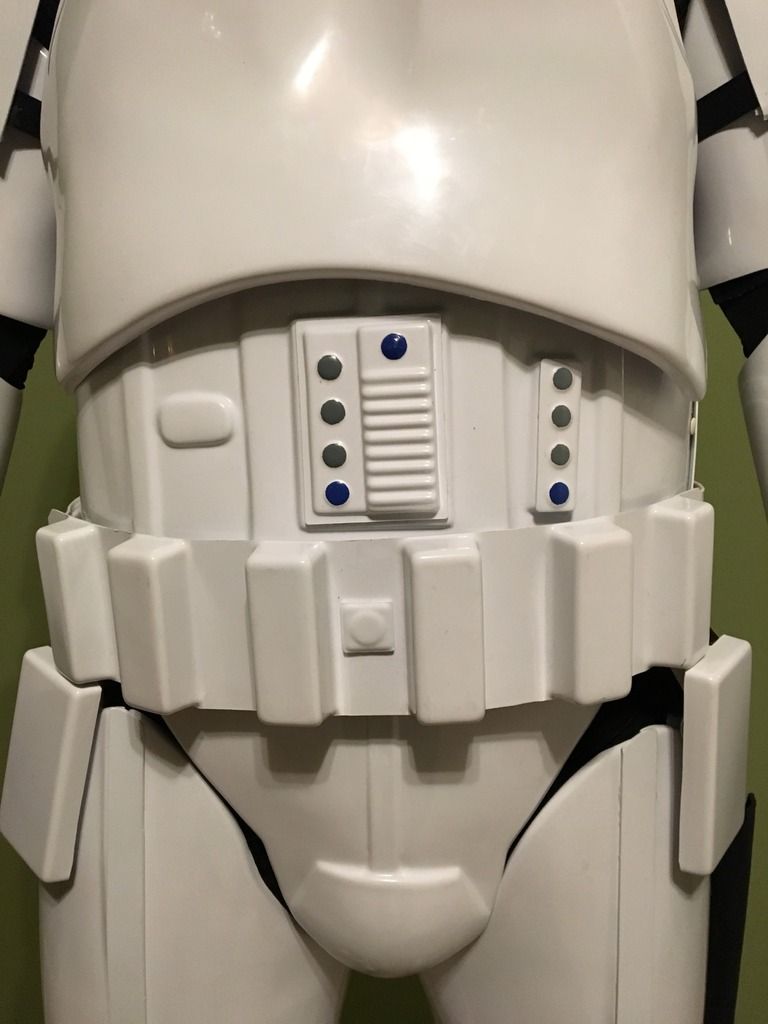
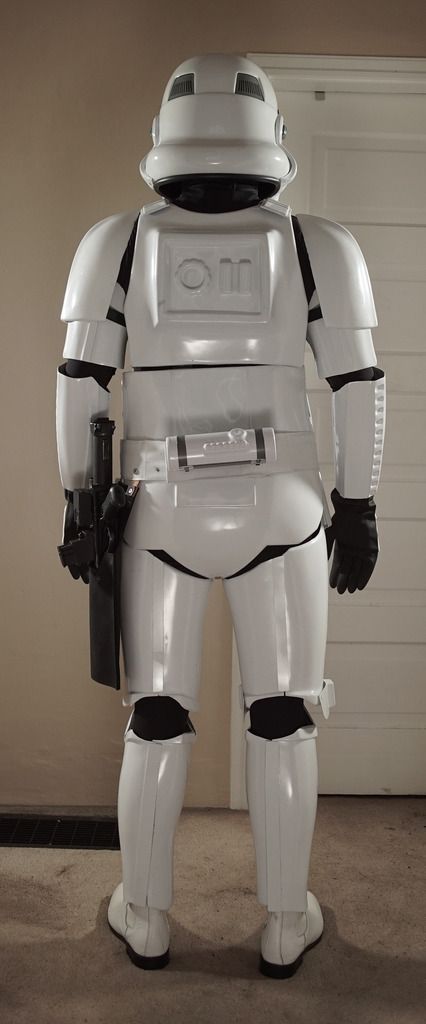
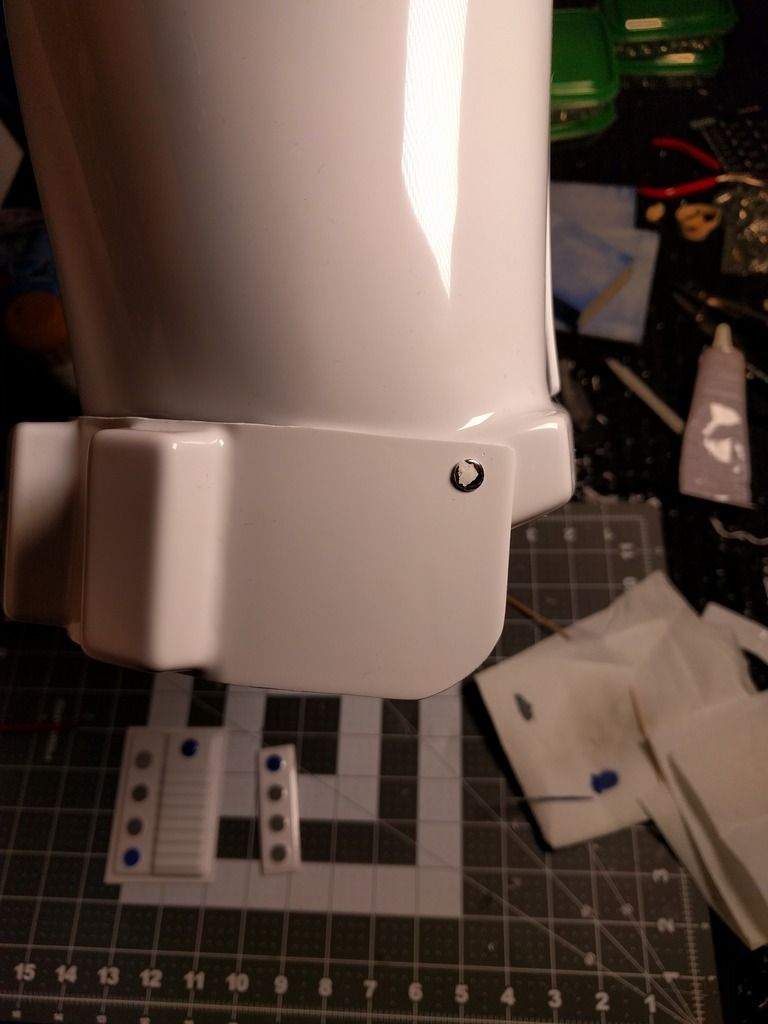
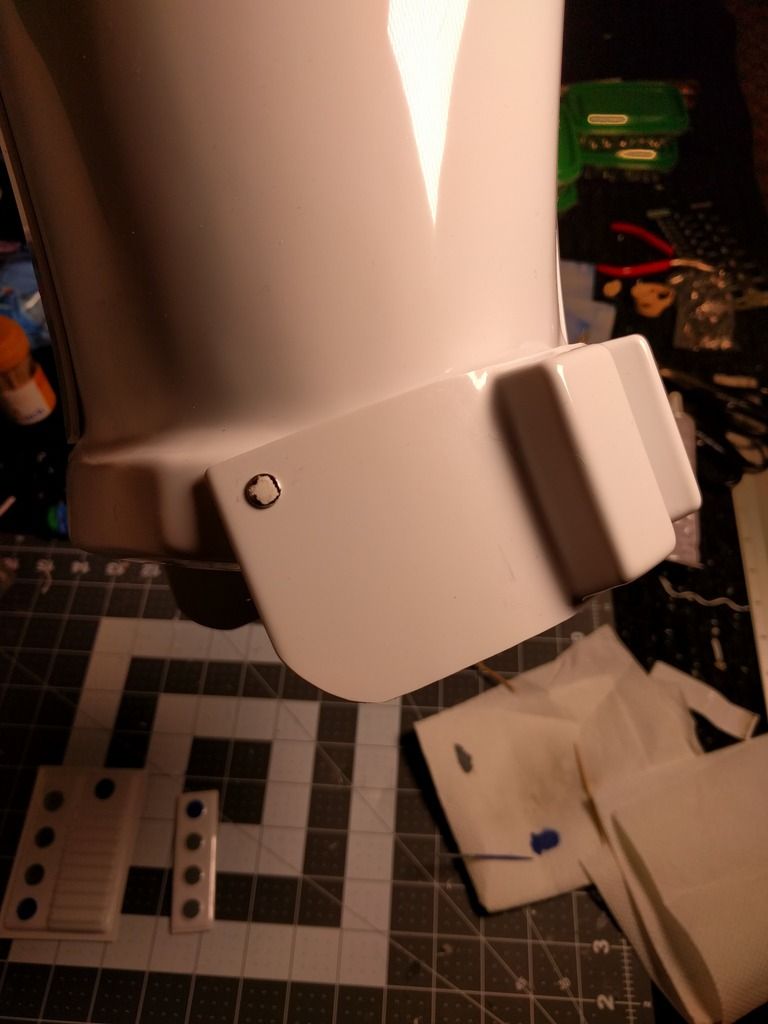
We have a question about the mysterious mark on your belt.
Is it a hole or a mark of some sort? either way if you can try and make it less visible, or even gone, that would be great.
Mystery smudge has been cleaned up.
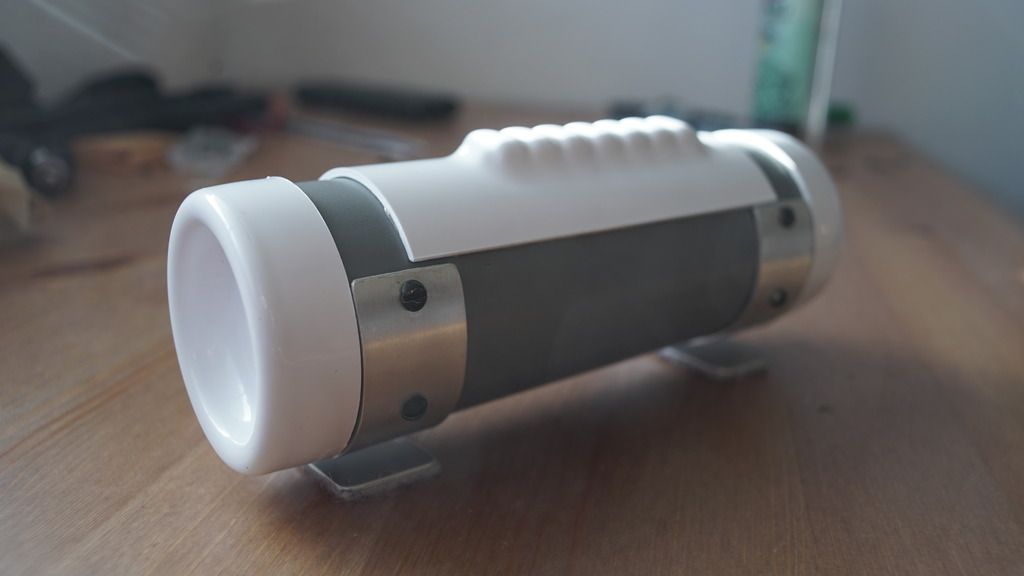
Lastly, onto an accuracy point, talthough the crews you have used are flat blade, they are of the wrong size (too large) and could really do with a coat of black paint for that screen used look.
I replaced the screws with smaller ones and painted them black.
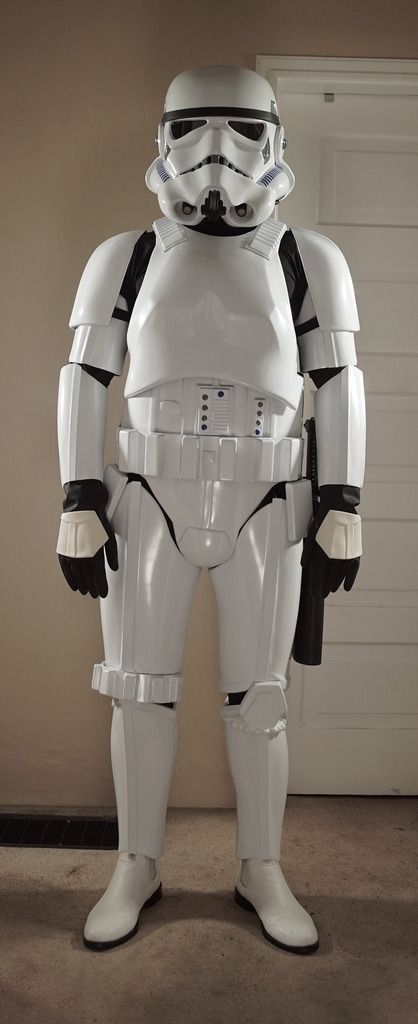
Onto the photos: Huge thanks to Jay, CoasterTK, for taking these for me!


Let me know if you require any additional pictures. Cheers!
-
3
-
-
Thank you very much for the approval and all the suggestions Sly, I'll get to work on those right away!
Just checked out that mystery mark on my belt and it's just a smudge.
-
Please consider my kit for EIB status.
Name: Marco Bossow
Legion ID: TK-62726
Forum Name: Atin
Garrison: Outer Rim Garrison
501st Member Page: http://www.501st.com/members/displaymember.php?userID=21341&costumeID=124
Height: 5'8"
Weight: 150
Armor maker: AP
Helmet maker: AP
Blaster: Quest Design
Canvas Belt: Robert Kittel
Holster: Darman
Hand Plates: AP
Boots maker: Imperial BootsNeckseal: Own made
-
TK-62726 from the Outer Rim Garrison requesting 501st access. Thanks!
http://www.501st.com/members/displaymemberdetails.php?userID=21341
-
The approval process went way faster than I anticipated. TK-62726 reporting for duty!
I could not have done this alone, so a special shout out goes to Terry/Pandatrooper and Jay/CoasterTK from my garrison, as well as Gary, Kris, and Aaron who have helped me here. You guys rock!
-
4
-
-
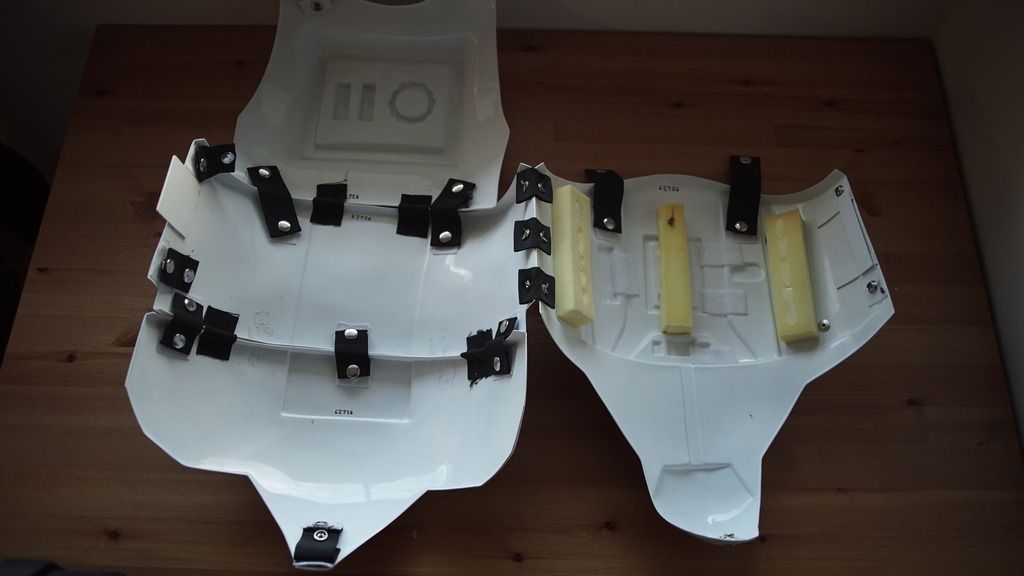
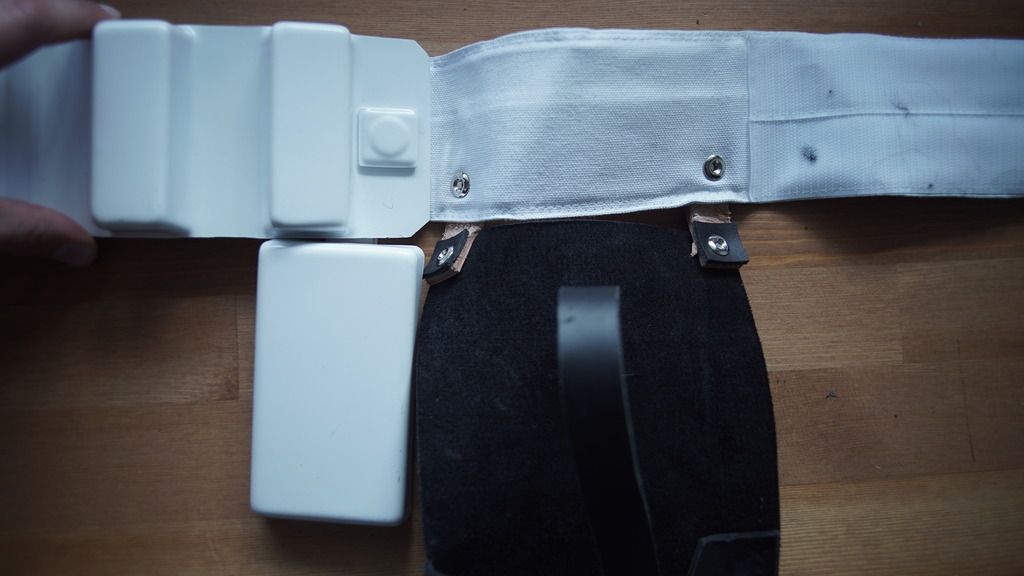
The tab system works great, thanks again for the brilliant suggestion! I've also put some padding into the ab pieces and it fits really well now.
I've tweaked a lot of other things including the strap length for the dropboxes, the shoulder bell position and the chest to back bridges. I've also added velcro to my boots to keep the shins in place and padded the thighs to keep them from getting caught in the sniper knee plate.
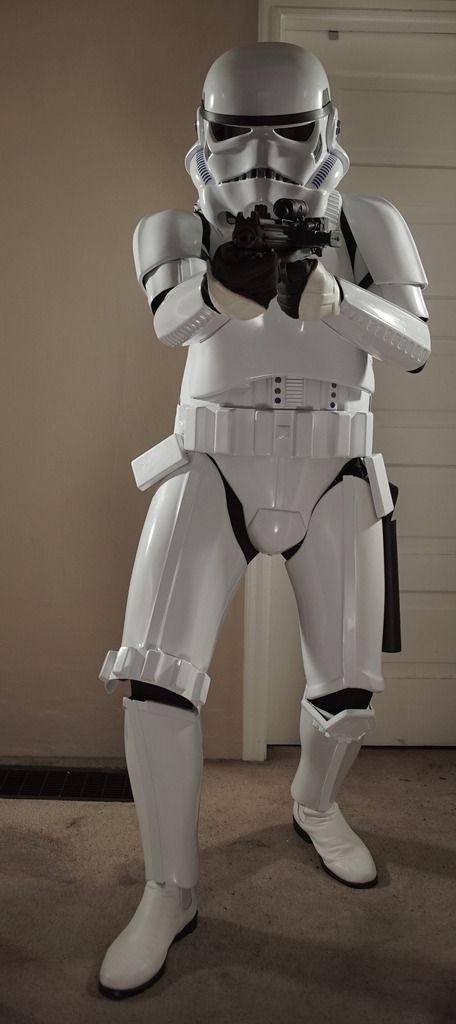
Below are my submission pictures that I just submitted a couple of hours ago. Thanks again for everyone who helped me out!
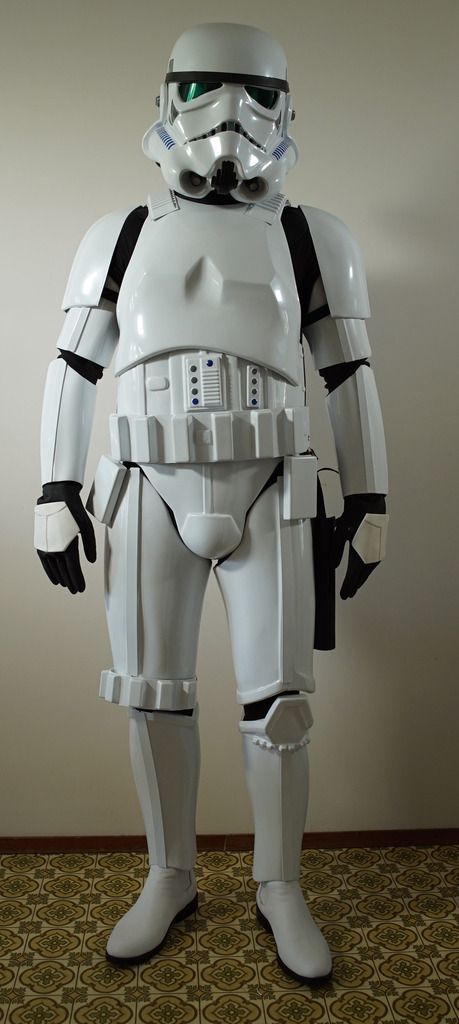
You can see the rest here: http://s1305.photobucket.com/user/Atin1337/library/501st%20submission%20photos?sort=9&page=1
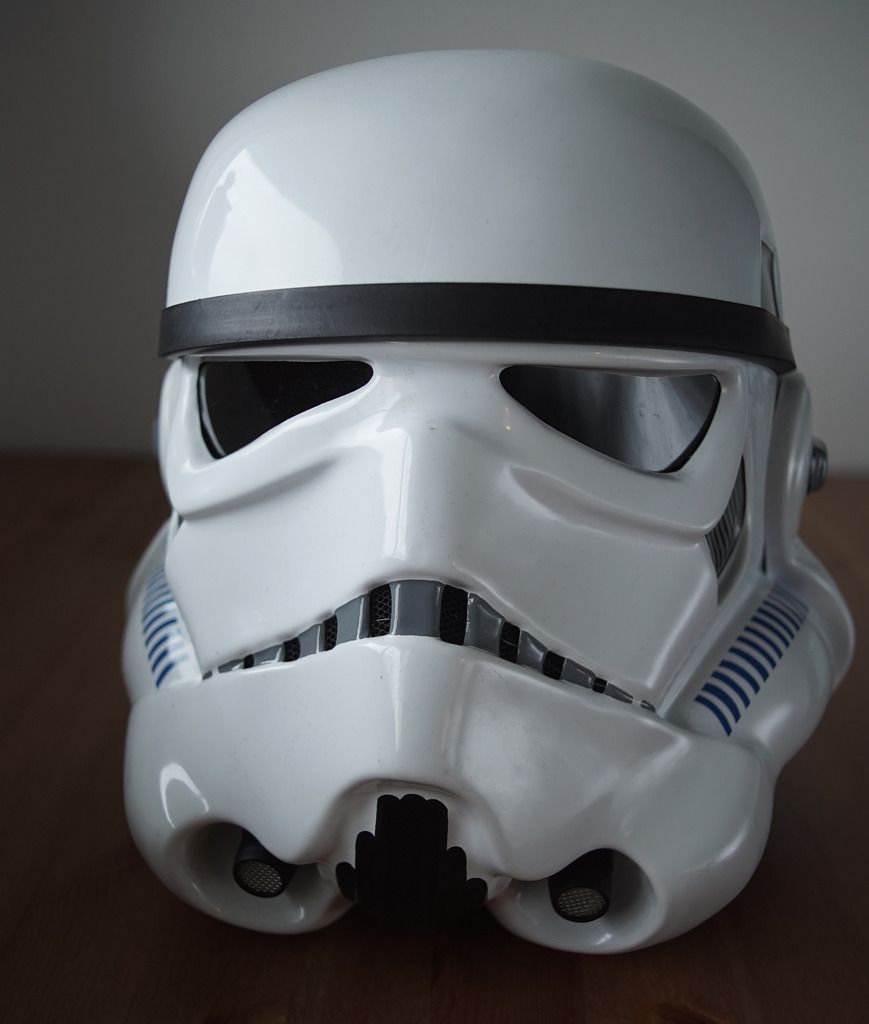
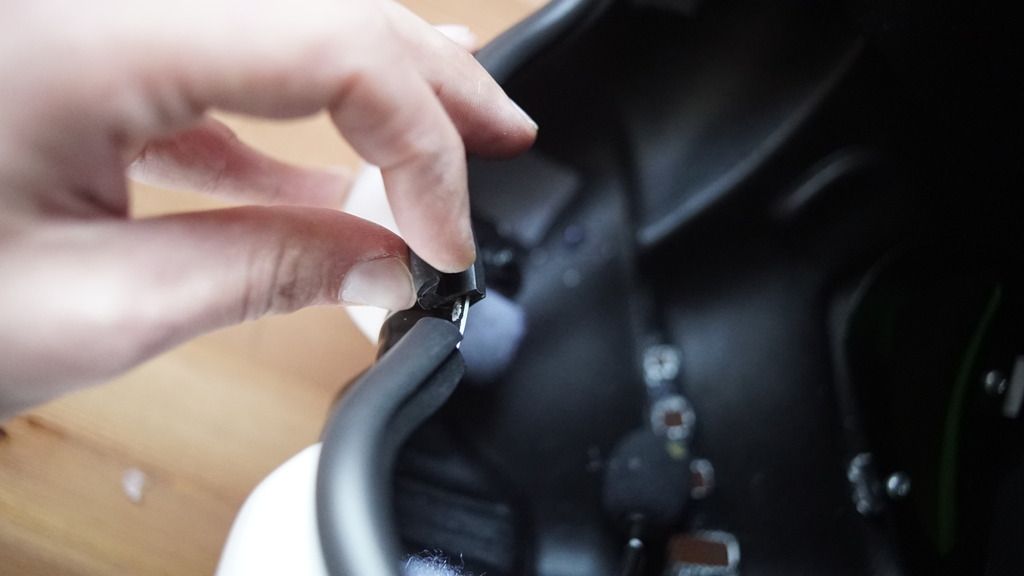
Next up are helmet electronics. I should have started with those a while ago but better late than never. Just ordered ukswrath's fan system and SHA. Tonight I'm going to install the Aker. Don't know yet whether the ICOMM is worth it for me, seeing that others are hard at work with apps that basically do the same thing.
-
3
-
-
Awesome update! Here's a few things I would recommend pertaining to the above:
1) You can use foam strips to help even up the sides. However, consider a slightly different option if you have the extra strips for it - a tab/slot configuration. Here's how lucnak did his (mine is similar): http://www.whitearmor.net/forum/topic/35730-lucnaks-anh-stunt-build-ata/page-4#entry484556
Oh my. I've seen these tab systems before but just now did I get what they're for. Penny -> Dropped
I should have enough ABS left to implement that system.
2) You are on track with changing the elastic. You might consider widening where the snaps go, so that they are farther out toward the edge. This should help pull them back in. The second pic here might help show how close to the edge I went: http://www.whitearmor.net/forum/topic/35177-sentrys-anh-stunt-build-ap/page-4#entry478144
Perfect, I'll do that.
3) I took care of the leg issue by cutting out those sections for mobility. This isn't necessary for everyone, but I had to do it, and I was able to make it to EIB without issue (I think it is ok at Centurion as well). However, I have heard of GML's not passing folks for basic with the cutouts, so you may want to try a hot water bath to help coax the plastic together. Others may have better suggestions.
If it's fine for basic I'll leave it alone for now. I was planning on cutting those out eventually so I'll do it once I have my TK number.
4) Yes, the smaller button plate will need trimmed down. You want to JUST see the edges of the raised ab where that plate gets mounted. It will feel like you are taking a lot of plastic off close to the raised buttons, but it will be correct. Just a little at a time - you can always remove more, but putting it back on is MUCH harder.
Hope that helps!!
How to solve all my issues in a single post by Gary. Cheers to you mate!
-
2
-
-
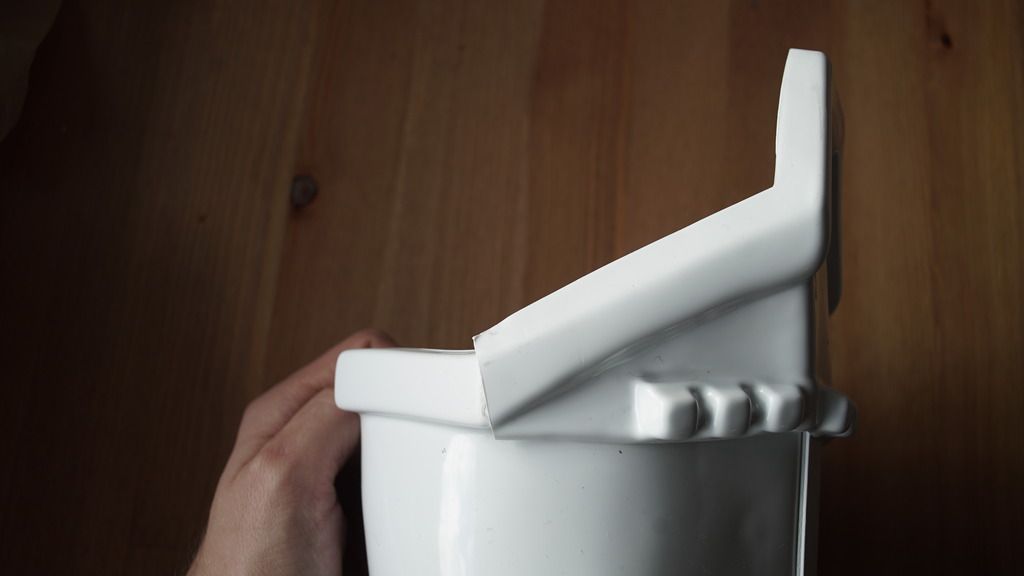
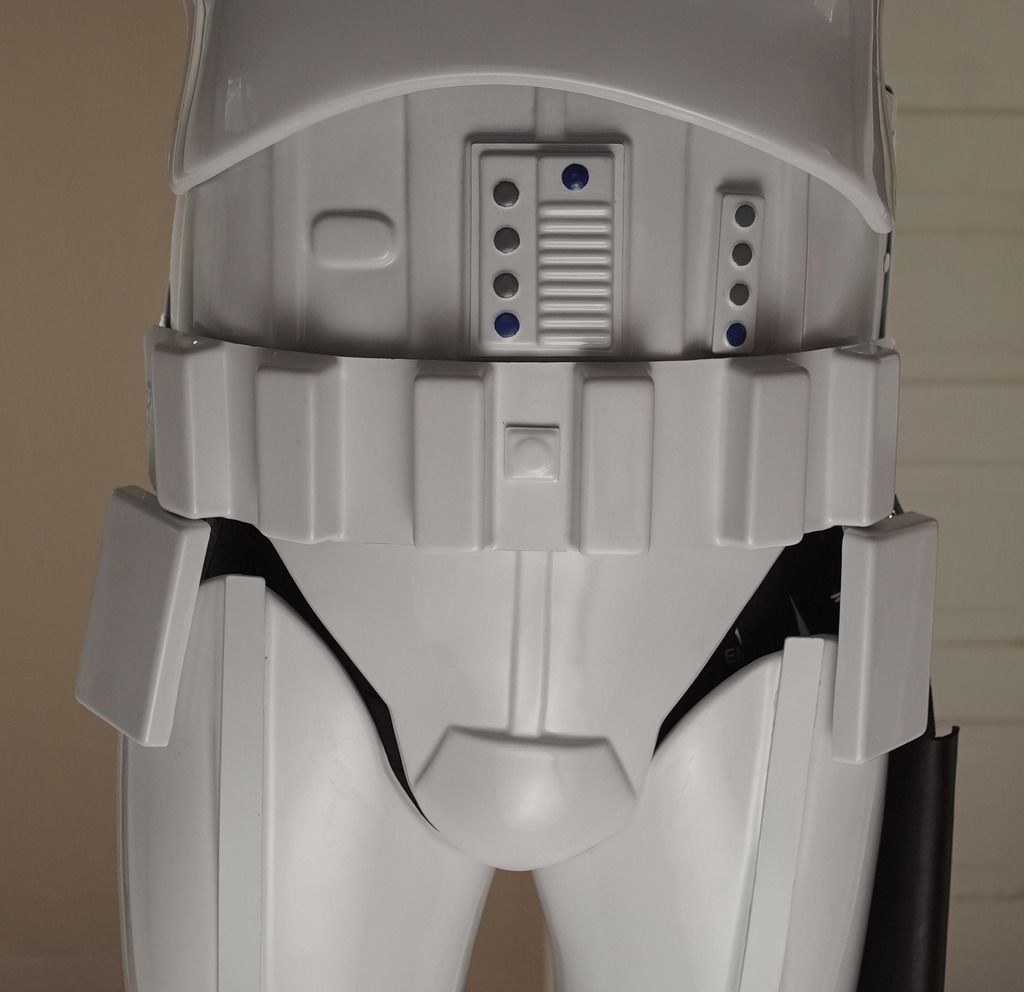
Okay, here's a big progress update:Attached my ammo belt, just have to repaint those rivets:
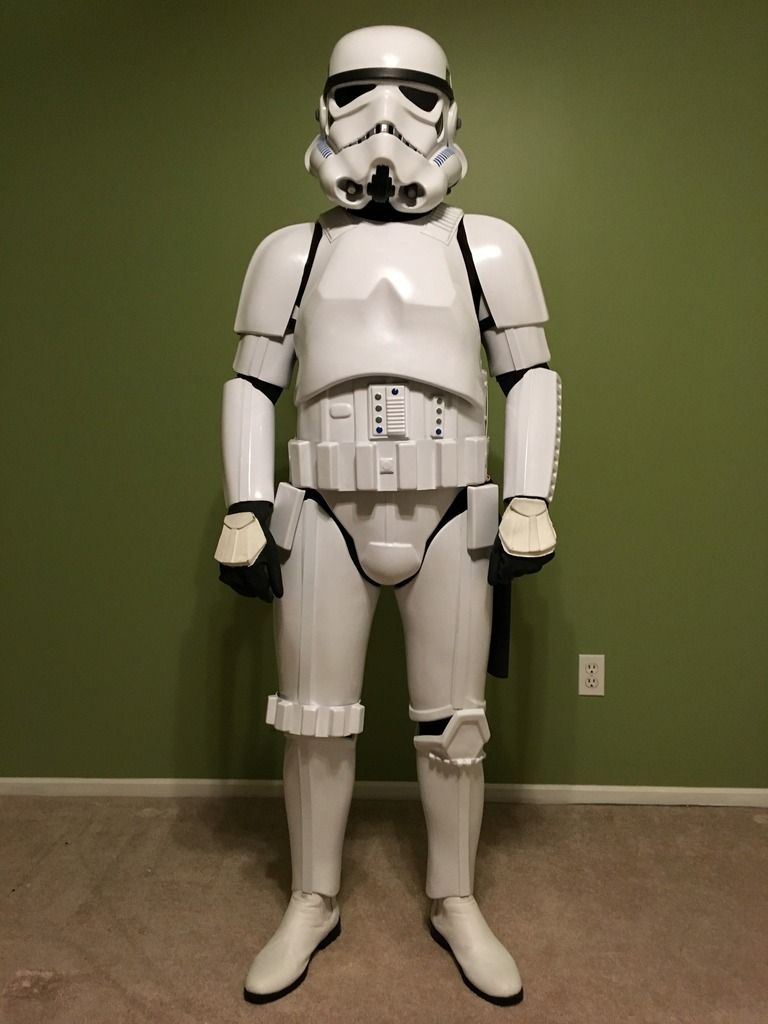
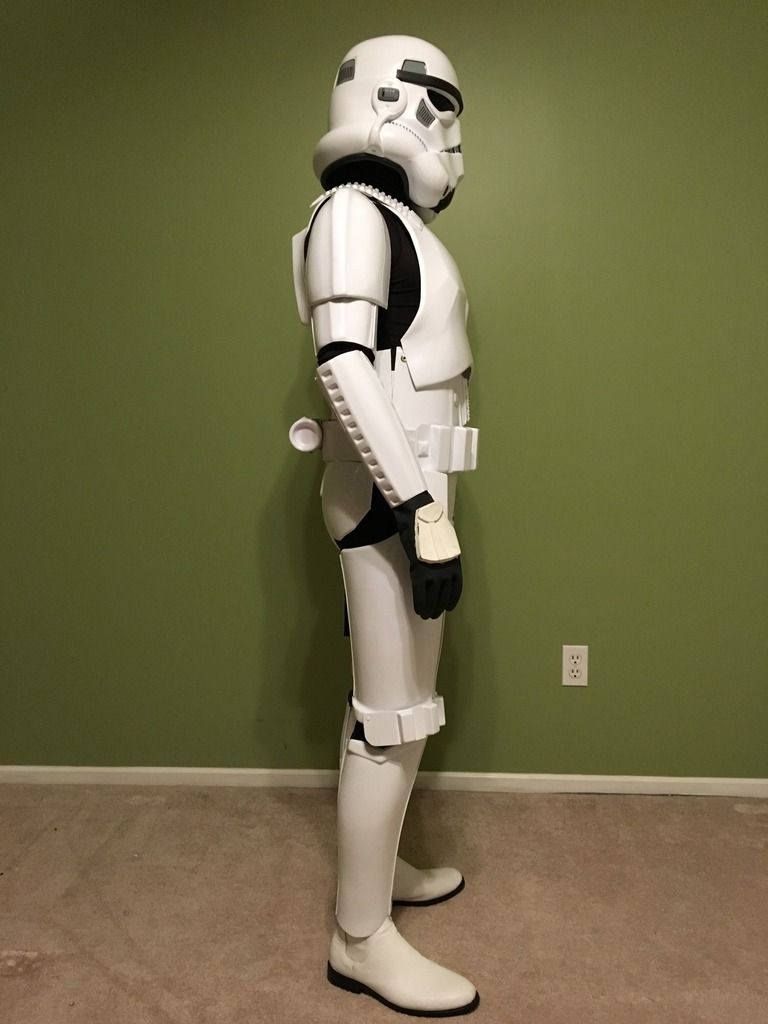
 After that I put on all the pieces together for the first time to see how they sit:
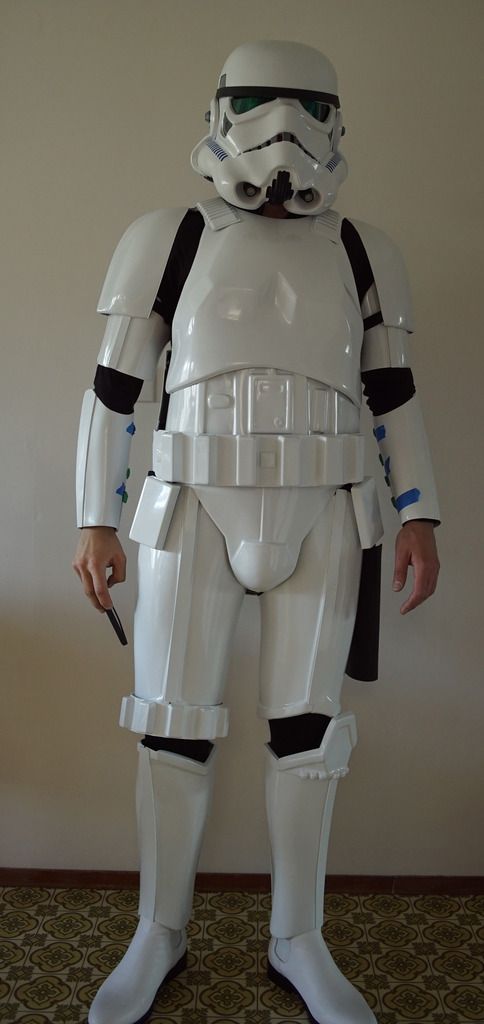

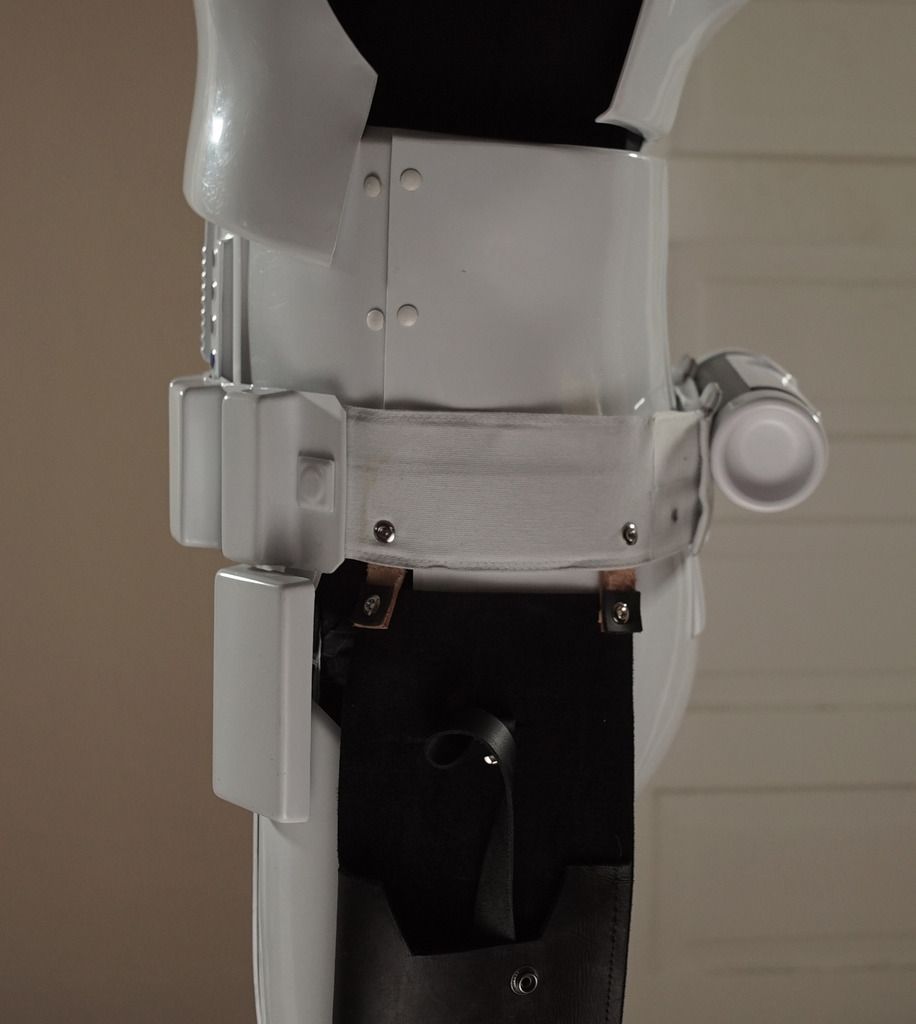
 I have since dropped the thighs a little lower so they don't collide with the cod piece.As you can see my kidney plate is flaring out on one side, so I think I'll put in some foam to push out the ab plate more:
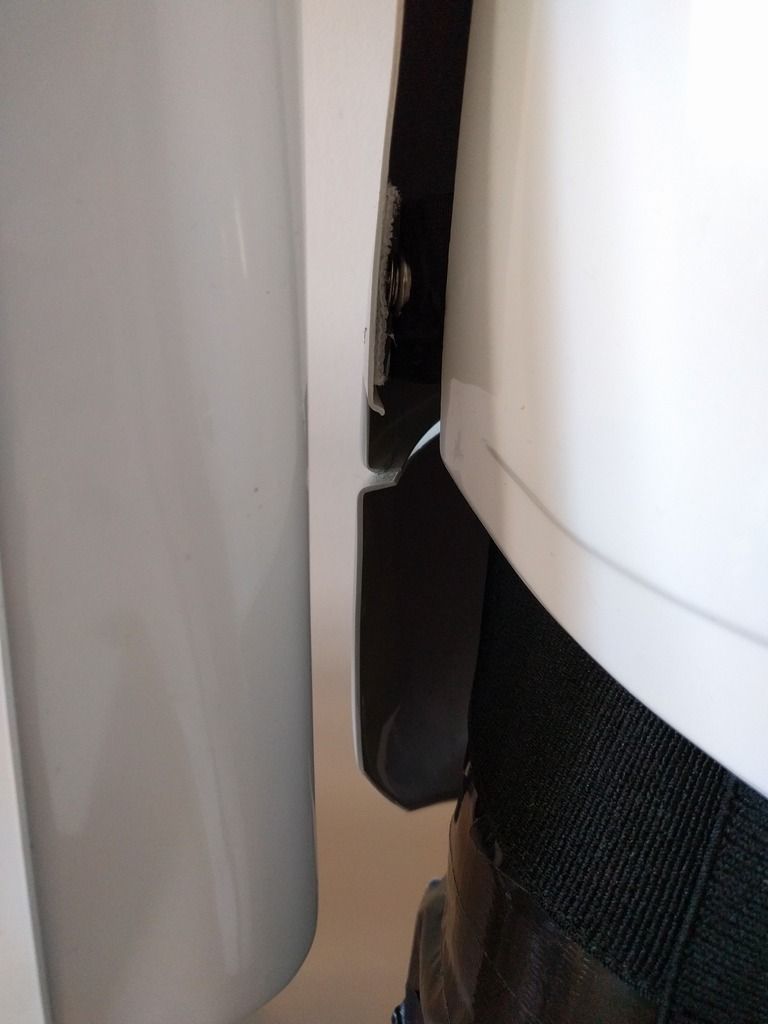 Even with the belt pushing the two pieces together it doesn't look right:
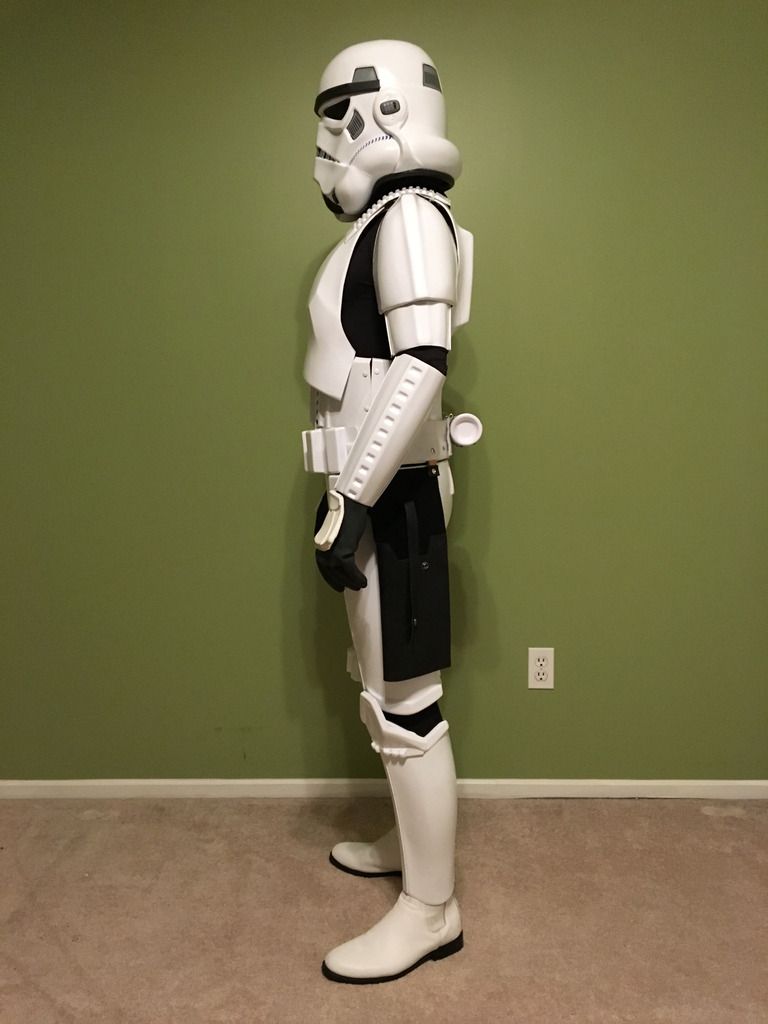
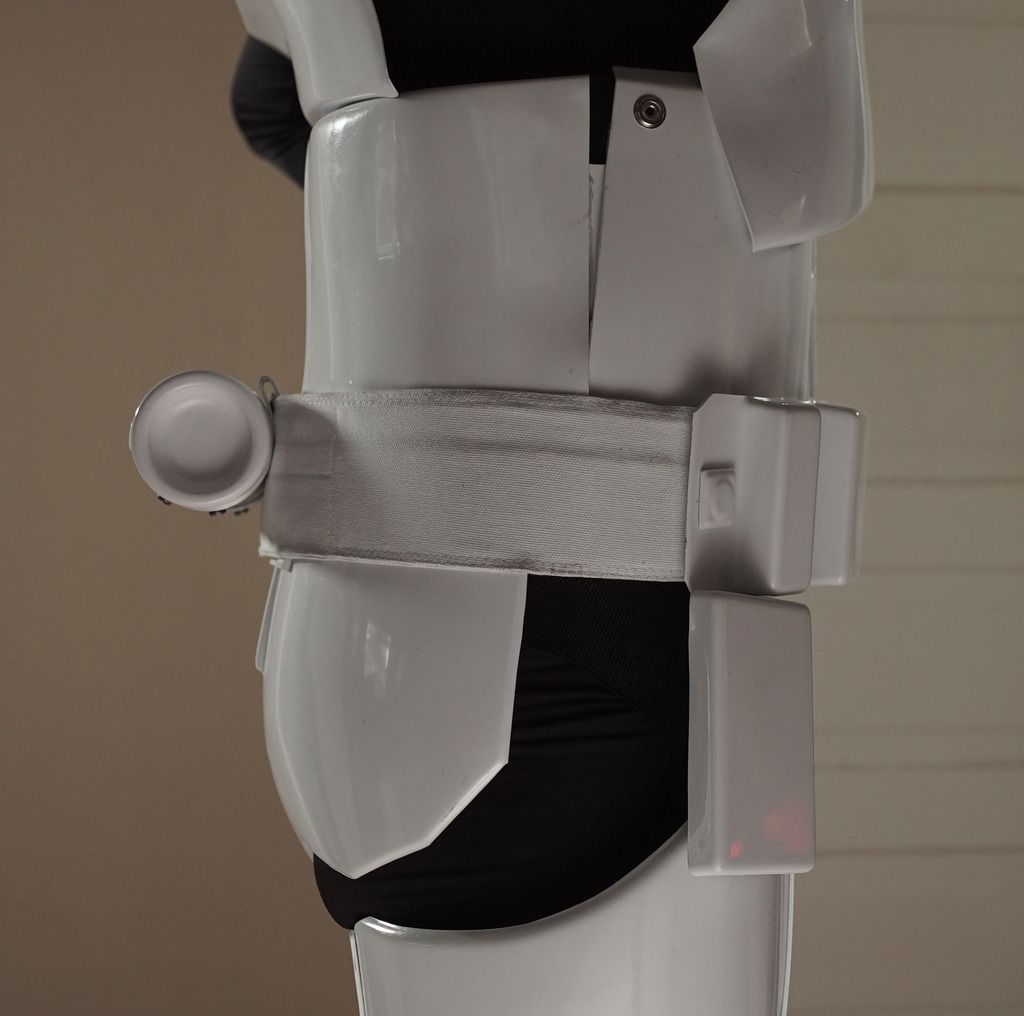
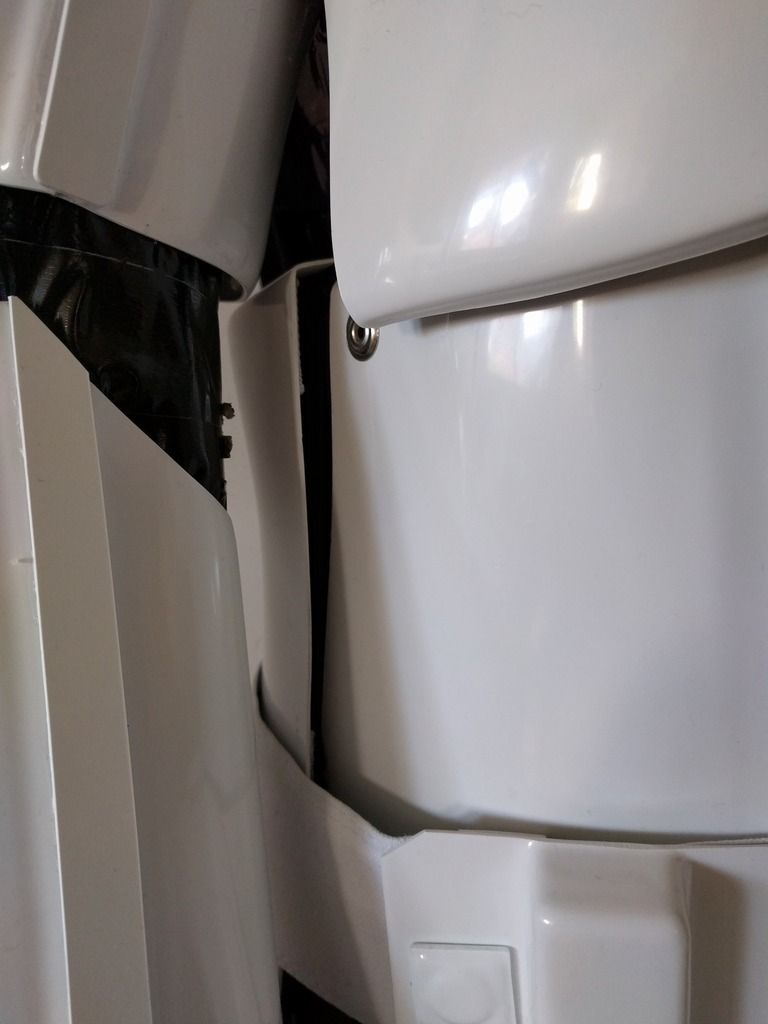 On the other side the butt plate is pushing up in a weird way so I'll make the elastic there a little longer:
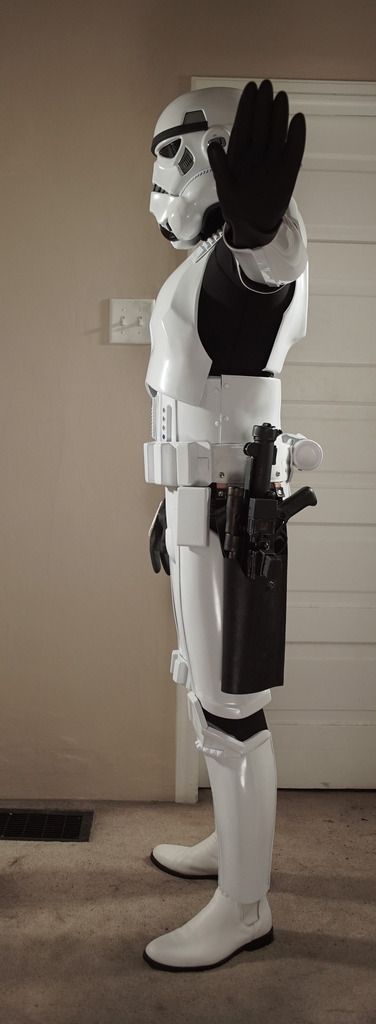
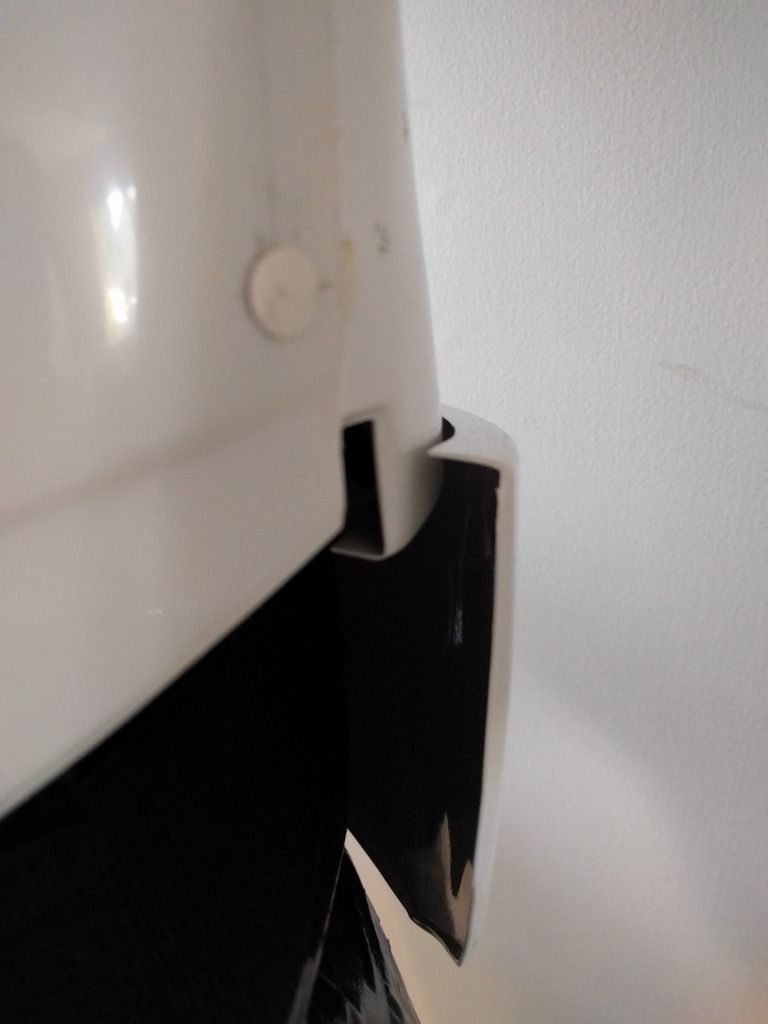 Here's my belt with the holster attached:
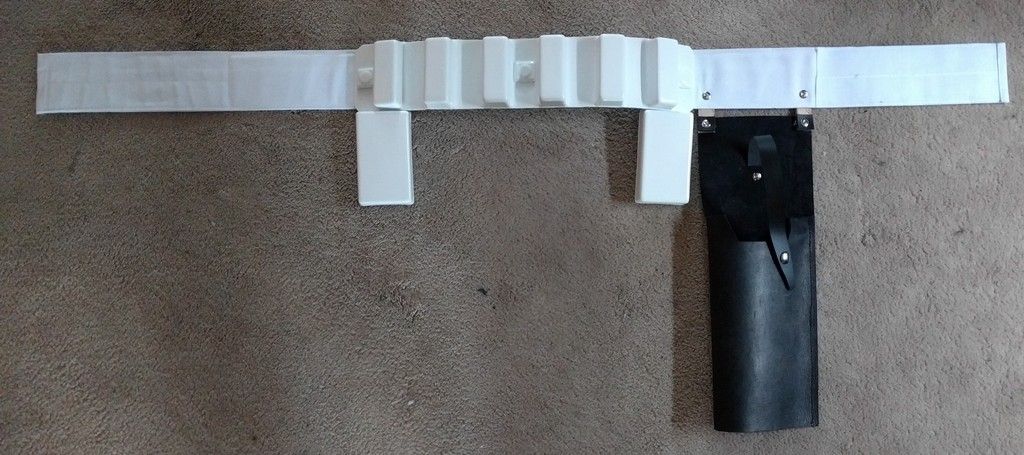 Since the taking the full suit pictures, I've finally glued the remaining outer cover strips:
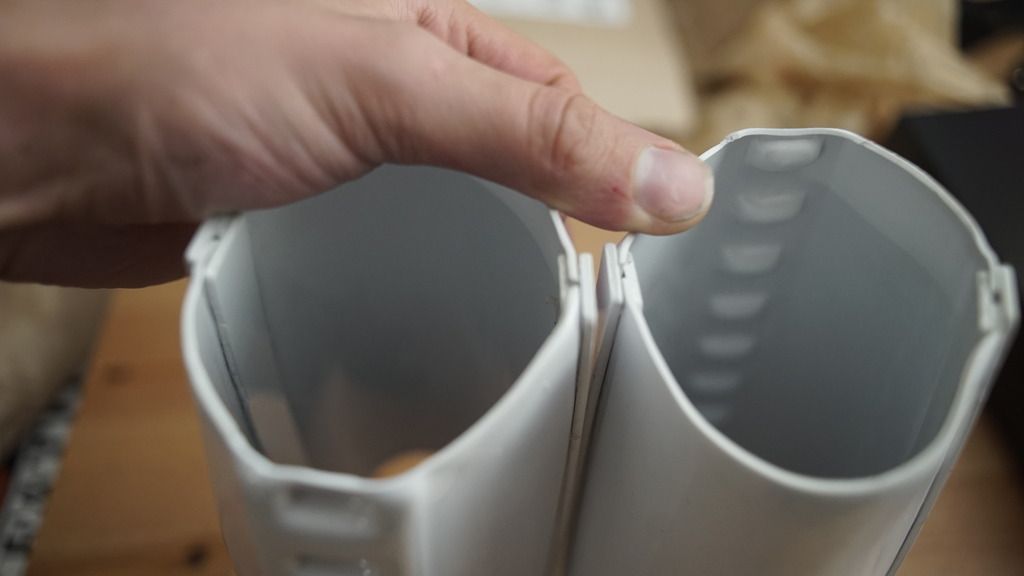
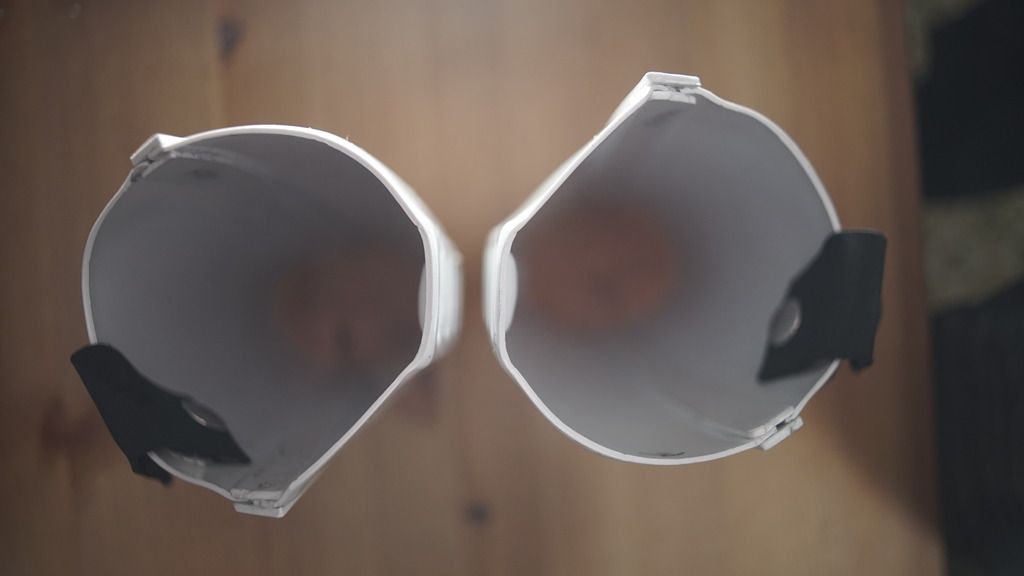
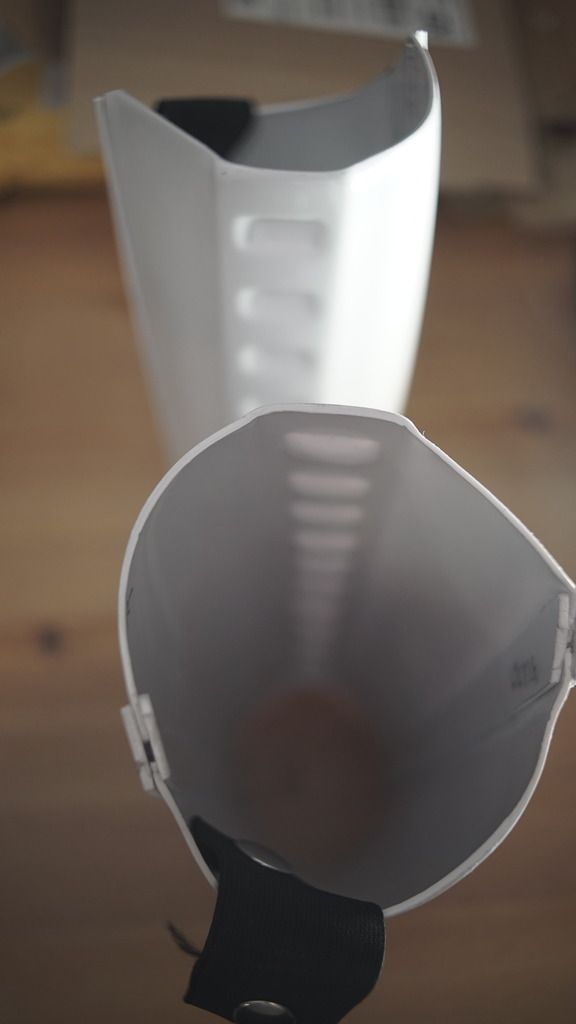
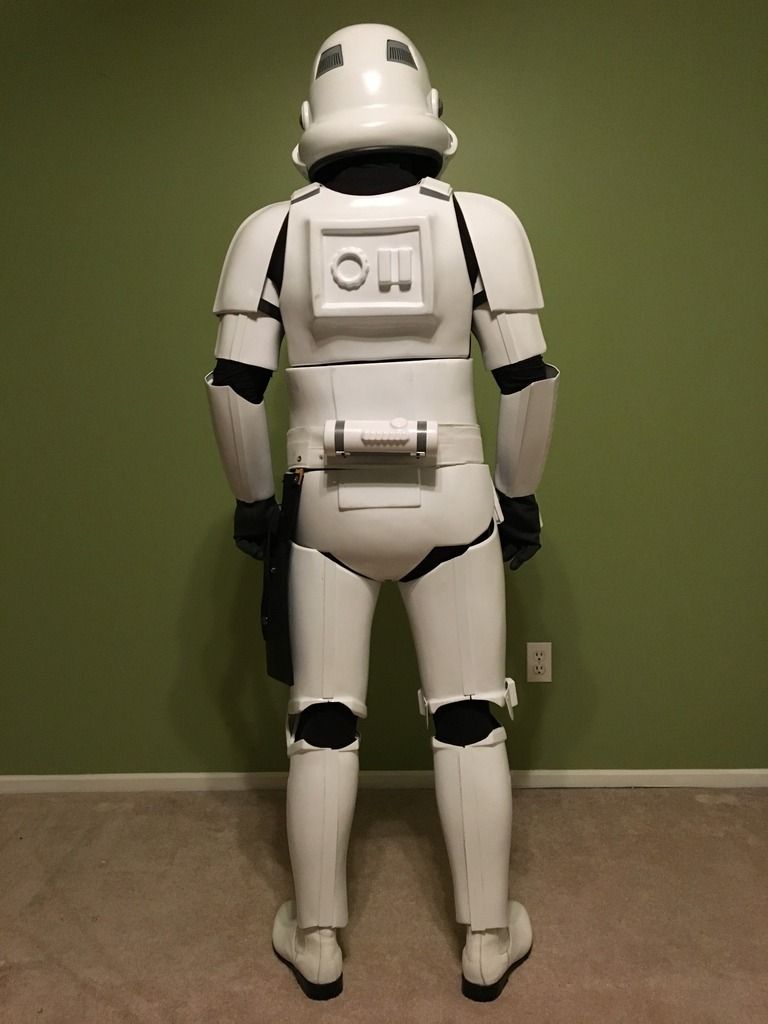
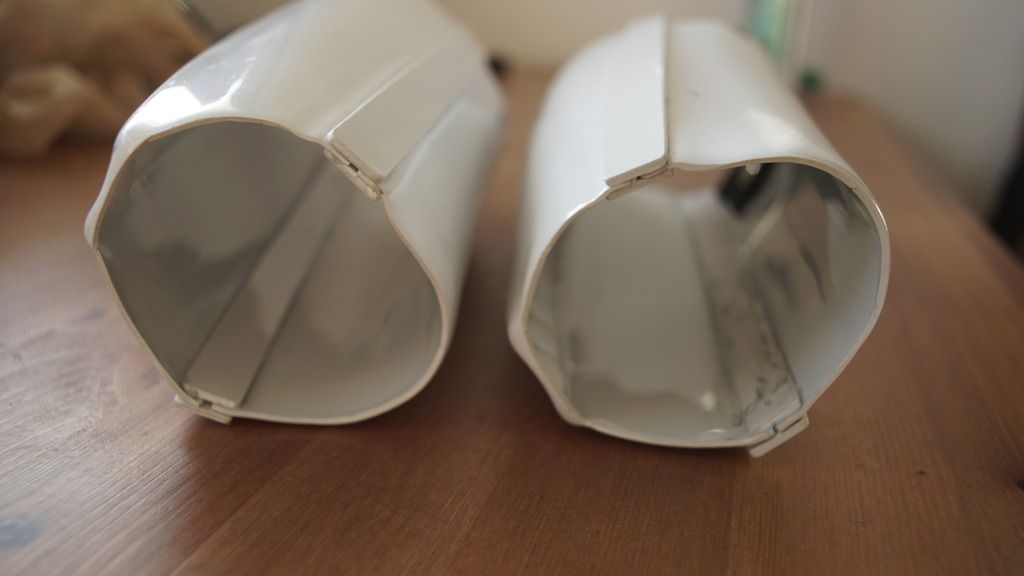
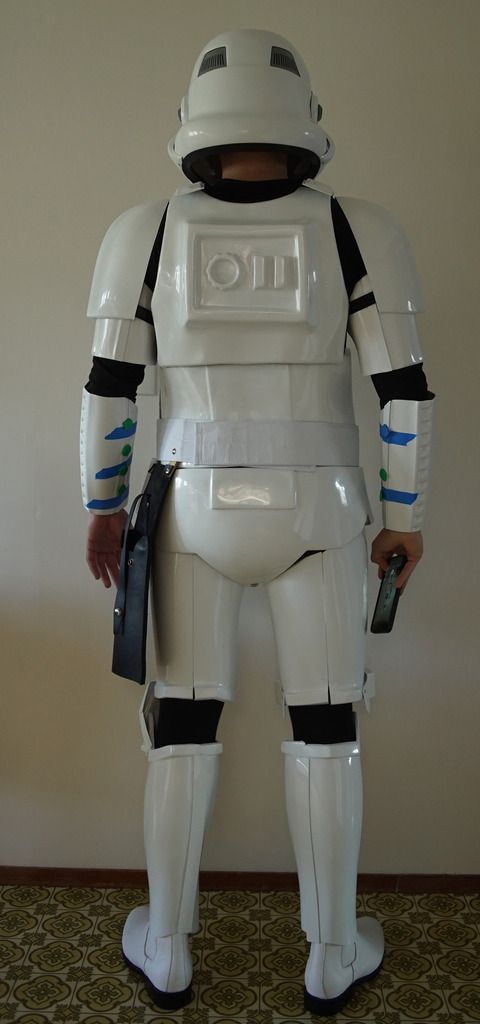
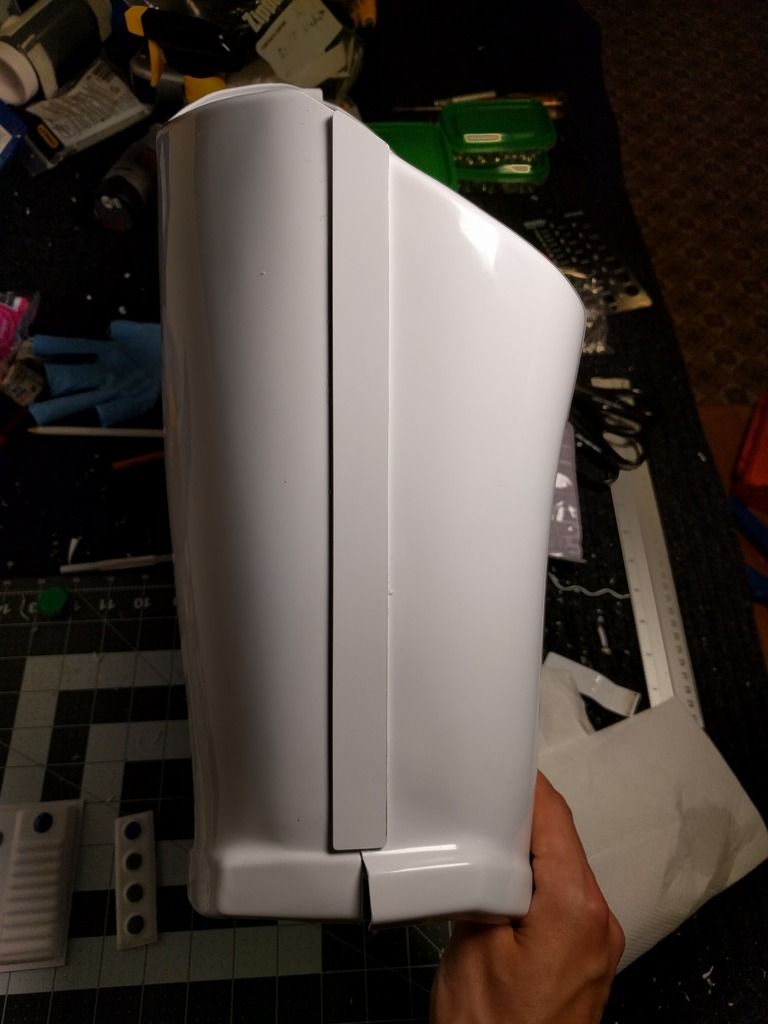 There's more weird stuff going on with the AP legs on the back side. Does this need to be/can this be fixed?
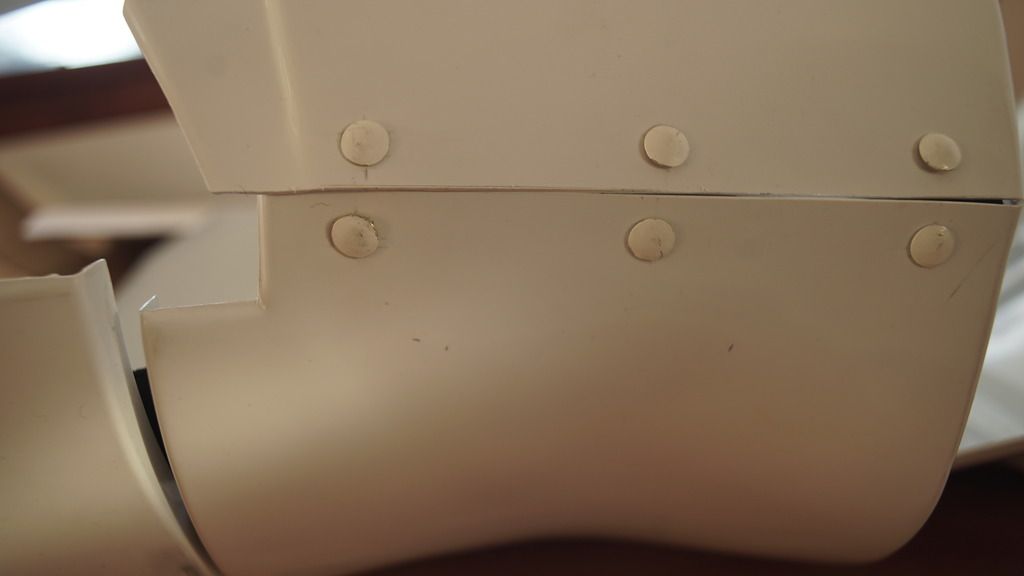
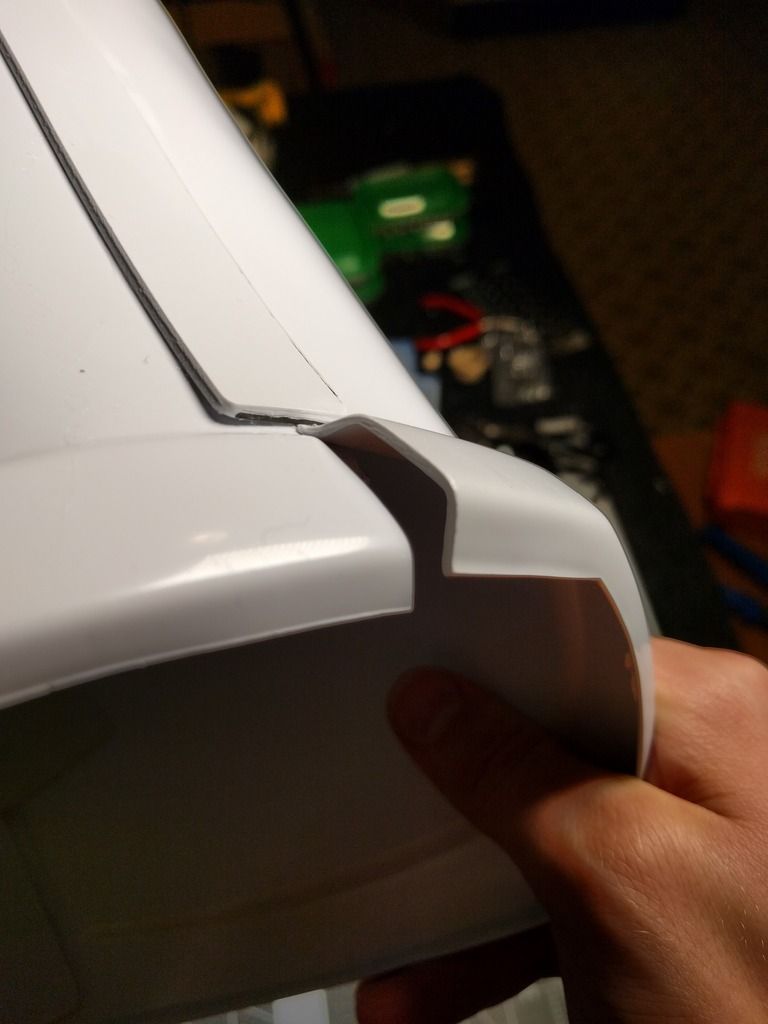 Finally gotten around to paint all my ab buttons. For some reason the top grey one turned out lighter compared to the others so I'll redo that:
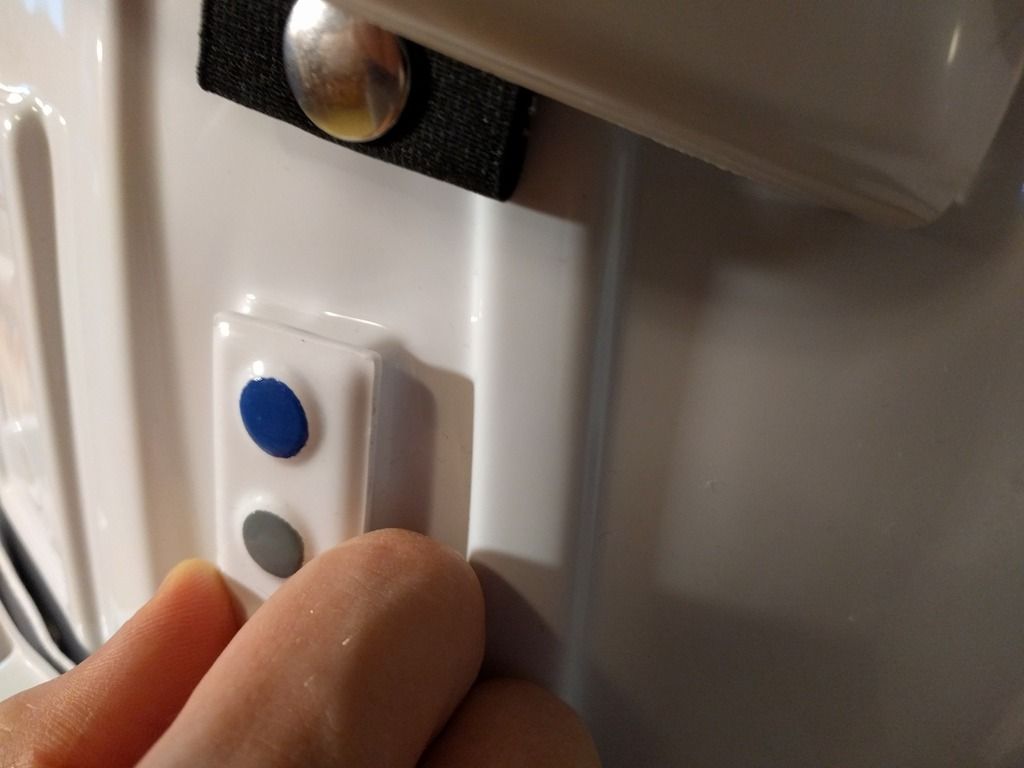
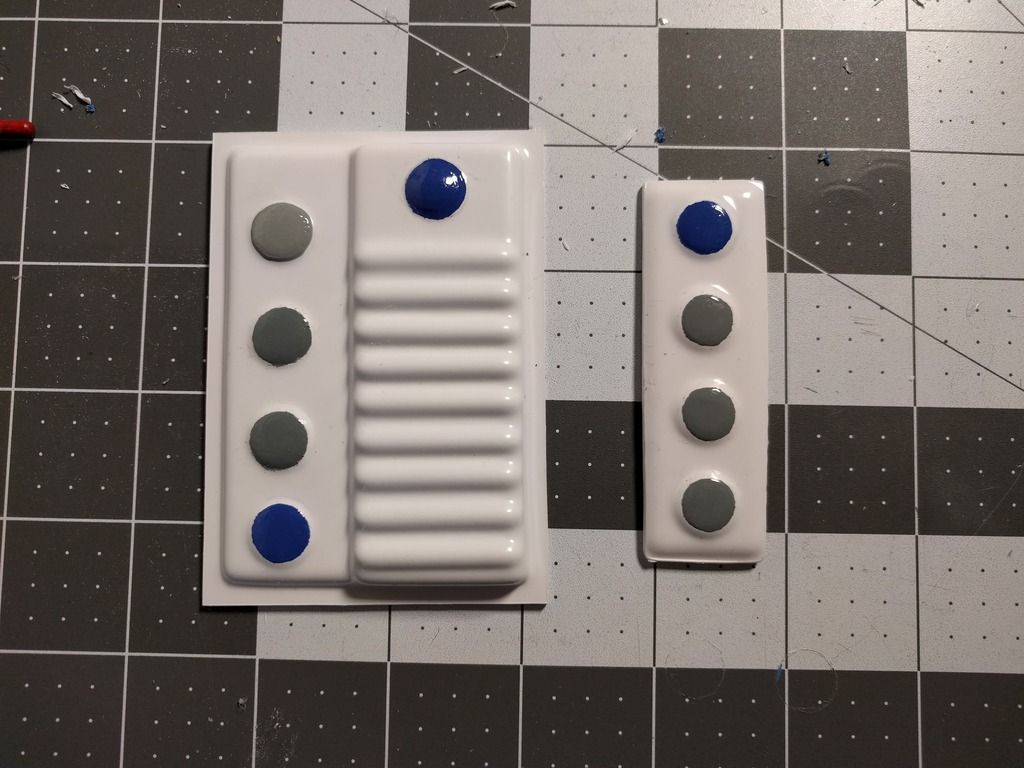 As for gluing them on, I feel like I have a little bit too much overlap on the button strip when holding it onto the ab plate. Or this fine?
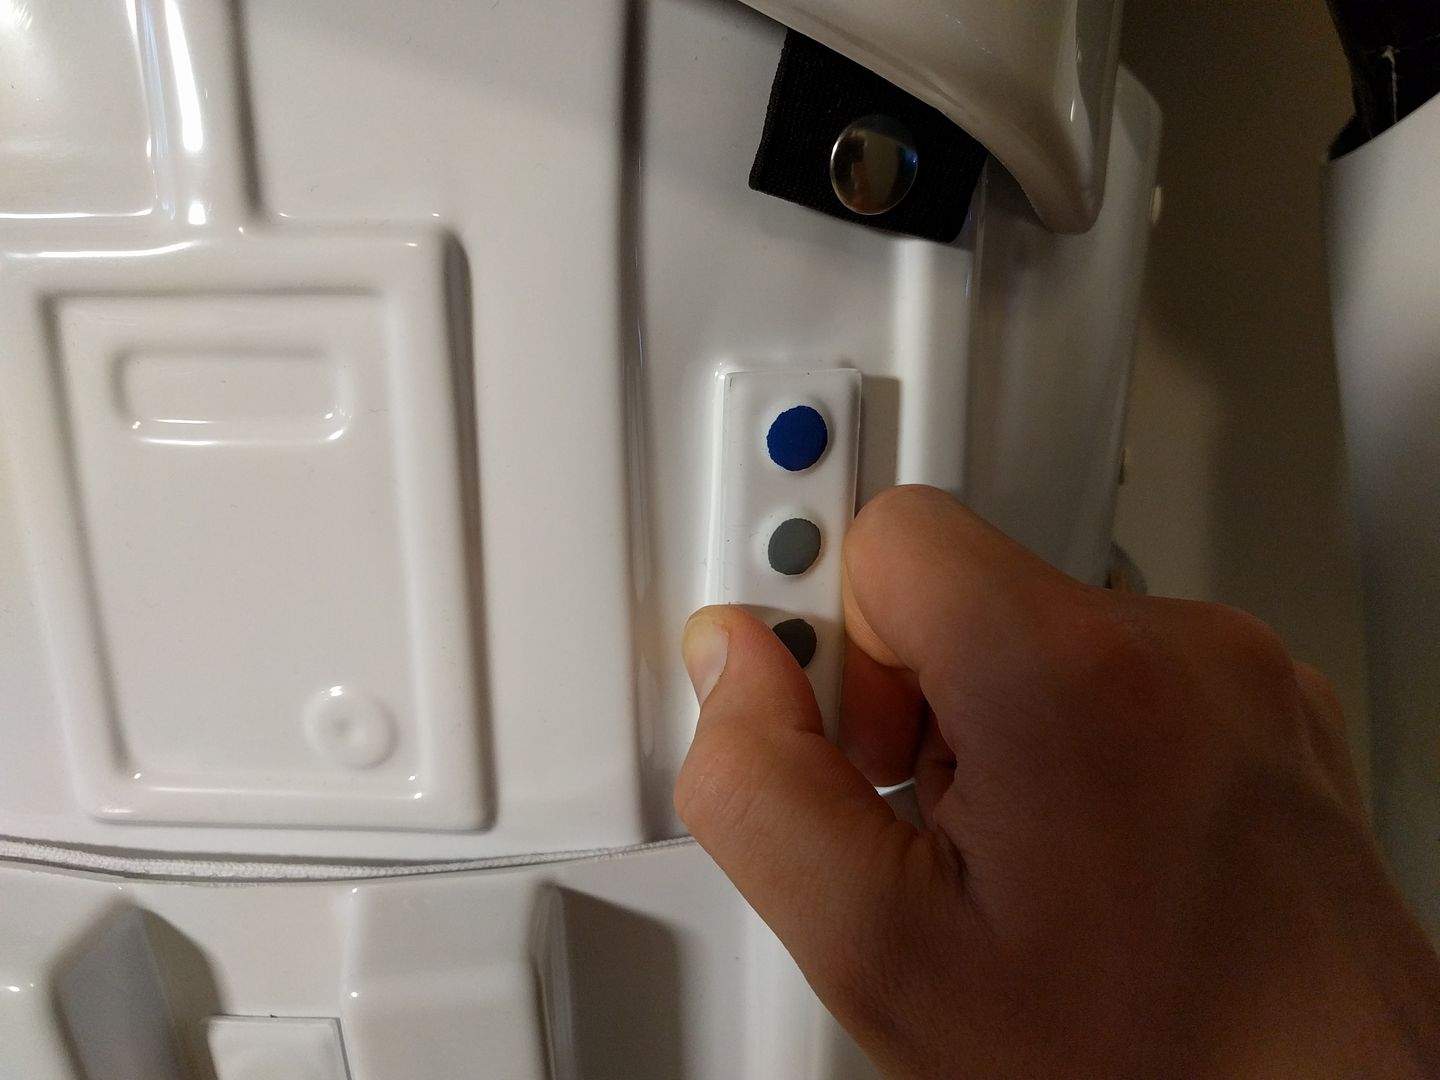
-
1
-
-
...also the sequence I followed to glue the sniper plate: front of plate, then 24 hour cure with E6000; inner side, another day for E6000 to cure; then outer side with super glue.
Sent from my HUAWEI G510-0251 using Tapatalk
I'm currently trying to get both sides attached with E6000 just because I might want to switch the plate out at a later point. It cracked on one of the inner corners from my attempts to bend it. Don't know yet whether that is going to work cause there's so little surface area.
I'm about to drill the holes for the ammo belt and just want to double check that the markings are correct. Here's my dry fit:


And here are the hole markings:


-
How you have it taped now, is how mine came out. I passed EIB with it in this configuration.
You might consider trimming the ends so that they are 90 degrees from the bottom of the knee plate. Just an option, not a requirement.
I think this is the link you are considering:
http://www.whitearmor.net/forum/topic/35918-hasos-anh-stunt-tk-build-ap-armour/page-2#entry476568
Perfect, thanks for finding this.
Even if the crooked plate is acceptable, I know it's going to bother the s&%t out of me so I'll attempt the water bath.
-
1
-
-
After a triple sanity check I combined both your methods for extra peace of mind and it came out nicely.
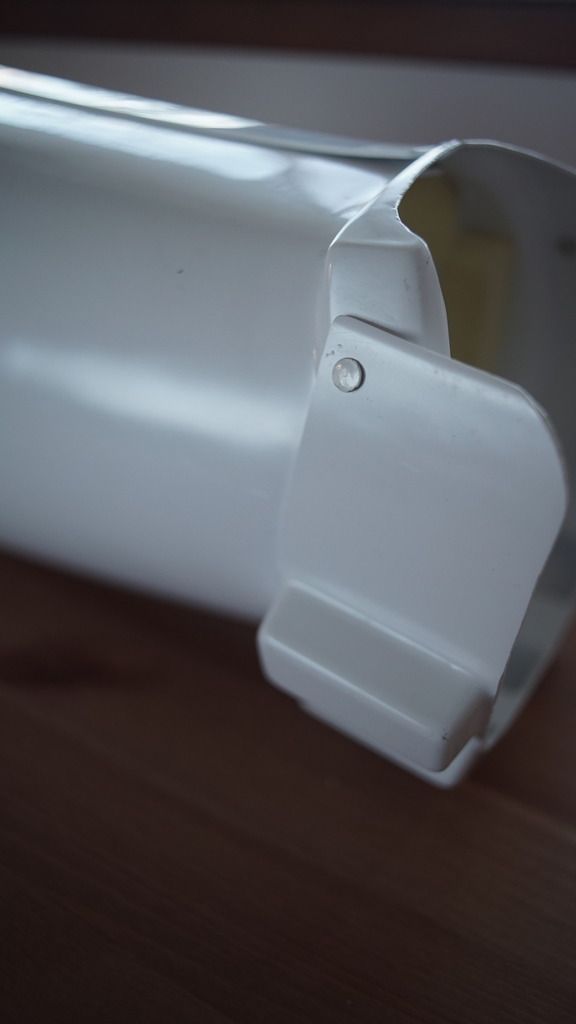
Now for the sniper knee plate...
So far it looks like I'll have to choose between aligning it with the ridges and have it sit crooked or or have it sit straight with one ridge not aligned. I saw somebody fixing this issue by bending it slightly but can't find that build thread anymore... Suggestions?


-
I'm about to drill the holes for the snaps in the ab plate that'll hold up the belt and just want to run the measurements by you guys. I'm was looking at the belt tutorial on this forum but my measurements differ quite significantly.
Here's my belt. The female snaps sit quite a bit higher.

I've cut a piece of painter's tape to exactly 335mm, marked a center line and attached it exactly 30mm below the upper belt line on the ab plate, which I marked with another piece of blue tape:

Here's the left side:

And here's the right side:

Before I irrevocably turn my ab plate into a swiss cheese, is there anything I've overlooked?


Bucketheads: A Stormtrooper Story (Fan Film)
in Off Topic
Posted
Yeah, Samuel is with us all the way! He also scored this teaser.