

Darkpain714
-
Posts
67 -
Joined
-
Last visited
Content Type
Profiles
Forums
Gallery
Articles
Media Demo
Posts posted by Darkpain714
-
-
Just tried upgrading to 2.0. Pretty sure I copied everything correctly. Now, I have what sounds like white noise constantly running and no mic input working at all. Any suggestions?
# sound to play when TKTalkie is started[startup=STARTUP.WAV]# chatter loop settings[loop=CHATTER.WAV]# 0 to 32767, 1 is pass-thru, below 1 attenuates signal[loop_gain=7]# VOICE ACTIVATION SETTINGS[silence_time=350][voice_start=0.05][voice_stop=0.02]# PTT (Push-To-Talk) SETTINGS[button_pin=2][button_click=BUTTON.WAV]# 0 to 32767, 1 is pass-thru, below 1 attenuates signal[button_gain=1]# MICROPHONE/LINE-IN SETTINGS# input settings (0 = microphone, 1 = line-in)[input=0]# 0 to 63[mic_gain=20]# SOUND EFFECTS (STATIC BURSTS, ETC.)# 0 to 32767, 1 is pass-thru, below 1 attenuates signal[effects_gain=5]# EQUALIZER SETTINGS# 0 = flat (none, 1 = parametric, 2 = bass/treble, 3 = graphic[eq=3]# for parametric/graphic = 5 bands, for bass/treble = 3 bands# bands are low to high: -1 (-11.75dB to 1 +12dB)[eq_bands=-1,0,1,0,-1]# VOICE SETTINGS# 0 to 32767, 1 is pass-thru, below 1 attenuates signal[voice_gain=1]# BITCRUSHER SETTINGS - VOCAL EFFECTS# Format = bits1,rate1,bits2,rate2# Set to 16,41000,16,41000 to just pass-thru (disable)[bitcrushers=12,16384,10,10240]# PINK NOISE GENERATOR# 0 to 32767, 1 is pass-thru, below 1 attenuates signal[noise_gain=0.1]# Turn debug messages on/off (1/0)[debug=0] -
Can't wait to play with this!
Sent from my SM-G930V using Tapatalk
-
So I FINALLY got my suit ready for submission, and of course for Halloween, and have been putting TKTalkie through its paces. I got HORRIBLE feedback when I put the helmet on, and played with different settings (Aker volume, TKTalkie volume, mixer gains, etc.) and finally realized the default mic gain is way too high at 36. The signal is really hot. I set it to 15 and am able to crank the Aker and get really good volume now without any feedback. It's nice and loud

Changing the mic gain also means tweaking the trigger settings a tad. I had to lower my min threshold by .01 because with reduced mic gain the amplitude is less so it would trigger the clicks too early, but it's working really well now as well.
So, if you are having feedback issues, first place to look is the mic gain setting. And if you adjust the mic gain, remember to recalibrate the trigger settings

HAPPY HALLOWEEN!
This works very well for anyone struggling. Thanks for sharing.
-
 1
1
-
-
That looks great! Where is your build thread?
Sent from my SAMSUNG-SM-G930A using Tapatalk
Here it is: http://www.whitearmor.net/forum/topic/37743-darkpains-anh-stunt-build-anovos-first-build/?p=502686
-
1
-
-
Pictures pictures !! We want pictures !!
I've been updating my build thread frequently. But here is a front and back view of the completed setup:

And a final video:
https://www.facebook.com/darkpain714/videos/10154517249274787/
-
1
-
-
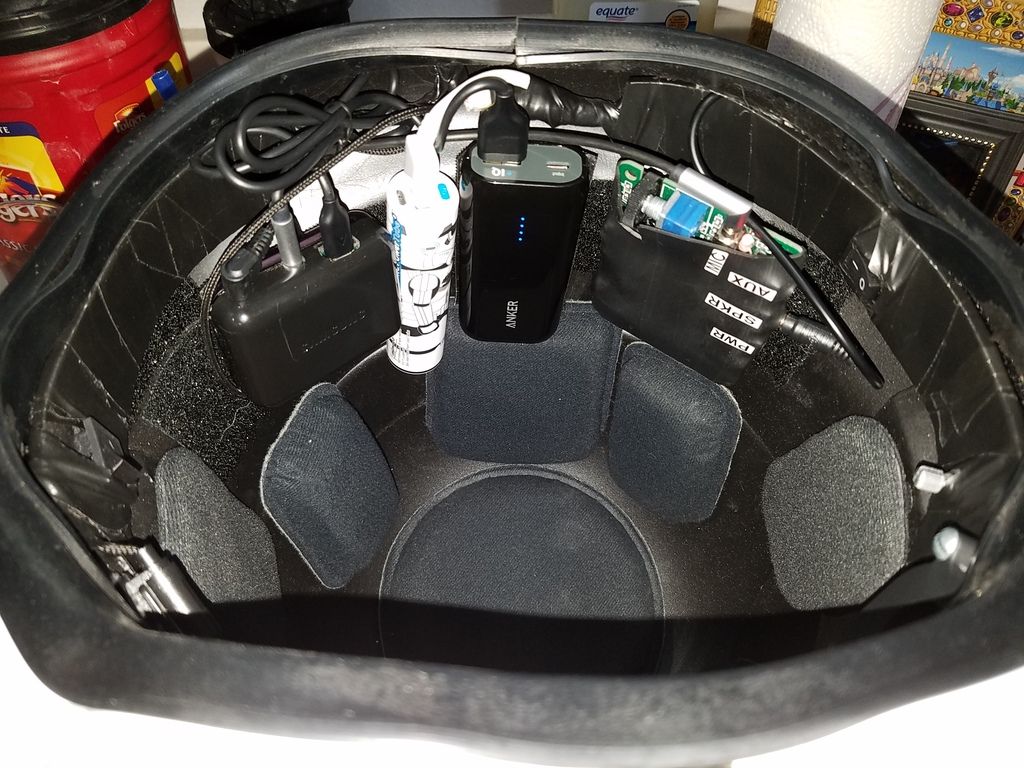
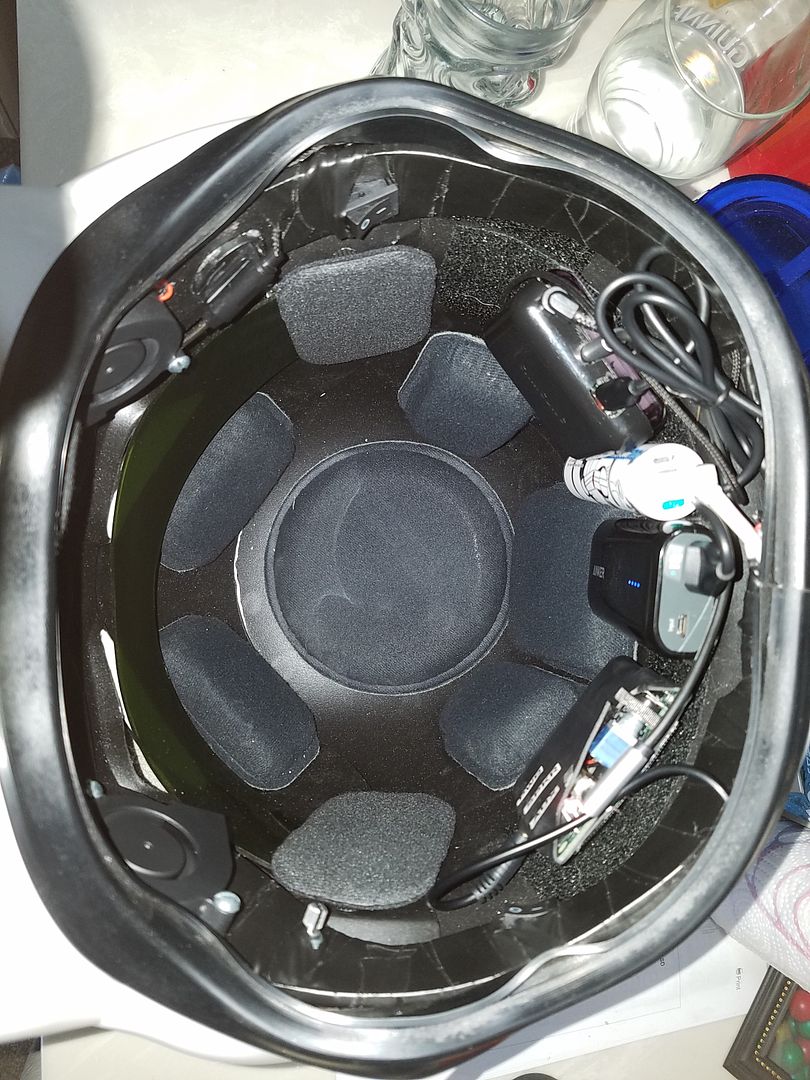
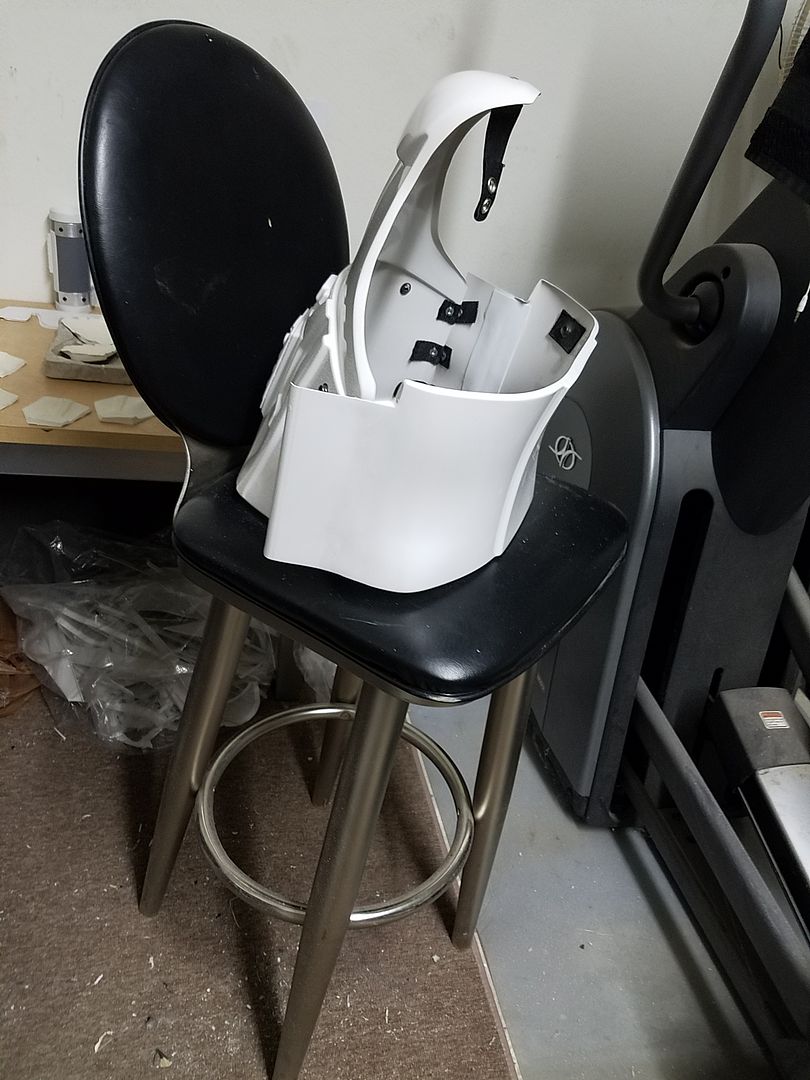
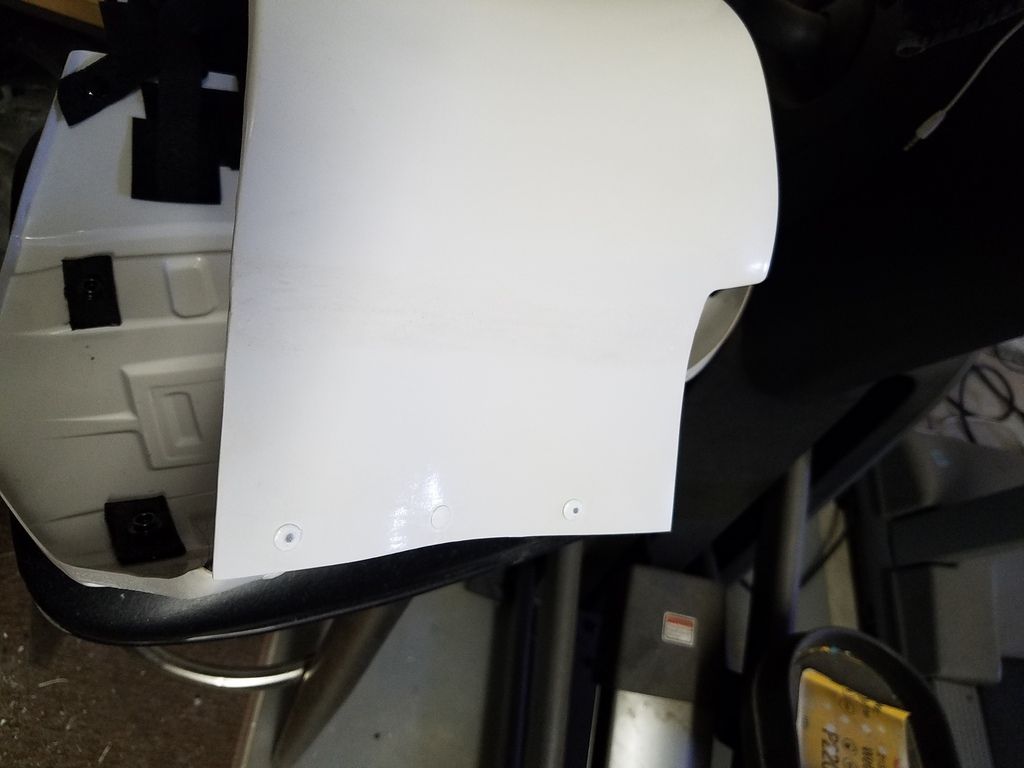
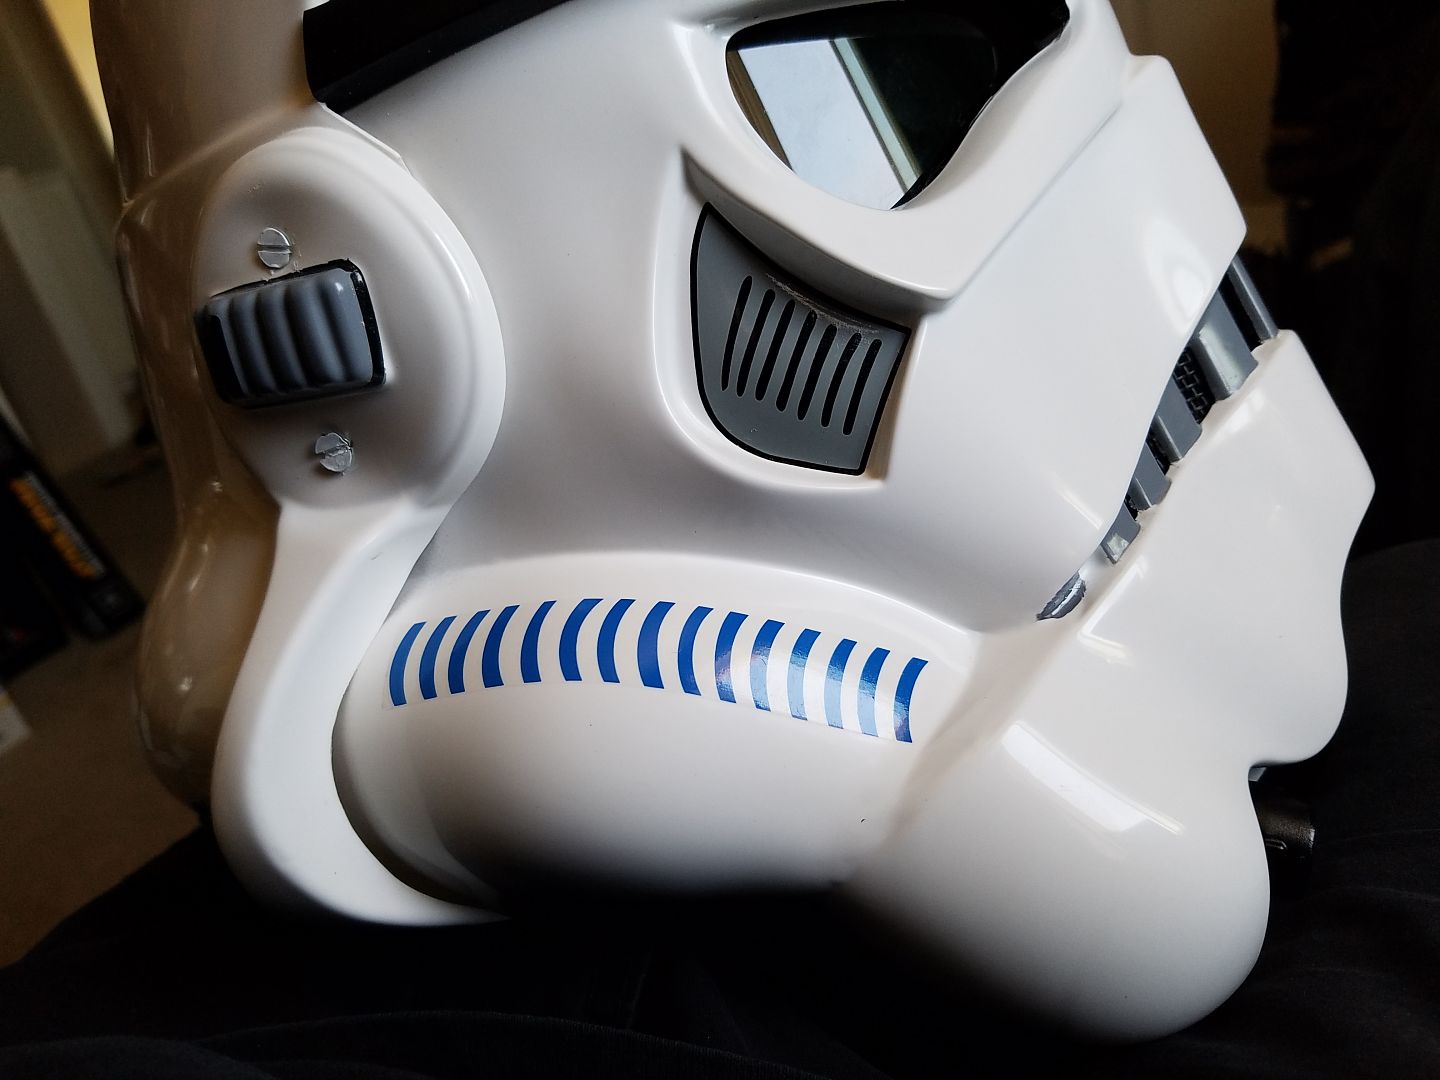
Helmet internals completed. Will replace one USB power cable, but otherwise DONE.
Credits:
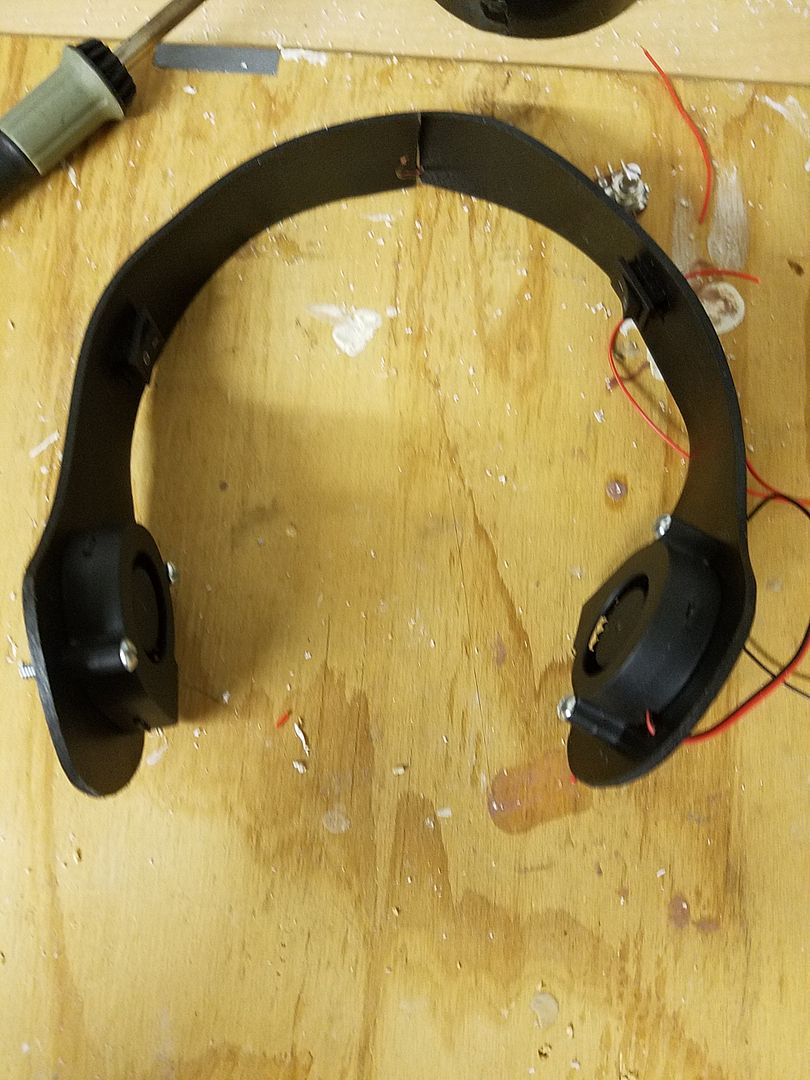
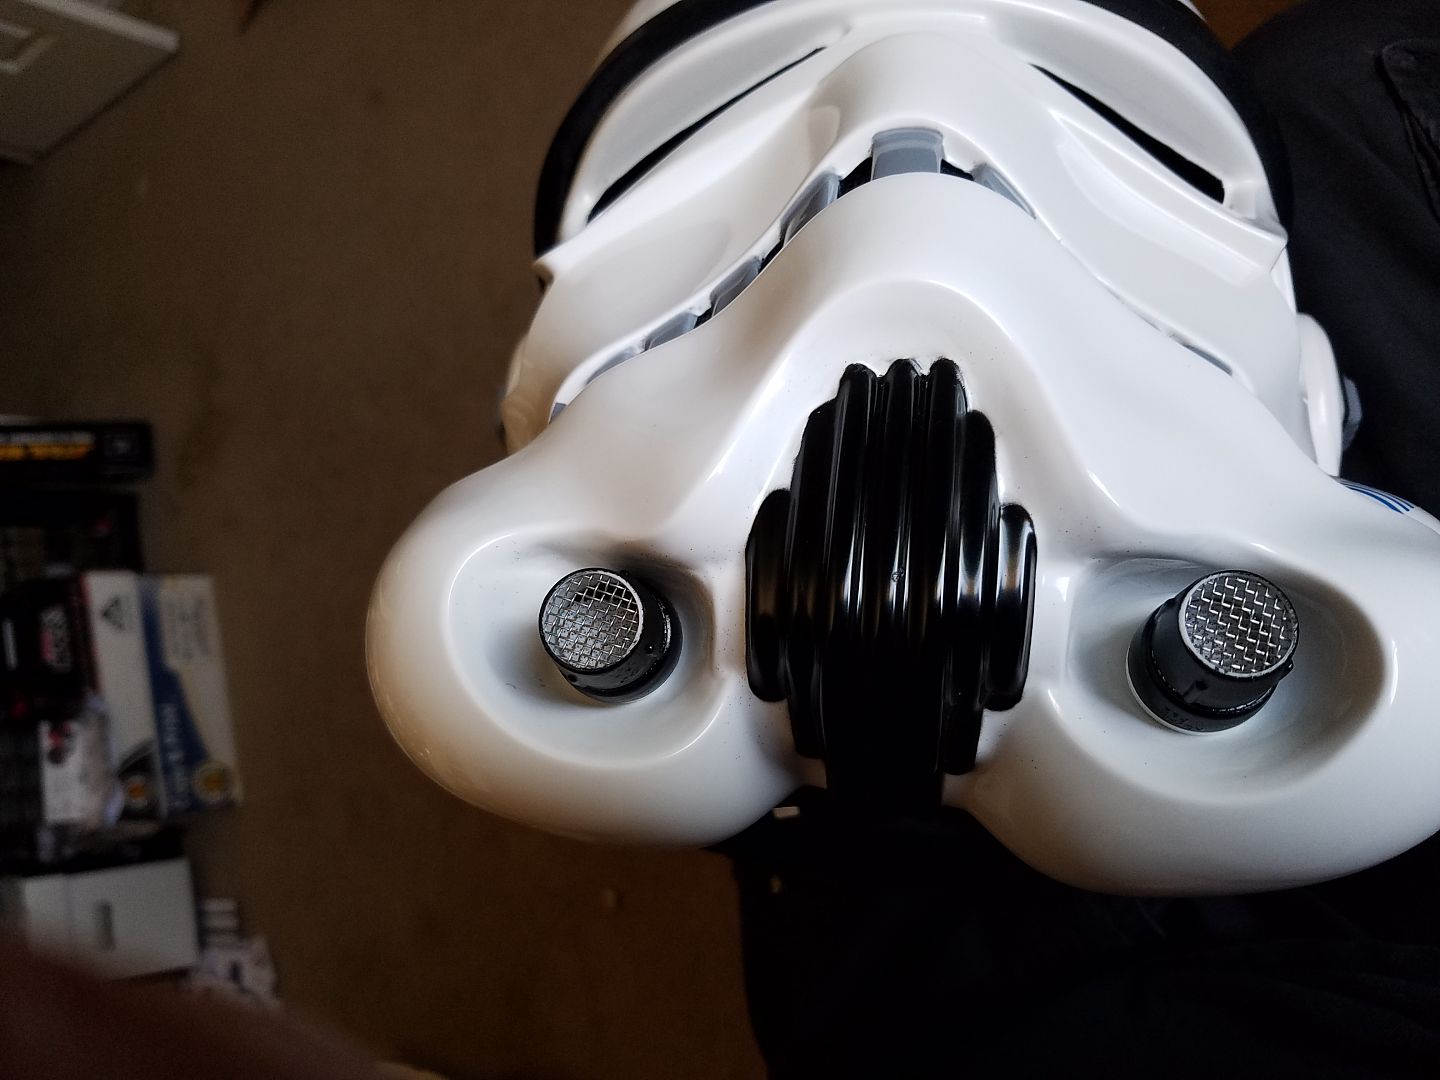
TK Talkie uses an Arduino processor driven by Teensy 3.2 audio board code by Lerxstrulz. Speakers are Hovi tip mounted and amplified by an Amp 2 module both provided by Ukswrath. Fans and bracket system scratch built by yours truly.
Video: https://www.facebook.com/darkpain714/videos/10154517249274787/
Pictures:
-
1
-
-
Thanks for the support kman. It shouldn't be too big a deal. Just was over celebratory thinking I was "done". Back to being almost done again lol.
Sent from my SM-G930V using Tapatalk
-
1
-
-
That is truly outstanding!
Sent from my SM-G930V using Tapatalk
-
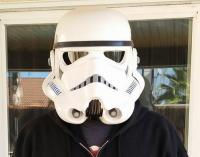
Well, everything is done and I suited up for what I hoped would be my final photoshot to submit for Centurion status. The suit looks amazing. It really is everything i hoped it would be. There's only one problem. Since I started this project and more specifically all the measuring and fitting parts for the side shims, I've lost near 20lbs and at least 2 inches off my waist. Which means those side shims that I spent countless hours sanding and polishing need to be at least 1" shorter on each side now. As I type this my mind is spinning thoughts on how to correct this. Will post more in a few days.
Sent from my SM-G930V using Tapatalk
-
Nice job/save on the blaster mods.
That's a lot of wires! #helmetnest

A few things I saw from your full body pics ...
Can you bring your thighs up?
Can you add some foam to the outside of your thighs (on the inside
 ) to remove the :knocked knee" look?
Bring your shoulder bells towards your shoulder sraps.
Can you reduce your back/kidney gap?
Looking good Trooper!
Getting there! I'm doing some thigh adjustments. In the EIB pics the tops of the thighs are firmly planted in my butt cheeks. I've sanded down the return edges completely as well as taking a bit of the point on the top of the rear down a bit. I think the fit is a bit better now.
Both the shoulder bells and the back/kidney gap have been taken care of with minor strapping adjustment. Pics coming soon.
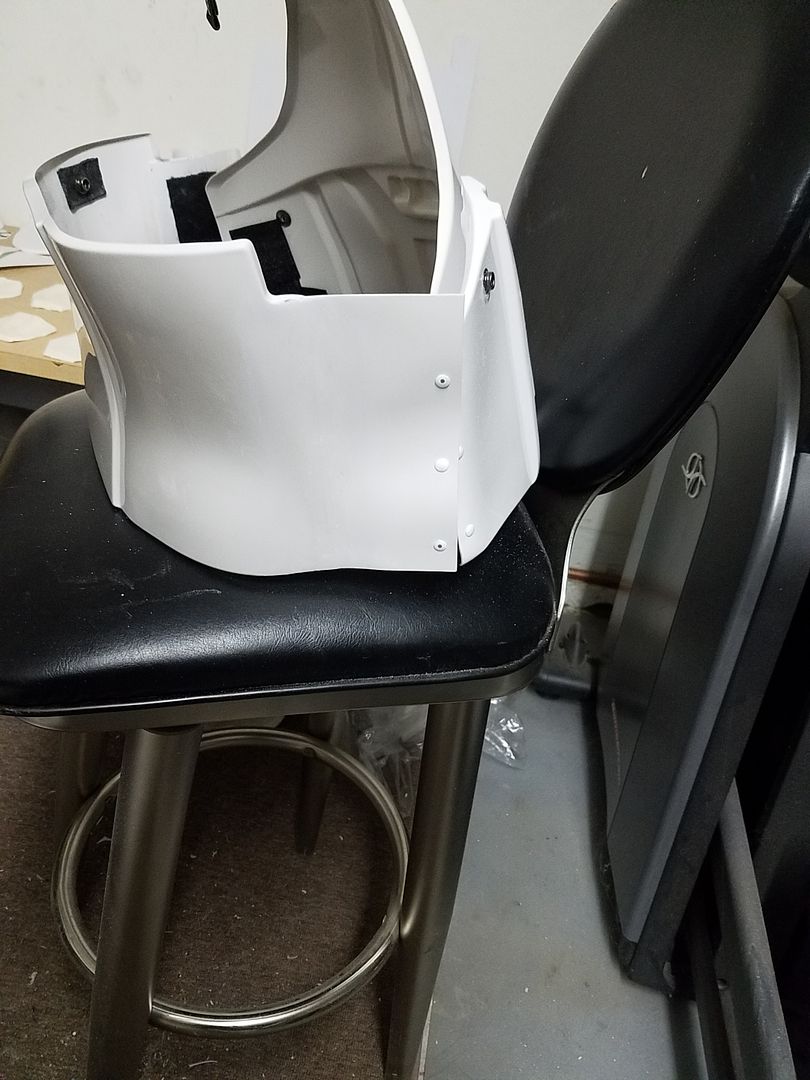
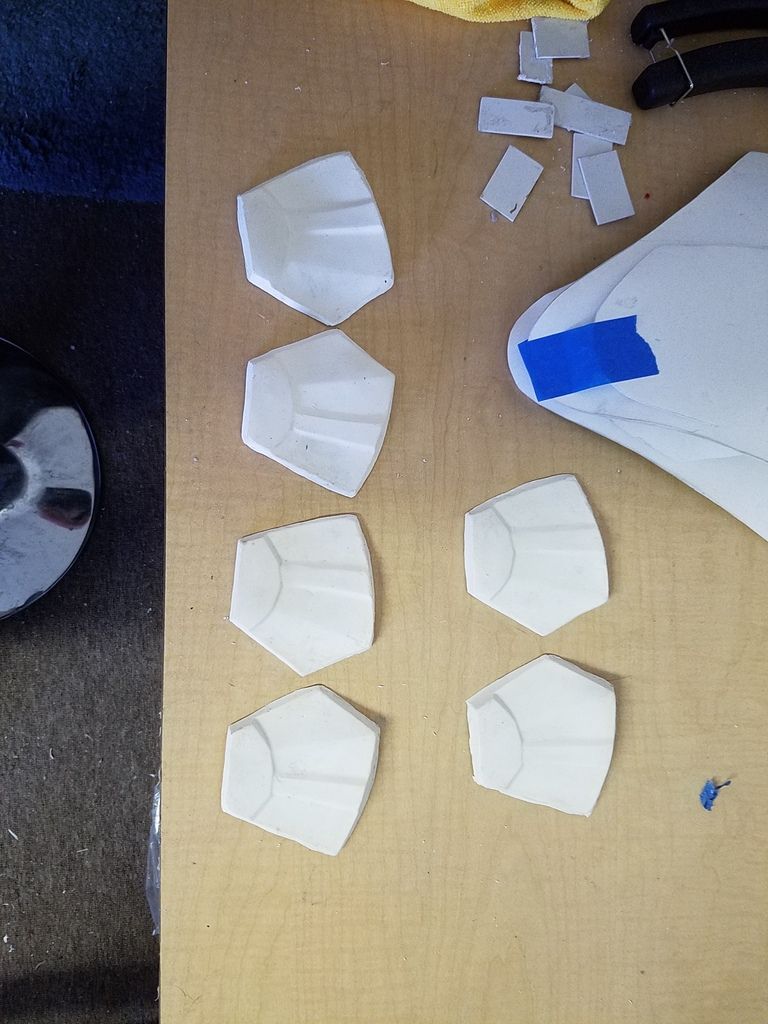
Side shims are about done:
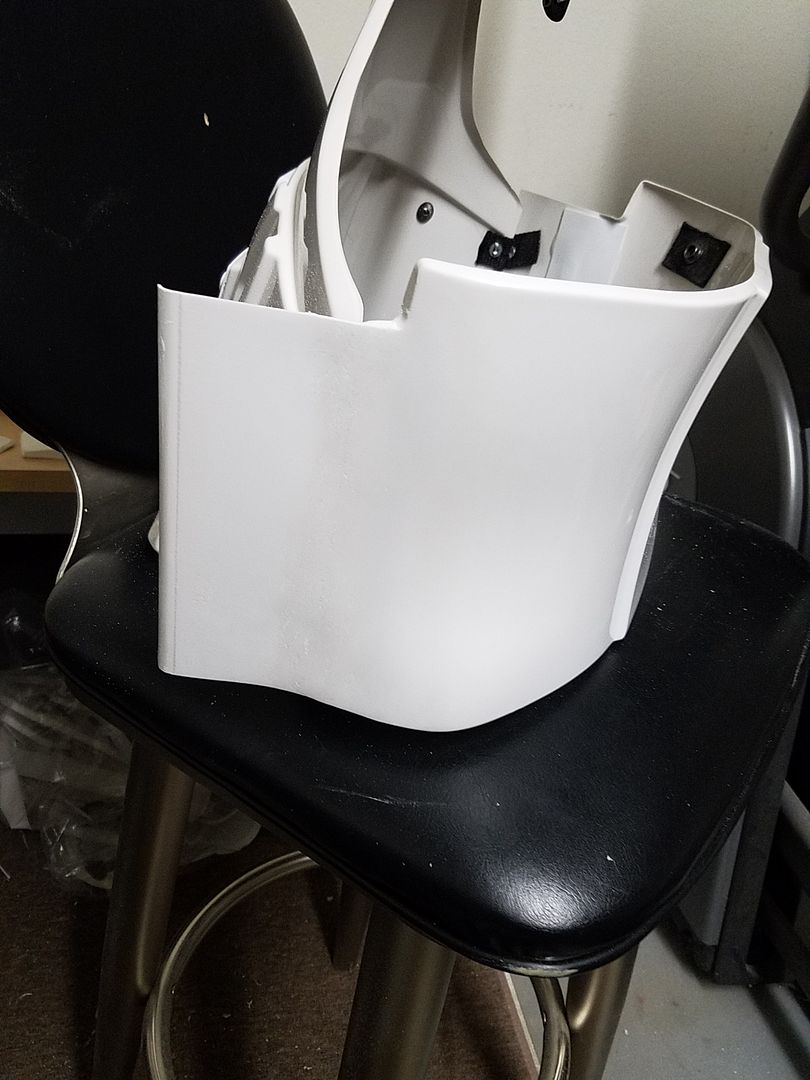
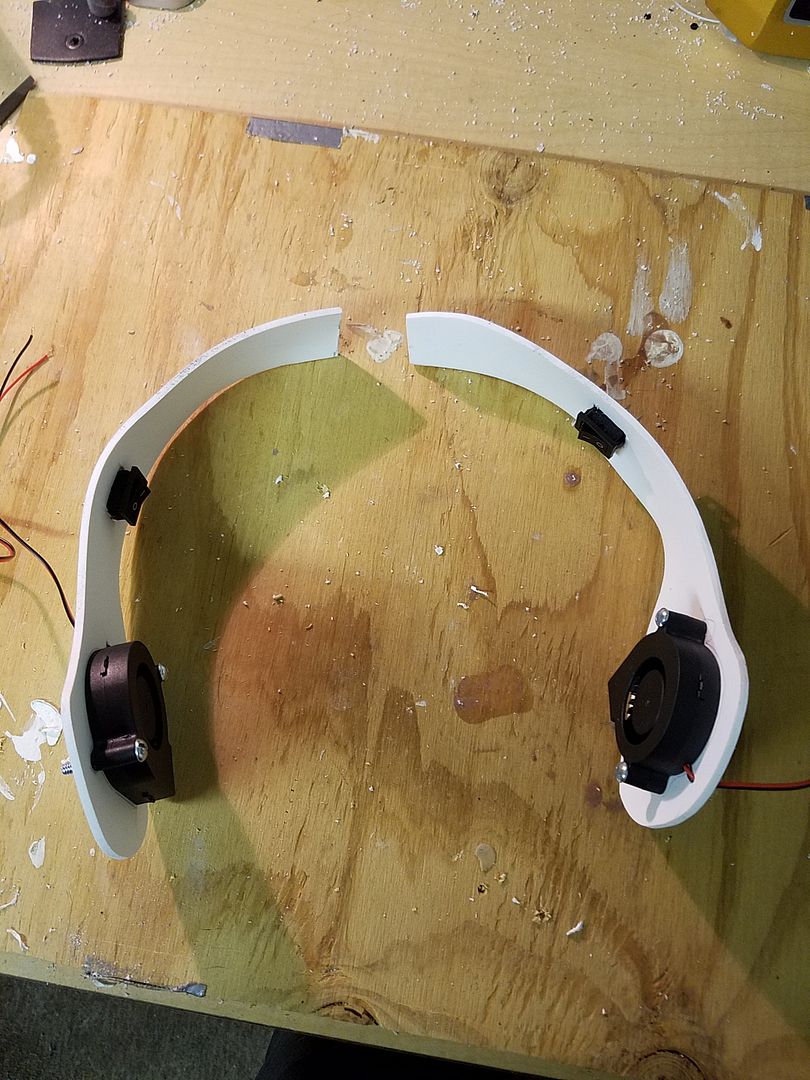
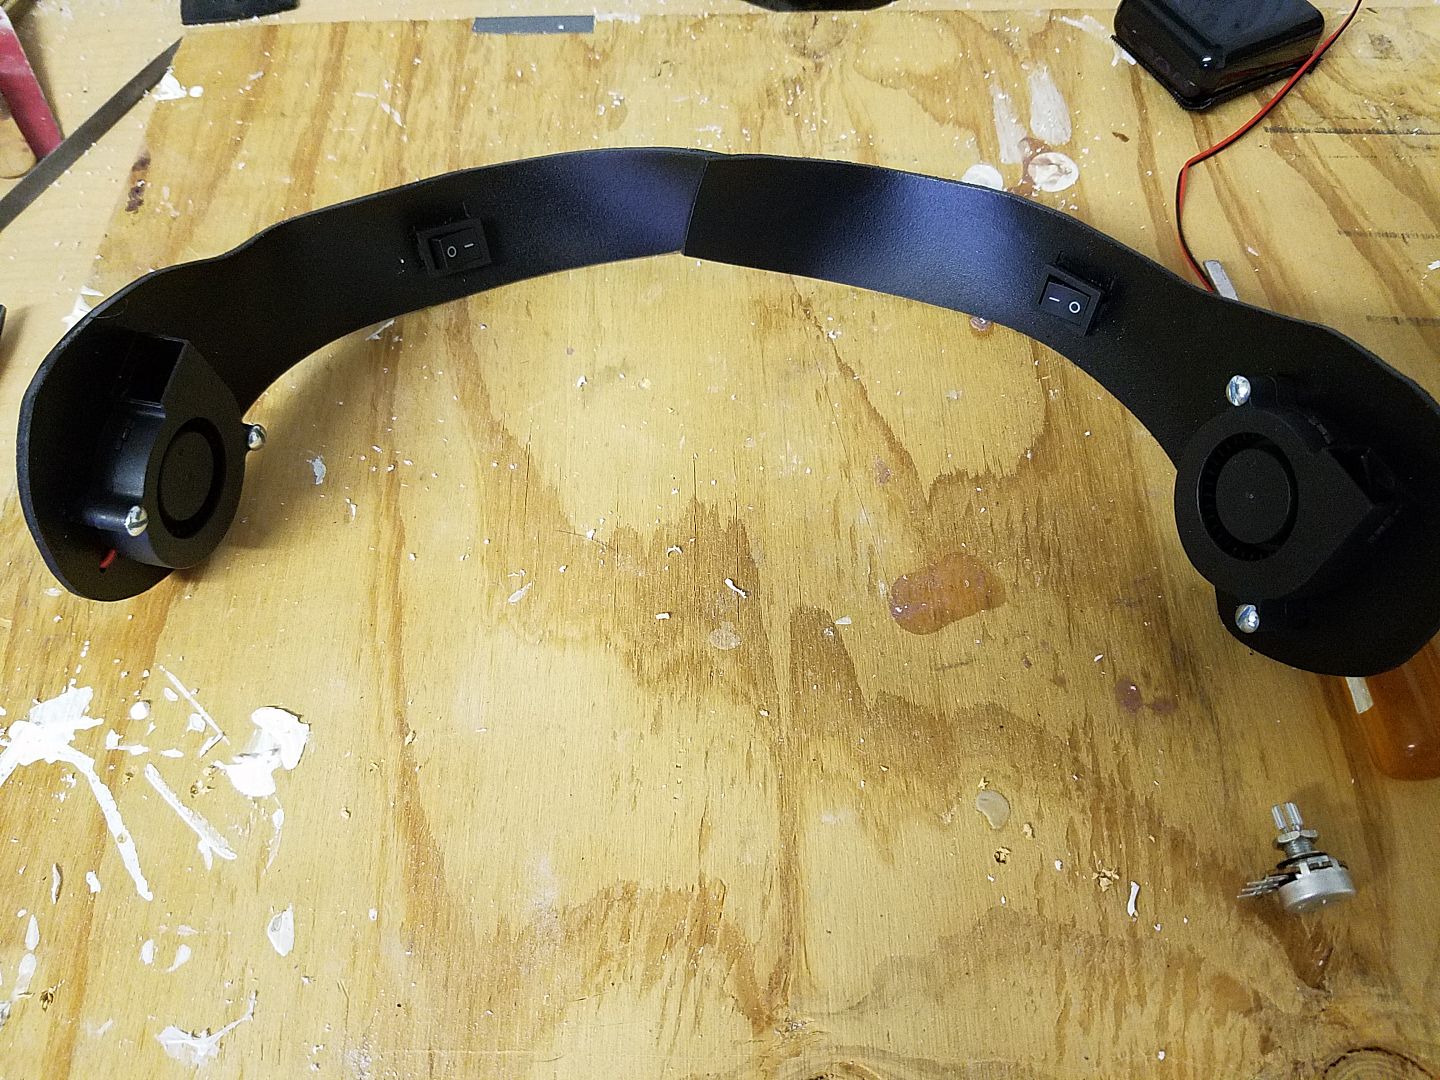
Finally, I'm attempting my own fan bracket to mount the individual switches, POT, and clean up the wiring. So far, so good:
-
1
-
-
Seeing as I got them from an electrician, I assume that is what he used them for.Looks good! Electrical box screws are the same format, as well. You also need to cut them down a bit, but otherwise they're perfect. (aside from not being brass, not that you can see under the paint)
Sent from my SM-G930V using Tapatalk
-
They are not brass no, but otherwise they are the right type and size. The short ones are just a hair too short and the long ones a hair too long. I used the longer ones and cut them down a bit.Looking good, Brian! I've been making steps towards Centurion as well, I suppose I should update my thread soon.
That mess of wires looks WAY too familiar, LOL!
Tell me about these helmet screws... are they brass?


Sent from my SM-G930V using Tapatalk
-
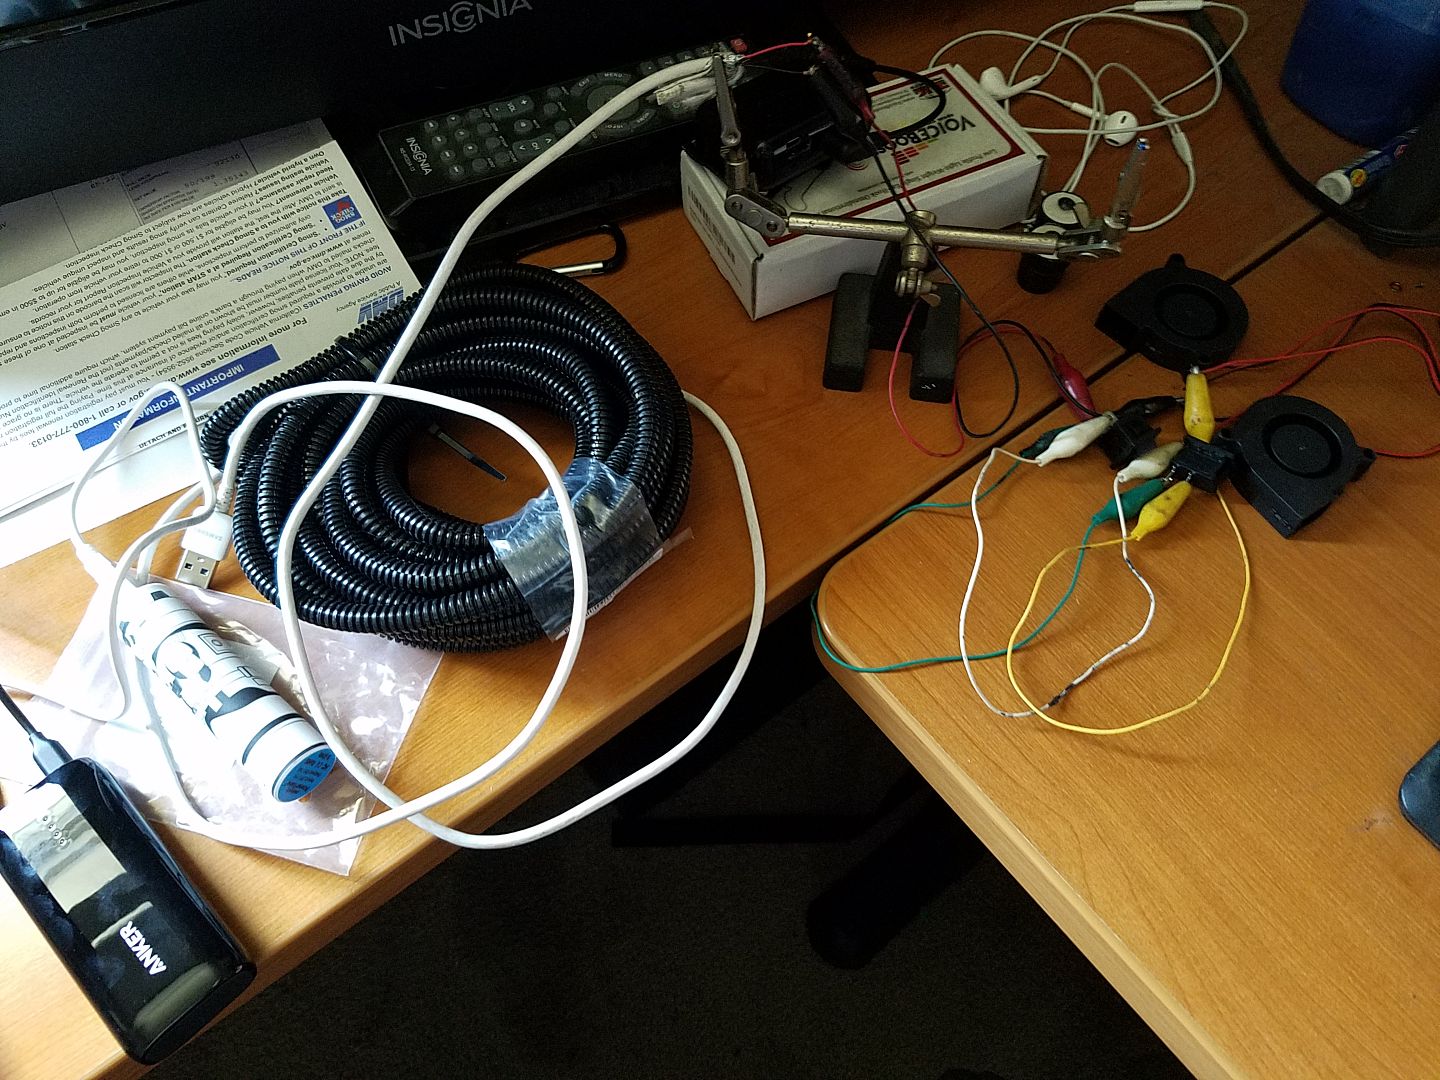
Another quick update. I've been busy helping the wife with her Mando build. But in between tasks for her, I've been continuing my quest for Centurion. As referenced in the last update the helmet cosmetic upgrades have been completed. I've also completed my electronics design and testing. Now I'm working on the cable management and cleaning it up inside. Currently all the electronics are gutted and getting a overhaul of the cables, conduit, battery layout...etc. Here is a pic of my current mess:
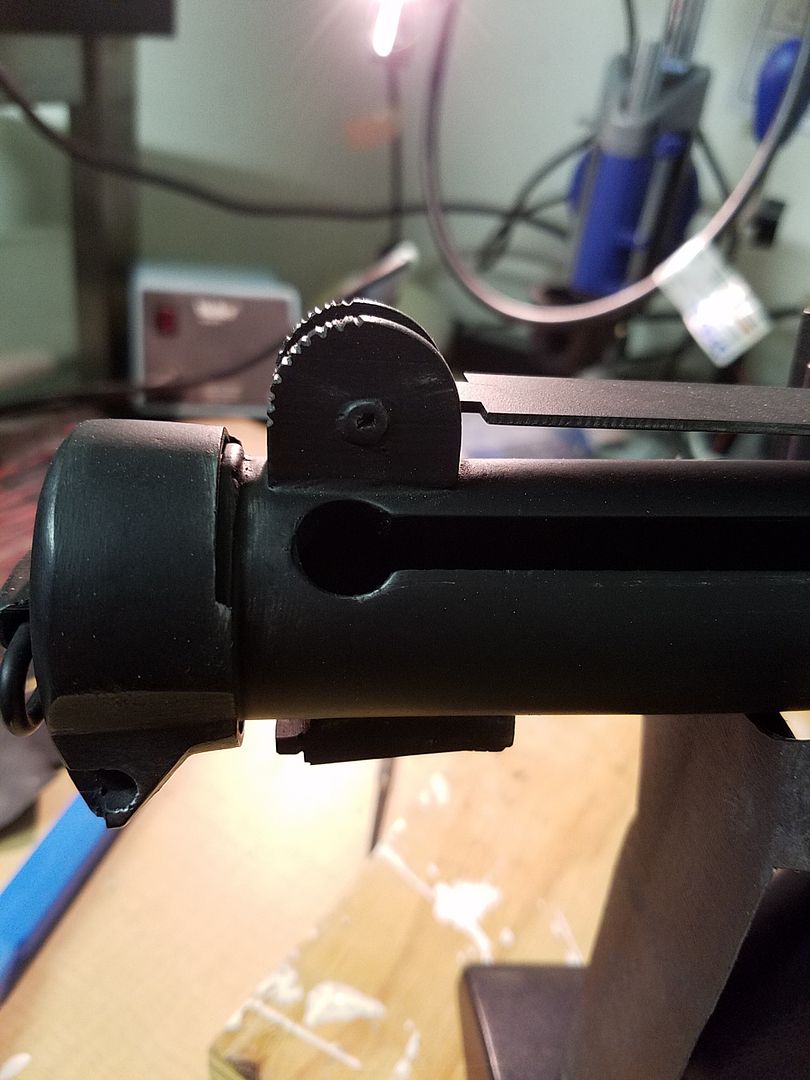
Blaster modifications have been successfully completed. I really thought that charging lever was going to be a HUGE problem. As I got to looking closer at it I noticed it seemed loose and I might be able to just wiggle it free, spin it around and reglue. I wasn't that lucky. The lever snapped off while trying to work it free. Not catastrophic, but kinda a bummer. But since it broke off pretty much right were I had planned on cutting it, nothing was really lost. So a couple of small holes, a finishing nail, and some CA glue later that thing is now facing the correct direction:
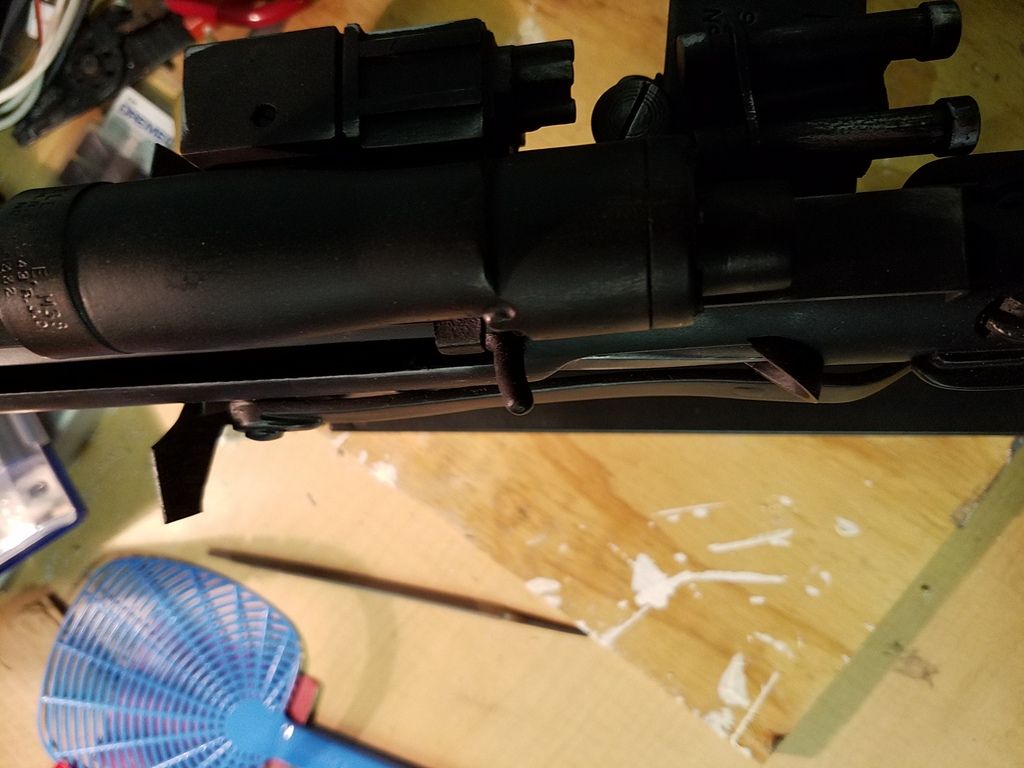
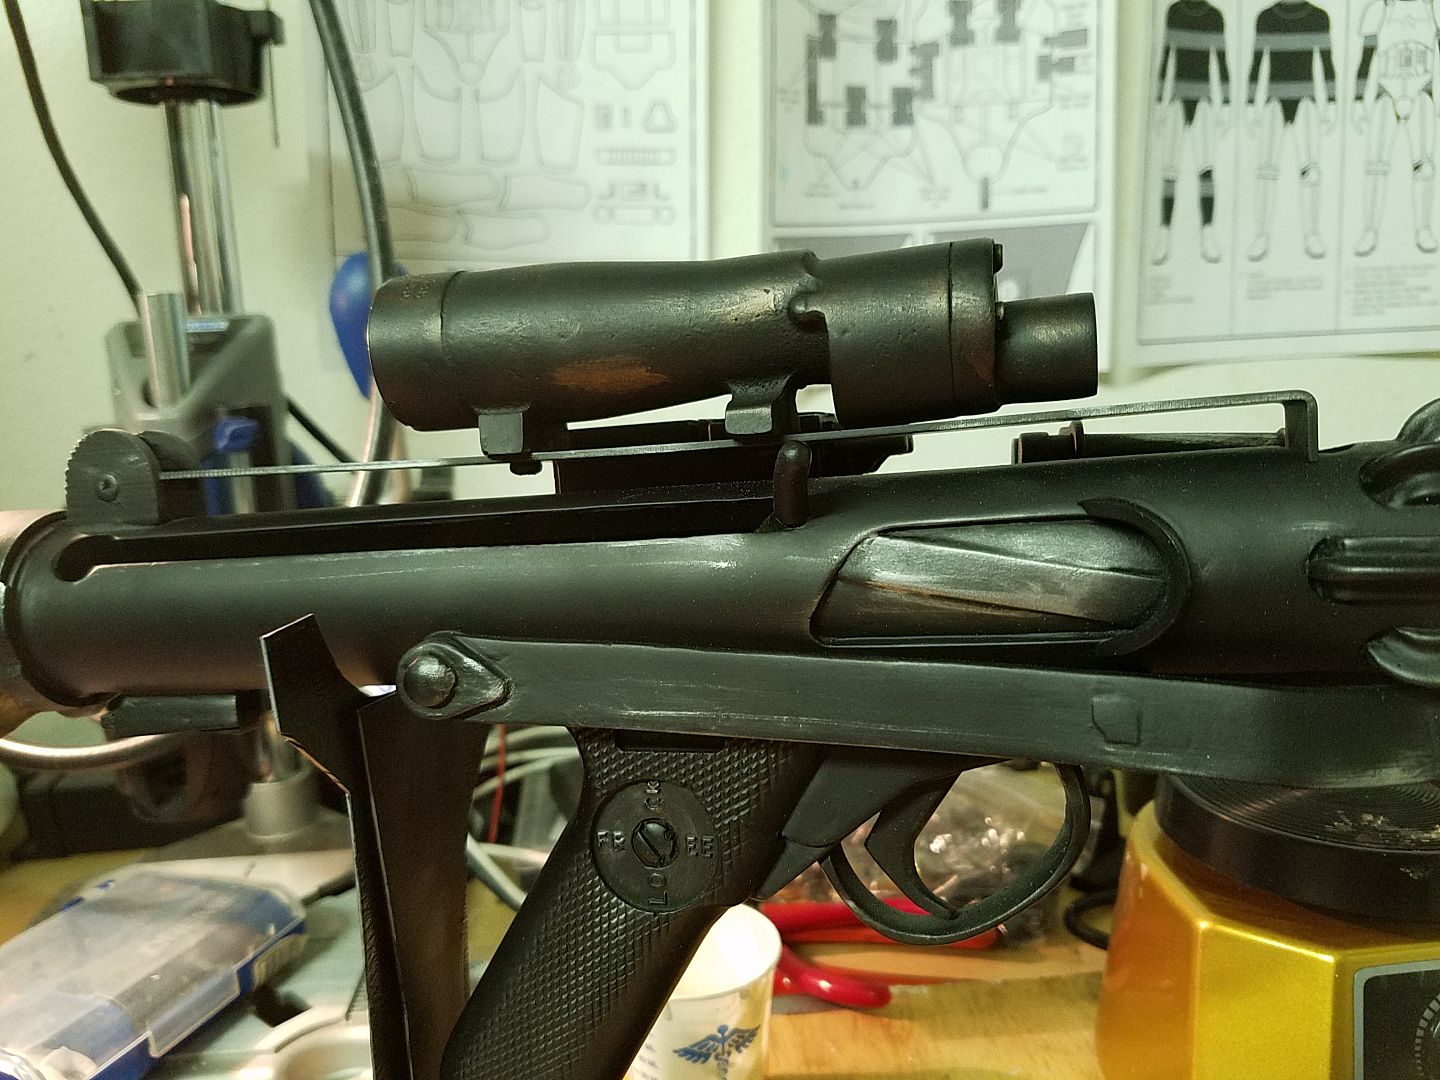
Also, you might have noticed the crisis of the rear sights has also been corrected. A little bit of sanding and a good file and those groves have been removed from the front and recreated on the rear.
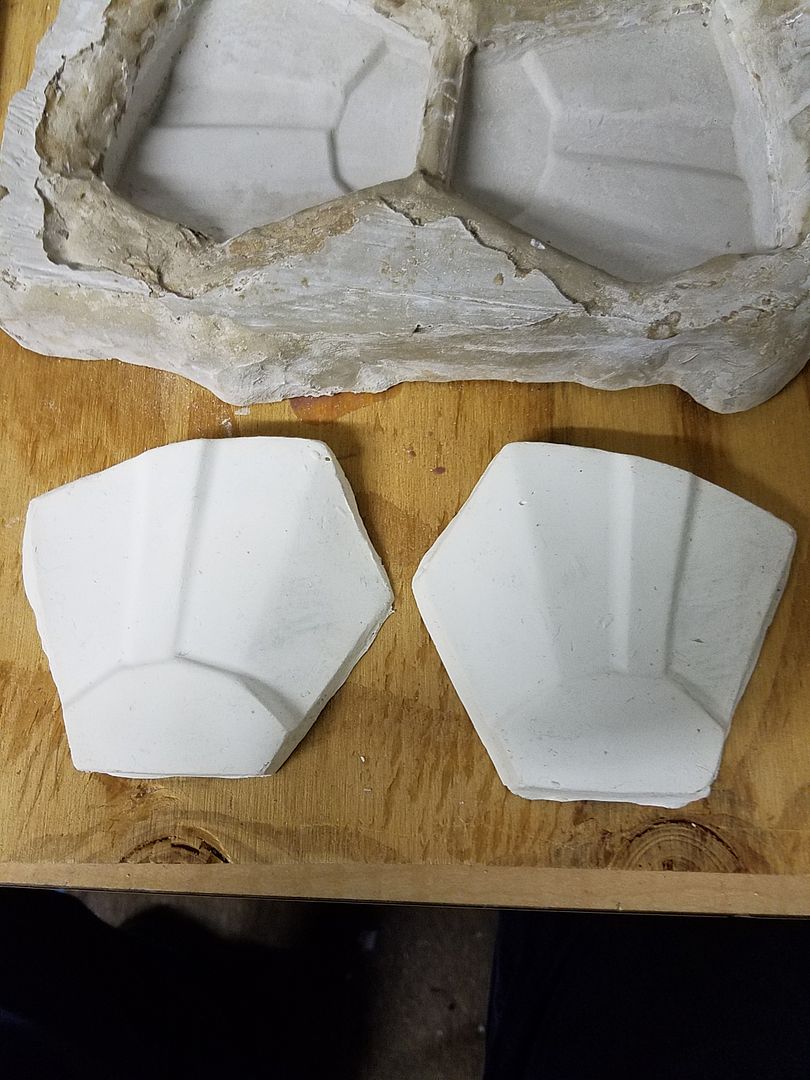
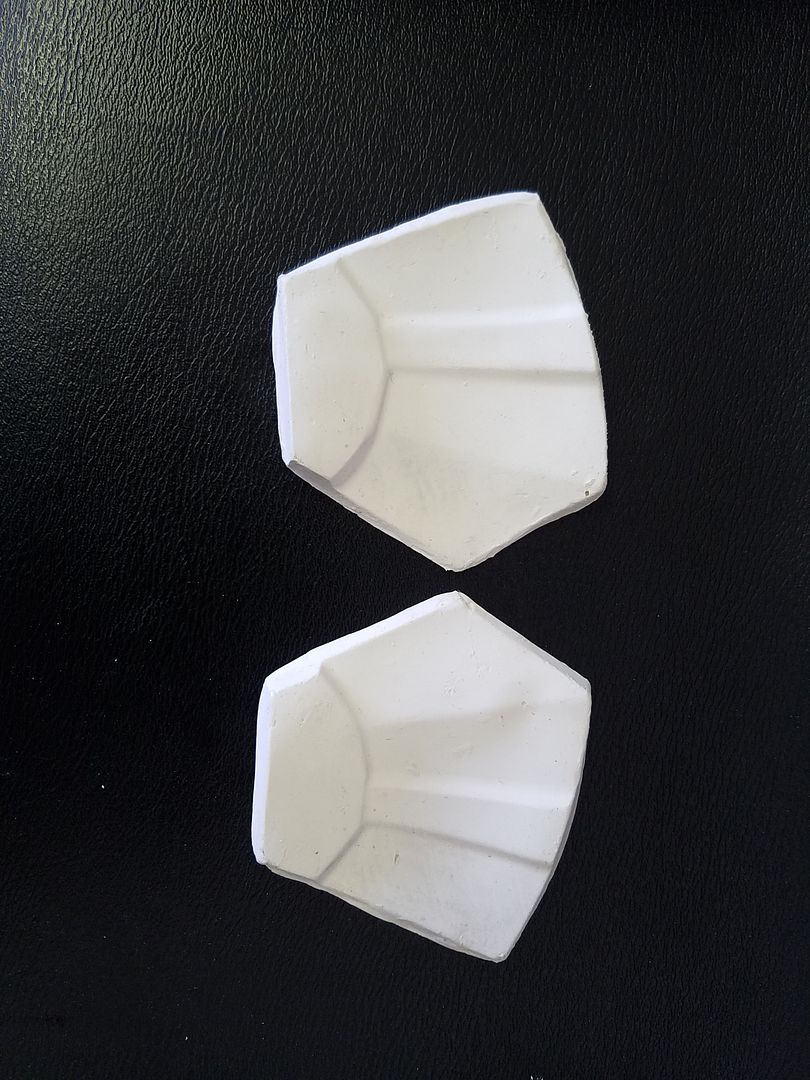
The back/kidney straps have been shorted, as have the shoulder bell to shoulder straps. I'll have some pics of that shortly when I suit up for my submission photos. I've been having WAY too much fun sculpting and casting my own latex hand guards. I'm churning out a set a day from my master mold until I run out of mask making latex. The best finished product will go on my gloves. After that, I guess I'll pass the others down to my squad.
Fun times!
My son was convinced this was chocolate and wanted to eat them when he discovered them hardening up in the freezer! I would've let him if they didn't take me hours to sculpt. I'm sure that Monster Clay tastes amazing!

Final task that I'm working is the side shim seem removal using ABS. I'm on my 3rd? 4th? Round of application and sanding. This is certainly challenging, but I think I'm finally getting close.
Just a couple little bubbles to patch over and smooth out and then hopefully I'll be ready for the big photo shoot!
Thanks all for standing by me.
Also, for my squad I discovered I have a huge trove of the correct screws for the helmet upgrades if anyone needs some, hit me up.
-
Everything is fine tuned and working like a champ. Added padding per ukswrath, adjusted mic sensitivity per lerxstrulz, added pots for fan control, added individual switches to power each fan, fans converted to usb power on the old power pack instead of the AA battery pack, and the new usb battery arrived to power the TK Talkie... WHEW! Do I have a lot of wires to clean up!
Thanks all. This has been great!
-
3
-
-
I need to adjust the mic sensitivity a bit. While the fans ARE installed, they are not running in the video. Once I turn them on the noise keeps the channel open and no pops and clicks. I'm also looking into an adjustment knob to dial the fans down a bit. They're blasting pretty hard.
Sent from my SM-G930V using Tapatalk
-
1
-
-
Electronics going in and almost complete. Need some cable management and a new battery pack which should be arriving in the next couple of days.

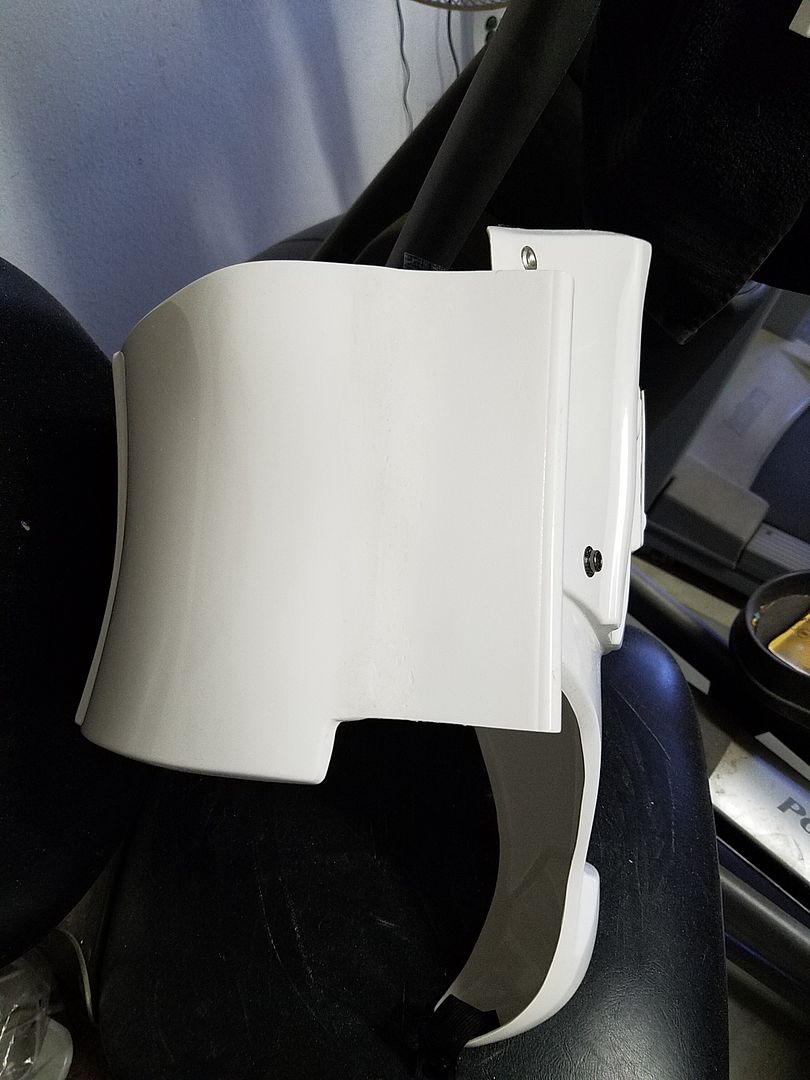
Centurion Helmet upgrades complete.

-
1
-
-
So lets try a video. Please let me know if you can see this:
https://www.facebook.com/darkpain714/videos/10154459801104787/
-
1
-
-
Wired. But unsure what type beyond that. The mic very well could be the problem. Guess I should've paid the bit extra for ukswraths.Are you running a wireless mic? The receiver being near the unit might be the problem
Sent from my SM-G930V using Tapatalk
-
Interesting. I'm not sure that applies to me (yet) as during all this testing the Teensy is still sitting outside the helmet.My friend had a lot of feedback with his IComm and wireless mic...He wrapped his IComm with aluminum foil and the feedback stopped. Wonder if the teensy is not shielded from RF frequencies as well?
Sent from my SM-G930V using Tapatalk
-
The hovi speakers sound great with loud volume using the AMP2 as long as the mic stays out of the helmet. But the feedback starts as soon as I put the helmet on and the mic gets where it needs to be, which is of course right behind the speakers.Yes that's it. There's also the mic gain. The idea is to let one thing control the volume....just give it a decent signal. I'm using the settings in the default sketch and I just have to barely crank the aker to get decent volume.
When you go above 7 on the teensy it tends to start distorting. What are the speakers in the hovi's rated at? Does it cut out at 3/4 with another speaker or headphones?
Sent from my SAMSUNG-SM-G930A using Tapatalk
The TK talkie alone doesn't produce much louder than normal speaking volume through the hovis without the amp and has the same feedback either way once it gets close to the volume levels needed.
Could be the mic. Am going to try adding some insulation behind the speakers and maybe a different mic.
But tomorrow. My wife has had enough of feedback for the day.

Sent from my SM-G930V using Tapatalk
-
Ah...yep that's prob a lot of gain...maybe try setting the mixer input to 1 for the mic in the software (below 1 attenuates the sound, above 1 adds gain, so this is base level) and turning the thumb volume to 2 or 3, then you could use the AMP2 as primary volume control without having a really hot signal. I am not familiar with the AMP2, though. Just remember the teensy is already already amplifying the signal, so amplifying an amplifed signal is feedback heaven (or hell...lol)
Heck you might even try just plugging the hovi's directly into the teensy if possible (you may need to turn up the audio shield volume in the software and use the thumb vol to dial it in, though.)
Sent from my SAMSUNG-SM-G930A using Tapatalk
Are you talking about here:?
// stereo input channels...just a little gain// for the MIC or LINE-IN inputs...adjust as needed.mixer1.gain(0, 1);mixer1.gain(1, 1);Either way, with just the TK Talkie, or with the AMP2 I seem to get the same volume level before the feedback starts.The TK Talkie by itself I can't turn the know up to about 3/4 before it seems to hit a limit and cuts out. -
Are you increasing volume using the software mixer or via the onboard volume pot?
Sent from my SAMSUNG-SM-G930A using Tapatalk
Volume pot and AMP2 volume knob.
-
As soon as I get a handle on the feedback issue I'll be sure to do that.Cool I was wondering how this sounds out the hovi speakers. If you could upload a video that would be even better.
Sent from my SM-G930V using Tapatalk
-
Ok! Hovi-tips speakers and AMP2 arrived today from ukswrath and they're certainly spiffy. The TK Talkie sounds WAY better coming out of his setup than my chest mount speaker/amp.
Sadly, I can't crank the volume up very high without a ton of feedback. Maybe time to try adding some foam between the mic and the speakers.
Also of note, do not try to use the Mimo PowerTube battery pack with this. It seems the Teensy doesn't draw enough power for the battery to realize something is attached. The Mimo works fine for my cell phone, but powers itself off after about 30 seconds when connected to the Teensy. Bummer, it was all cute and Stormtroopery. A better battery pack has been ordered.
More updates to come.
TKTalkie V2.0 Released!
in Electronics for Helmets / Blasters
Posted
Thank you. That did the trick. v2 is MUCH louder than before. That was my biggest issue at my Rouge One troop last night. It was too quiet still. I took the mic gain down to 5 and upped the voice gain to 1.5 as you have it. It's much better now. I'm thinking I can probably push a lot more out of these hovi speakers still without feedback with a bit more tinkering.