
.jpeg.ff3078cf696d324fa576c149490ede78.jpeg)

themaninthesuitcase
-
Posts
4,121 -
Joined
-
Last visited
-
Days Won
31
Content Type
Profiles
Forums
Gallery
Articles
Media Demo
Posts posted by themaninthesuitcase
-
-
Not long ago I started a to do list using Trello.
For those interested it's publicly viewable here:
https://trello.com/b/6Iy1Plmi/anovos
The items with blue are needed for EIB and the red for Centurion. No colour means JFDI.
I think I'm starting to get close to finishing the armour. Then all I need to do is finish the E-11....
-
 2
2
-
-
Looking good chap.
-
1
-
-
Righty then, more progress.
The first (right I think) do over on the rear thigh cover strip worked nicely.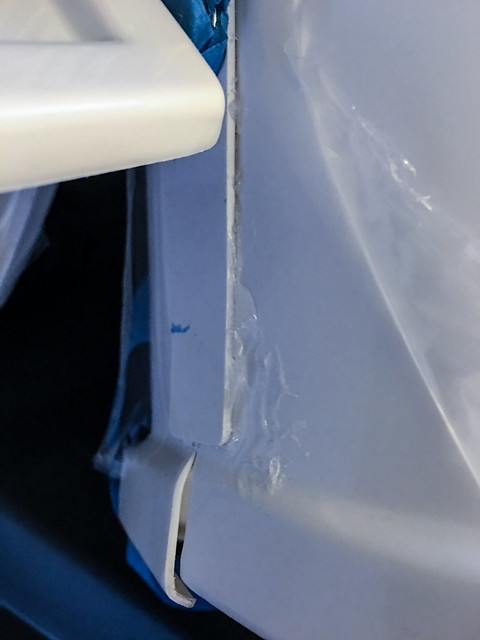
As you can see I was heavy handed with the glue, lots of squeeze out. Once I released the clamps the cover strip actually bent a little to the shape of the curve so pretty happy with the glue bond this time.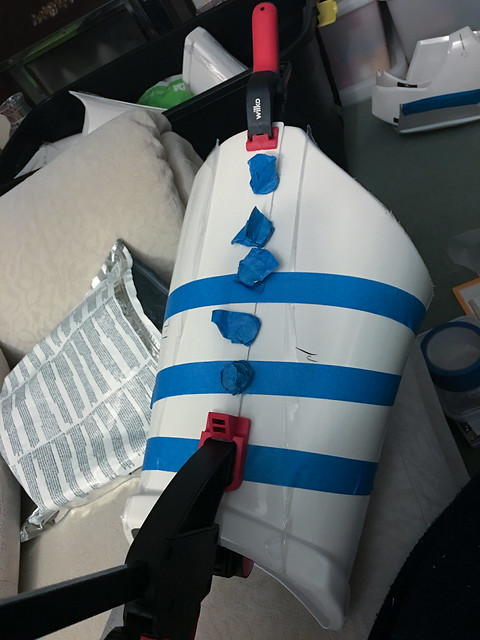
Did the left last night and will be leaving it until tomorrow to allow the glue to truly set.
Next I made a start on the drilling. I needed 2 sizes, one for the snaps and one for the rivets. I found a piece of 1mm scrap and after I measured the parts found the nearest (but small) drills and made some test holes.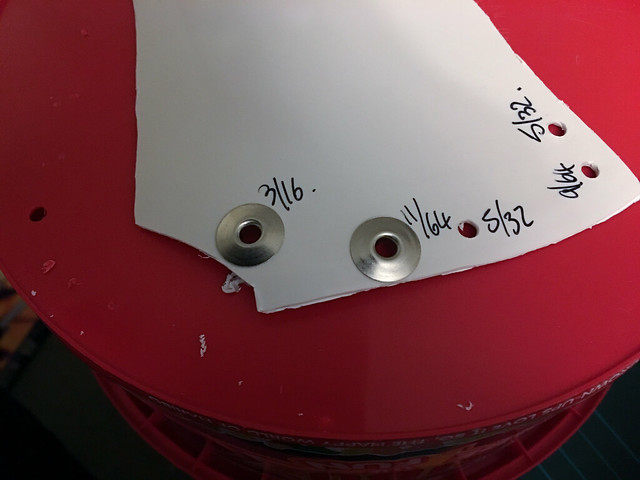
I used some imperial HSS drills I have as I have them in 1/64th increments. I used 5/32 for the rivets and 11/64 for the snaps.
After using a 1mm ish drill in a pin vice to create a pilot hole I drilled out all the marked holes.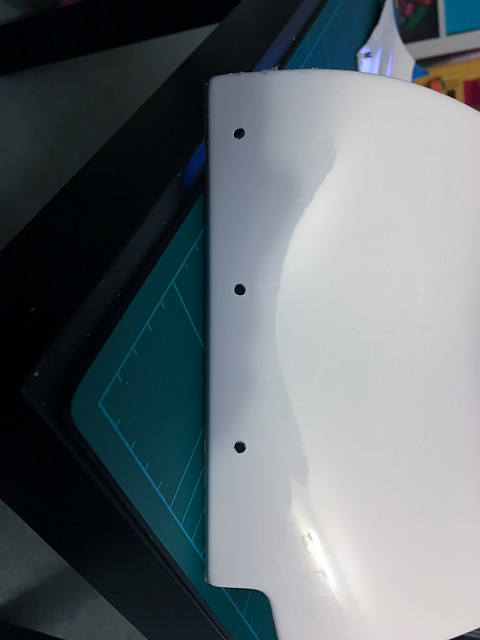
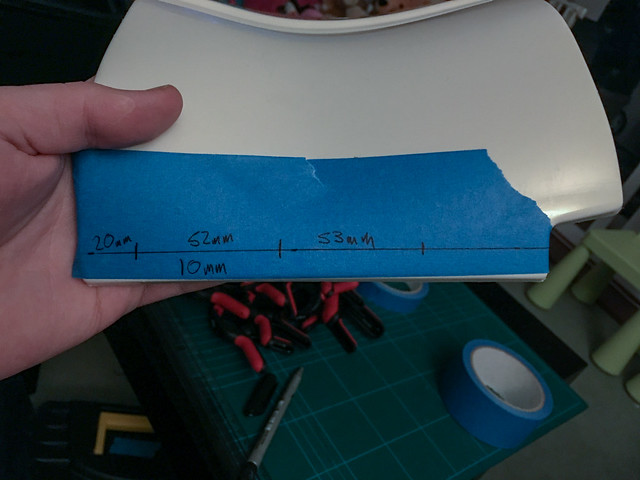
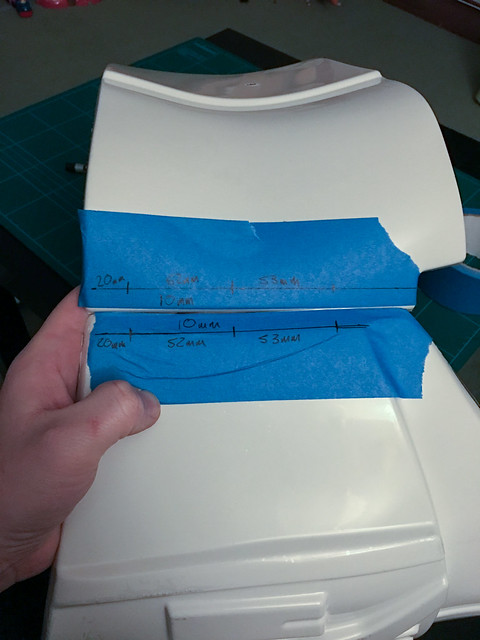
Kidney, 10mm in NOT 20 like Anovos instructions...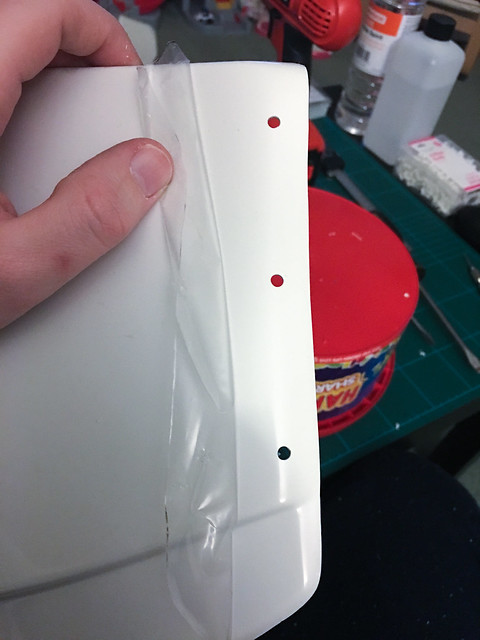
Ab, also 10mm in. Nice solid material here.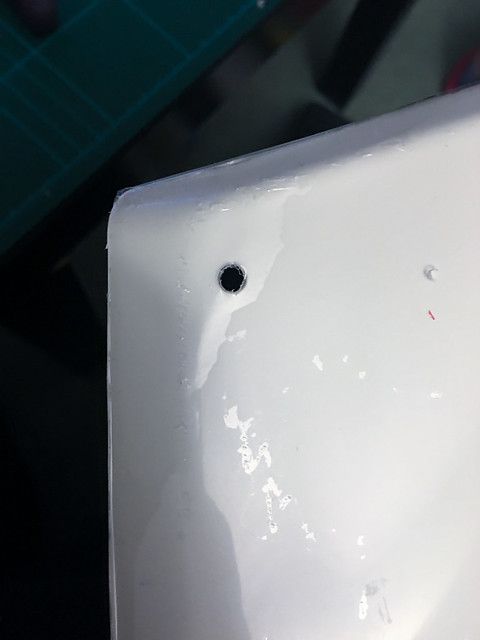
The hole for the single snap on the ab plate. About 20mm in and down to give the appearance of the correct space.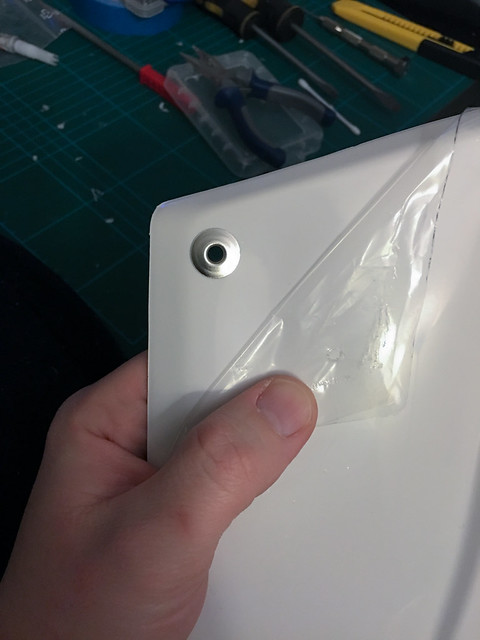
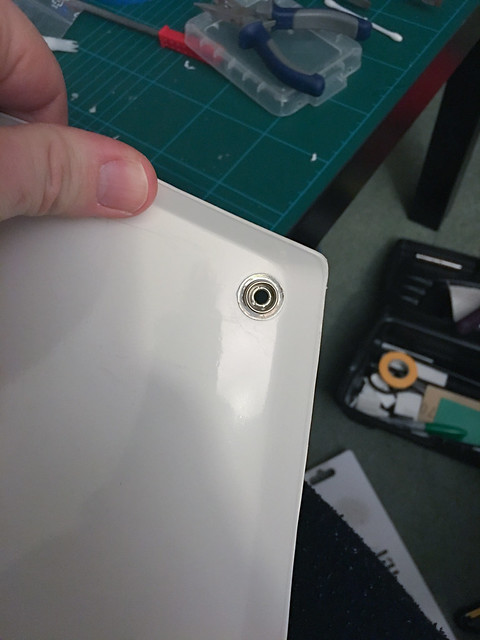
The snap set. The material is a bit thin for the tool so the snap was a bit rattly despite being set well. To prevent too much movement and so wear I super glued the inner part of the snap. I did this for all the snaps in the plastic.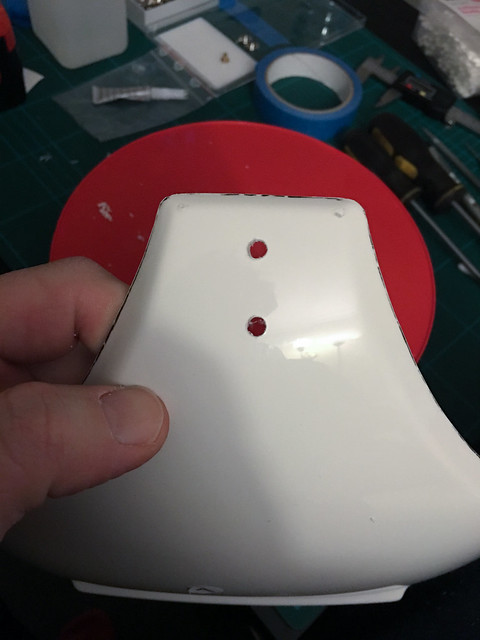
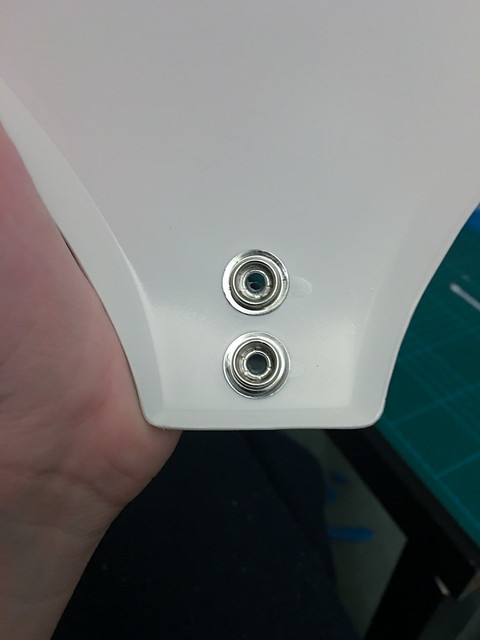
Butt plate snaps, again super glued. Can't tell you the exact measurements but where based on ukswrzaths build one FISD adjusted for the different snaps.
I've not done any of the split rivets yet as I forgot to pick up my small cold chisels when I was back at my dads at the weekend. I won't be back again for a while so I'll just order some new (better) ones.
I also made some progress on the TD.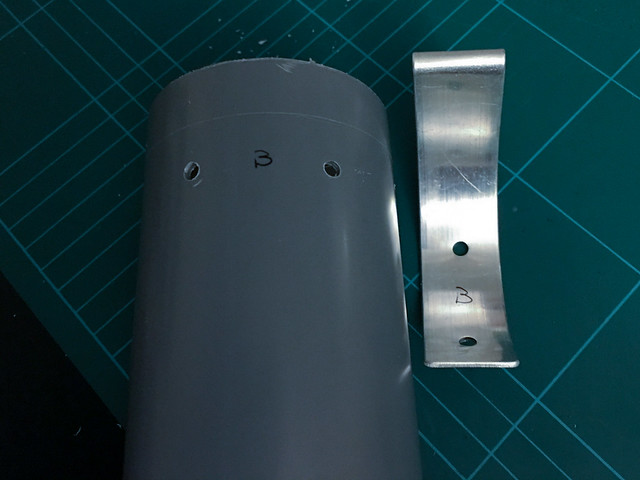
First I offered up, marked, then drilled for the brackets. They should be right up against the end caps once I add them, if not they should be pretty close. The letters are so I know which bracket goes on which side.
I also drilled another 4mm hole under where the control plate will be. The purpose of this is to allow the air to escape when fitting the end caps hopefully making this easier.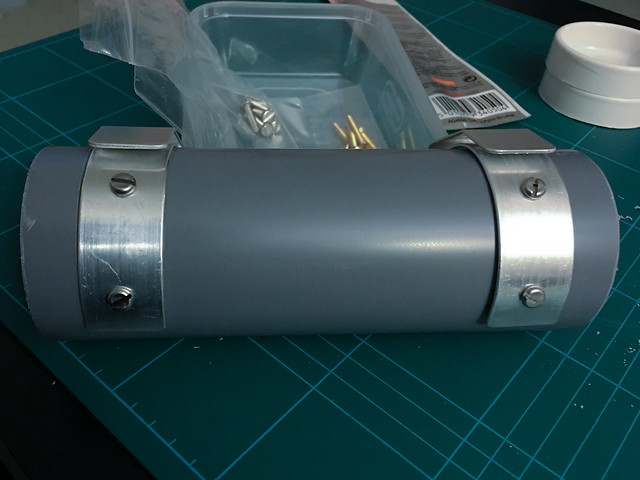
I'll be using M4 pan head machine screws for the brackets. These will be secured by a washer and a nyloc nut on the inside. To better match the originals I've applied a layer of satin black Humrol (#85) to 5 screws, 1 spare. I need to do a 2nd coat looking at it now it's dry so I'll do that soon.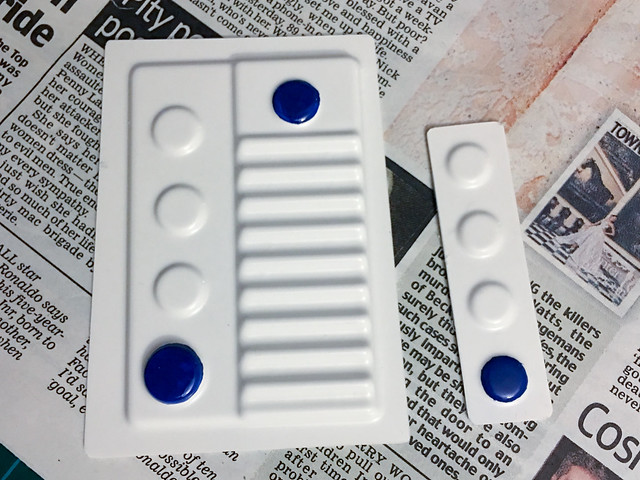
I also did the ab buttons with the #14 French Blue. I of course managed to drop the plate after the photo so had to touch it up. Looking at it today theres a few marks I'm not massively happy with so may use a light smear of white spirit to smooth and then re-do the top coat again. I have a test piece I'll try this on before the buttons to see how will it works. If it goes bad I'll leave it as is, you'd have to be inches away to notice.
I did have HUGE issue with the #5 grey though. It was clearly very old and had completely separated. After 10 minutes of mixing it was far too light looking. I did a test on my scrap and even once dry it was way too light. I got my Humbrol from a small local hobby store and the tin was obviously old. From the 5 tins I got I had 3 different tin print styles. The grey was clearly the oldest as was the Mediterranean blue for the bucket stripes. My black had also settled a lot, after a good stir it was okay for the screw heads but no good for the bucket, far too thin.
I will be replacing the #5 grey, #85 satin black and #48 Mediterranean blue with new tins. The #22 white was new a looking design and the #14 was fine with a quick stir. For what the paint costs I feel this is just easier.
Normally I like to support local shops where I can but Humbrol has become a pain to find* so I'll be ordering it direct after I finish this post. I'll also get some gloss varnish so to use to seal the masking template and prevent the blue from bleeding.
* when I was a kid I could have gone to 3-4 places in town, now maybe I have to go to Hobby Craft in an out of town place.-
1
-
-
Pretty sure it's Gazmosis who did the rebuild.Check TrooperMaster's Anovos Helmet rebuild thread for good tips on making is fairly straightforward
-
1
-
-
Is there a minimum size for the TD. I know the rough length is correct as ships but the proportions look off once built. I've seen one where they've trimmed about 1cm from the length and it *looks* spot on proportionally but would now be closer to 7" long.
-
whats 197 in real moneyIf you're referring to the shoulder bridges/ straps use "Tony's Hot Tub Trick" - bring a large pot of water to a boil (197*F) - putting one in a time let them take about a 5 to 10 second dip then take it out and start to shape - repeat process until desired form is achieved


(Yes this is a joke. Also what crazy altitude are you at if water boils at 91C?)
-
Seeing those mangled snaps makes me so glad I bought the pliers!
I've got to bend the shoulders too to reclaim about 2". Any pro tips?
-
I have a source for M3.5 but only 30mm long. There's shorter ones on evilBay but I think they will be too short.I just picked some up today in 1/2" and 1" lengths. The heads are 6.4mm dia. so I think this is pretty darn close since the 3.5mm unicorns are so hard to find,...this should work until the unicorns can be obtained.
I will post pictures once I get them changed out.
Sent from my Imperial communicator using Tapatalk
-
1
-
-
that sounds like the butt plate measurements.Crotch measurements: 15mm and 35mm (from one of Tony's threads)
-
The on going adventure continues.
Last couple of evenings have been busy. I started last night by re-doing one of the shoulder snaps. The snaps don't aways set as well as I'd like and I didn't realise how bad this one was until after I'd glued it. I pulled of the old one and reglued a new one.
I've also glued most the the snaps to the body parts only needing to do the chest and OII plate. The side is still outstanding also until I get the snaps/rivets in place. I've also yet to add snaps to the arms, though still toying with the idea of glued in 2" for the elbow vs snaps, at least on 1 side.
I then re-trimmed both the rear thighs to get them to line up better and then re-glued the cover strips back on as before.
The new gap is far cleaner.
I have also marked out for the various holes that are needed, though I've not done the butt plate yet.
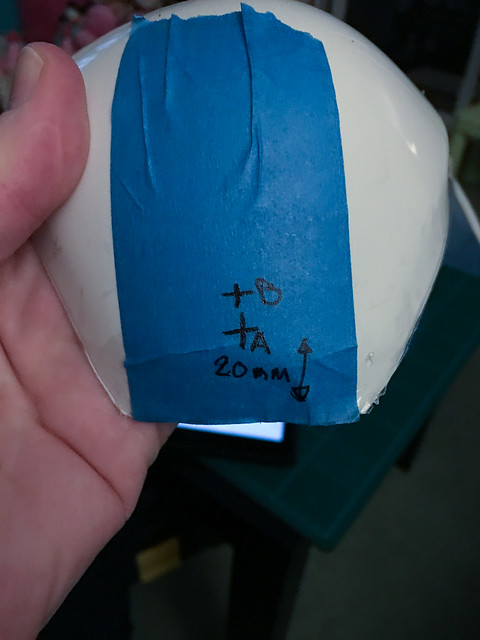
I couldn't find any measurements for the crotch strap, A is 20mm and looks a bit close maybe? B is about 25ish.
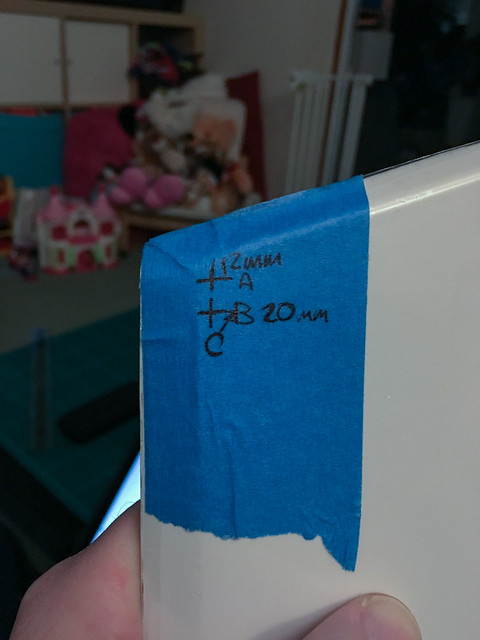
The solo side snap was suggested at 12mm (A). Looking at other builds this seems a touch close to the seam. 20mm is what another Anovos builder is using and looks a bit better (C, follow the arrow its basically in the cross of the B ).
Measured out for the side rivets as per reference (http://img.photobucket.com/albums/v336/themaninthesuitcase/TK%20Reference/RoughMeasurementSideRivets01_zps6fiotrbz.jpg).
Then repeated this on to the Ab. I've yet to drill these, I'm waiting for my bag of brass split rivets which should arrive early next week.
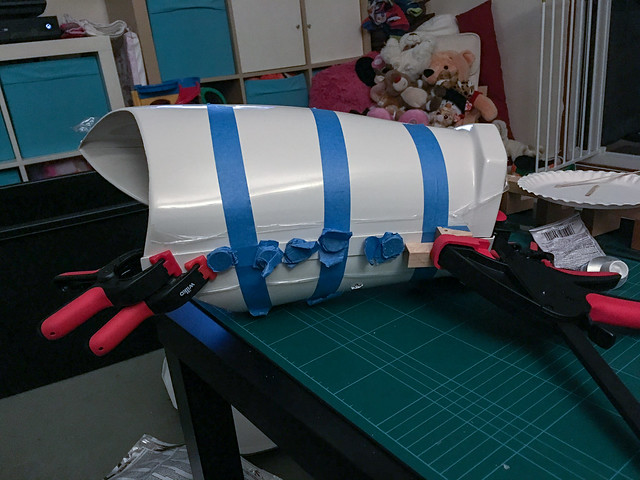
I also started glueing one thigh again. I've used a big beefy locking ratchet clamp to hold at the smaller end where the most stress is. This seems to be doing the job and I'll leave it for 48 hours to fully set.
Finally I need to re-form the back plate as is common with the Anovos kit. I have about a 2" gap which I should be able to close up if I heat form the shoulder arc which is very square.
To reduce the stress on the bend when doing this I'm going to trim some return down to the following lines. The neck side doesn't need to be done as the return angle doesn't make it necessary.
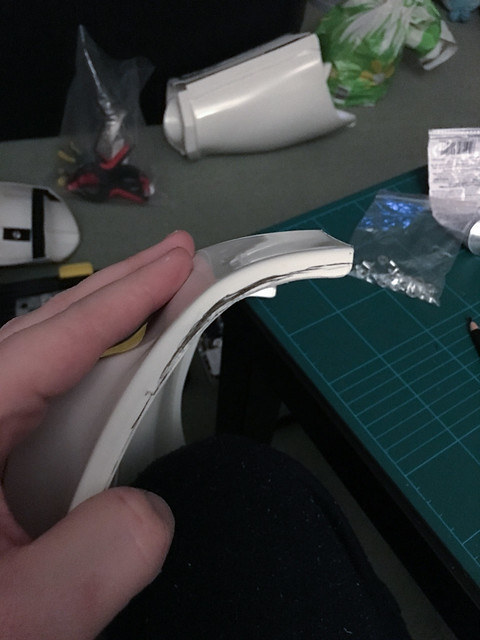
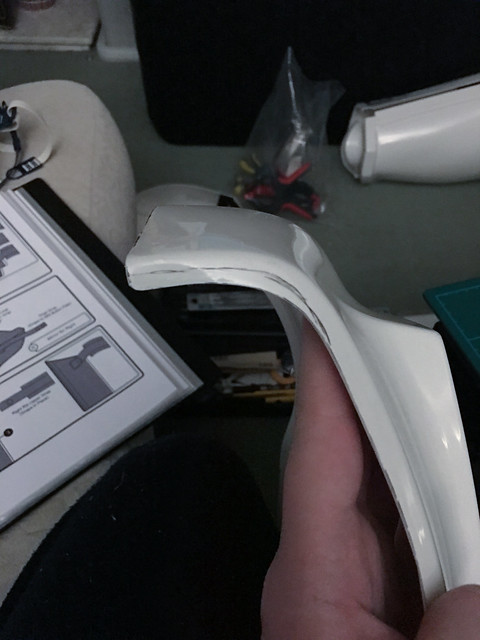
Once the trims done I'll have to use some boiling water to warm the plastic to allow for the bend and then cold to set the bend. Once I'm happy I'll add the snaps and be able make the shoulder elastics.
-
Spent the evening gluing snaps on and also cover strips back onto the rear of the thighs.
I lined up the butt plate with the kidney to made sure everything lines up. I have added more to various parts until I ran out of clamps again.
To get the thighs to line up I added a slight trim to both which seems to have helped a lot. Guess we'll see when the glue sets after the final join.
I've also started marking up for the holes I need to drill. I took some photos but I'll post those another day as it takes me a long time to sort through things. Once the snap glue dries on the kidney I'll mark up there too.
-
Yes, you are.

I'm sure either method would work fine. But tape is tried and true, and requires no drying time. And was sitting right there. So I went with tape.
I was thinking of doing test, but the tape was faster than 24 hours for E-6000 to dry and me be happy that it wouldn't react.
Having a night off today, last night was too frustrating. Normal service will resume tomorrow and I'll figure out whats going on with that thigh gap. I picked up some 2" masking tape so will be really pulling on that to hold it down. Will lightly sand the armour side see if that helps, and maybe even wedge it in between something solid too.
I should have plenty of clamps left after that so will glue on some snaps too.
-
1
-
-
The UKG Armourers suggested an inner strip to help with the gluing. I am going to trim a small bit of 1 side to get a better alignment as well. I need the room at the top but I'm okay at the bottom so will trim a small wedge no wider than about 2mm. I'm getting good with the scissors now so I think I'll be able to do it once I get a line marked up.I had the exact same look at the back of my thighs. Probably because I didn't trim anything off the thighs at all, since I need all the space they can offer.
I "fixed" it from behind by putting longer inside cover strips, curved to match the curve of that ridge (see my build thread). That at least stops the black from peeping through the crack. I may (or may not, see below) fill it with ABS paste at some point, to further close it up.
*snip*
Considering there is a decent chance that part will be cut away anyway, later down the road, for increased mobility (on stairs, etc.) I’m not too worried about it.
-
I was going to paint but I didn't as I wasn't sure if the paint would be desolved by the glue. So I decided to go with the proven masking tape method.
-
1
-
-
The Billhag on UKG gave me some updated versions of the snap diagrams I posted before. I've added them to my reference photobucket here. I've elected to follow the UKG advice on snap locations (including on the arms/shoulders) seeing as they will be my garrison.
Bit of a 1 forwards 2 back kind of night.
First some nice things:
The new M3.5 brass screws for the bucket ears came. I could only get really short or really long. I got the long ones as brass isn't exactly hard to cut.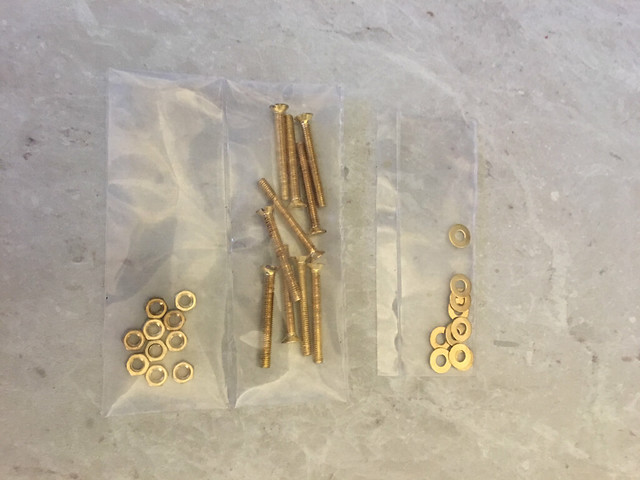
The new, longer, M4 pan head screws came for the TD.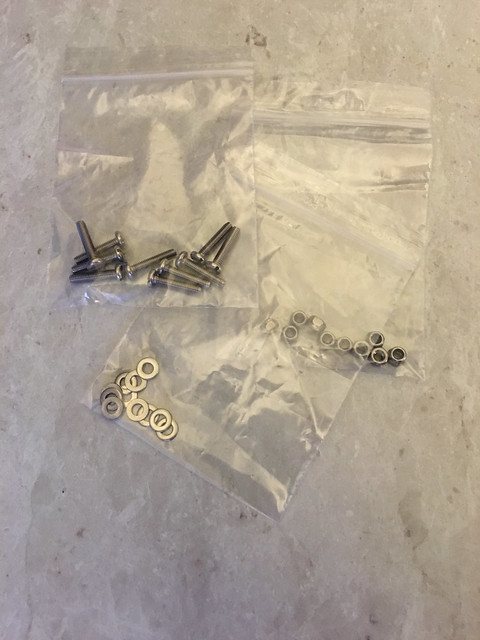
Spot the new respirator. Seems the old one was well past due.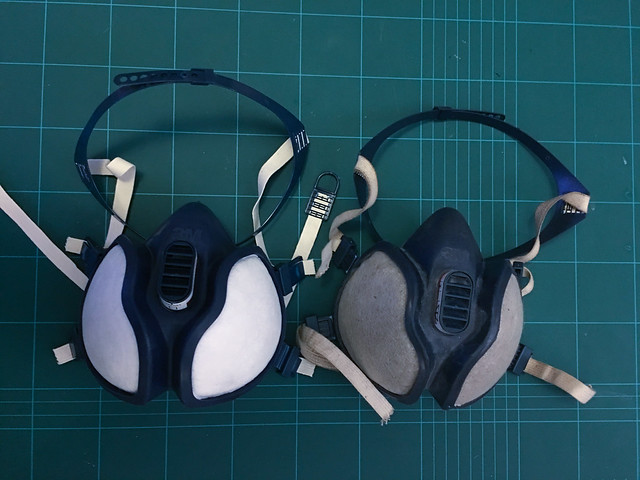
Now for some bad news. The glue on the rear of the thighs didn't hold :bleep: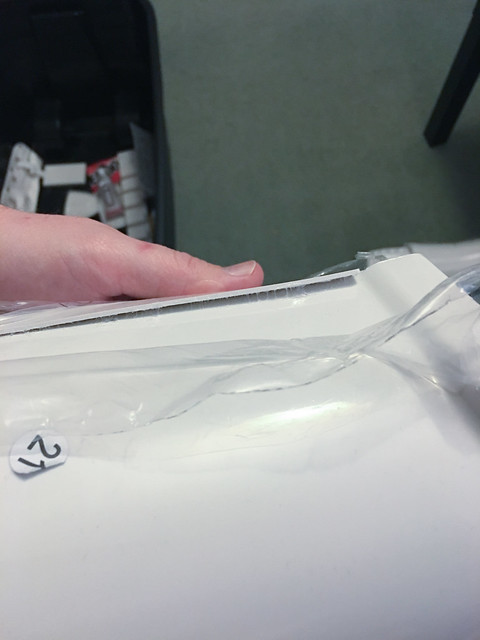
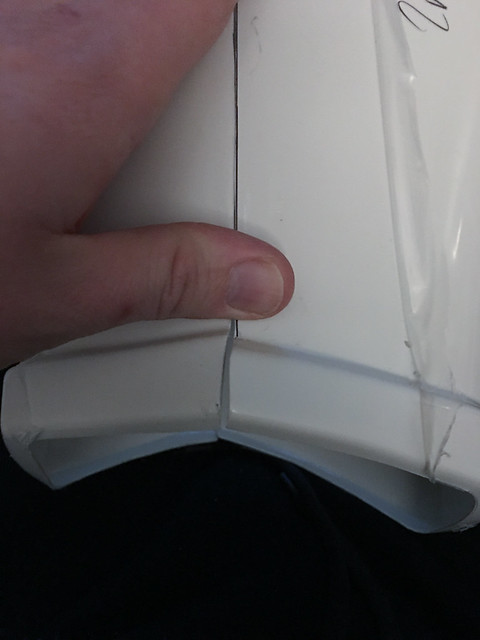
This was the worst on but the other went too. Looks like it was down to me having the cover strip down too far and also raised sections at the base interfering with each other on one leg. I've trimmed that now to give them room. I also pulled the strips off to re-try the glue up. I noticed that 1 left has a gap (see below) it the rear, is this a problem? I can trim off a mm or 2 to close it up if needed. It will close up a touch more once the thighs are fully glued up, or at least I hope so.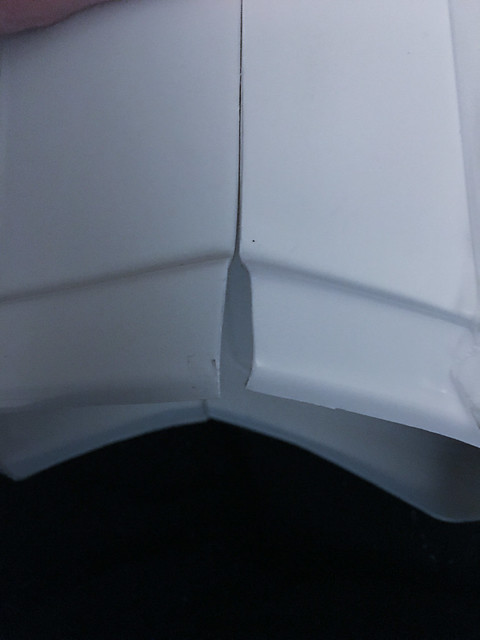
The photo probably makes it look bigger than it is. I think it's just down to how the trim was done when I cut straight lines.
Back to happier news I started glueing on the snap plates to a few parts.
I started by taping over the snap plates as I am told they can react to the E-6000 glue. This was done by running a strip of tape along my cutting matt then trimming to width and then cutting squares off of the strip.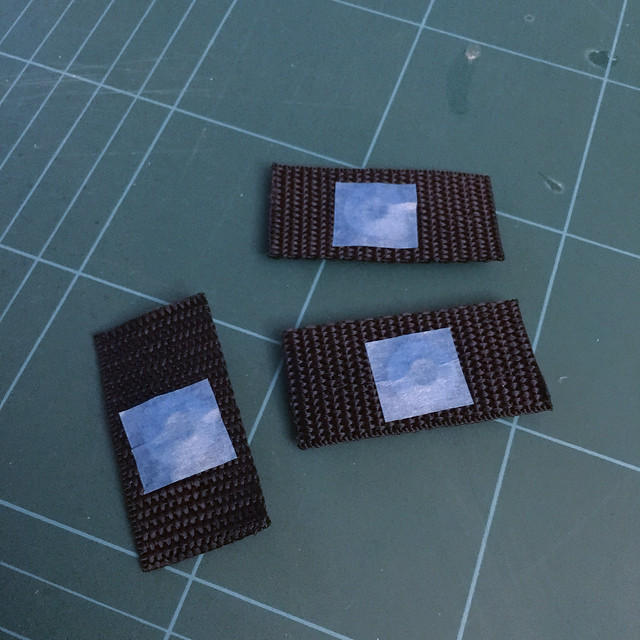
I started with front shoulders, and for some reason don't have a photo so you'll have to use your imagination.
I then added the 3 snaps along the base of the kidney. Once these are set I'll do the "posterior" plate ones to line up.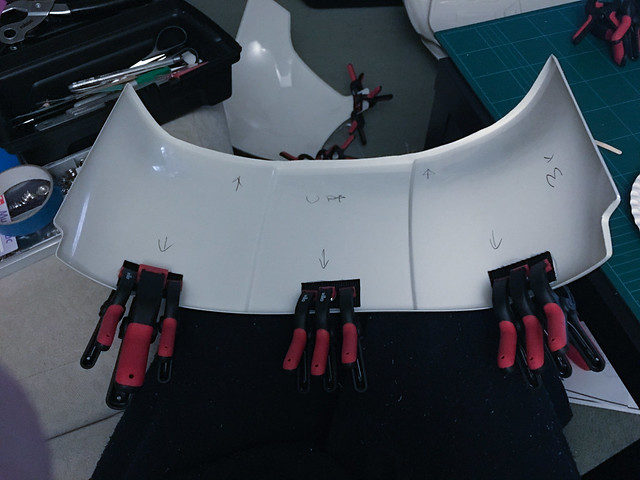
I also added two to the ab plate as per the Billgram.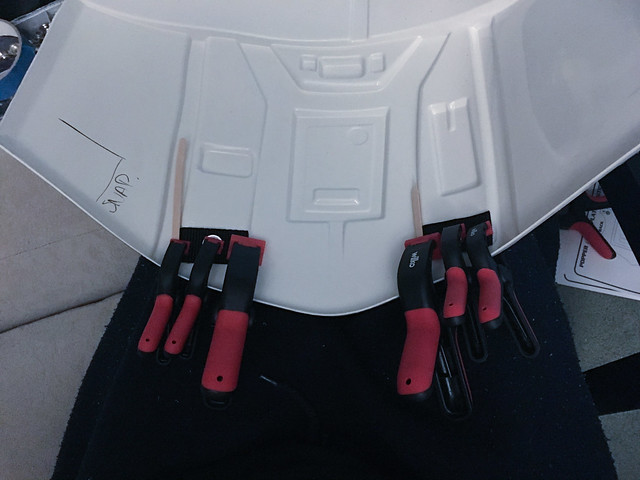
At this point I was out of clamps, and the wife was getting fed up of the glue smell (she's in the room when I do this stuff but doesn't wear a respirator as her face isn't stuck right into it). To use up the last of the glue I'd squeezed out I also added one snap to a shoulder bell for the bicep strap, this was clamped with some of my smaller 10mm magnets.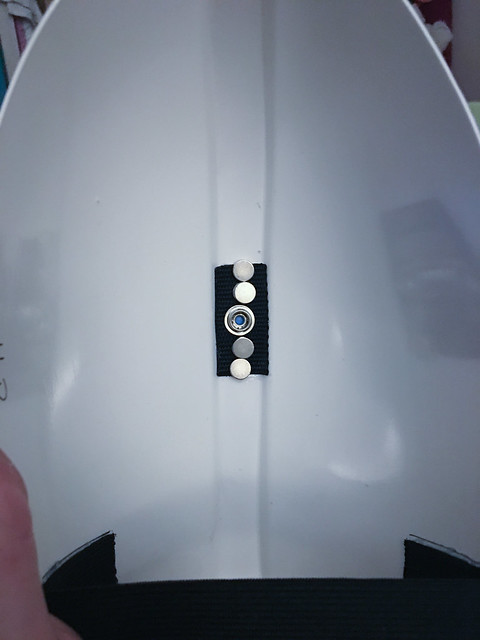
None of the was done particularly accurately, I eye balled the centre and checked by using a glue spreader to measure and compare them to ensure they where at least close, mm accuracy here is a waste of effort I felt. Parts just need to match their counter parts which is easy to do just by lining them up.
I also trimmed down some returns on these parts for good measure whilst I was in there. Namely the kidney and the top of the butt plate. There's still a good 5mm on there but not the massive return there was before. -
I wasn't planning on cutting my TD and was worried it wouldn't look right, but it looks fine. Still not decided if I want to chop the 1/4" mainly as the chop saw is at the bottom of a very large pile of boxes.
-
How much glue are you using, it looks like a quite small amount. I used a wooden stirrer liberated from a coffee shop to smear a layer of glue over the entire surface to be glued. If you leave this a minute or two it starts to go tacky and makes the clamping far easier.
-
I should also mention the pyrm pliers are a god send. I couldn't imagine having to do all of those snaps with a hammer!
-
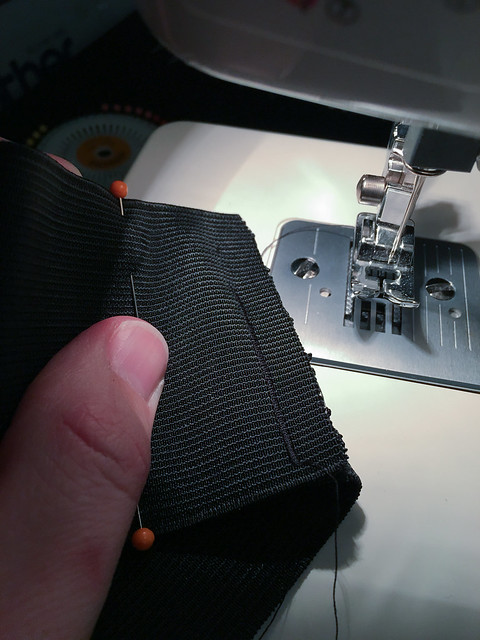
Last couple of evenings I've spent working on more of the elastics.
Last night I sewed my poppers onto some 3/4" black elastic for the shoulder bells. The phone show one with the other half popped on so I don't lose it.
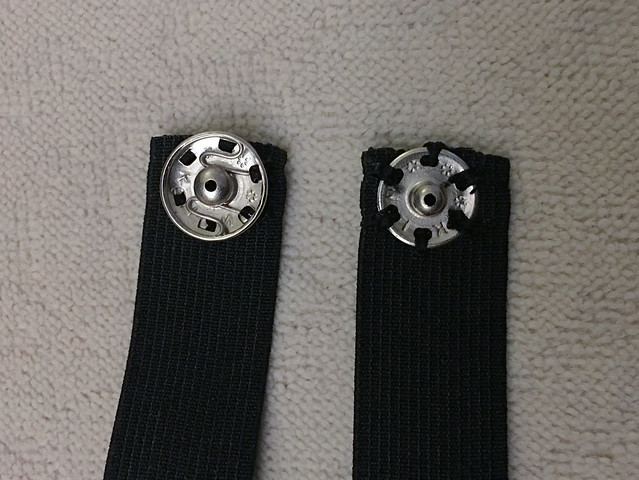
My sewing skills aren't much so it took me a really long time. Got faster by the end though so hoping the part on the white elastic will go faster.
Today my snaps came from Rebel Scum Workshop. I ordered 100 to allow room for mistakes and I also ordered the pliers.
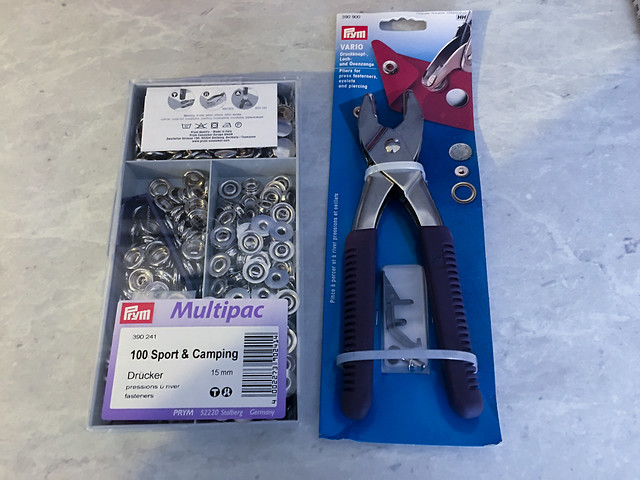
I bought a hole punch to do the holes in the webbing and elastic a while ago. It's a cheap Rolson one was I figured it would only be used for this project. I'll come back to if this was a good decision later in the post.
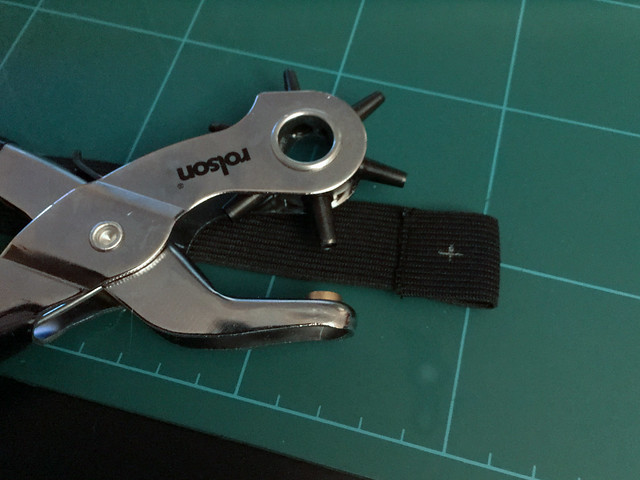
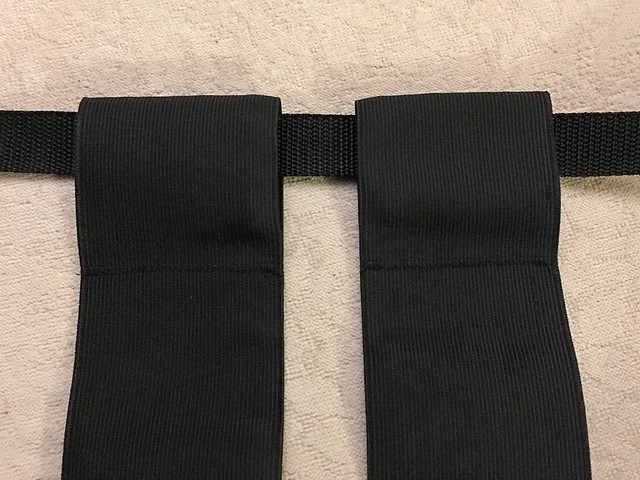
As you can see I made a 1" loop in the end of some 1" elastic and sewed this on the machine. I then used a silver pen to measure and mark the centre. This done I used the punch to make the hole and sealed with a lighter. I found that you need something soft under what you want to punch or it won't punch a clean hole. I used a doubled over off cut of elastic from when I was practicing on the sewing machine.
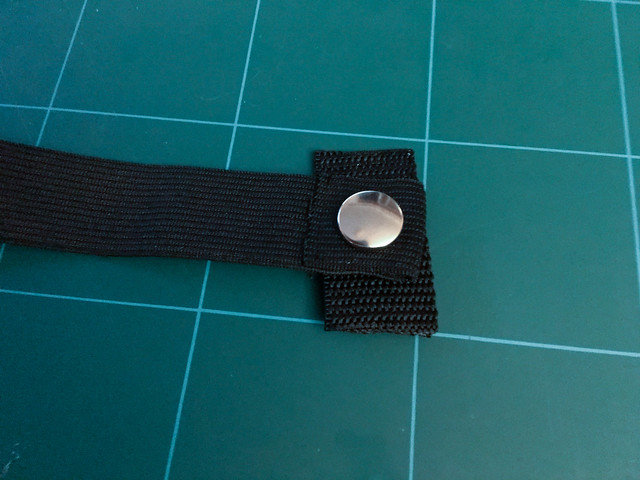
I also cut a 2" strip of 1" webbing for the armour plate. I heat sealed the ends with the lighter but the punched hole was left alone, the snap will press the fibres into place and the punched hole didn't want to fray anyway. It almost seems as if the pressure sort of melts the fibres together.
Tests done I made a template webbing 2" long with a central hole and used this to cut and punch against with out having to measure dozens of times. This allowed me to make 25 straps pretty fast.
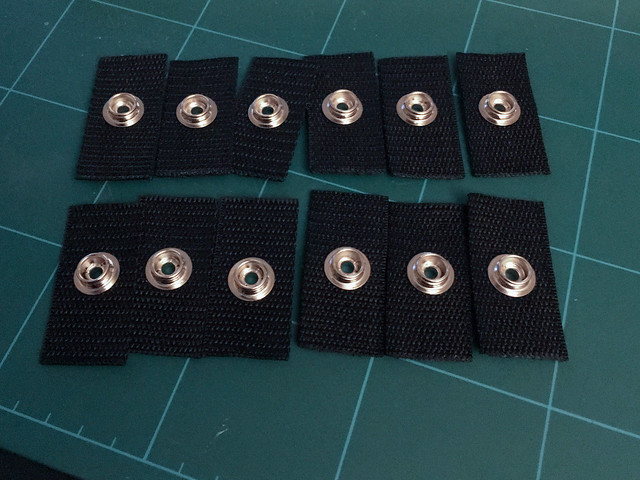
This should be roughly about the right amount I need, but I have some questions.
I based my count on the following Billgrams:


These show only 2 plates joining the upper armour sections to the lower ones, yet almost all armours (including the wire hooked originals) use 3. Whilst I've seen amour in this exact layout I suspect there's a good reason most used 3? Am I just paranoid.
Also they show 1 snap for each of the 2" white shoulder straps. I've seen many use 2 snaps here but then a lot use double snaps for all lengths, which I am not. I suspect 1 will be plenty but then I don't know how much stress they are under. Not hard to change but that means more sewing

Finally what length should the elastics be. It strikes me as easier to make a standard length elastic and then I can have spares. I was thinking 4" (plus the folded over sections so call it 6" total). I'd then glue the plates to this distance. Again not hard to change but I don't want to make up a dozen or so and find they are too long/short.
For the 3 rivet side do people use snaps still or just rivet through the elastic directly. I have also seen people use the split rivet to hold a snap in place, I'm toying with this idea but I don't have enough rivets to do any tests with I don't think.
I mentioned the Rolson punch tool. Once I remembered I needed a "pad" to punch against it was fine, bit short on leverage but worked of you squeezed hard. However before I realised you needed the pad I of course chipped a punch, the one that's the correct size for the snaps. On fabrics going down 1 size wasn't a big deal as they can stretch a bit. For the snap needed in the armour this is a HUGE irritation. Fortunately it looks like pliers came with a punch tool also so I'll test that on some scrap to see if it a: works and b: is the right size.
-
1
-
-
It took me a long time to find M3.5 countersunk last night in any qty that wasn't by the 100!Yes, they do look smaller on the Anovos helmet. They probably use the more common M3 screws instead of the correct sized M3.5 screws.
Also do I need washers or just nuts?
-
I don't plan on filling mine, the originals wouldn't have been. My reference isn't high enough resolution to prove this, but I can't see them spending the time to do it. I'd want it a bit tighter too, I'll be doing mine some time next week.
-
In a break from our regularly scheduled program I broke out the sewing machine. I have a new nemesis.
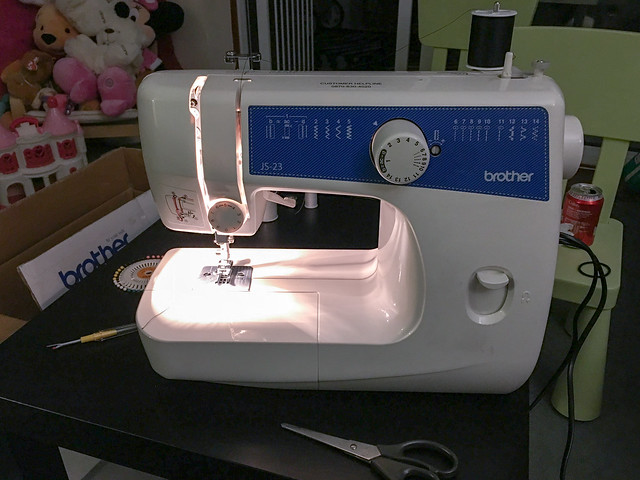
Initially I had the machine set for a small tight zig zag but was having lots of issues with snapped thread.
That one snapped about 2/3rds of the way across.
After a lot of trial and error on some sacrificial 3" elastic I discovered I needed to increase the tension and also change to the next size larger stitch. This gave me almost perfect seams going forwards.
On my 1 inch elastic I left the stitch the same size but reduced the tension down to 7 from the max of 9 I was using on the 3" elastic. I'm not sold on if sewing the 1" doubled over for the snaps will be worth it.
I folded over 3" and after sewing this left a hole 2 3/4" wide for the waist belt. Currently I am trialing a belt I got with some outdoors trousers but the large loop gives room for a more robust belt if needed.
As I did with the shoulder elastics I've not cut the elastic and just added the loops at each end. Next job for them will be to figure out how long to make these and to glue them in. Thankfully my new mask came today so I will no longer be starved for oxygen when using the mask.
-
25 for the top, 16 at the bottom?Yes, M3.5 brass machine screws. I believe the original RS helmet had 25mm and 16mm long screws.
-
So if I wanted metric (as they are easier to source in the UK) I'd want to use M3.5? And they'd want to be about 20mm long?My inch fractions are not very good but I believe 6/32 is the same as 3/16 which is roughly 4.7mm. The actual size of the brass screws are 3.5mm which is approximately 9/64.
themaninthesuitcase Anovos ANH Stunt Build
in ANH Build Threads
Posted
I got my helmet pads in the post today so started a basic disassembly of the bucket.
The hard hat liner came out easily and basic testing of the pads looks like the will work well.
I also removed the S trim to allow me to repaint the vocoder as the standard paint job was less than great.
Under the s trim I found 1 small crack. I've drilled a small hole at the end of it to stress relieve and stop it running. I will make some abs paste and fill from the back to reinforce it.
They also where a bit heavy handed with the CA glue when building these. I've got some CA remover but it melts the ABS. I've added a layer of CA to my test sheet and will see if I can use a cotton bud to at least thin down the glue a bit in the worst areas.
I will redo the frown as well as the paint wasn't great but unless there's any pressing need will leave the tube stripes and traps for later. I will eventually do them again but for now they seem okay.