

Moussvroum
-
Posts
79 -
Joined
-
Last visited
-
Days Won
2
Content Type
Profiles
Forums
Gallery
Articles
Media Demo
Posts posted by Moussvroum
-
-
Thank you Tino.
I have to study the weathering technics

Weight of the baby : 2 kg !

-
 5
5
-
-
-
-
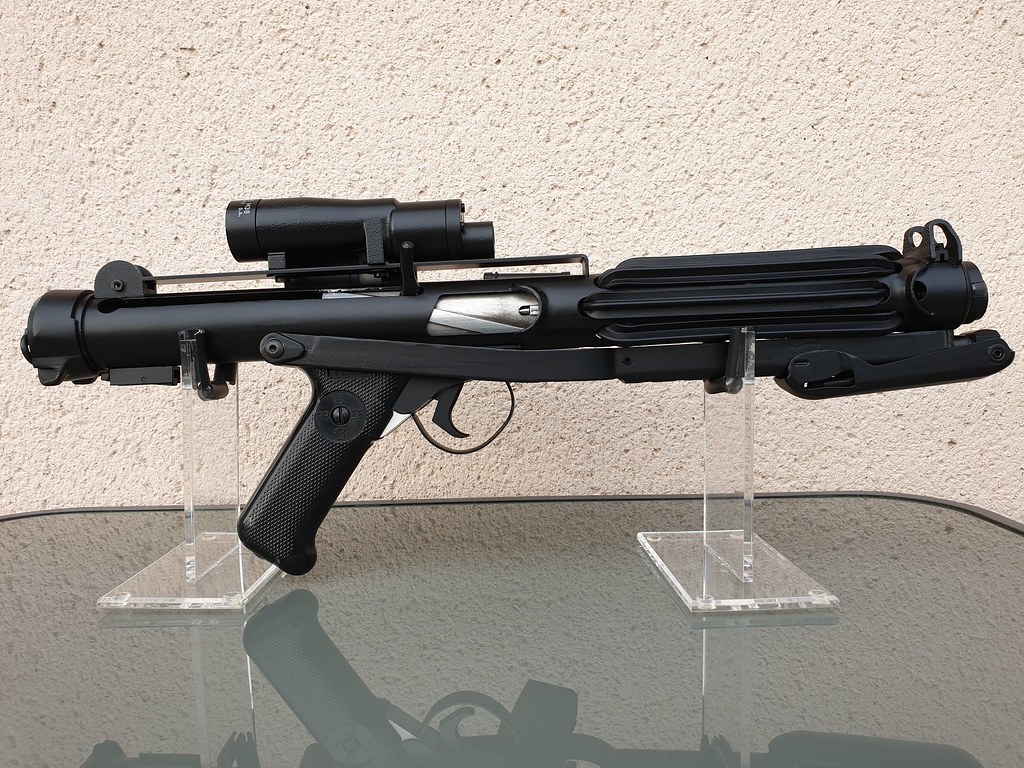
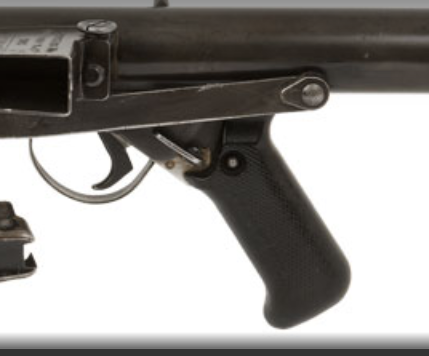
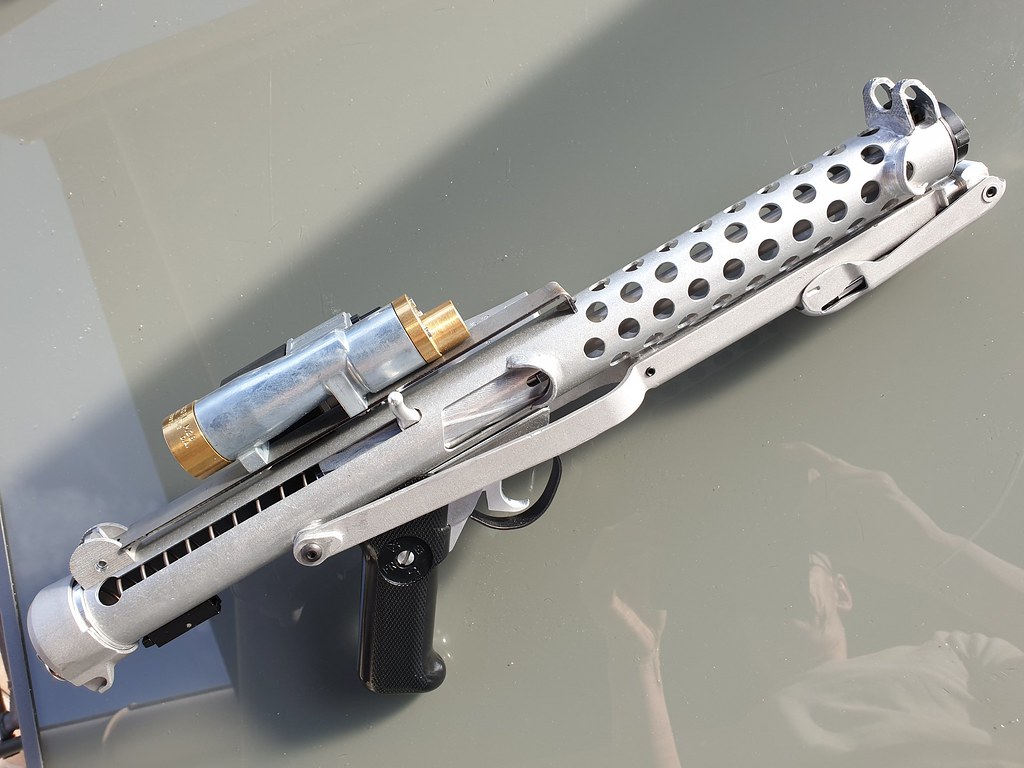
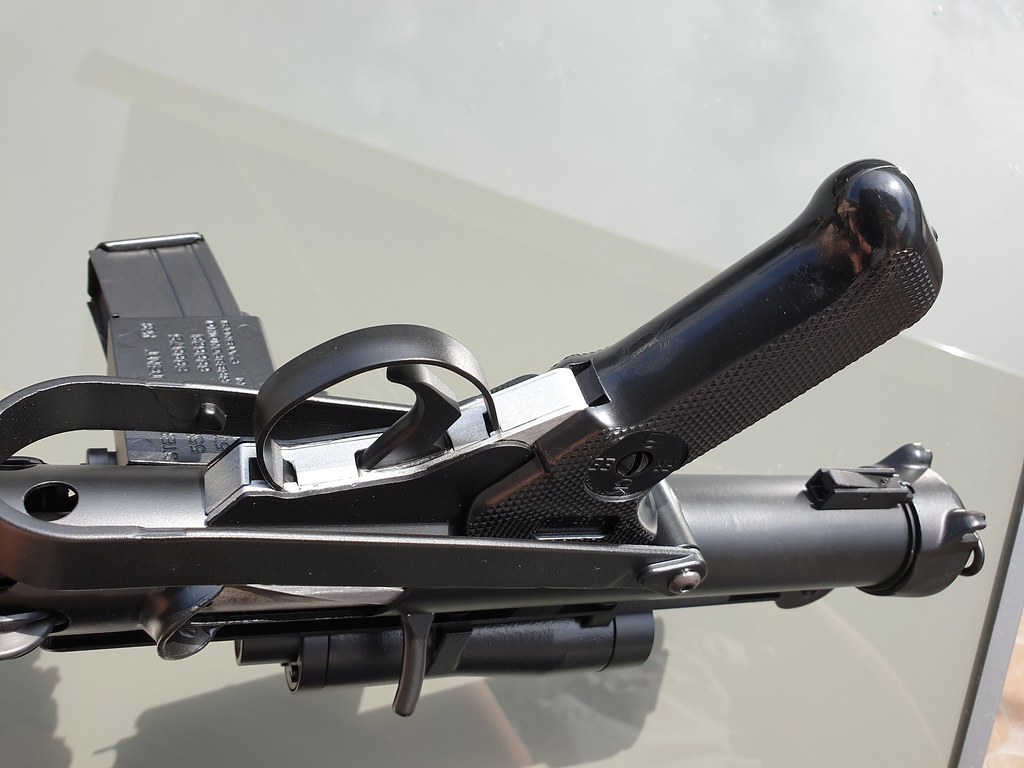
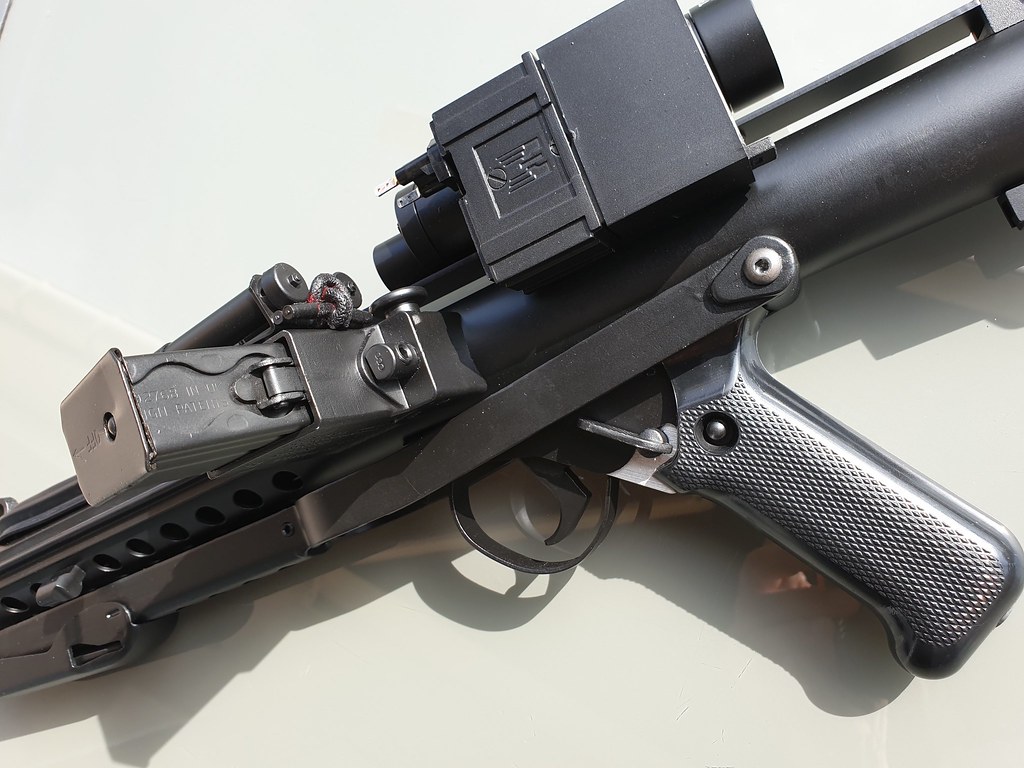
There are still some issues to be resolved especially with paint details, but I'm pretty happy to present you my blaster.
Still don't know if I'll do weathering.
It was a fabulous journey and I want to thank you all for your support and advices.

-
4
-
-
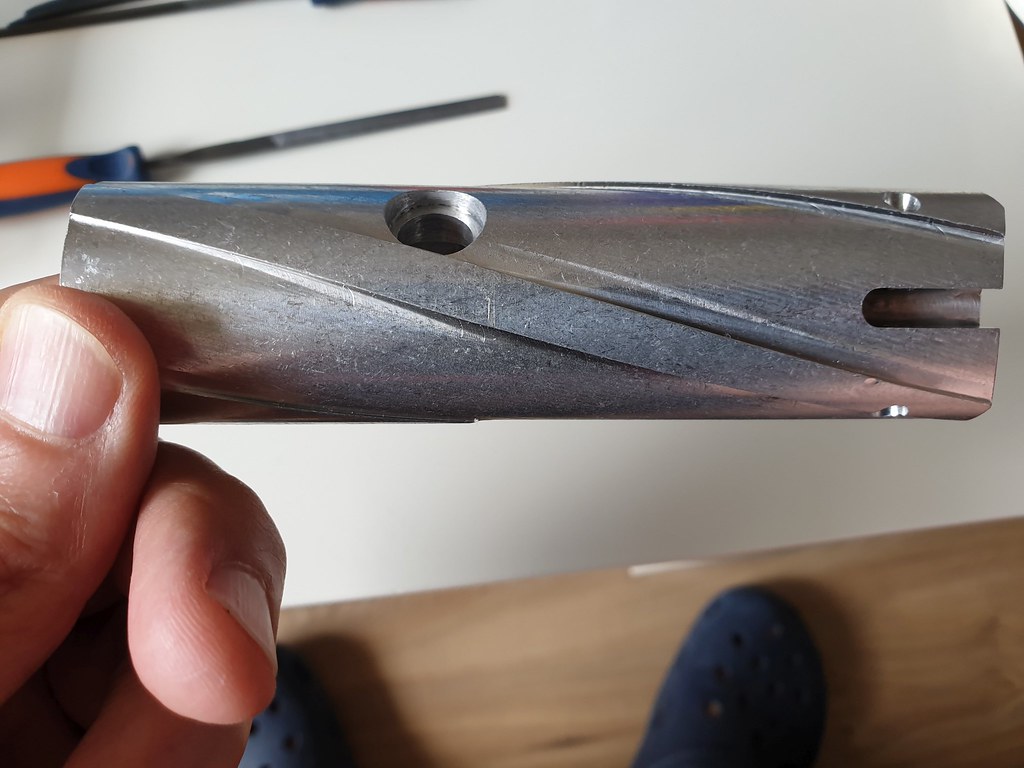
I've done the t-tracks. It wasn't easy and I stressed a lot. I used hot water and pliers to curve them. It works pretty good.
I followed mainly two tutorials :
http://www.stormtrooperblaster.com/e11-blaster-t-track-installation.html

I've glued the t-tracks with cynolate glue. I shoud have used hot glue because cyanolate vapors made white stains on the paint between the t-tracks. I had to retouch paint.

The result looks good. For a first time, I'm not disappointed. Not perfect but accurate. Will do better with the next blaster !


-
3
-
-
I should use a translator ;-)
Corrected.
-
1
-
-
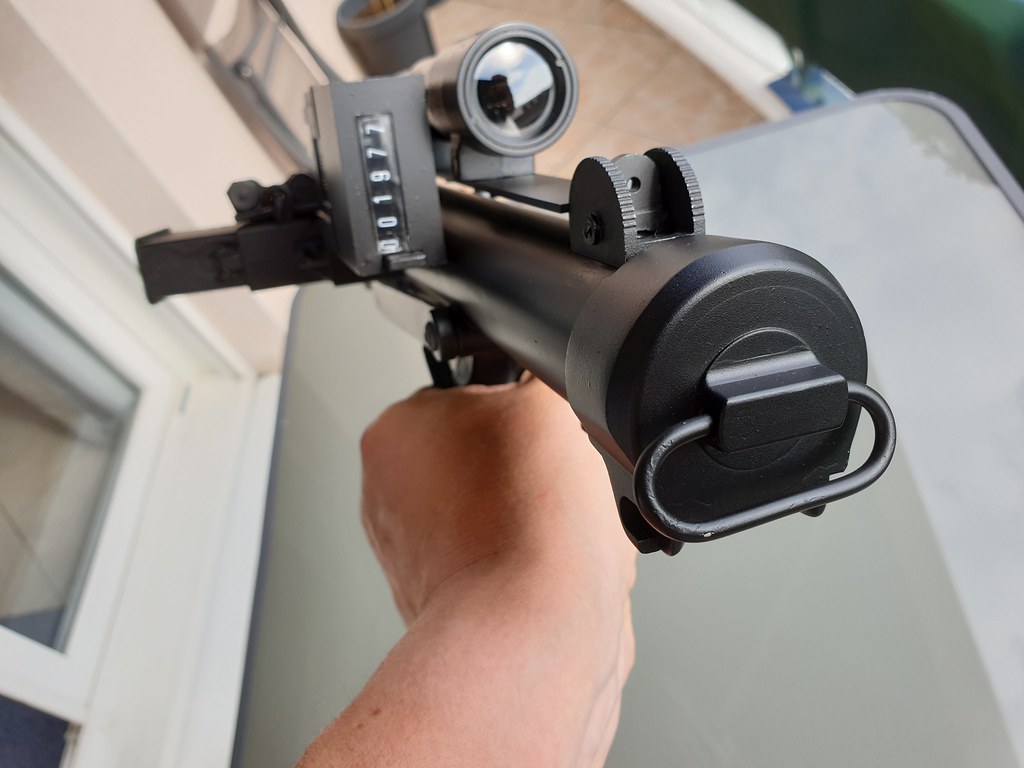
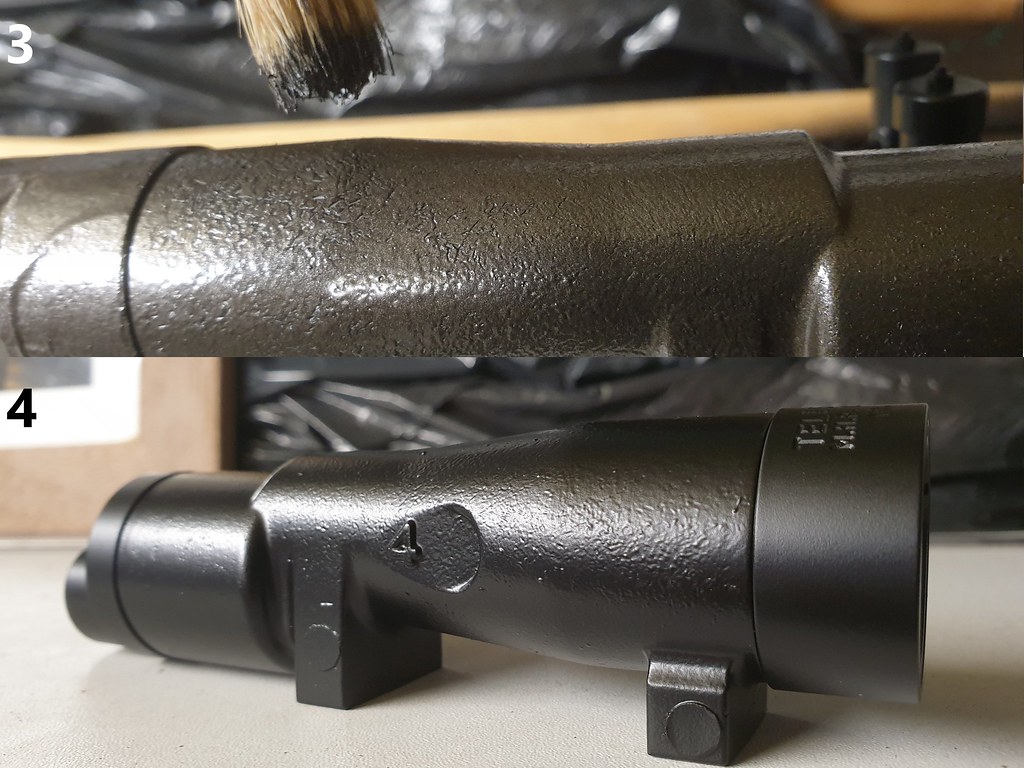
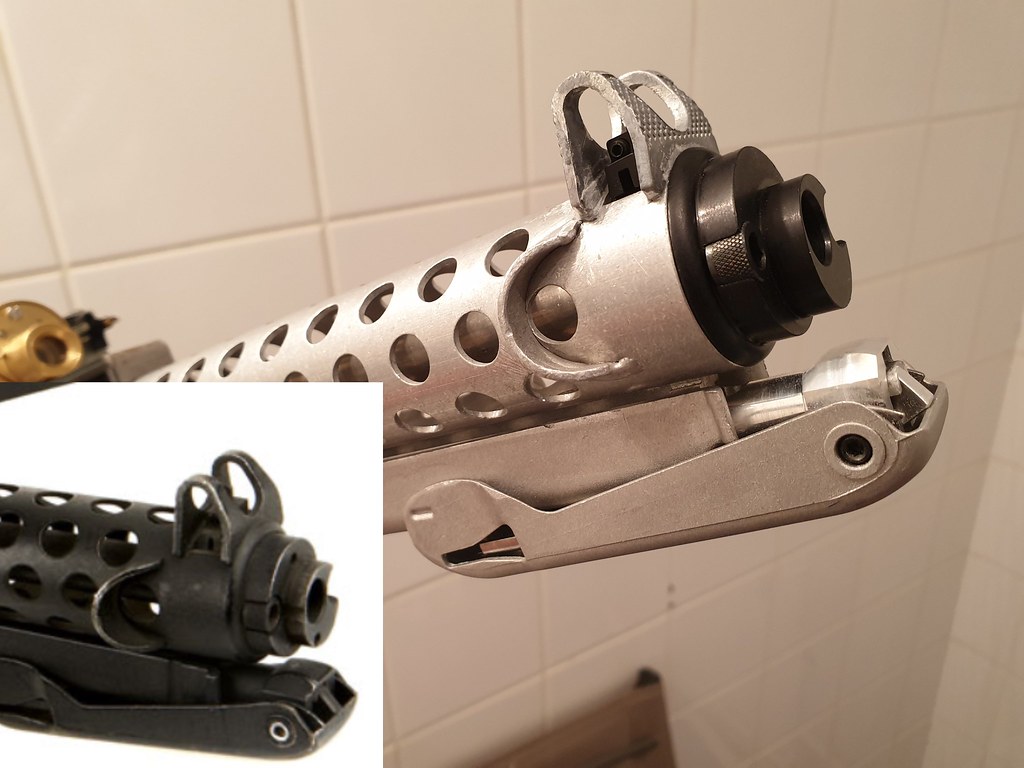
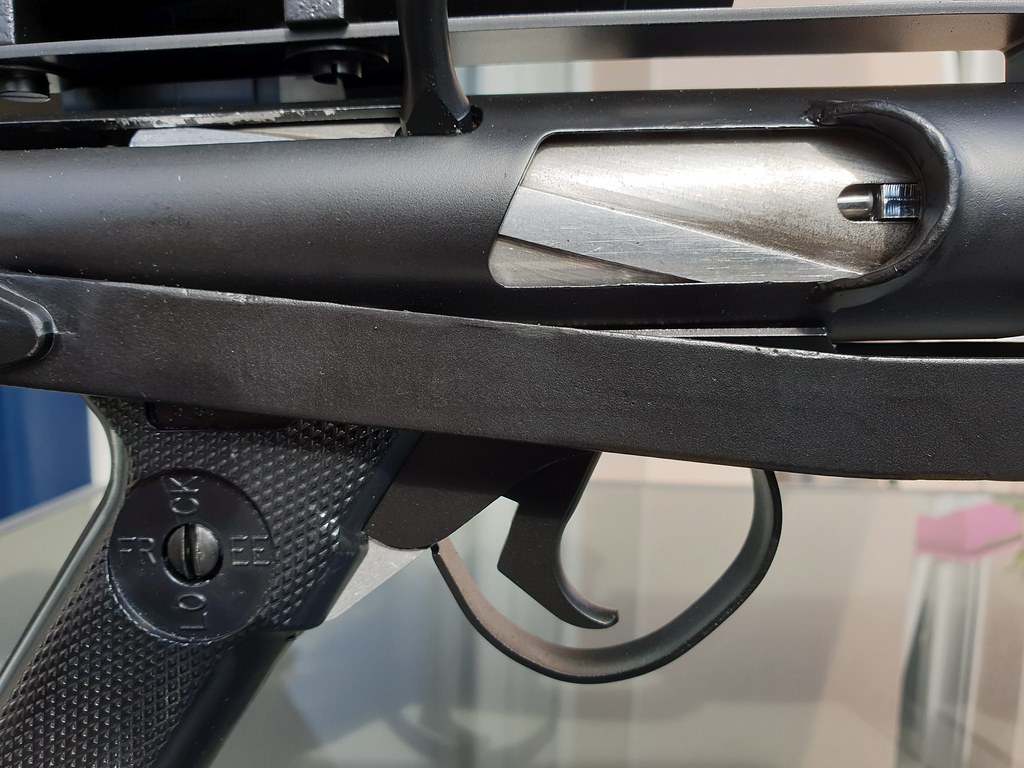
I wanted the bolt to look like steel. I’ve masked the parts in contact with the main tube and used the dark grey hammered paint, spraying paint and immediately removing it with a cloth.
- picture 1 : aluminum bolt
- picture 2 : masking and paint
- picture 3- 4 : the result.
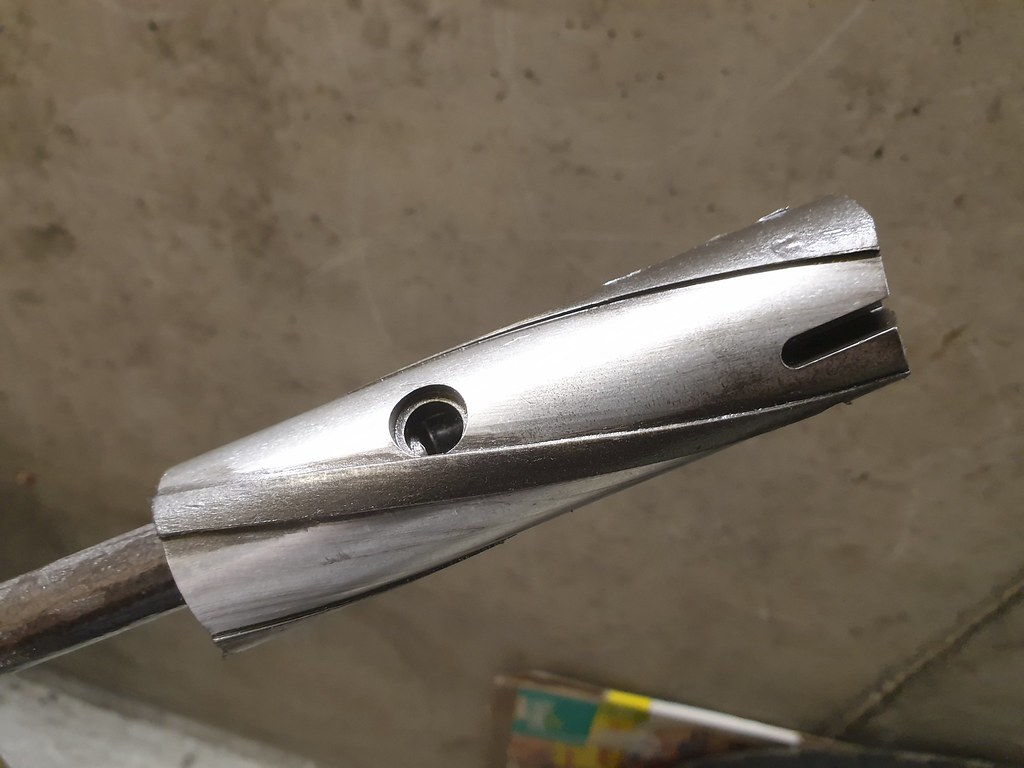

I've also "painted" the M38 scope text (let it snow, let it snooooow ...)

-
3
-
-
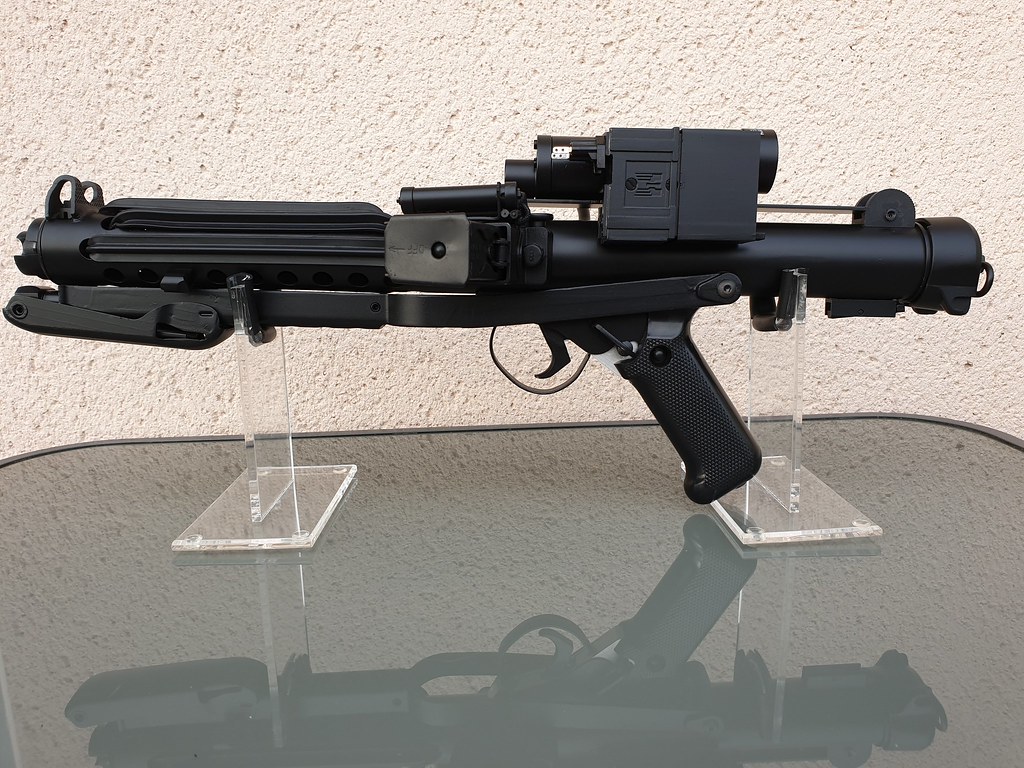
Thanks ukswrath. FM blaster is fabulous.
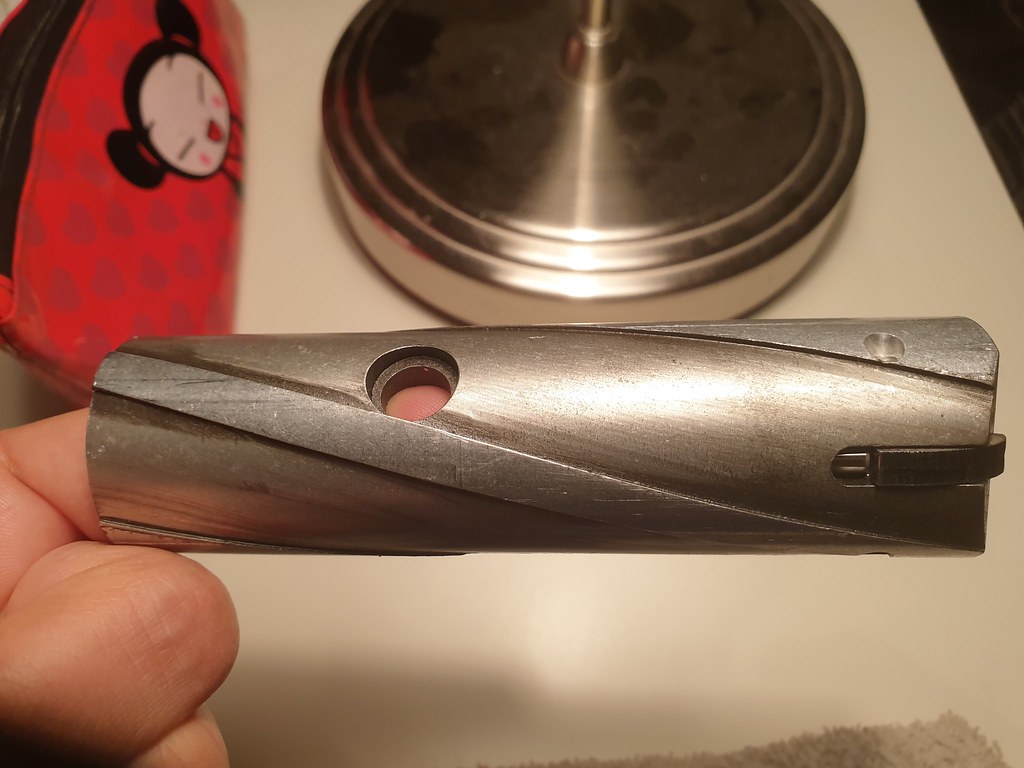
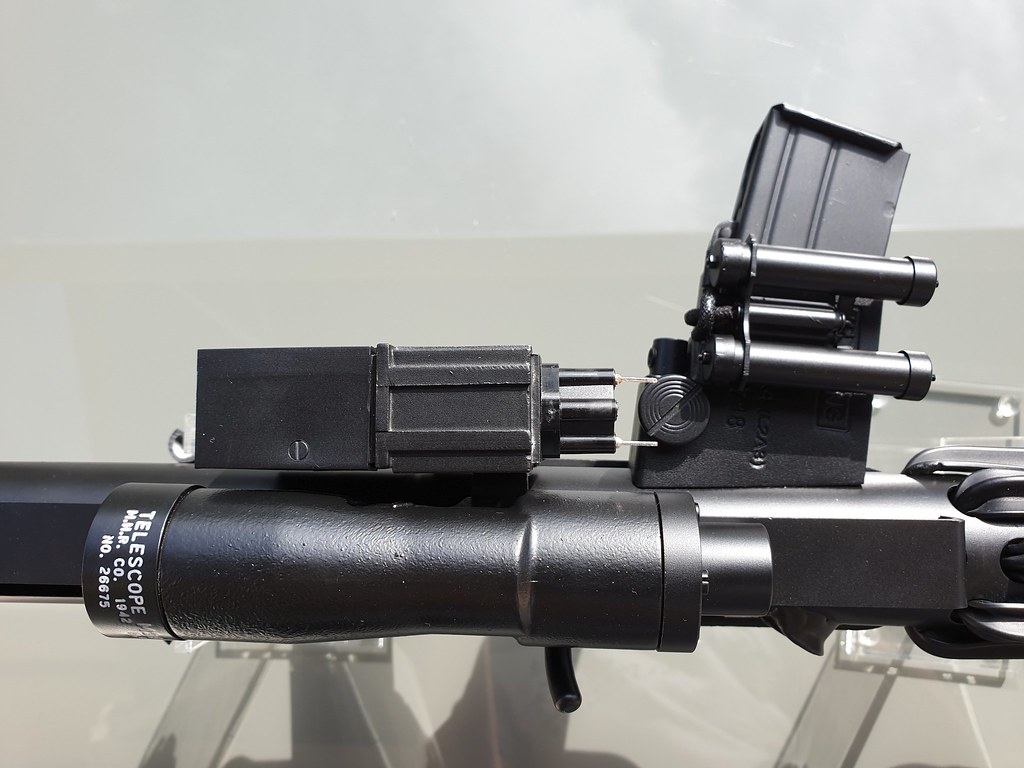
So, after 3 layers of primer to be sure not to forgive any portion, I did several tests on aluminum bars to find the good black color. I also wanted to test textured paints for the scope.
The flat black primer was good (not a flat black but not satin anyway). I finally decided to use a real flat black paint (MOTIP MTP-M04006). No textured layer for the main tube, just on the scope.
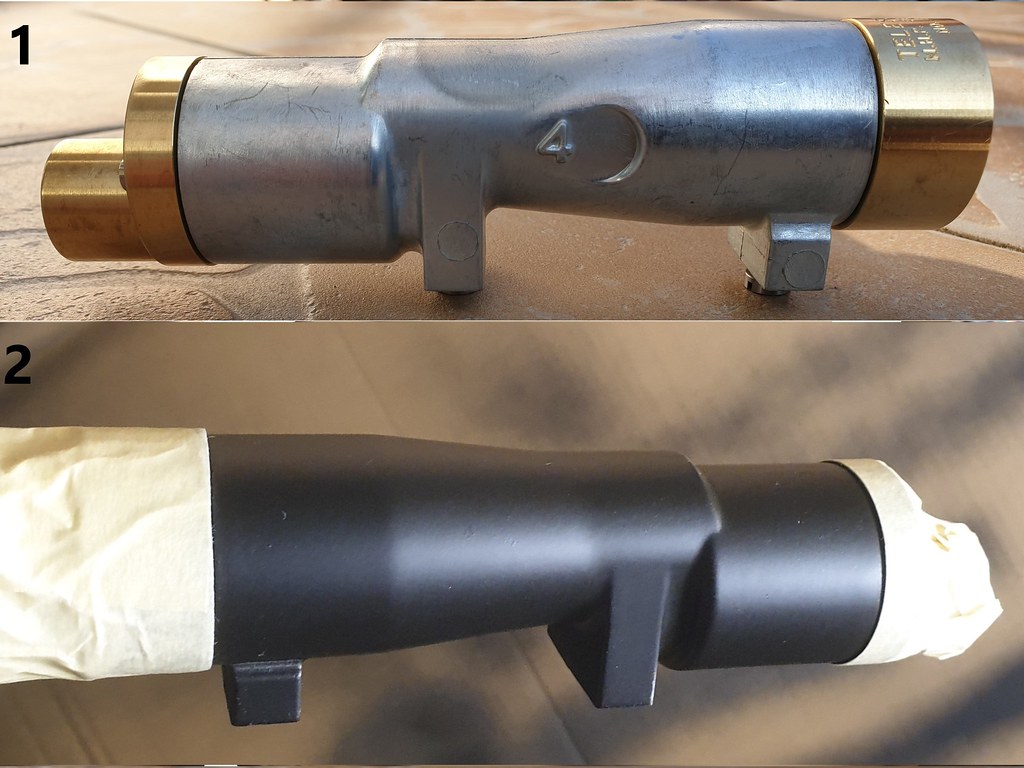
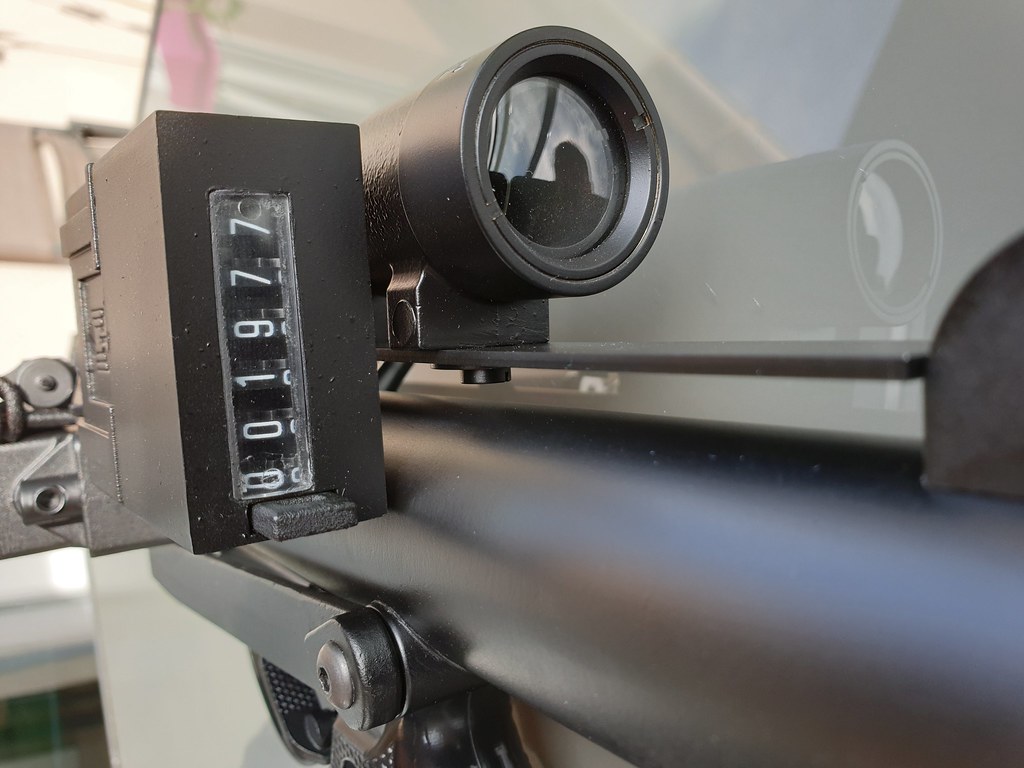
Picture n°1 : you can see the M38 scope as Chris sells it.
Picture n°2 : I applied 3 layers of a flat black primer (MOTIP MTP-M04052) on all the scope. After drying, I masked the two brass extremities.
Picture n°3 : I used a dark grey hammered paint to give its texture to the scope (MTP-M04017 ). Wasn’t satisfied by my tests on aluminum bars, so I followed Tino’s idea. To enhance the texture, I used a brush to tap the paint when it was drying (sorry Tino, I didn’t use kitchen paper).
Picture n°4 : After drying, I unmasked the scope and I applied 2 layers of flat black paint on all the scope (MOTIP MTP-M04006). Et voilà !
I will enhance the text in white later. Will also do some weathering.
-
4
-
-
Will follow your work with attention ! Keep going on !

-
1
-
-
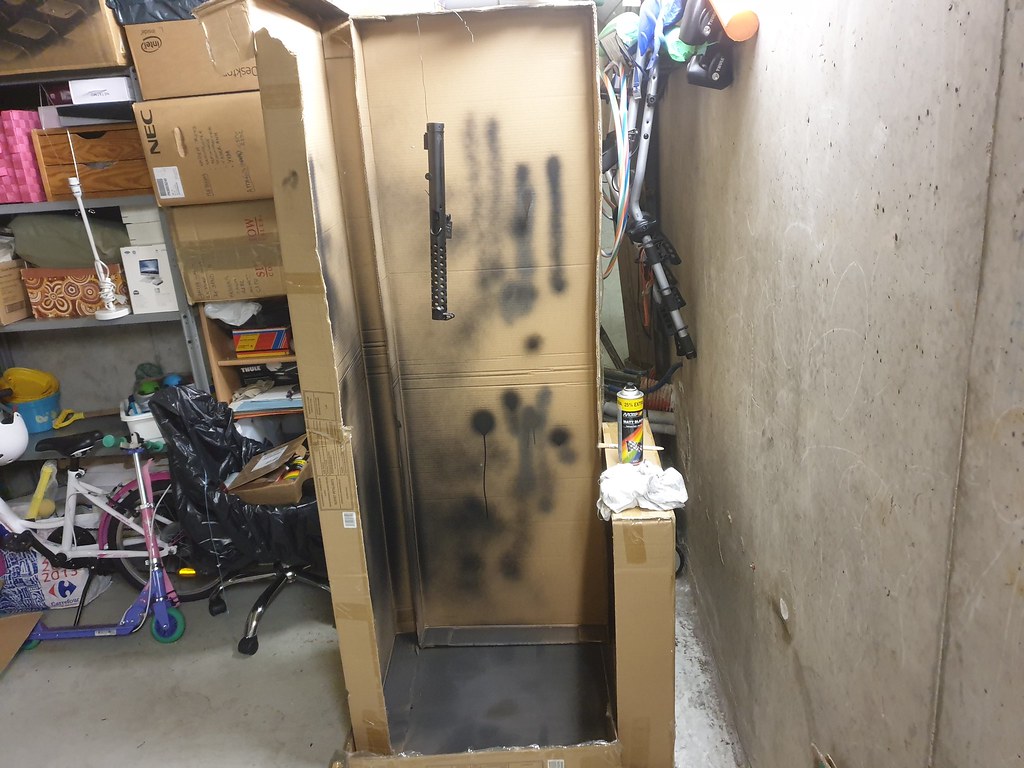
Have painted today. I've some good results ! Will show you soon ! I love this blaster !!!
Meanwhile I show you my painting booth

(don't forget to use a mask, glasses and gloves)

-
1
-
-
Done.
Another little "accident" : I use latex glowes for painting. They're full of a white powder (talc ?). I didn't see with the first layer that the powder goes everywhere and I can see my fingerprints when I take the parts. Fortunately the powder is easy to remove. So one advice : wash the glowes before painting !

-
1
-
-
14 hours ago, ukswrath said:
Fantastic work so far

Thanks.

I've missed some sectors. Will apply primer on them tomorrow.
-
1
-
-
8 hours ago, T-Jay said:
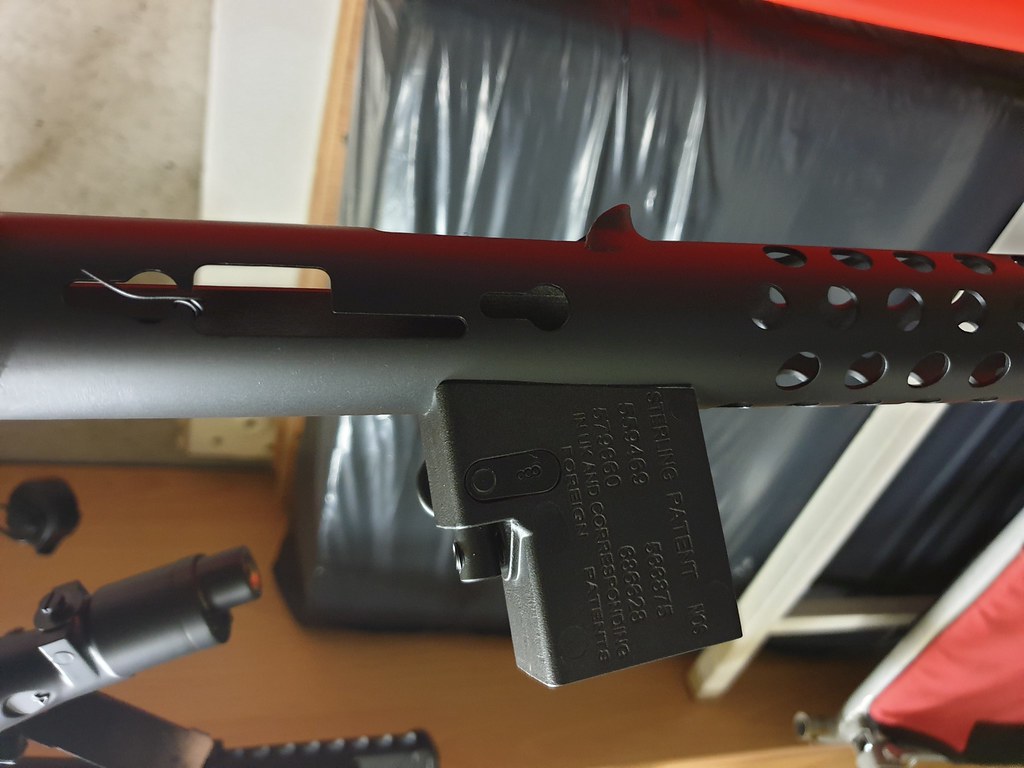
The original magazines are just simply black. No structured paint on any surface there. However, you can work with a layer of silver paint underneath the black and then add scratches.
Thanks Tino. Will keep kitchen paper when painting
No structured paint on the magazine. I was wondering if I must apply a flat black layer or not.

-
Time to paint. It's the most difficult part of the build for me. I not very clever with painting ....

After masking some parts and cleaning the other with alcohol, I've applied a flat black primer ( MOTIP MTP-M04052).

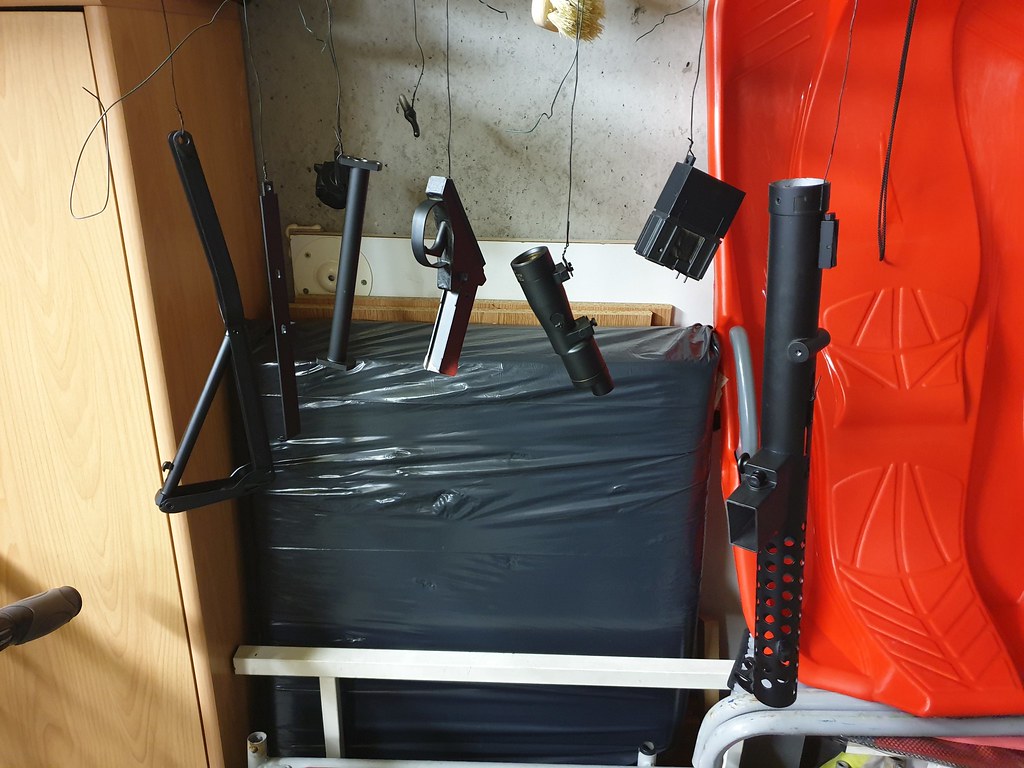
I'll have to sand a little bit the scope rail because I applied to much paint (too close).
I don't think I'll apply a second layer of primer.
I will spay a grey hammered paint (MOTIP MTP-M04017) on the scope and after that a flat black (MOTIP MTP-M04006). Will decide after that if I use the hammered paint on the main tube or not.
Haven't decided yet if I'll paint the magazine or not.
-
1
-
-
Thank you Chris
")
-
Perfect !!!
-
1
-
-
Fabulous work !!! I wish I had a 3D printer !
I'm not an expert but I see just a little thing disturbing me : the grip should be more rounded. The one you draw comes from an airsoft, or an MGC Sterling (ROTJ), not from a L2A3 sterling (ANH, ESB).
-
1
-
-
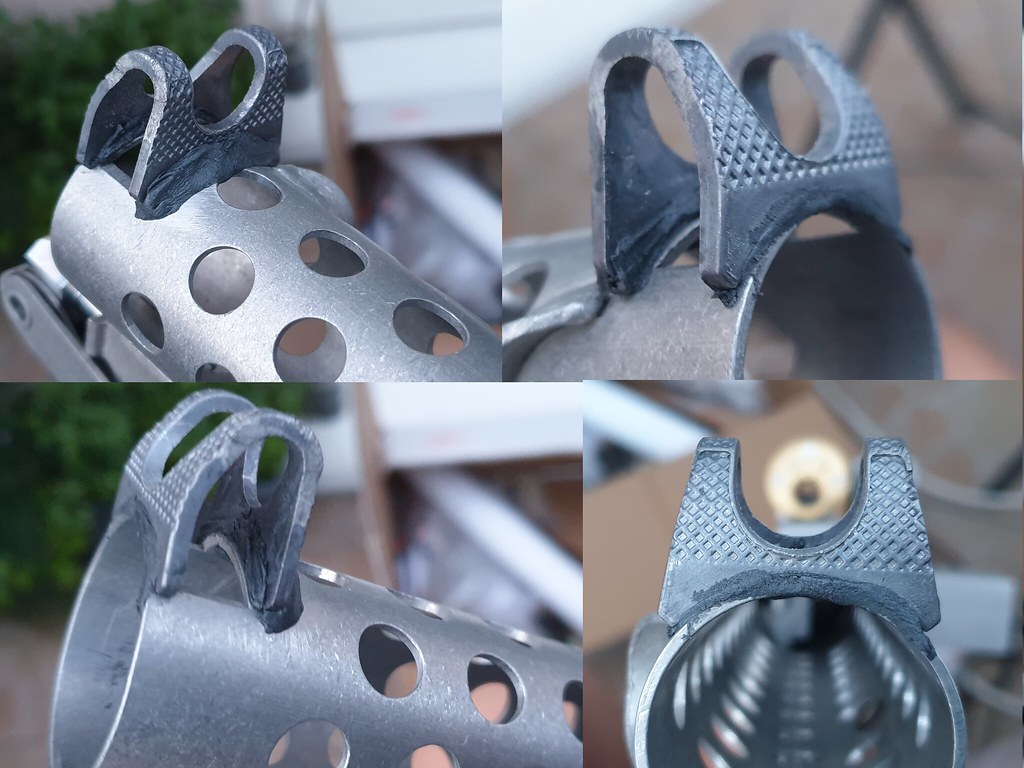
Wasn't satisfied with the triming ...
I've trimed the guard again under the sun light (more visibility) ... The result is better !

Next steps :
- T-tracks,
- disassembling,
- primer,
- paint.
-
5
-
-
Front sight guard finished. It was difficult to trim it : I didn't want to remove to much material but I wanted to keep accuracy.
Not perfect but I'm pretty happy. Paint will mask the excess of material. And the front sight guard is stronger.

-
3
-
-
Wasn’t happy with the front sight guard witch was too much forward on the muzzle.
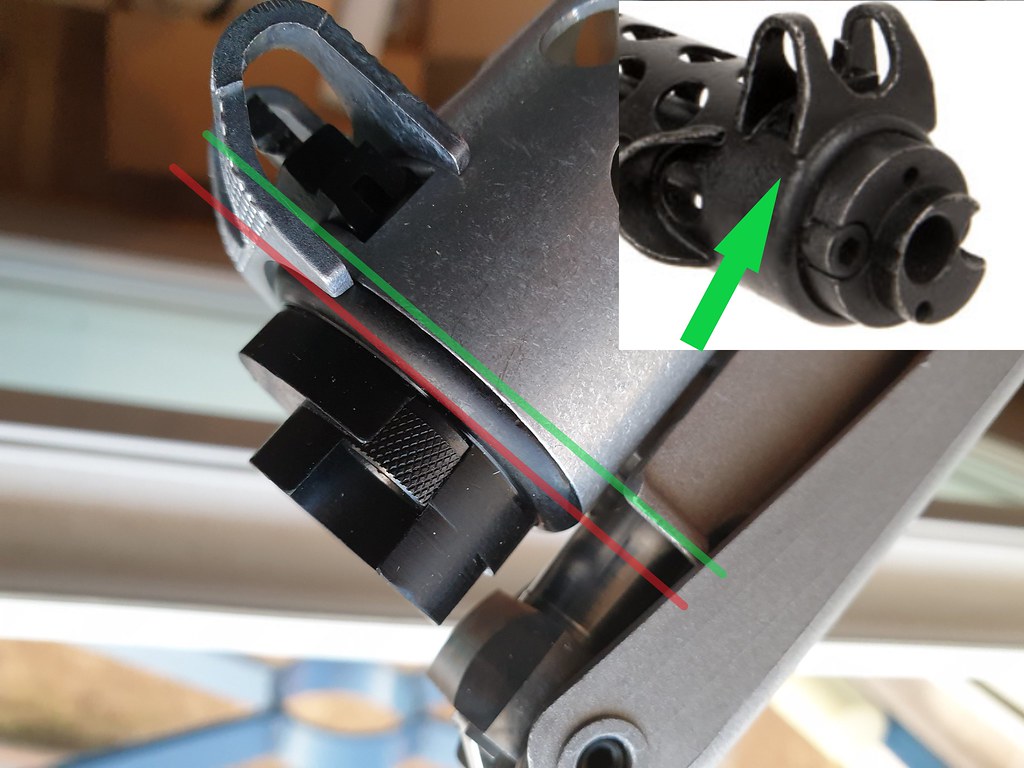
Furthermore, it wasn’t right in the axis of the main tube.

I tried to correct this problem with pliers without disassembling the muzzle. Very bad idea. I broke the little hook that maintains the guard
Aluminum is fragile. I think this part should be in steel (Chris, if you read me
 )
)
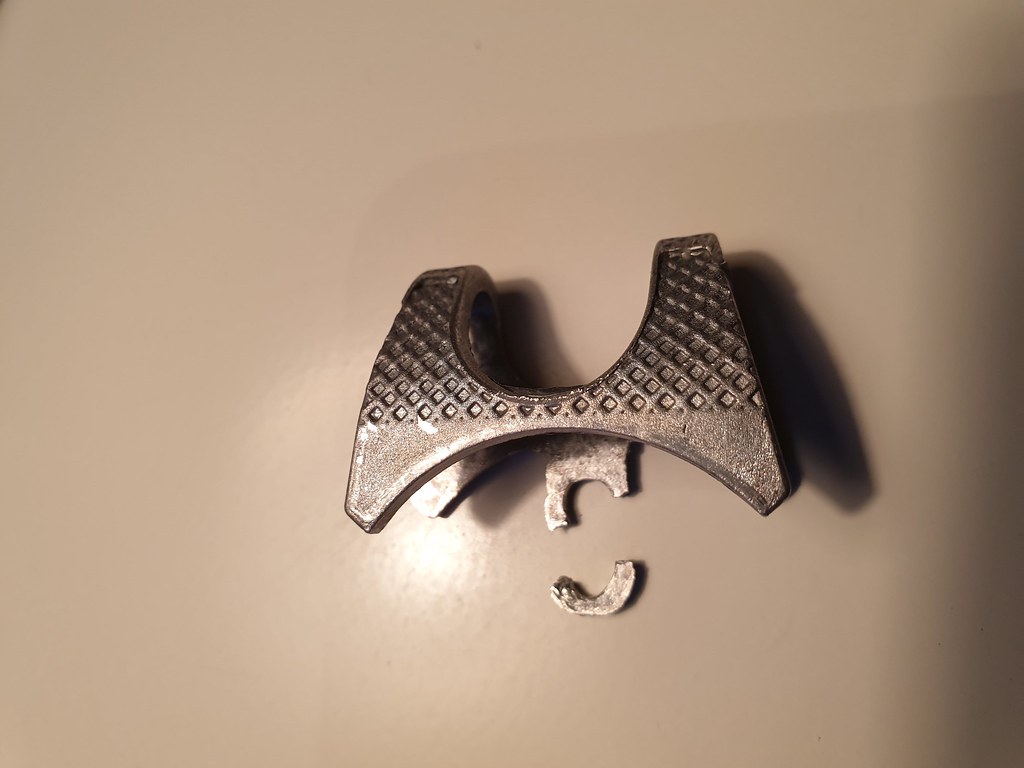
So I decided to sold it on the main tube with bi-component glue (after it was filed and adjusted - won't make the same error 2 times !).
Tomorrow, I’ll trim it.
-
2
-
-
Thanks ! I've contacted him on FB.
-
1
-
-
47 minutes ago, darthcue said:
For more details about this prisms you may contact@Bulldog44
Sent from my LYA-L29 using Tapatalk
Does he sell the prism cell and the prisms ?
-
1
-
-
I think I should use 2 porro prisms ( like in binoculars). Thinking of this I must
-
Thanks. Can you give more details ?
-
1
-


My e11 build (Fieldmarshall kit)
in ANH BlasTech E11
Posted
Thank you all !