


Winter
-
Posts
45 -
Joined
-
Last visited
Content Type
Profiles
Forums
Gallery
Articles
Media Demo
Posts posted by Winter
-
-
Or you could modify one of the helmets and have a Hero and a Stunt

Or I could have the $$$ to put towards my armor! lol
-
Thanks for the pointers. I will address those issues this weekend. I really have had a lot of fun building this and I couldn't have done it without the great support I have received here.
The kit I am planning on purchasing for my armor comes with a helmet. So I am considering selling this one to put the money towards my armor.
Sent via my R5 unit via TapaTalk4.
-
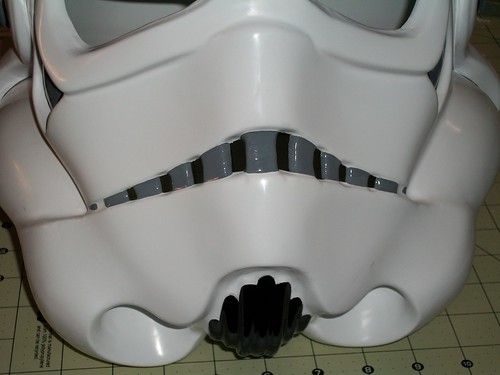
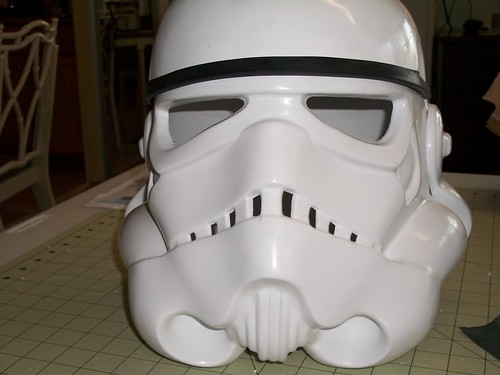
I think I have it done except for the tube stripes.. Please let me know if you see anything.

-
I just glued down the outside so I can tuck wires underneath on the inside of I need to like in the tutorial.
-
Great work the lines are looking a lot better, my S trim does the same so I wouldn't be worried about it.
Thanks. I wrestled with that trim seems like forever to get it so it wouldn't pucker and in the end I gave up. My main concern was that the outside that was glued down looked good.
-
So I wasn't happy with my markings and like every good craftsman, I blamed my tools. So I went and bought a new set of brushes and repainted everything. I know, I know. lol
 I need to put the vertical lines back on, but I think the outline is much better now.
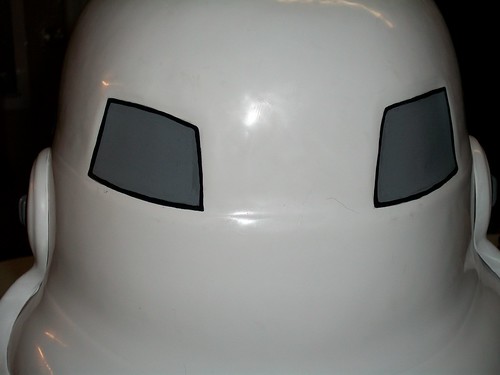 I installed my Trooperbay lense, screen accurate padding and S-trim.
 Is it normal for the S-trim to pucker a little on the inside?
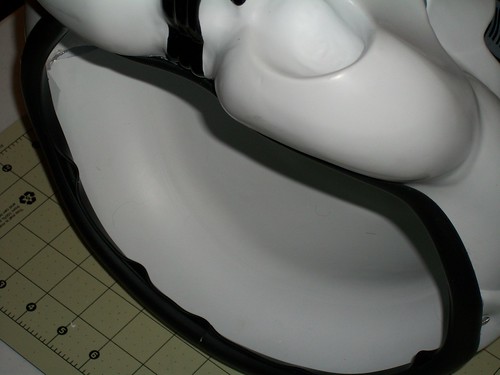
-
I'm not happy with them as I look at them this morning. I may try to paint them free hand.
Sent via my R5 unit via TapaTalk4.
-
So, my first attempt at making stencils turned out absolutely horrible.
 So i tried cutting the stencil out of painters tape.
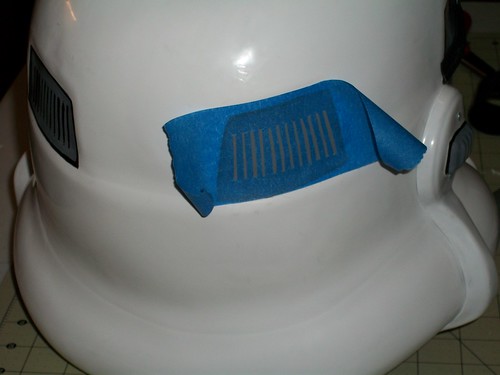 This worked out somewhat better. But I still think it looks bad. But, then again, most of the screen used buckets looked like crap as well! So is this passable? Or should I try again?
-
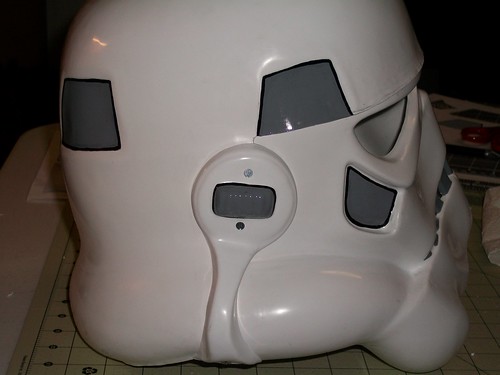
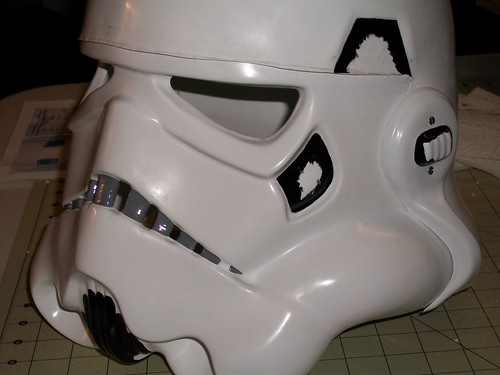
I need to work on the vocoder. It just doesn't look right to me.
Sent via my R5 unit via TapaTalk4.
-
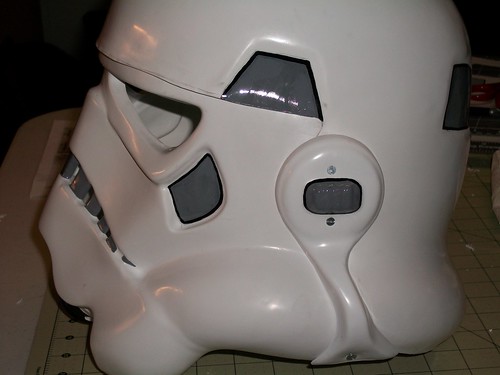
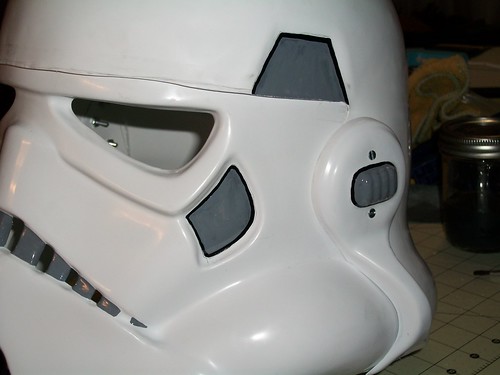
In normal lighting the lines look great! Until I hit it with the camera flash and then it seems like every little imperfection is so glaring. But I'm committed now. I found some markings on the RPF that fit pretty good that i am using for stencils for the vertical lines. So we will see how that goes. I also touched up the teeth. Let me know if you see any spots that need attention.

-
Phase II of the detail painting is underway.

 It will get another coat tomorrow after this one sets. As always, any comments or critiques or disparaging comments about my lineage are welcome!
 -
So, let's try this hand painted thing. What's the worst that could happen, right? Right?
-
I agree, it was the flash, looming good, make sure the paint is really dry before adding the next coat as it can wrinkle
I'm following the great tutorials here and letting each coat dry a full day before applying the second.
-
That's what I am hoping. I think the flash from the camera is making it look worse than it is as well. Here is the first pass with the paint. I see some lines I will clean up with the second coat.
-
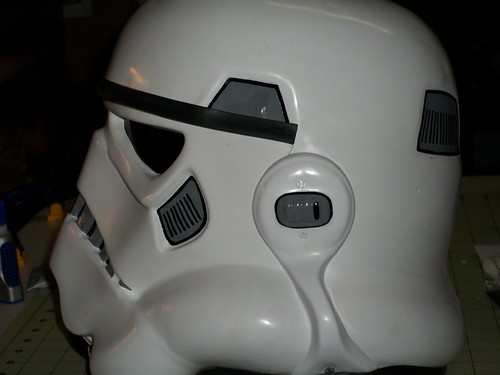
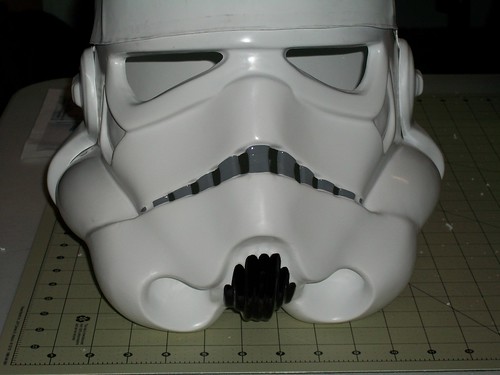
I went back to work on the teeth and cleaned them out. How does this look?
-
Looking good, I would take out a little more from the teeth, you can make out the ridges still, nice work

Will do. I was thinking the same thing. But I figured I would ask some opinions since it is easier to take more off than put it back on!
-
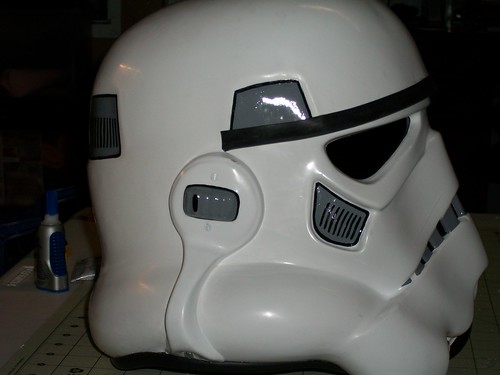
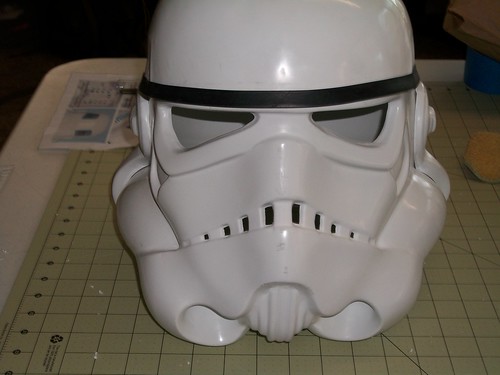
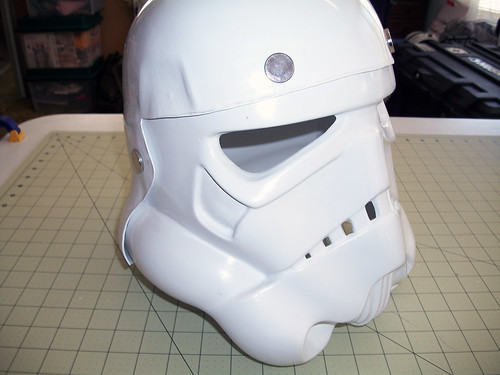
Everything is screwed down and I am quite happy for my first TK bucket. If anyone sees something that needs to be fixed, please shout it out.
Front
 Left Ear Cap
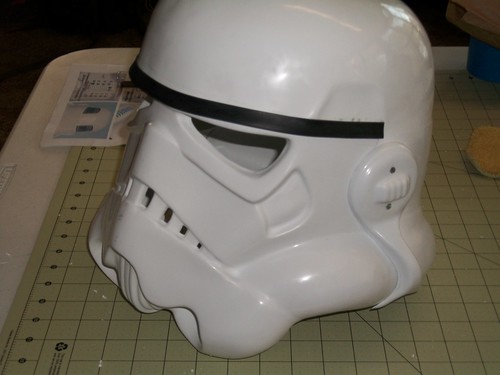 Rear
Rear
-
WELL DONE SO FAR!!!!! You nailed that ear!
Actually, I used screws.
 Thank you.
 -
Those are some of the best damned ears I’ve seen.. Great job! Nice and snug, with hardly any gaps at all!
Thanks. This was actually attempt number two. My first attempt the plastic shifted as I was drilling despite the hot glue and clamps in the tutorial. I thought it looked horrible so I took it apart and redid it.
-
Here are some more views of the ear cap.
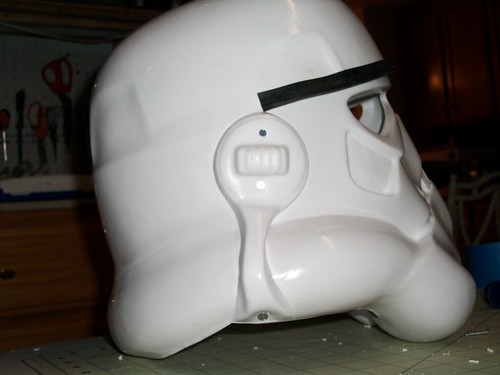

-
Let me tell you how much fun ear caps are. FUN FUN fUn fuN Fun NufFUNFNFUNFUNFUNFNFNAnywhoo, How does this look?
-
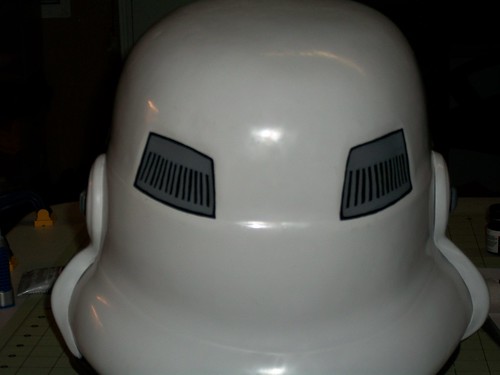
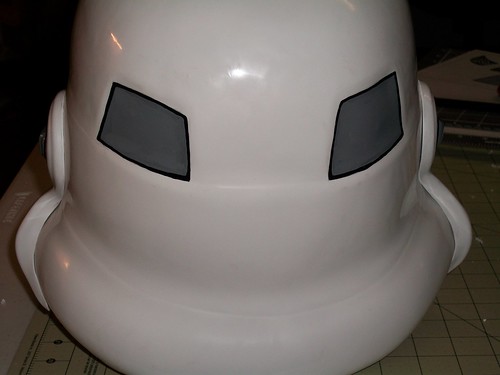
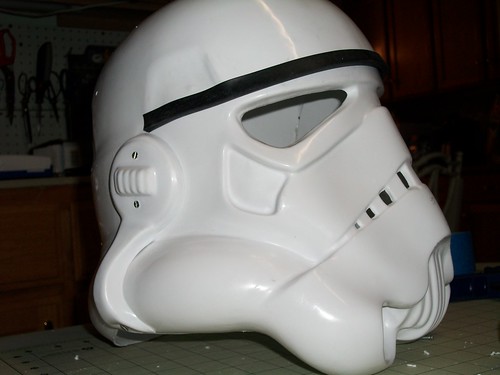
Teeth and eyes trimmed and edges cleaned up. I used my ubber-powerful rare earth magnets from K&J to hold it together. Seriously, these things are so strong I can barely pry them apart.
-
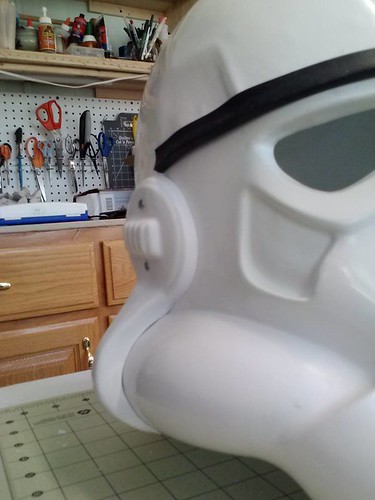
The mic wells are very thin points so I reinforced the whole chin area with a light coat of fiberglass resin and then painted it white.
 Is it me, or is it really nerve wracking when you start cutting holes in your faceplate?
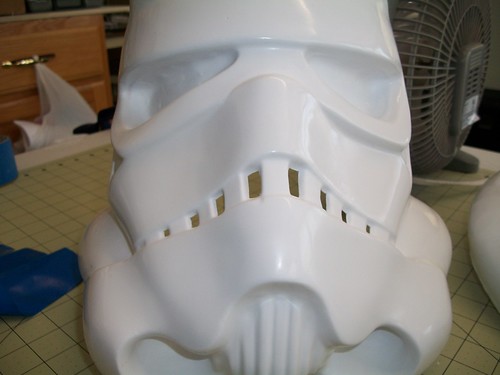 Any help on whether the teeth look good or not is appreciated. I keep looking at them from different angles but I don't want to over file them.
-
I guess it is about time for me to start a build thread of my own. They can be very helpful for getting feedback from members and constructive criticism. I welcome any and all comments.I started with a bucket from Scootch pulled in HIPS and let me tell you, this thing is great. Nice clean lines and crisp detail, not to mention that he ships fast!
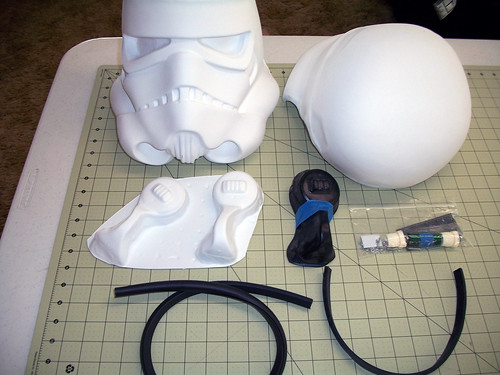 After spending 2 weeks scrutinizing every tutorial and build thread I could find I figured it was time to dive in and make my own mistakes.I wanted a shiny bucket but it seemed a shame to put white paint over nice white plastic. But the HIPS is pretty dull so I went back to the forums with searches about polishing HIPS. (Note: for all the other first time builders like me, 95% of your questions will be answered with the search function!) After getting some good advice from other builders I went over all the pieces with 400 grit sandpaper. After that I went over everything with 1000 grit wet sanding followed by 2500 wet sanding. This makes the surface like glass but it still wasn't "glowing" like my spit-polished boots back when I was in the military. To really bring out the shine i went over it with my Dremel with a polishing wheel. If you try this, BE CARFEFUL! Leaving the pad in one spot too long will make a tiny melted spot. But with careful attention it is not difficult.Here is the end result of my polishing. Not bad for HIPS considering I was told I would have to paint it to get a really good shine. I plan on a coat of wax after I paint the details.
Winter's ANH Stunt Build
in ANH Build Threads
Posted
I got the tube stripes painted (thanks Pandatrooper for the template) as well as hitting the eyes with some sandpaper and fixing the tops of the rear traps to make the corners less sharp. Thank you to everyone that has been helping me with critiques! Keep in mind the flash brings out things that are not normally visible! lol