

boomshakra
-
Posts
425 -
Joined
-
Last visited
Content Type
Profiles
Forums
Gallery
Articles
Media Demo
Posts posted by boomshakra
-
-
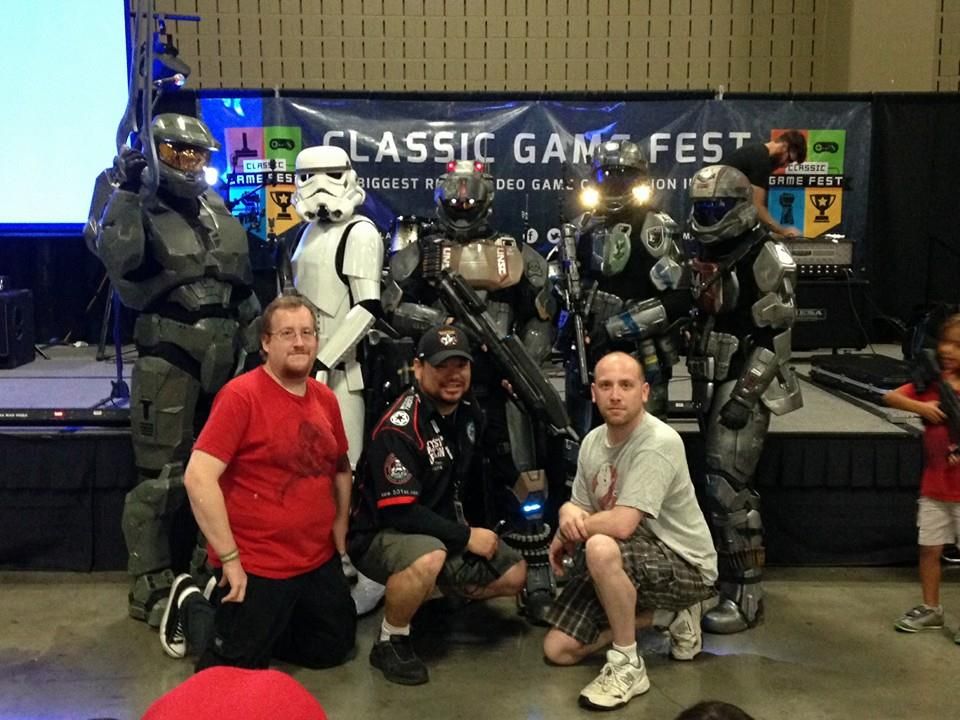
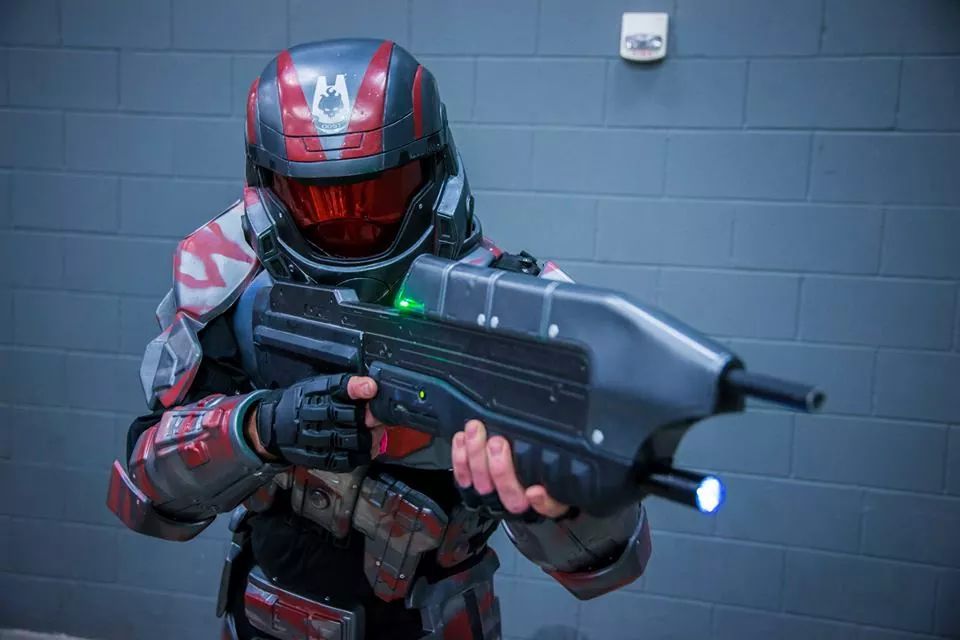
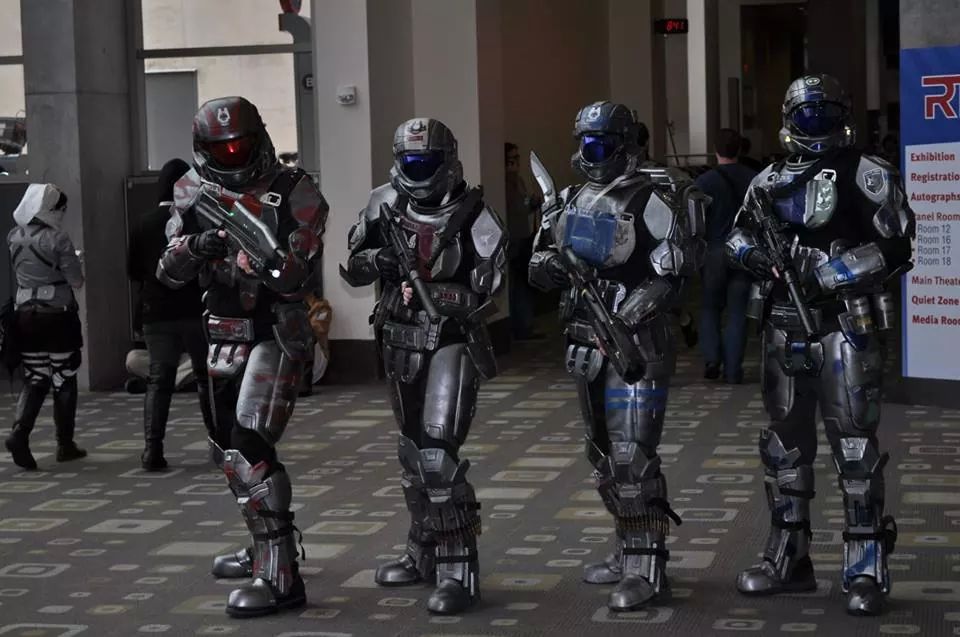
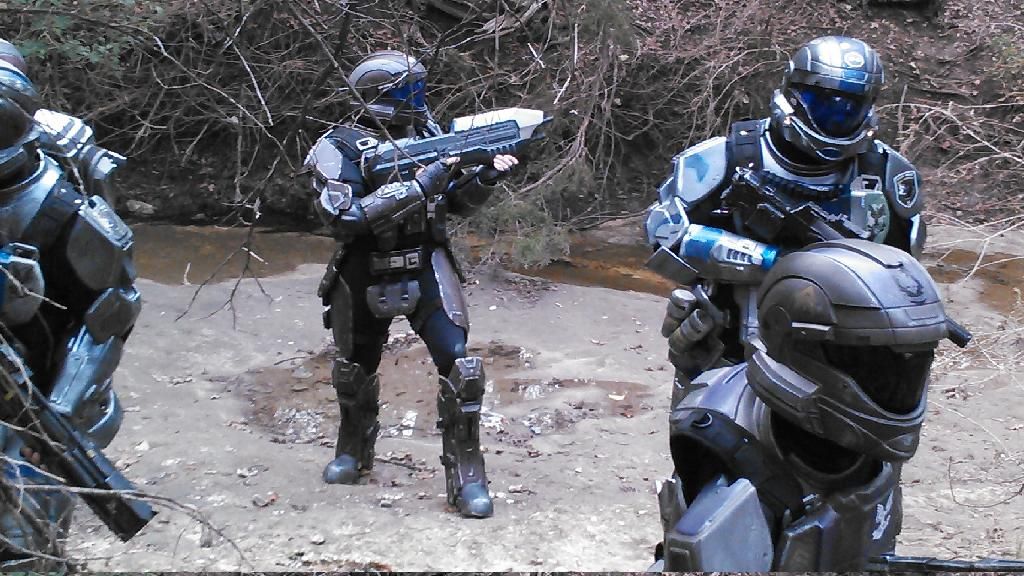
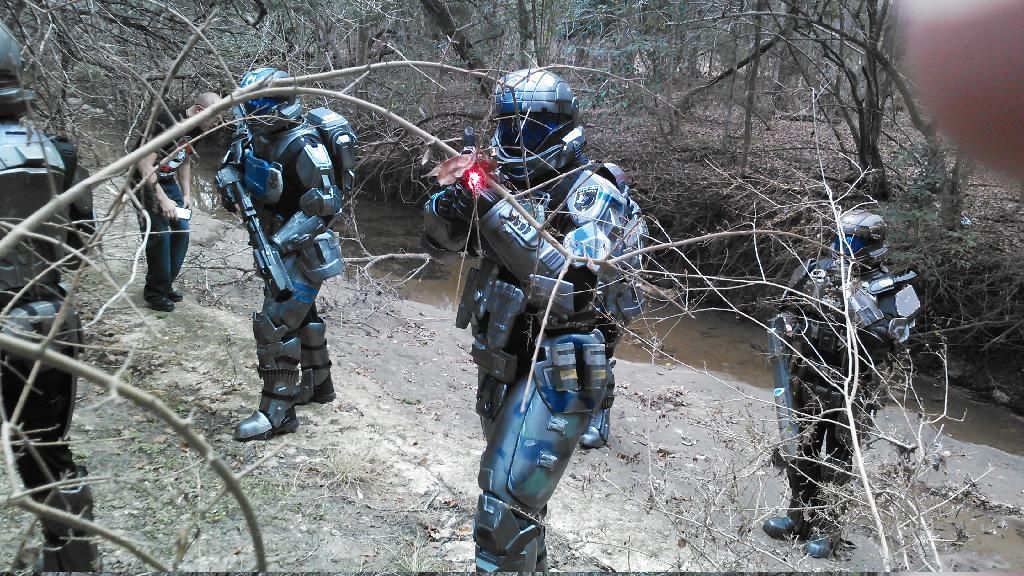
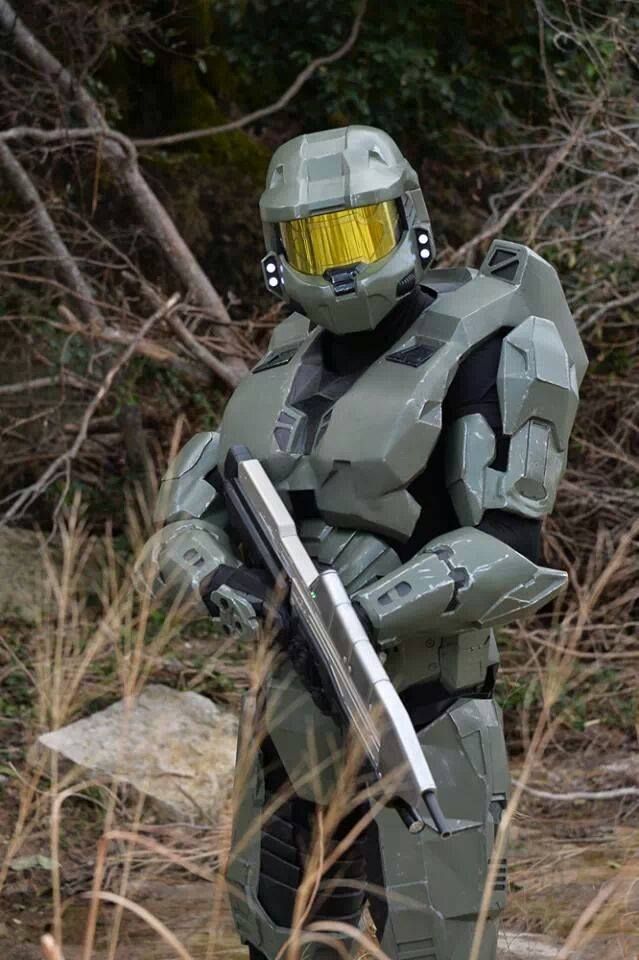
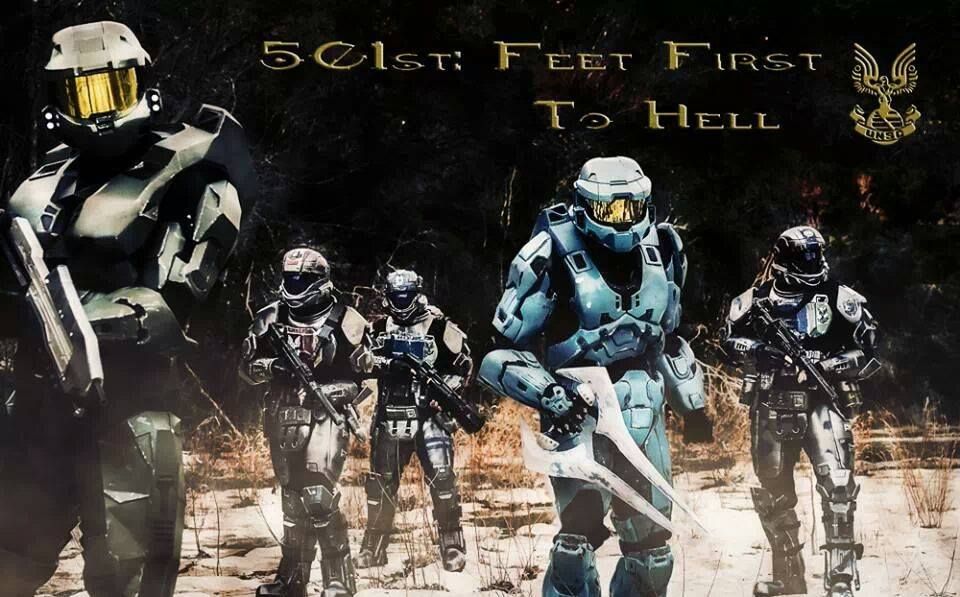
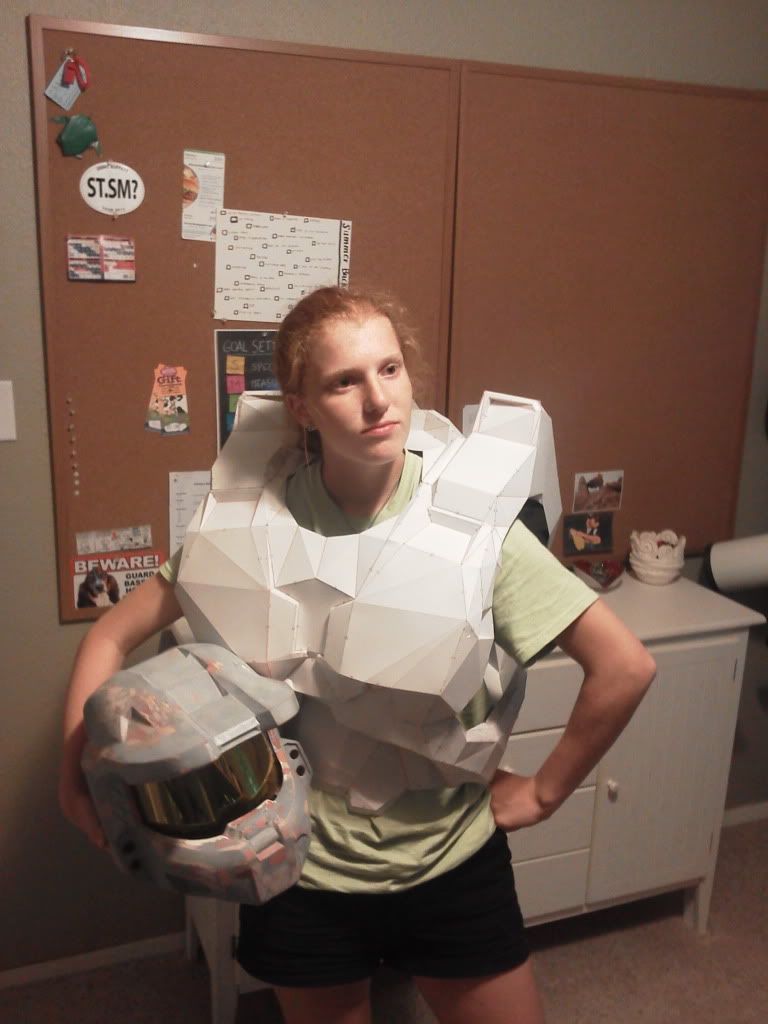
Long time, no update, but the armor is more or less "complete" - including new chest piece. So, time for random picture updates from 2014

RTX 2014:
Classic Gaming Fest, Austin, TX:
Alamo City Comic Con, San Antonio, TX
Master Chief Collection Launch, San Antonio, TX
And a few ODST for good measure, as it is done as well
RTX 2014:
-
Welcome to FISD!
-
Welcome to FISD!
-
Welcome to FISD!
Unfortunately, a wait is (usually) part of the process - be it for blasters, boots or armor
 But, plenty to read & absorb here on the forums, and I see the link to our Academy FaceBook page is already posted above.
If you can make it All-Con next month, stop by - a good portion of Star Garrison will be in attendance!
-
The waiting is the hardest part - but plenty to be done in the mean time! Since you're here, just keep on reading and absorbing, as there is a lot here for both. Start accumulating everything else that goes with the armor as your budget allows (gloves, undersuit, boots, belt, etc.). If you're thinking of a Doopys full resin E-11 or just the parts kit to mod a Hasbro blaster, and your budget allows it, get one ordered & start a build thread when it arrives. If you're leaning towards a Hasbro, it's not a bad idea to look on craigslist, check out goodwill or peruse garage sales - you might find one on the cheap (I found mine for $10 on craigslist). It's not a bad idea to create a spreadsheet to track all of this stuff as well.
-
Welcome to FISD!
Be sure to make it to All-Con this year - a good portion of Star Garrison will be in attendance! We have a large number of members in the North Texas Squad (Dallas area) so you'll be in good hands for your journey to 501st approval.
-
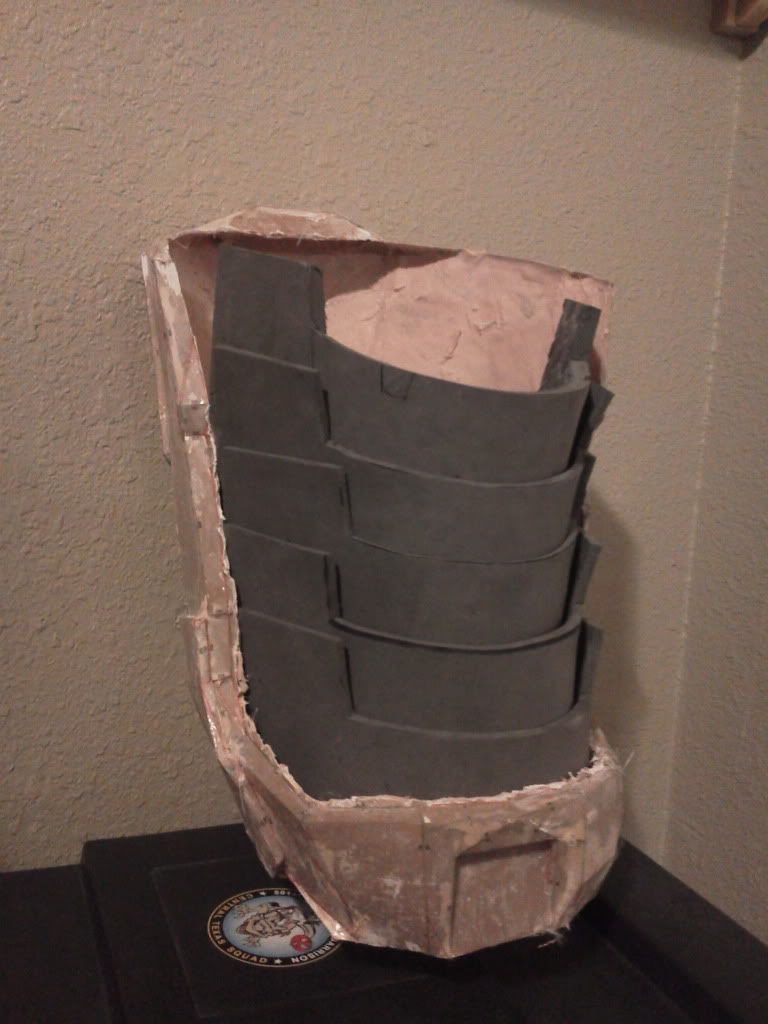
It has been an on-again, off-again project, but I am SO close to completion! A couple of things have gone wrong: when drilling a hole in one of the calves for a rivet, the drill bit snagged, ripping the piece from my hands and tearing a big hole in the calf...oops. I kind of fiberglassed/bondo'd the piece back together, but decided to just go ahead and make new shins. The file I built the original ones from wasn't as detailed as I wanted, and I found one that is a lot better looking.
Problem #2: I made a critical mistake of not trying on the shoulder pieces when I had the chest piece assembled but not yet fiberglassed. I got all the way through sanding/painting/detailing and started to put it all together...and the chest was too big. Huge bummer. I couldn't lift my arms more than about a 45* angle from my sides and they appeared disproportionate. So, after much whining and gnashing of teeth...v2.0 chest was started
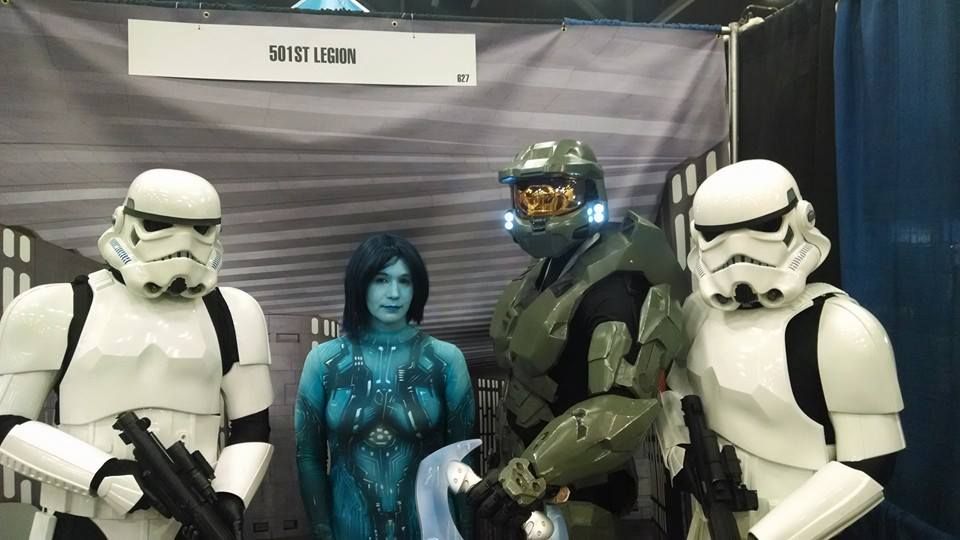
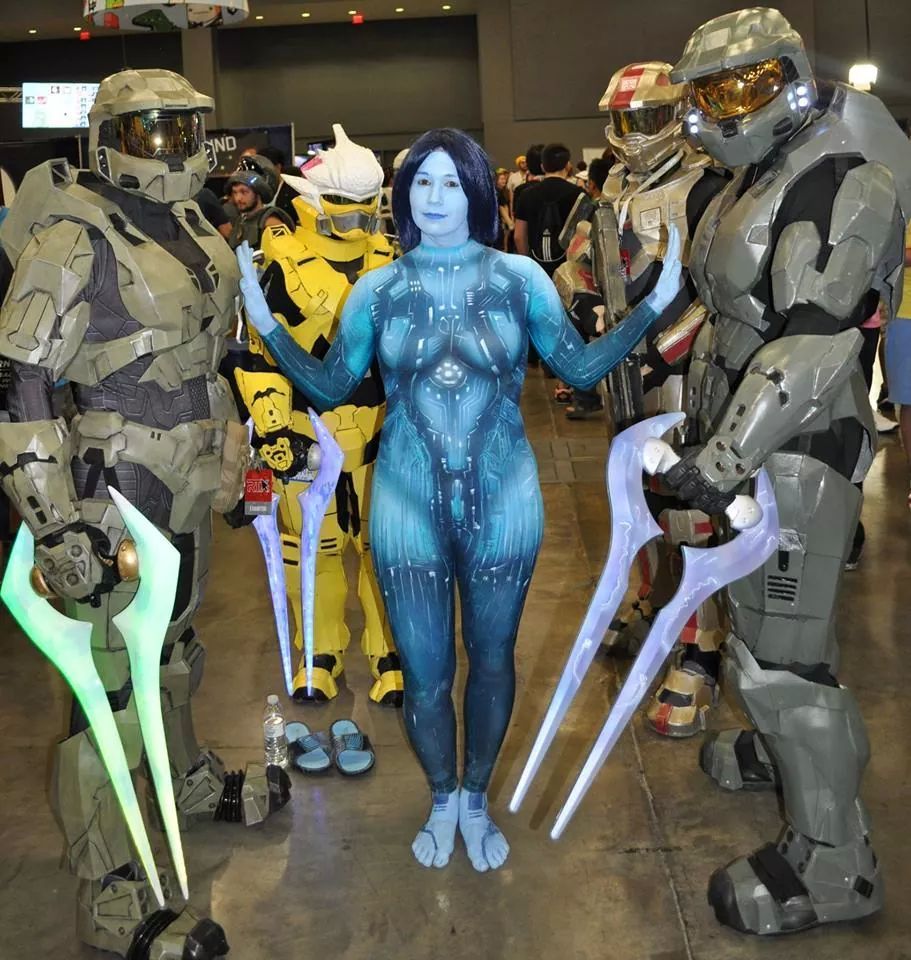
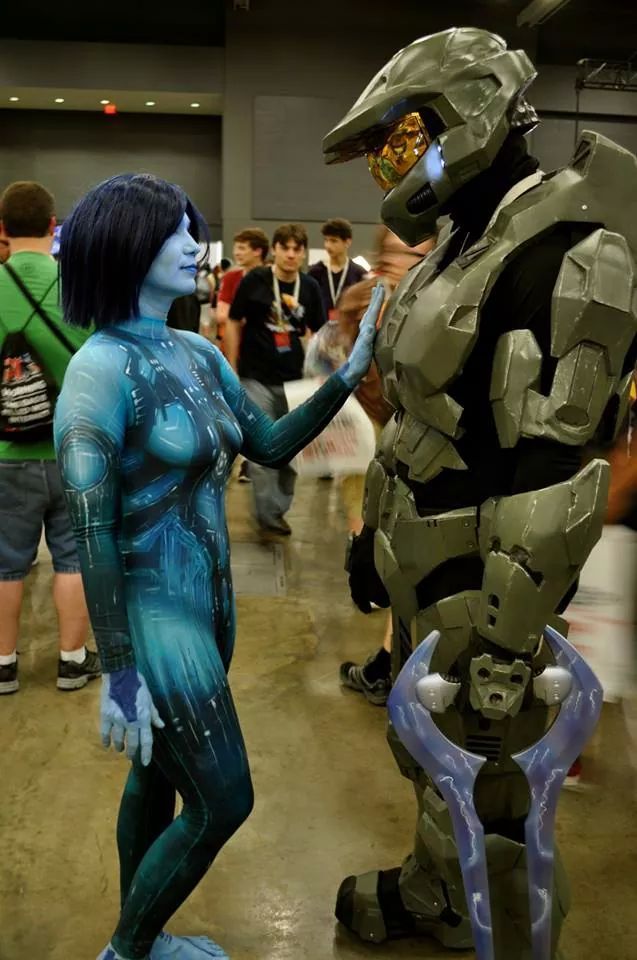
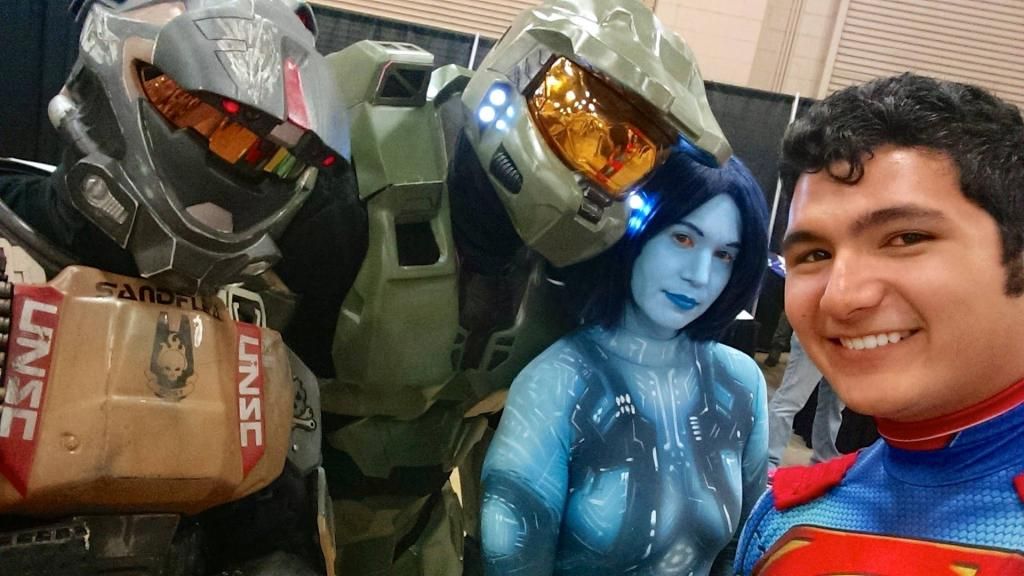
I was armoring up for a photo shoot, but just went to help as a handler instead. My 501st Squad is also working on a separate Halo squad, mostly ODST. I am the lone Spartan so far...probably because building your own (as I know from experience) is time consuming and takes a lot of patience, and commissioned armor can be cost-prohibitive. Here's some of the pics:
The armor pictured is made by Sean Bradley, and I have my own set on order from him. Already have the bucket, though:
Can't have too much armor, I always say! As a side note, once these projects are complete it will be back to 501st builds: TIE reserve and then Pilot
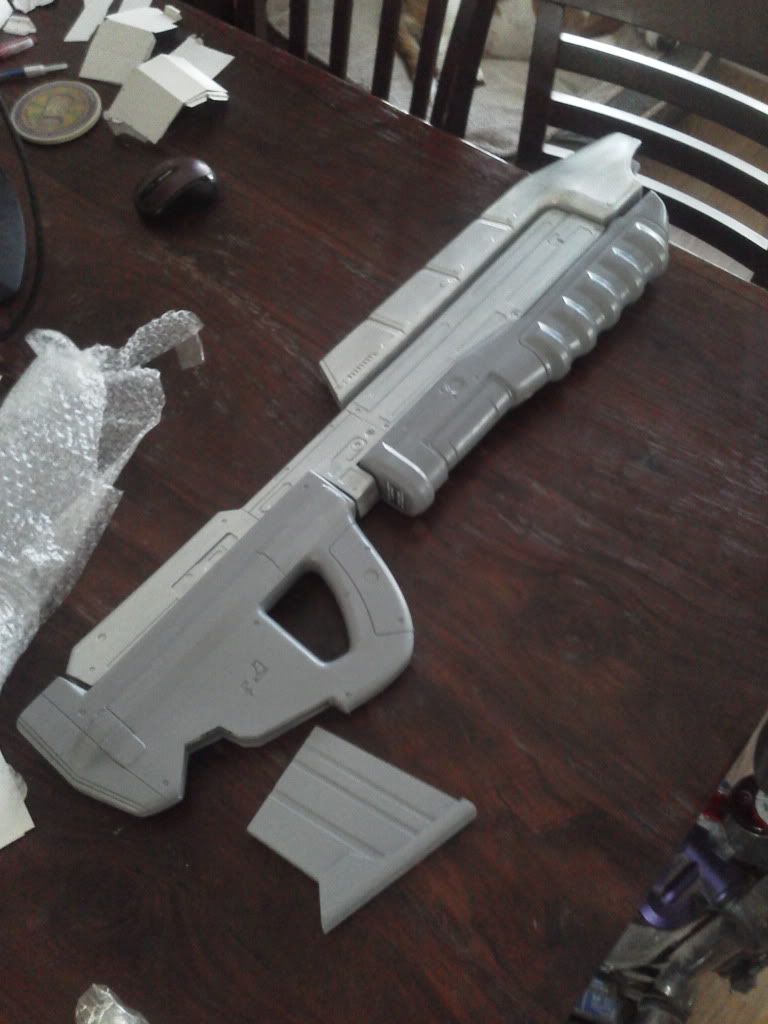
In other happy news, I got the MA5 build and electronics installed:
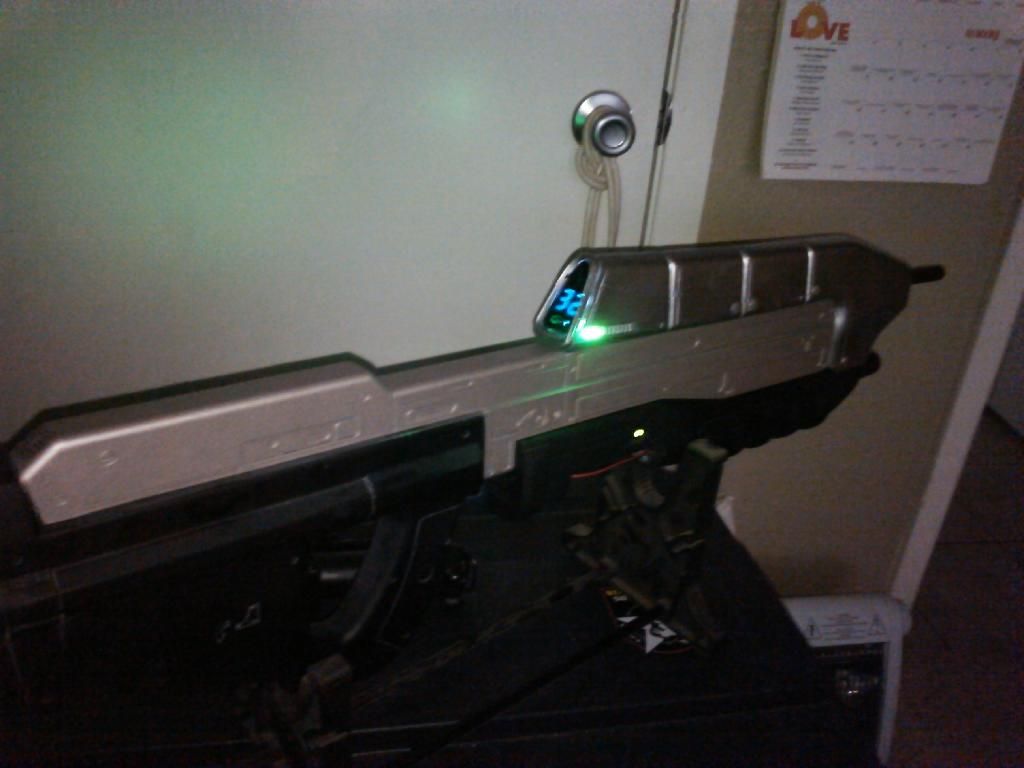
The counter counts down (duh...) and there is a reset in the magazine well. The magazine I have is solid resin, and I'm working on a way to keep it in place that will allow it to be removed but also not drop it out when trooping. I will probably build a foam replica for trooping so that I don't have to worry too much about it
So, while frustrated that I was having to build another chest piece, I decided to make do with the one already built for another photo shoot. Keep in mind, I have no (completed) shins or boots (which are another source of frustration...won't go into that). Fortunately, the photographer was able to accomodate that for the pictures (photo credits Michael Paolini):
The photo shoots are a lead-up to a fan film we'll be shooting next month. I think that ya'll will like the story line & I'll post a link once we have it "in the can"

Stay tuned!
-
Welcome to FISD, David - what part of Texas are you located?
-
Welcome to FISD - what part of Texas are you located?
-
Welcome to FISD and we hope to see you trooping with us in Star Garrison soon!
-
I am in agreement that Centurion is 100% worth it and echo Eric & Paul's comments to go for it right out of the box.
-
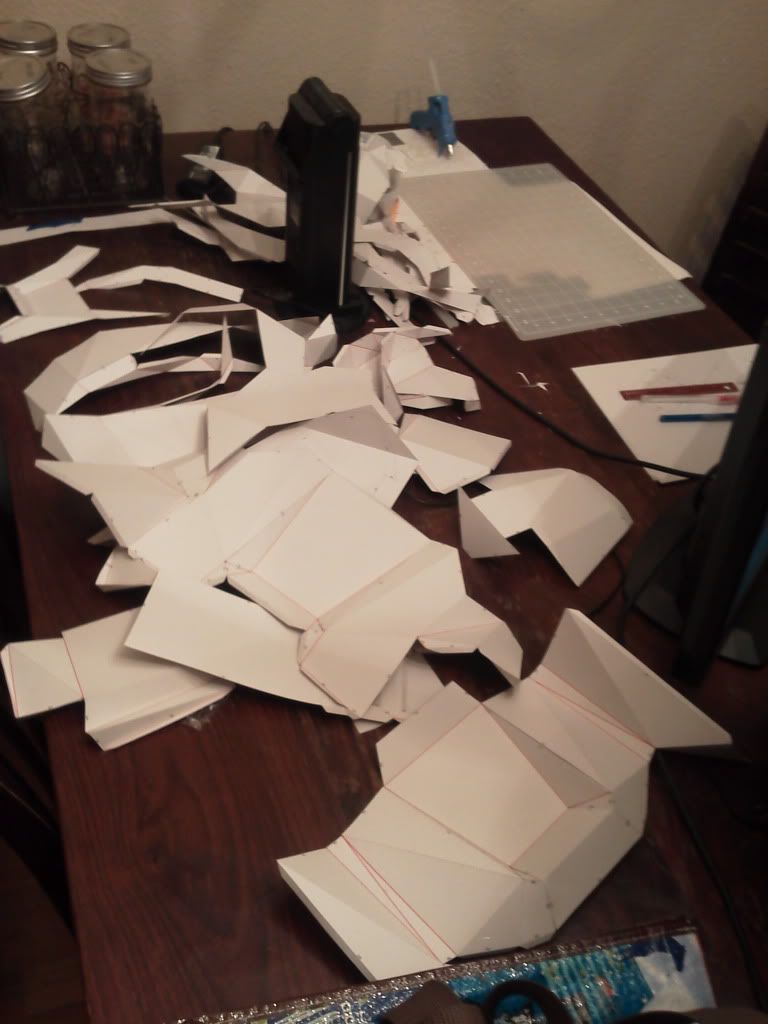
Every day is an armor party when you're working with pepakura/resin/bondo:
Adding some depth to the cod & biceps/shoulders...will continue the process with the thighs, forearms & shins:
And I also keep getting distracted by side projects:
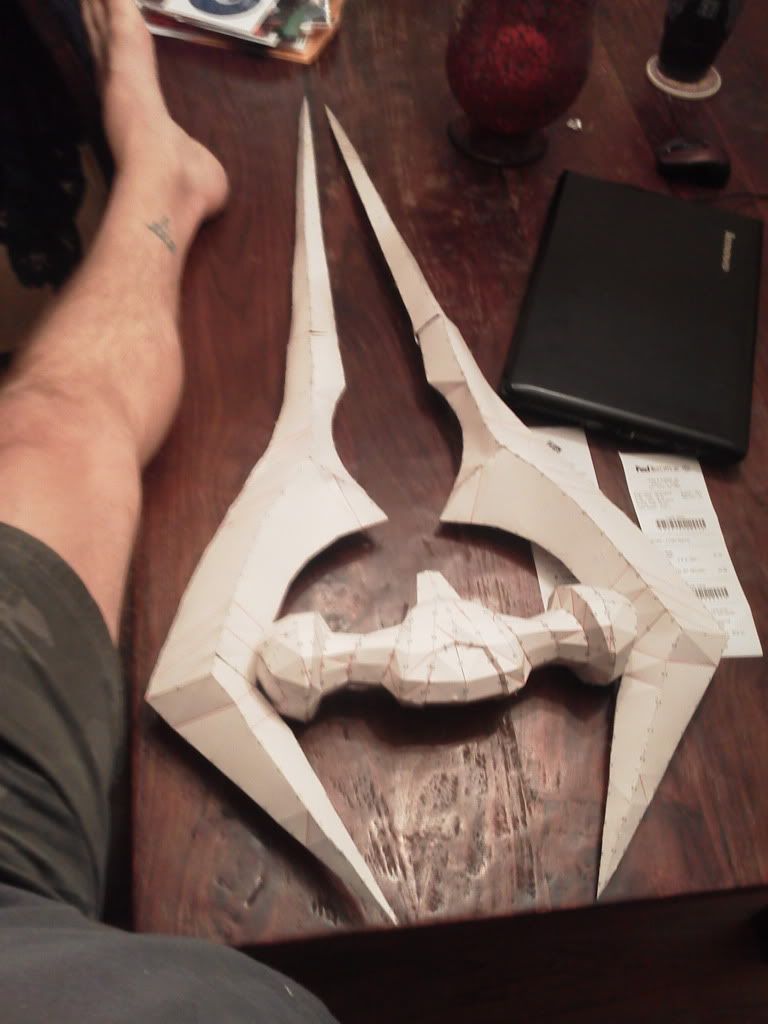
(I have a ~34" inseam, my leg is there to show the size of the blades
)And the next Spartan build (Jorge from Halo: Reach) has already started (will do the armor in foam this time...)
And then there is this...which I REALLY need to get cracking on:
The MA5 will have a countdown ammo counter and some LEDs on the side and I will also be adding sound to it - that part will be a little tricky, but I have the sound board and files loaded on it. It came with a pre-wired speaker, but it is kind of small...and distorts when the volume is up. The board does have a line out, so I will be shopping for a smaller amp that I might install to give it some oomph when 'firing' - definitely something smaller than an Aker...
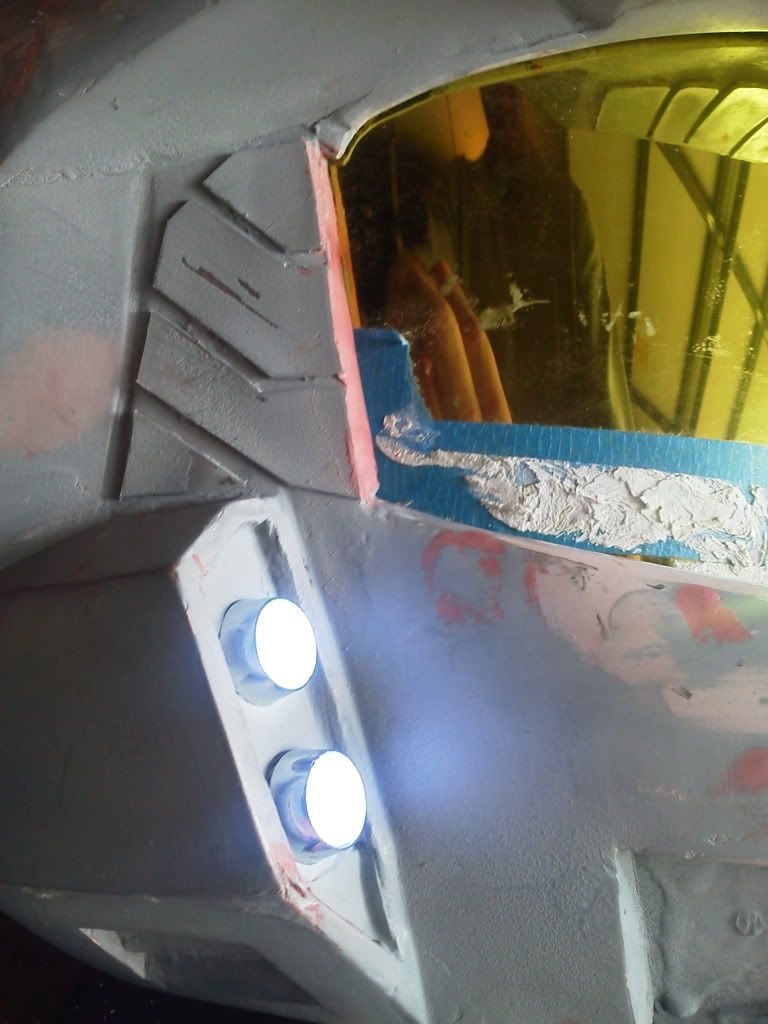
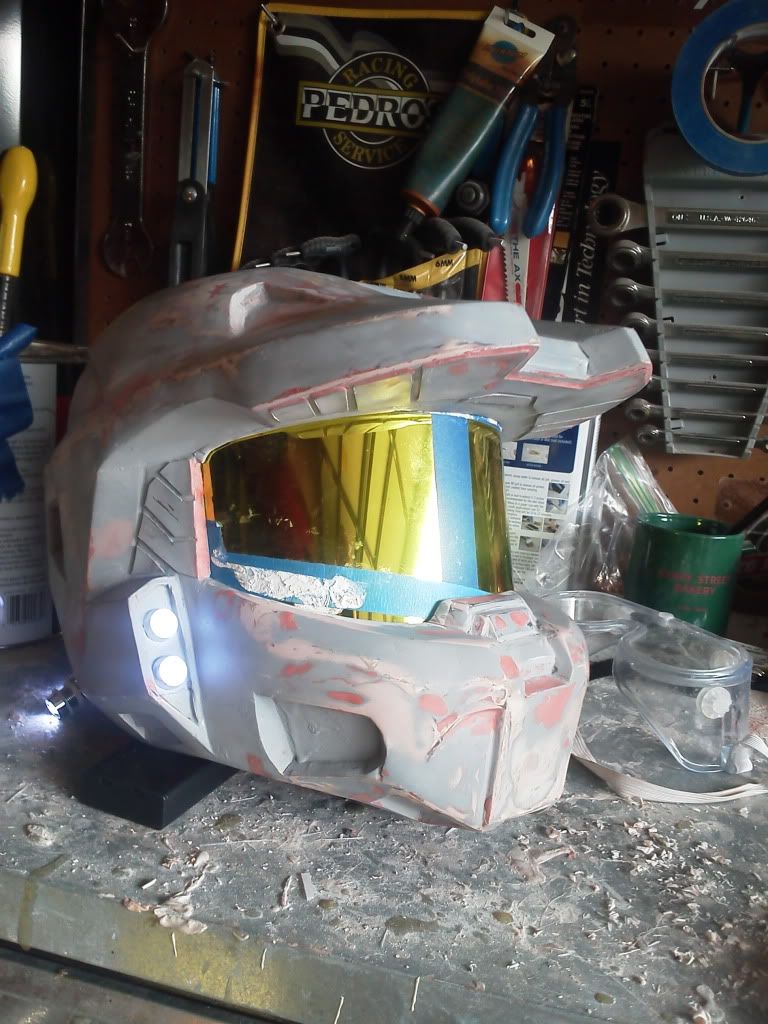
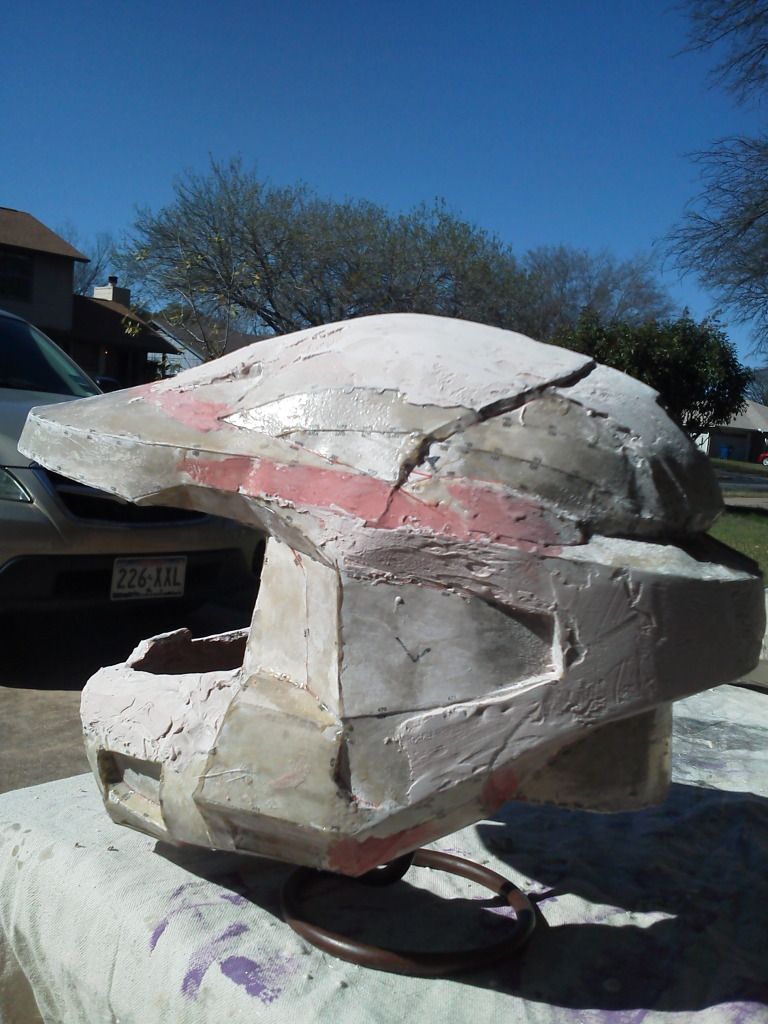
And last, but not least - FINALLY got the paint on the helmet!
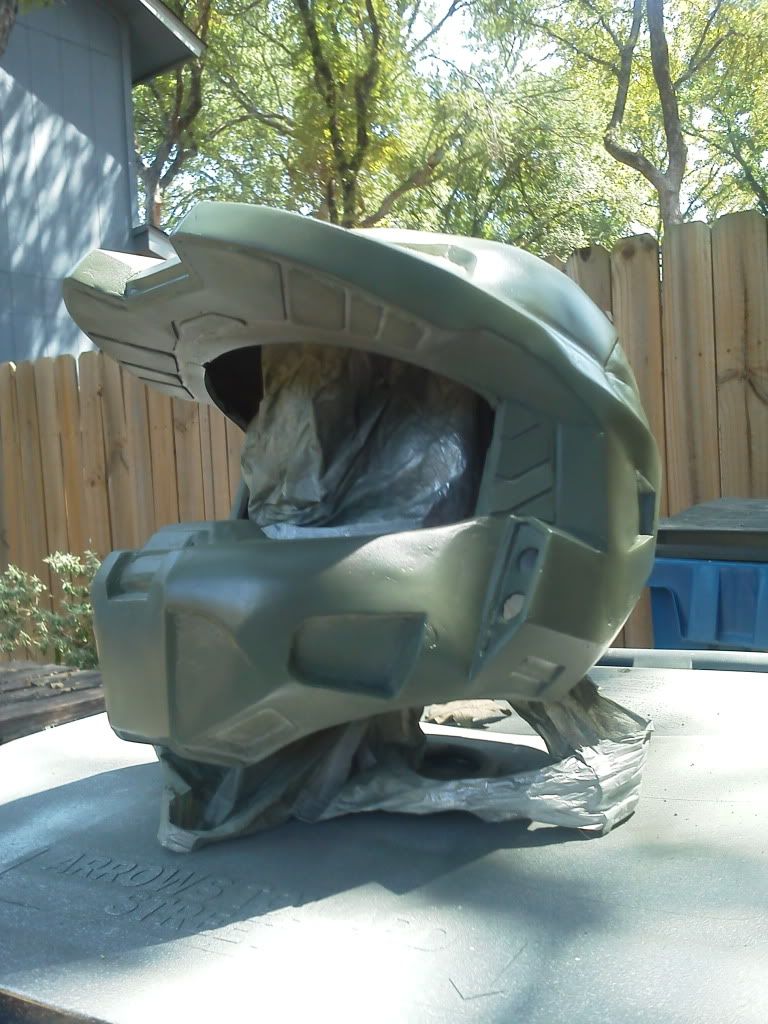
Sorry for the low-quality phone-camera quality - and I am holding the visor in place (it has velcro in it now, as I may not use this visor...still working on/sourcing another):
As always, more to come - stay tuned!
-
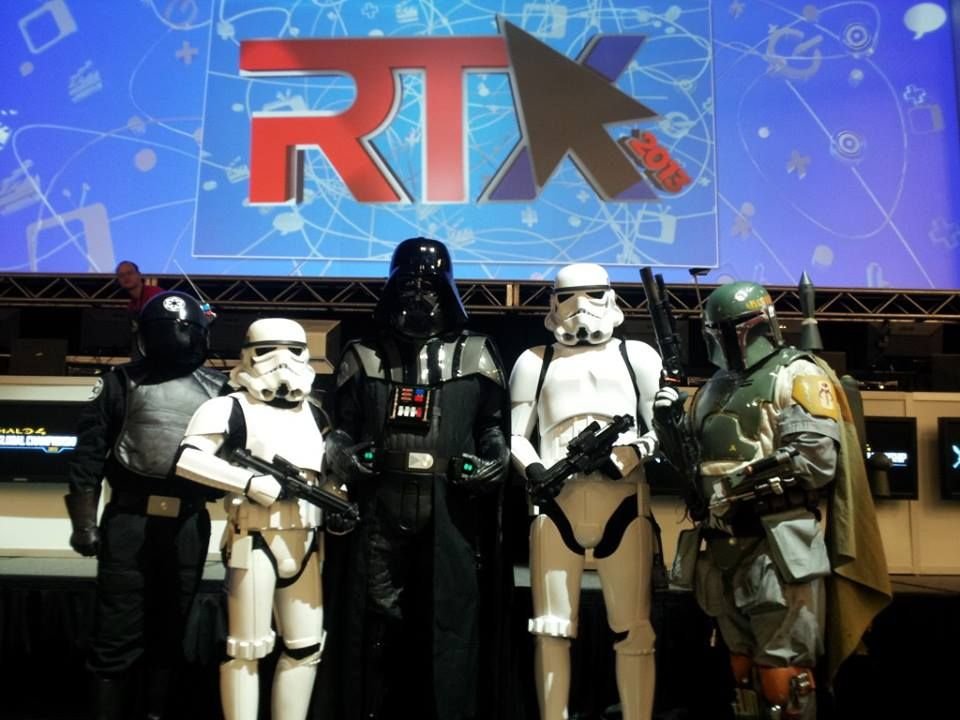
Thanks to Stephen, Peter, Gary, Billy and especially Kevin for allowing me to be part of this fantastic reveal and debut. It was an honor and a privilege trooping along side you guys - this has to have been the most memorable Celebration for me yet - until we are all together again with even more RMQ Concept Stormtroopers at Celebration Anaheim!
-jono
Jon Farmer
CX6834
It was awesome that you wore it to SCC last weekend - look forward to trooping with you again soon!
-
Thanks for posting this up - great trooping with ya!
-
State of the Build:
Lots of bondo & primer...
But things are looking bright!
And somehow this...
became this

Future Spartan? Time will tell...
While all the pieces are somewhat assembled...there is still SO much to do. With the much needed rain of the past few days comes 67% humidity...so I can't start putting resin on the chest. I did glue in some sturdier card stock in some places to keep the warping down. I really need to get out and do more sanding on just about everything. Yesterday I spent a couple of hours cutting and shaping the outer visor...but it isn't going to work because you can read the imprinted mfr logo from the mold (using a 3M safety visor), so I will need to get over to the welding supply this week to get a clear visor from them & start over. In happy news, I ordered a MA5B assault rifle and it should be here next week
More to come - stay tuned!
-
Ah, RTX - my first troop as a member of the 501st last year, this year I returned as a veteran
. Here are some pictures from Saturday & Sunday of the event. First and foremost, a HUGE shout out to the RTX Guardians - these people in the red shirts were not only a huge help to the 501st, but to all attendees. They were our go-fers, stopping by the booth to see if we needed water, food (which they cheerfully brought to us so we didn't have to venture out) or an escort anywhere in the venue, which was very helpful when you were trying to get back to the dressing room for a break & didn't want to stop for "just one more photo"
-
I obviously haven't gotten a whole lot done on this, but am plugging away despite the lack of updates. Mis-sized the left thigh...twice. The third attempt I used the LD file and cranked it out in about an hour...briefly considered just doing LD for the thighs but the file i used does not have the braces/supports necessary to hold everything in shape for the resin to stiffen it up. Yes, I could fabricate my own, but decided to just go forward with HD files. I still have a chance to pull it all together in time for RTX in a month - but, if I want to reach that goal I will definitely have to go with a LD file for the chest...180 pieces is too much, plus the bondo/sanding of all the detail would take me a month in and of itself.
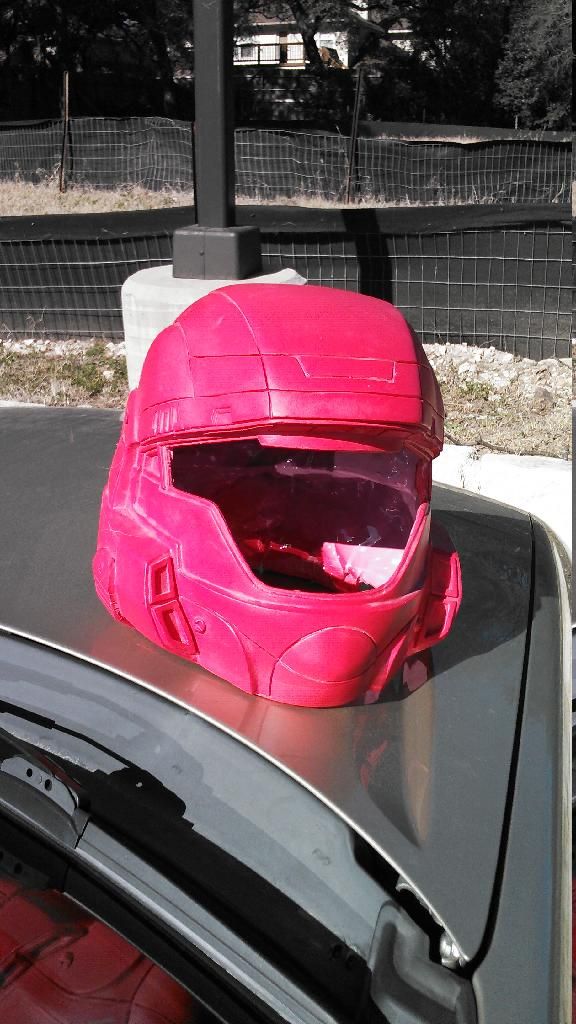
So - repainted the M6:
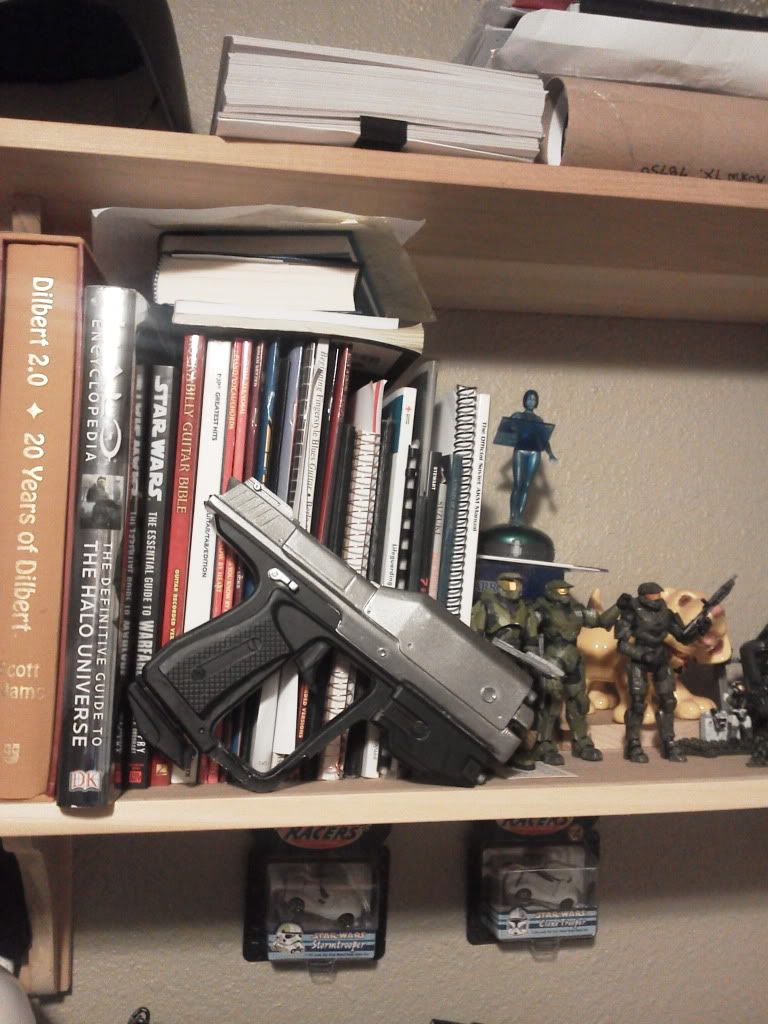
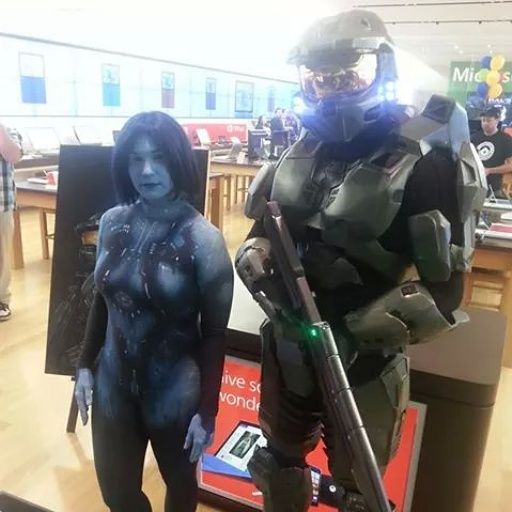
Still need to weather it...way on the back burner for now. You might also notice my Master Chief figure collection is growing...with Cortana keeping an eye on the Spartans
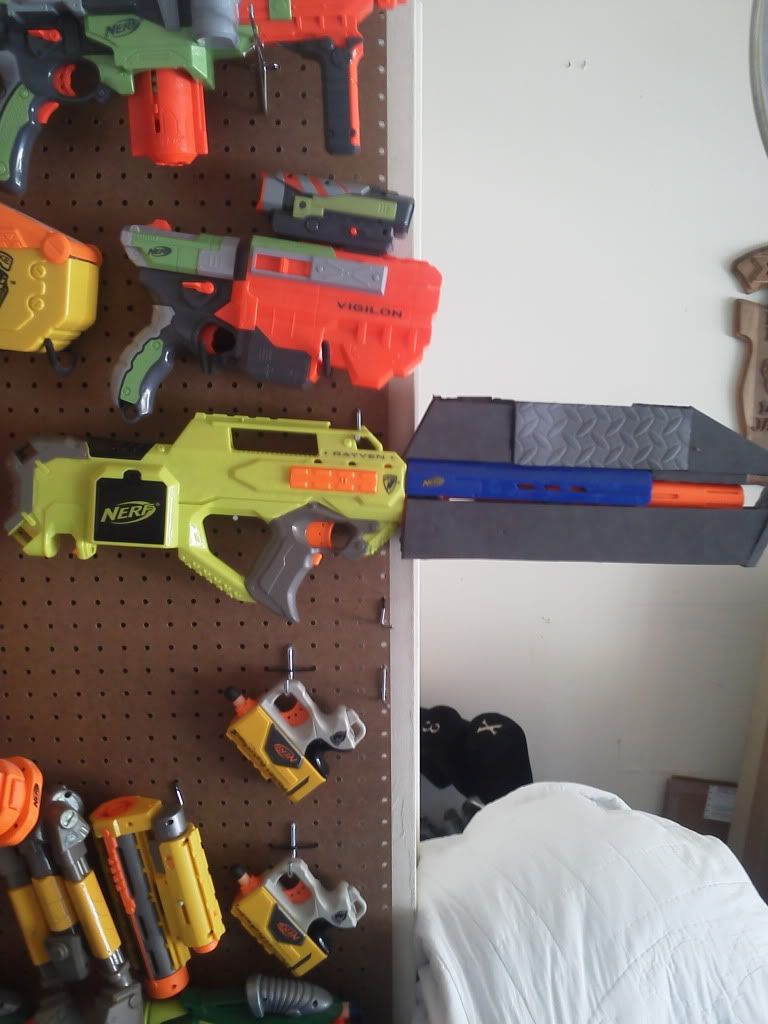
Speaking of weapons, I did a little bit of work towards converting a Nerf gun to a MA5...need some craft foam for the upper/lower area around the barrel. Again, low priority:
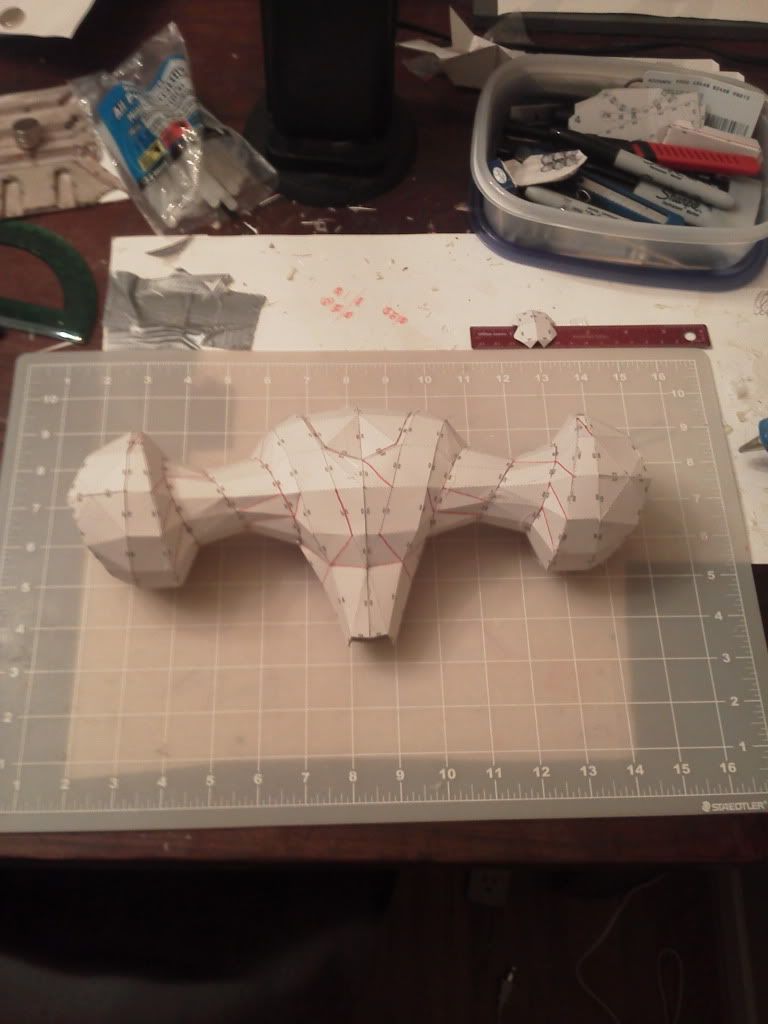
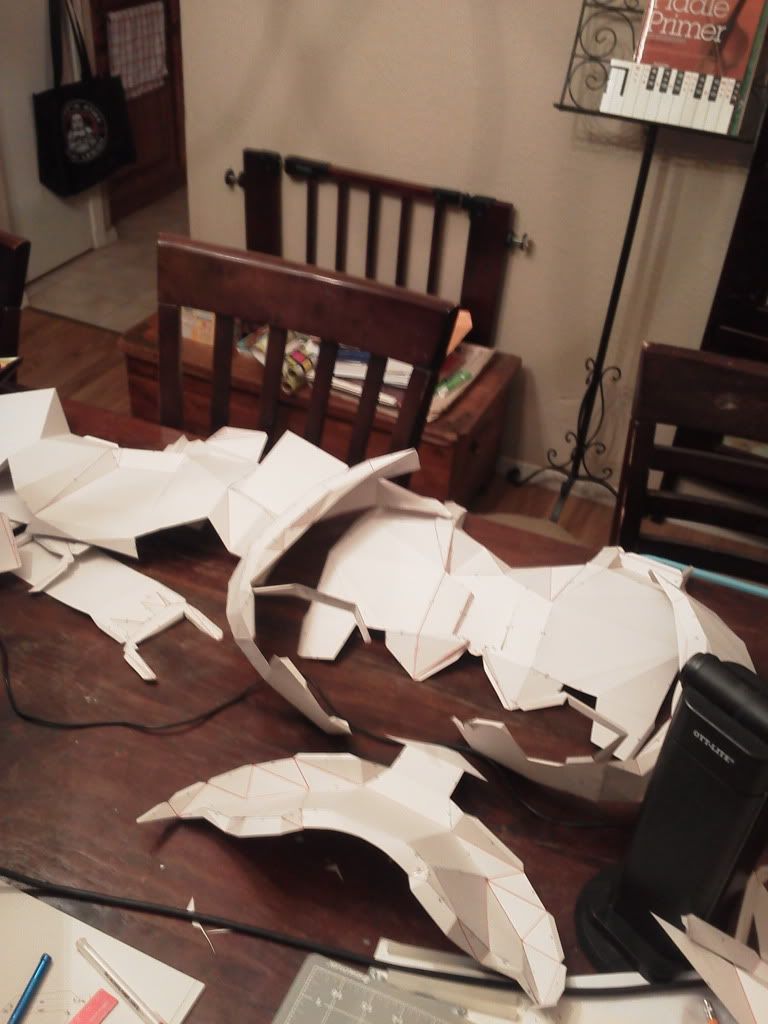
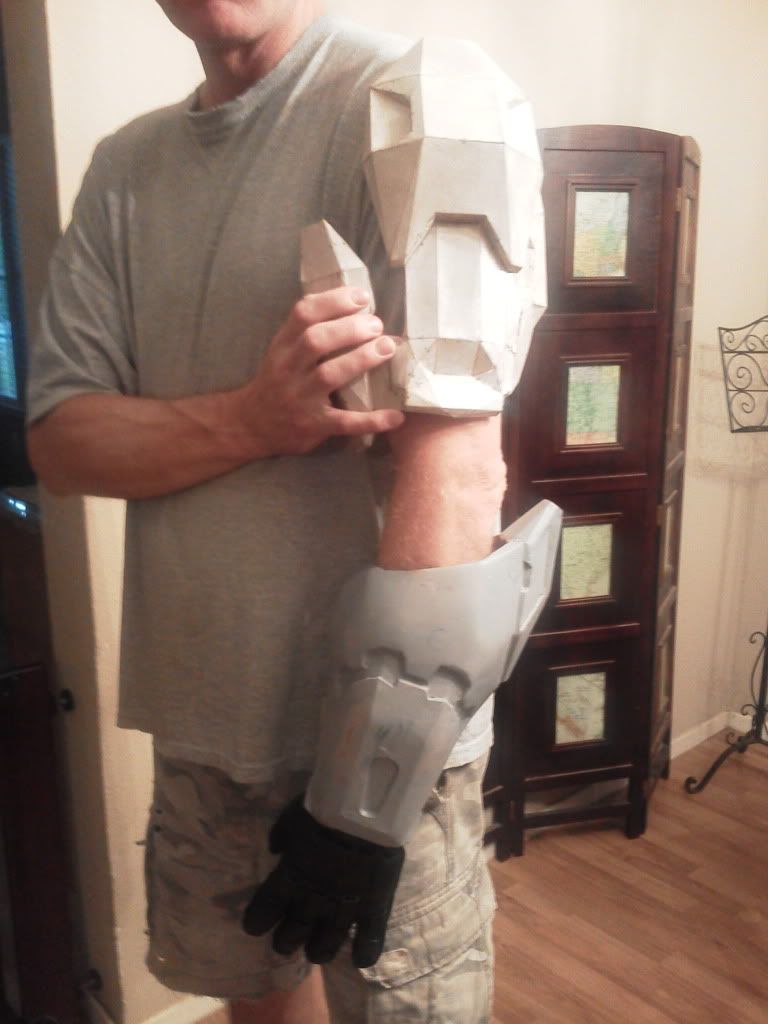
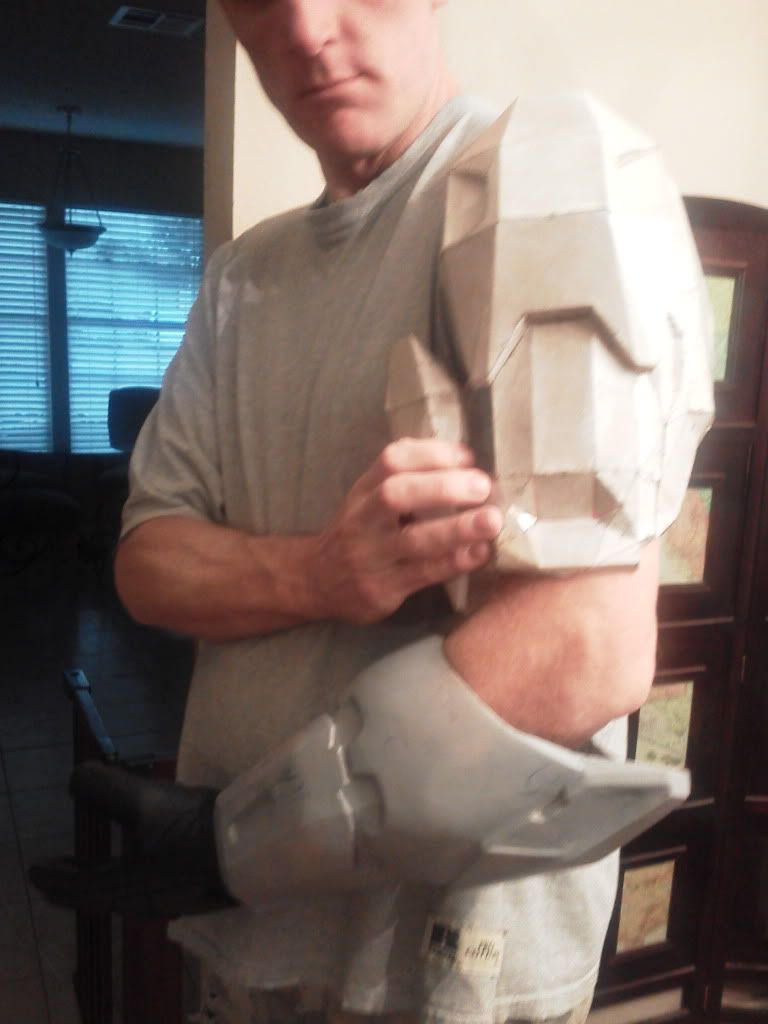
I did the biceps with a LD file. Pictures here aren't that great, since it is raw paper and it is sagging while I hold it in place. It has been rondo'd since (both l/r) and both received about 2/3 coverage with bondo tonight. Since it is a LD file the bicep itself will take some shaping to round it in front. The shoulder side will keep its polygonal (dunno if that is a word...) shape:
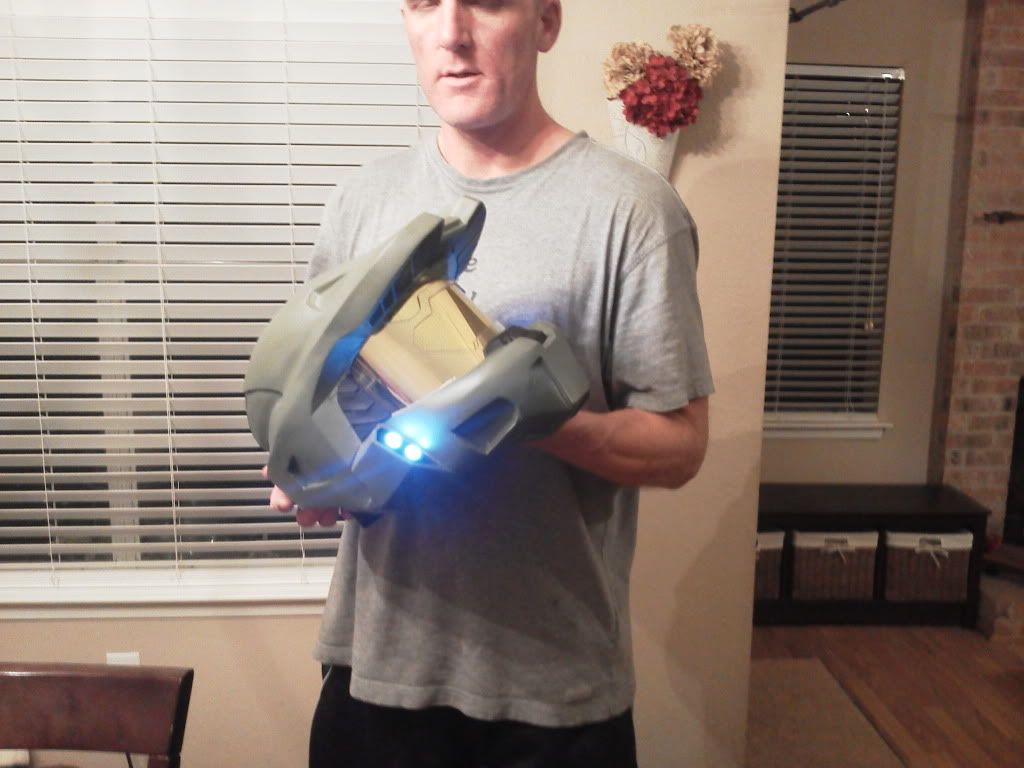
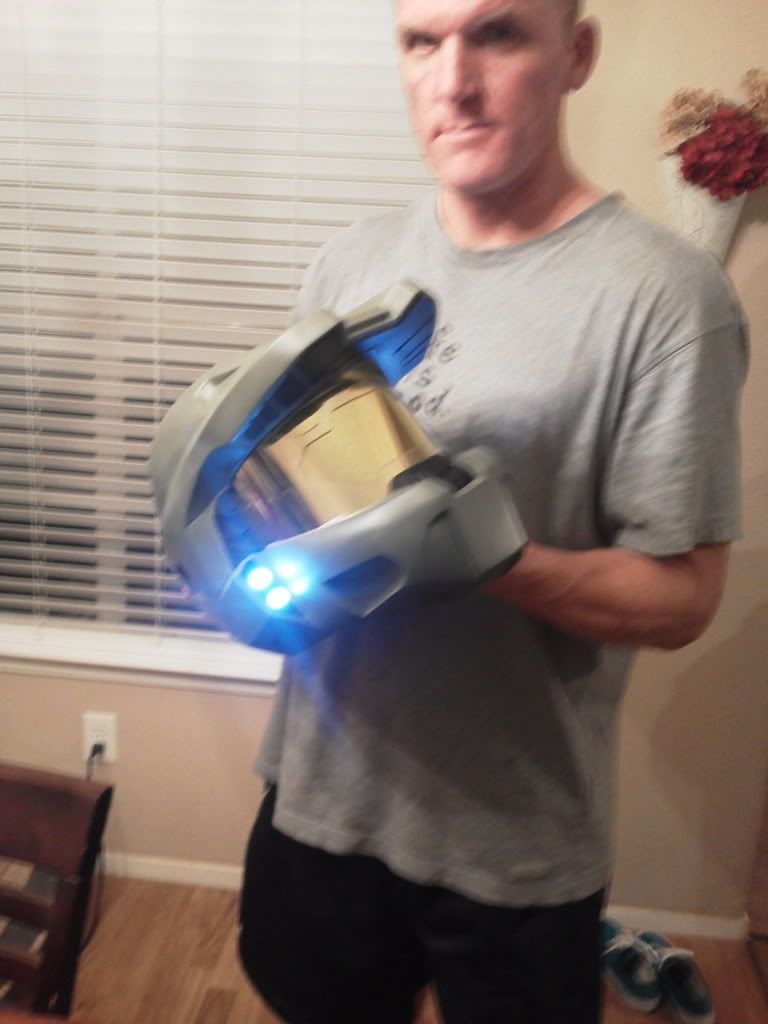
And I finally sourced a visor with gold tint!:
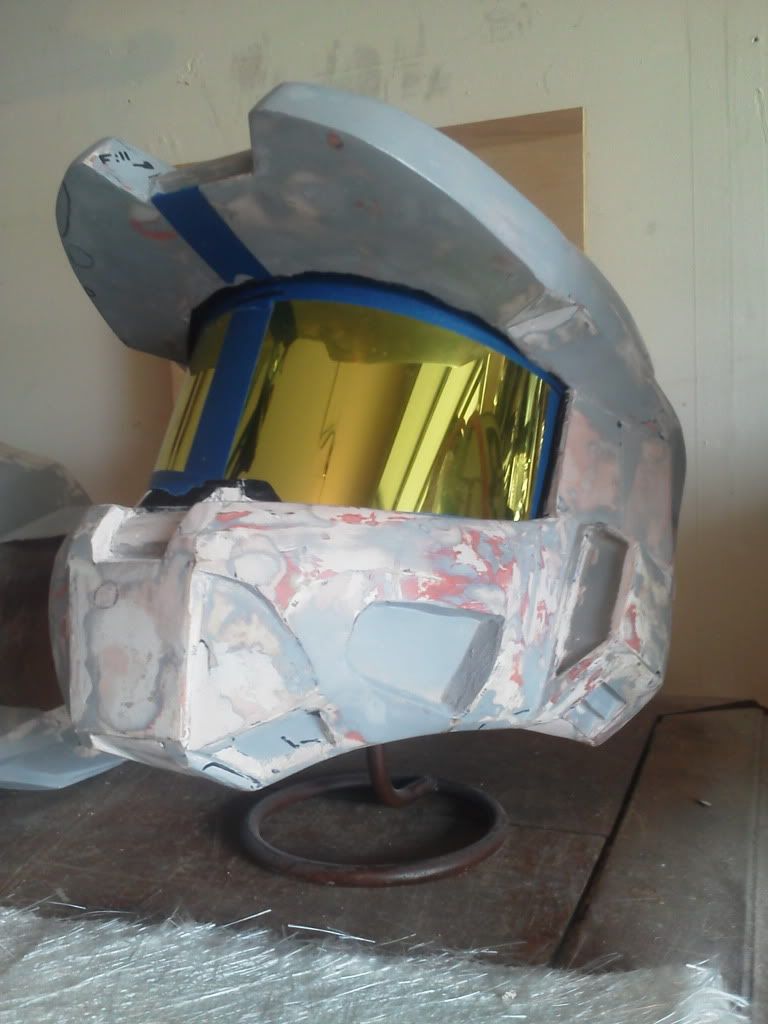
It is a welding visor with the tint slapped on it. Paid too much for it, but at least I have SOMETHING for now...I haven't had time to check around the local auto tint shops to see if they have any scrap, but I am not sure if that style is legal here in TX for auto use. I will probably end up using motorcycle visors for the final product.
That is where it all stands - the boots also got some bondo on them and the theme of the weekend is SANDING, unless I get around to it one evening this week. I am at the point on the helmet that I have taken it just about as far as I can for my first effort. It needs the 'detail' pieces, but I have a plan for those. Will also try to have that finalized so the 'final' coat of primer can go on and painting can begin in earnest!
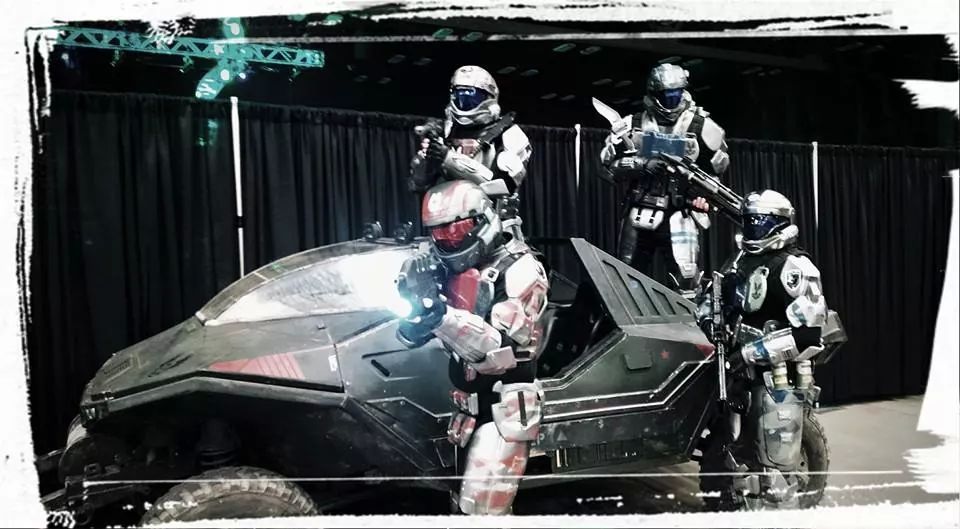
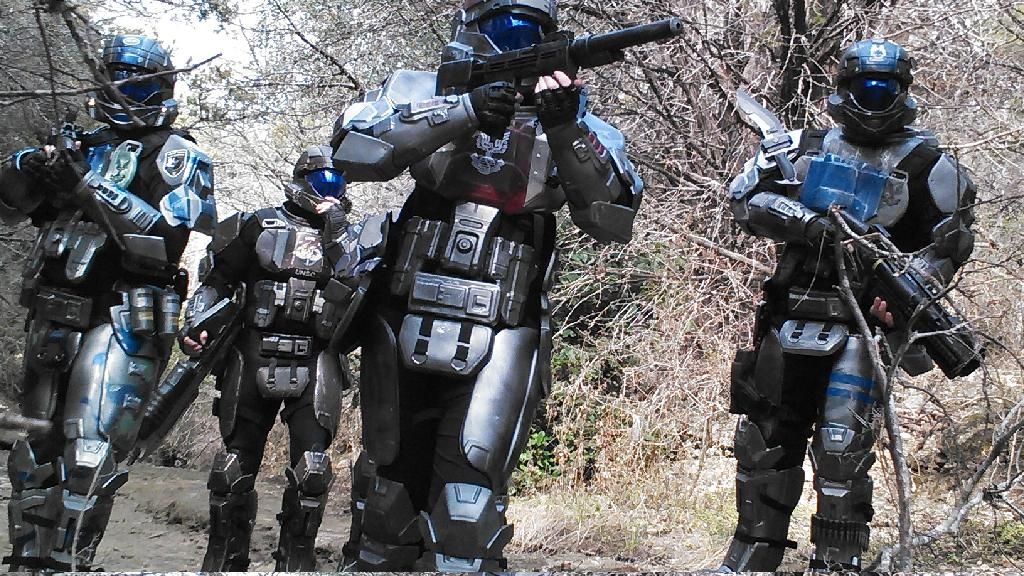
And in other news, the members of my Squad who are dabbling in Halo armor are planning to build armor so we can form Noble team...I will be Jorge, and we're all going to be using foam to build our armor. The due date for that project is All-Con 2014. If nothing else, my Spartan WILL be done by then!
-
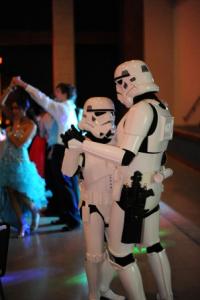
The Central Texas Squad was graciously invited to be present at the New Braunfels High School Prom this year, the theme being "Imperial Nights". It gives me new hope (heh) in this generation that they selected the 36 years young movie that brought all of us to where we are today as their theme! But our presence wasn't the only visual connection to the movie - A New Hope was playing on a screen (sound off...or drowned out by the music - was too busy dancing to notice
), and here are some pictures of the decorations:

-
Welcome to FISD and looking forward to having you in Star Garrison! Where in Texas are you located?
-
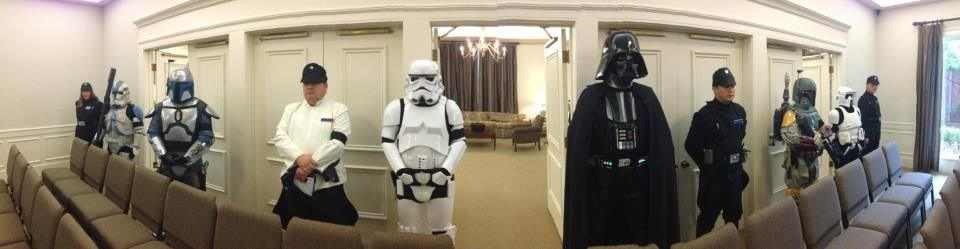
Star Garrison and the Central Texas Squad had the honor of being requested to stand guard as our friend and honorary 501st Legion member Richard Leparmentier was laid to rest in Austin, TX. The service was filled with many anecdotes about a wonderful man's life, and there was more than one reference to Admiral Motti's experience with Lord Vader
. At the end of the service our Garrison XO, William Tatsch, presented the family with an Imperial flag, and we escorted the family out. Not very many pictures, but the nature of the event didn't lead to very many photo ops. (All photos by Topher Bradfield).
TK 4796 & TK 42170 standing vigil:
-
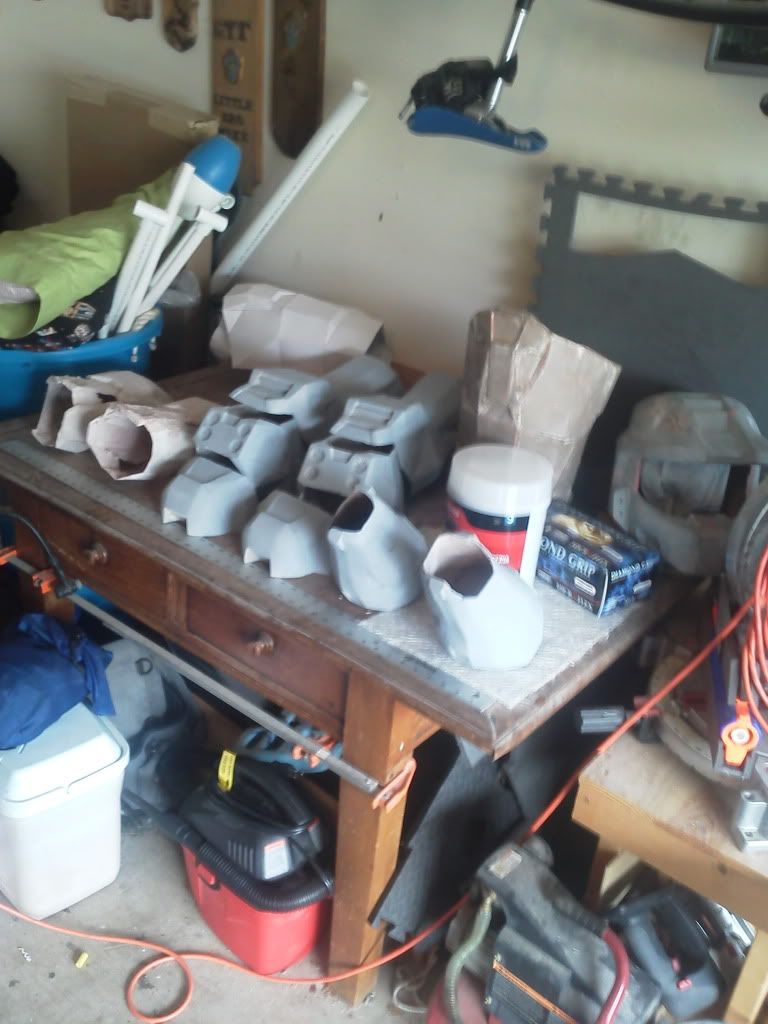
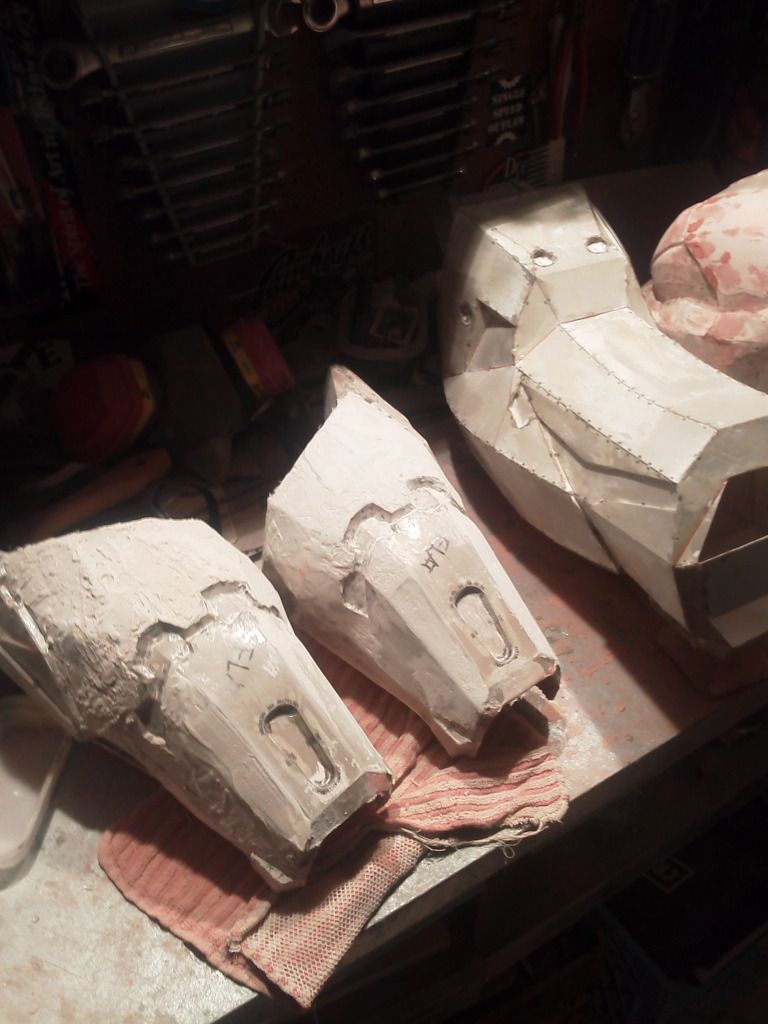
I wish I had more to report this time around but I haven't been able to dedicate a significant amount of time to make much "real" progress. Shins & forearms are in bondo and I am still cleaning up the helmet - the coat of primer I put on it a few weeks ago is all but totally sanded off from corrections, put a new coat on today and...still a lot of little stuff to be done (smoothed, refined, and defined). Somehow the humidity shot up over 60% today (after a dry week), so bondo is out for the time being. I rediscovered how handy a mouse sander can be on larger pieces that don't have much detail - namely the shins and forearms
. I managed to smooth out some deep grooves that the spot putty wasn't sticking to on the forearms.The new set of boots I have been pep-ing are not going very quickly - still cutting on the left boot, right is a stack of paper
. I glued together the toe cap and it is...big. I'll have to glue the other two pieces and put them on the boot to see if 'sizing fail' has struck again. If so, I might take dizzytroopers advice and bust out the heat gun on the v1.0 pair so I can move forward towards completing the build...I can always make another pair of boots sized 'in-between' the two sets I have already created (or started on).so, this project isn't dead, just moving very slowly (unlike my mando build, which is stalled and may be scrapped in favor of a Deathwatch Mando build
).I just noticed, this is my 400th post - yay me!
-
Sorry for the lack of updates - but I have been busy working on the armor! Here's some new progress pictures:
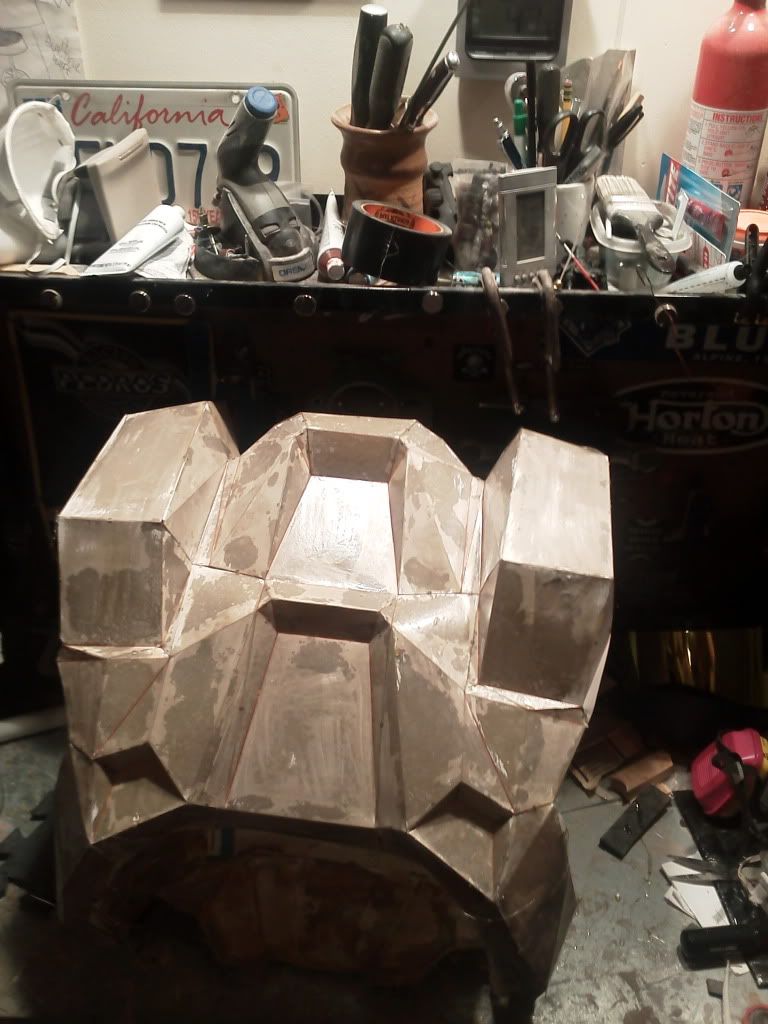
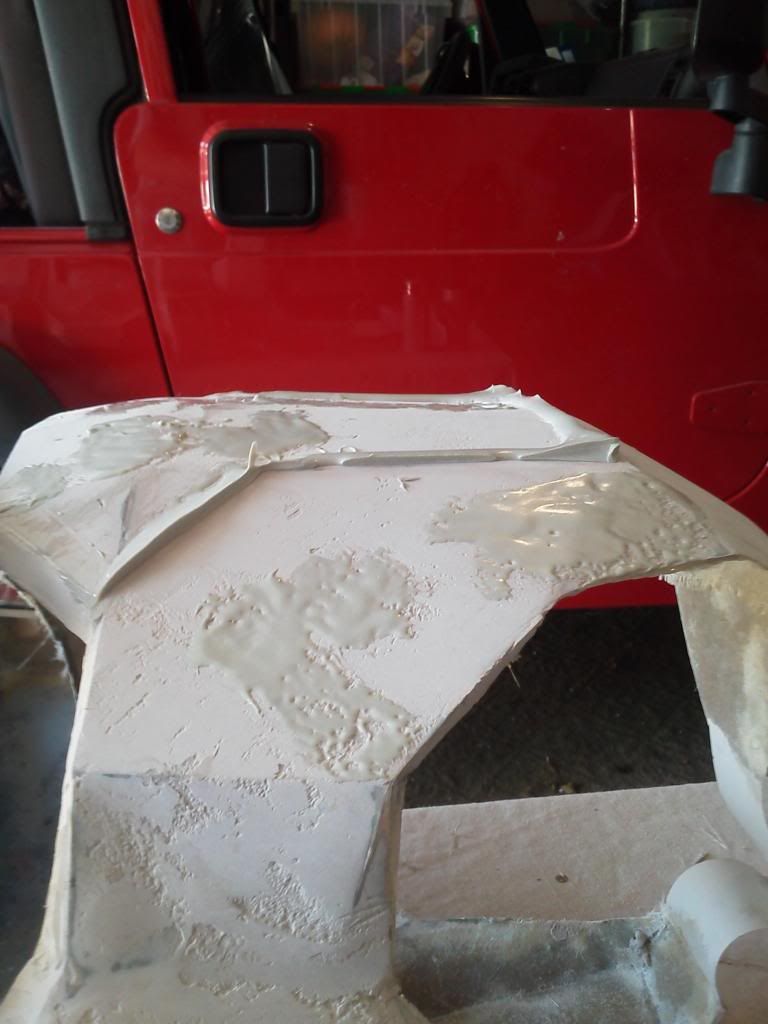
I managed to get the shin the correct size (as far as I can tell) It is over to the right, next to the forearms that are in the process of being bondo'd & sanded...got a little to happy with the former and am doing a lot of the latter now...
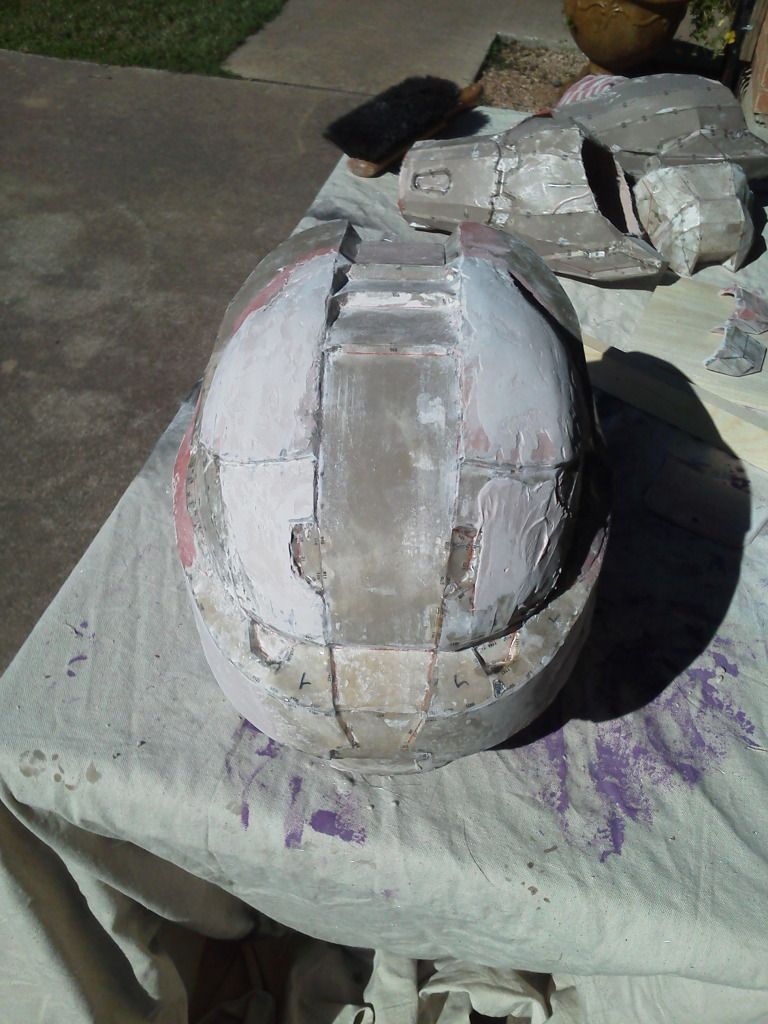
I am really happy with my progress on the helmet - still a lot of work to be done, but it has gone from the picture above (in early bondo) to the point that I put on the first coat of primer, which will help me further identify where more bondo/spot putty/sanding needs to take place:
"What's that smell?" "Dunno, smells like primer"
But, as much as I have moved forward, I have to take two steps back:
Sizing FAIL (again) on the boots...forgot to take the indent of the toe section into consideration when measuring
But, I wasn't happy with them anyways and will reinforce the areas that warped during resin before doing it again. The only thing I am bummed about is the waste of materials (bondo, resin, fiberglass...and TIME) put into them. Live & learn!I have one shin partially resined/fiberglassed & am still cutting the 2nd one out, so it will probably be awhile before I have anything exciting to post, unless I made significant progress on the helmet. Now that the primer is on I'll be able to work a bit more efficiently with corrections
-
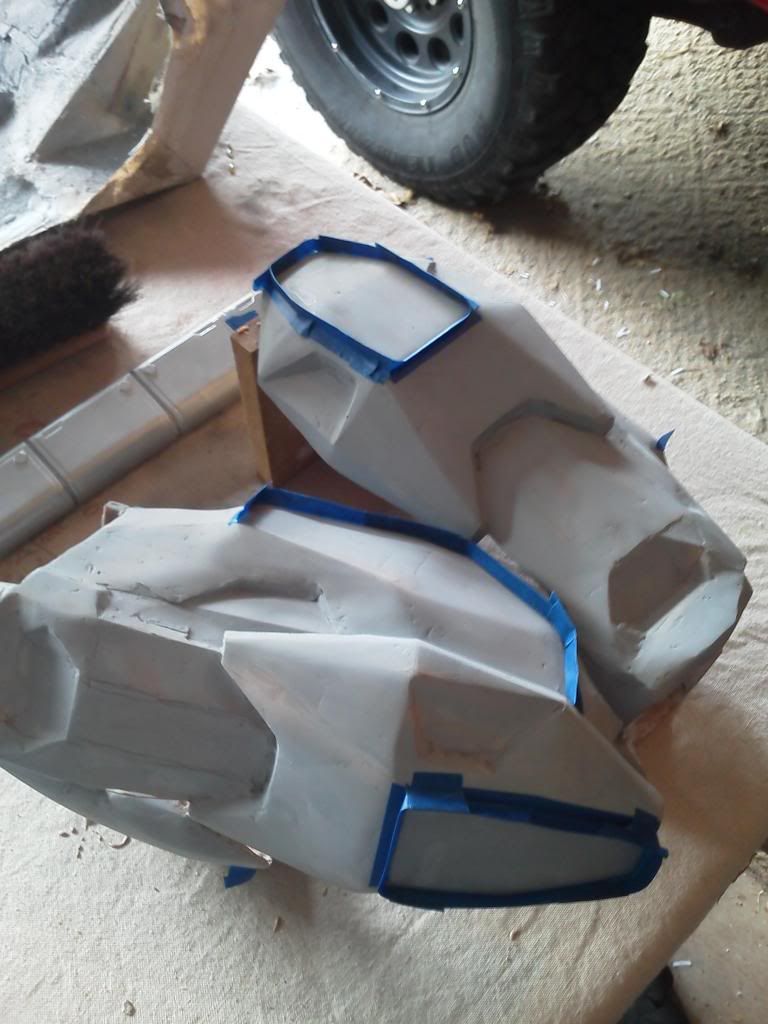
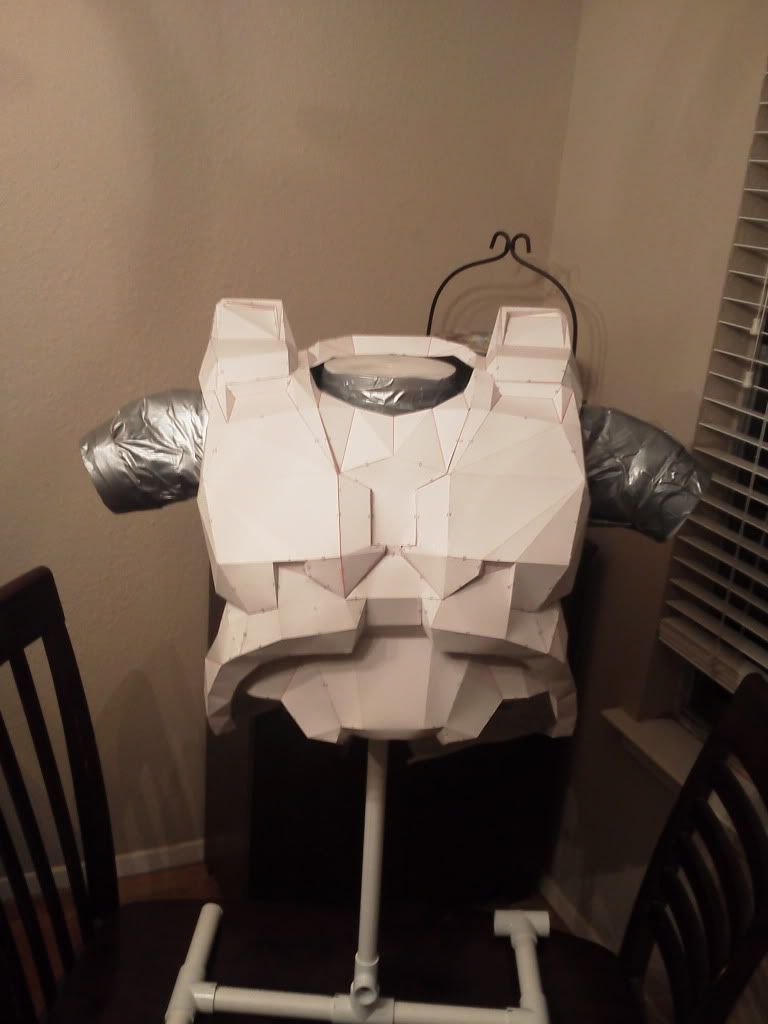
The good news: v2.0 forearms fit!
The bad news: v1.0 shins are too big! And by too big, I mean it could be an umbrella stand...
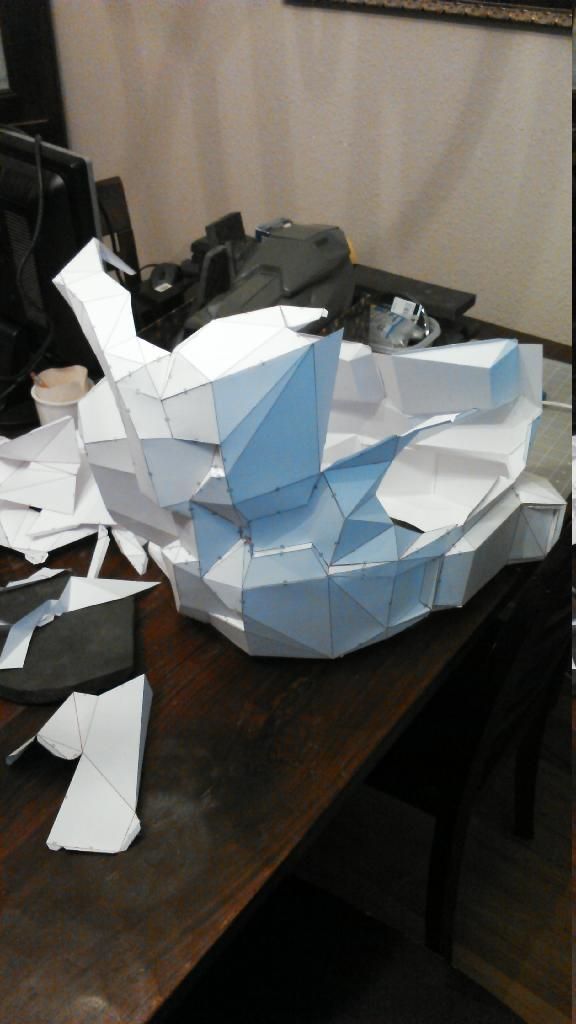
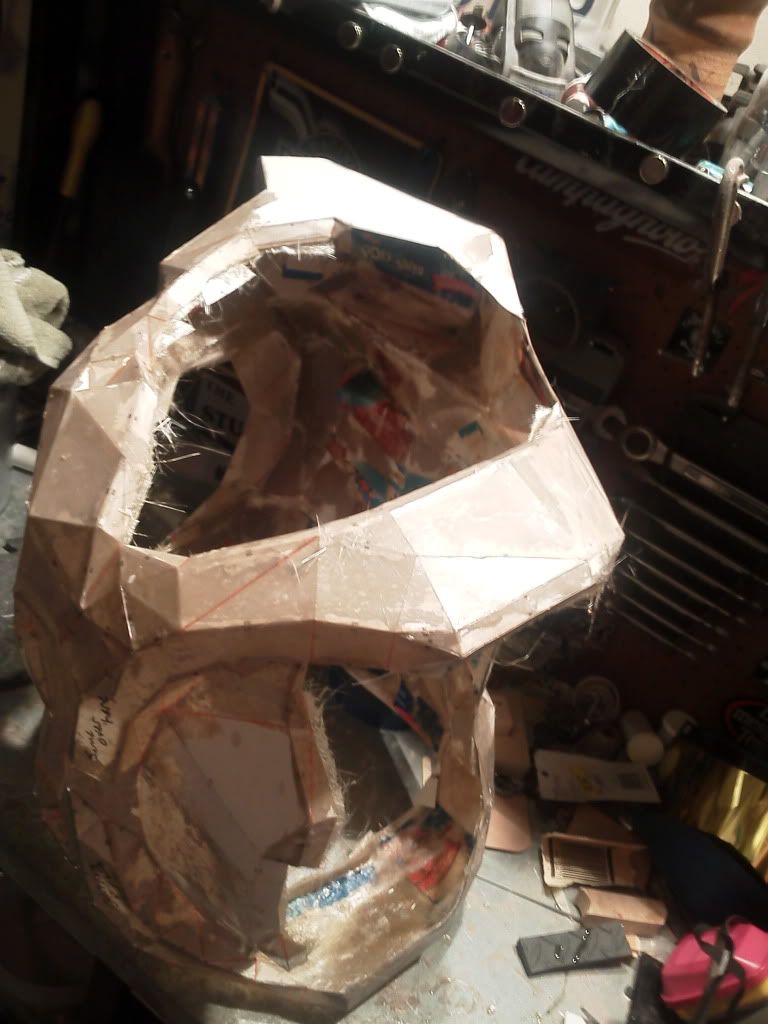
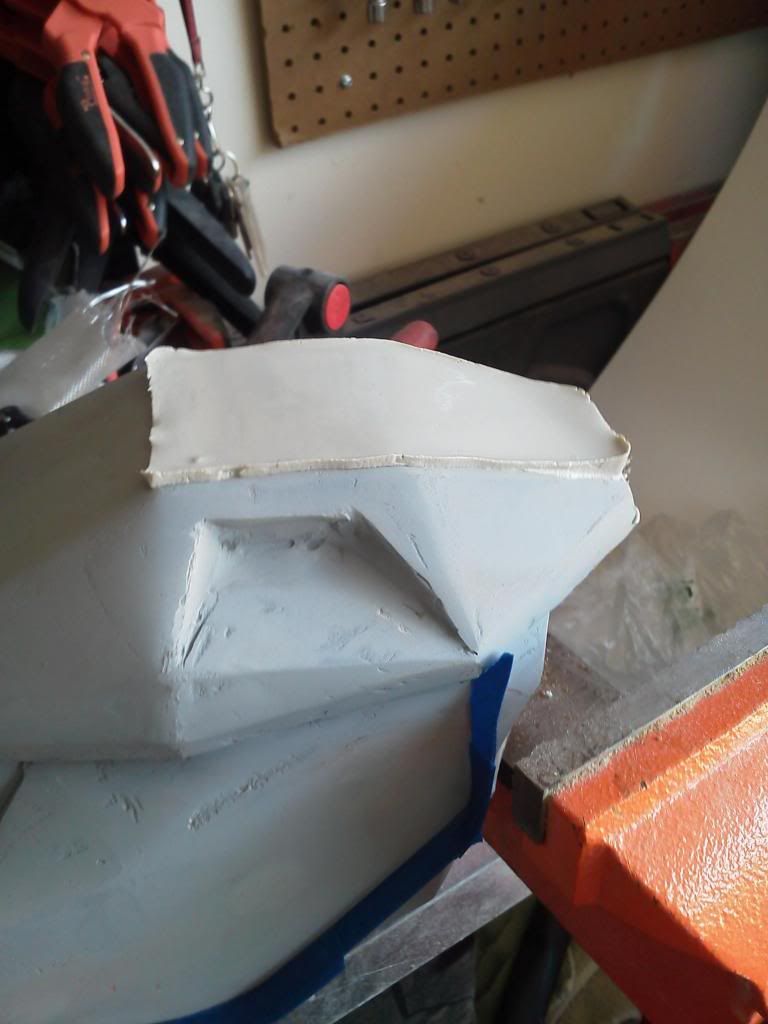
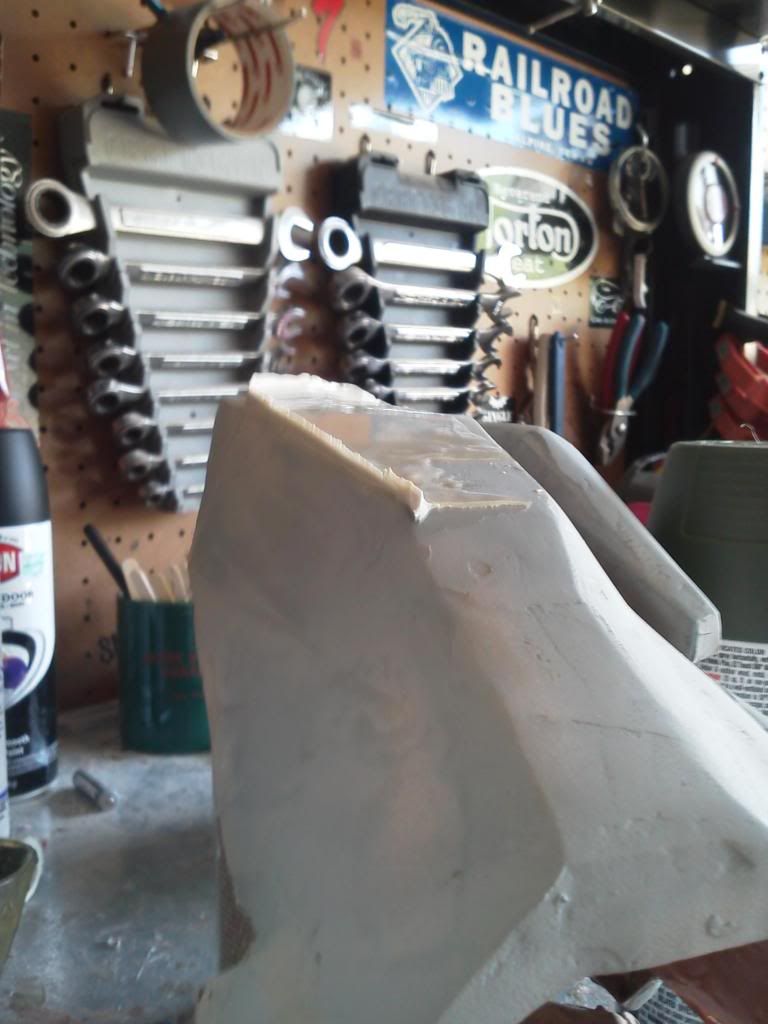
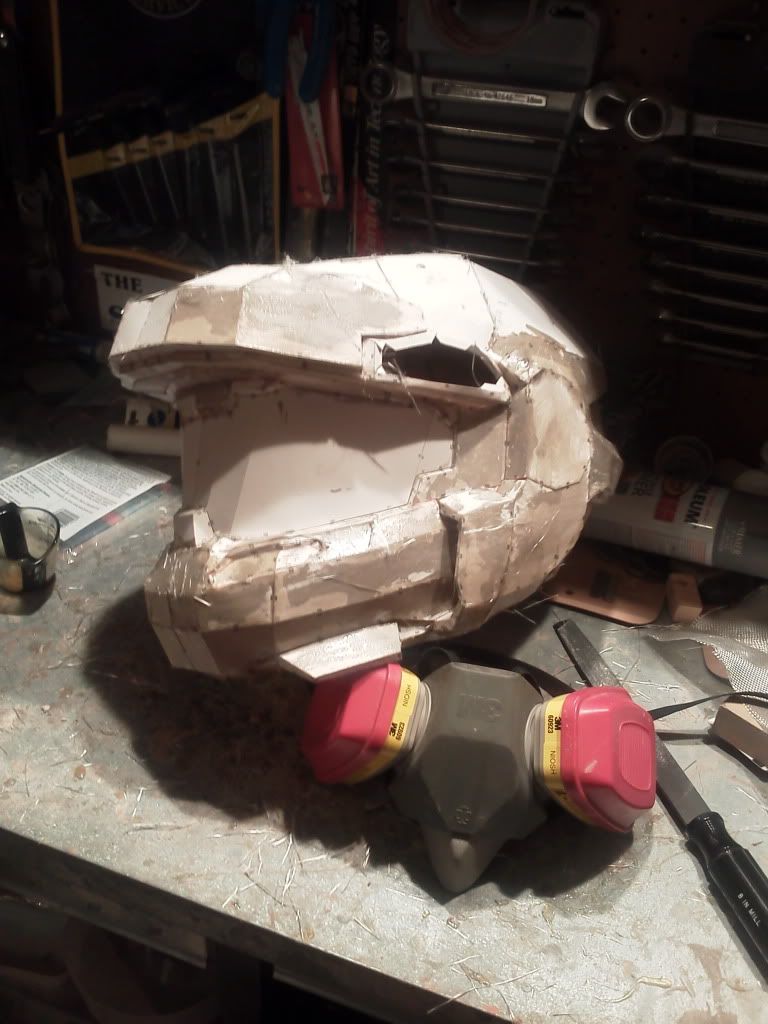
So, back to the 'cutting board' for the shins, which I have already started. Beautiful weather today, so I spent some time getting bondo on the helmet. This is actually a step that I have been dreading, worried that I would totally botch the job trying to make it symmetrical, but it is actually going better than I thought, though there is still a lot to be done:
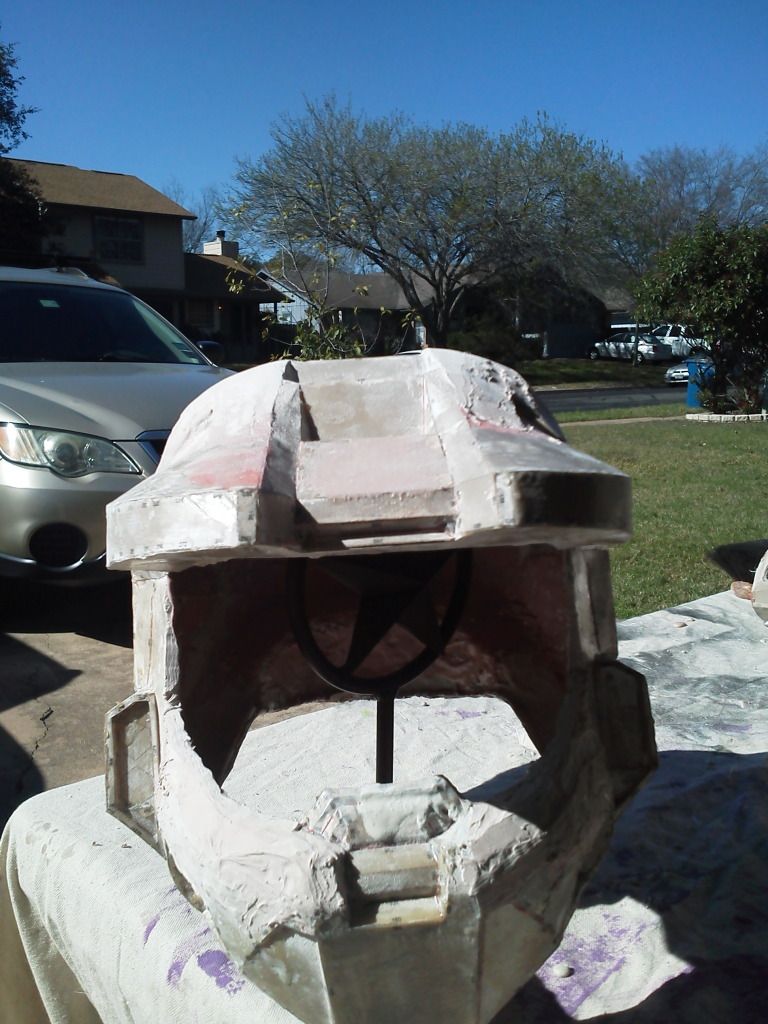
When I resined the helmet it created a few low spots from warping that I am having to correct. The most noticable is the underside of the visor, but that is not as bad to fix as I thought. What is challenging (aside from the symmetry) is getting the 'hard' and 'soft' lines correct, as they add detail and shape to the helmet. That said, I am excited about what I have been able to do so far and looking forward to getting it all cleaned up & ready for paint.
Now my dread is getting the boots up to speed... they also warped on the "lace" section and that is going to be challenging to correct, especially on the sides. If all else fails, I'll print out a new set & start over - I'm used to doing that by now
-
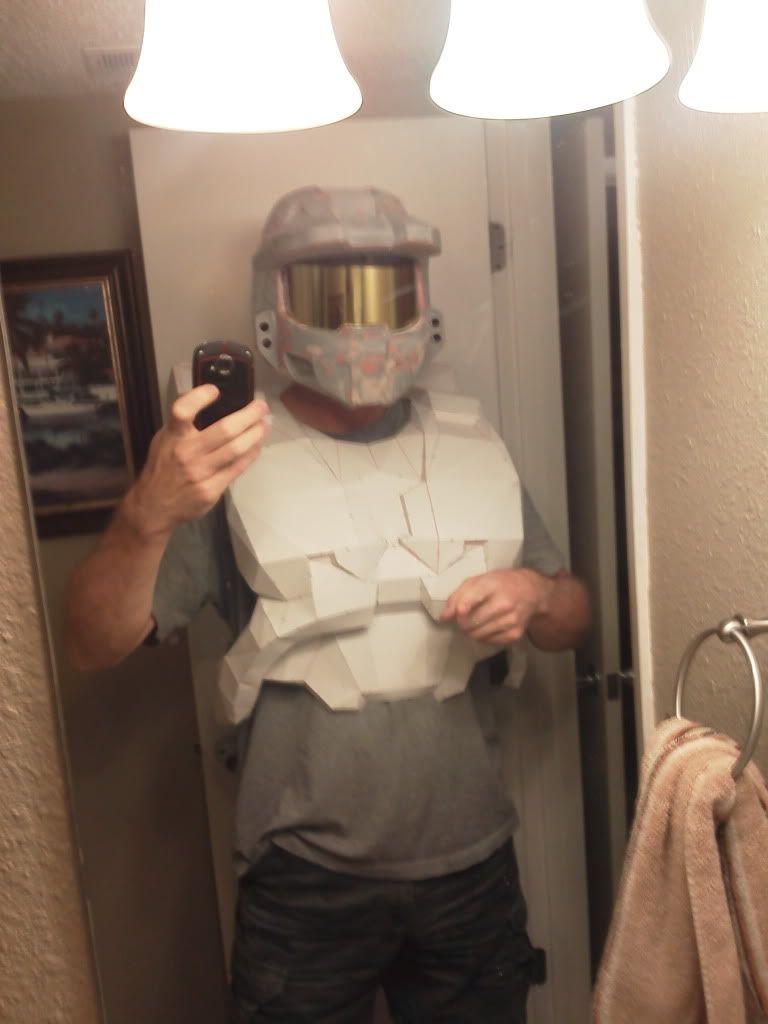
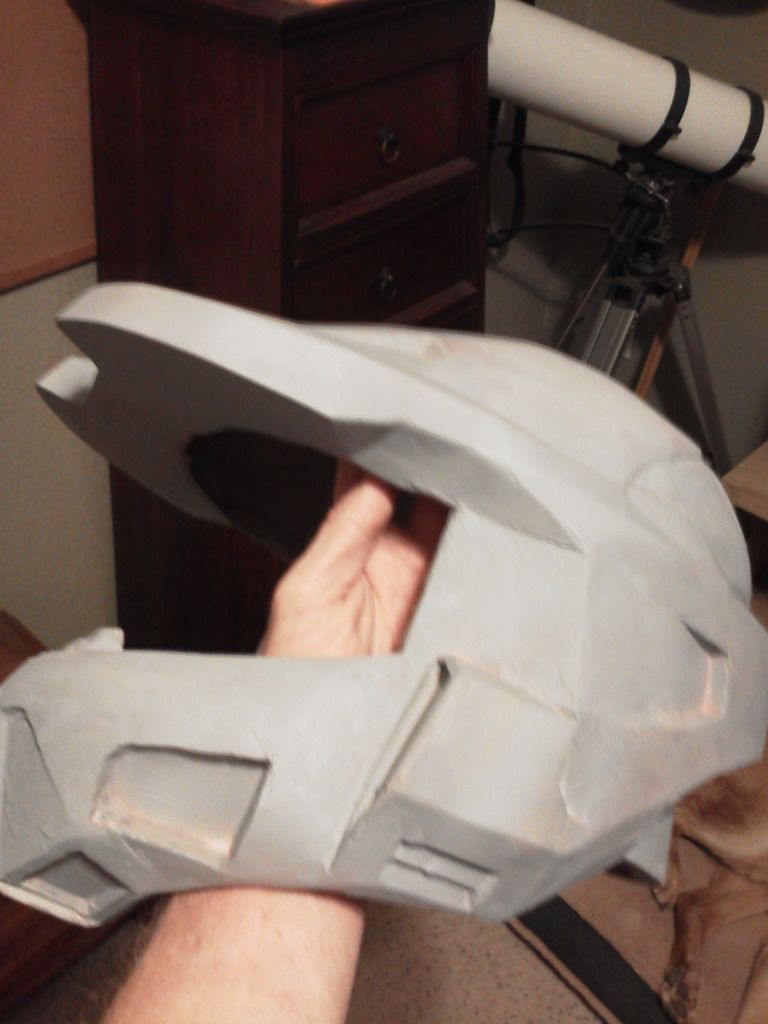
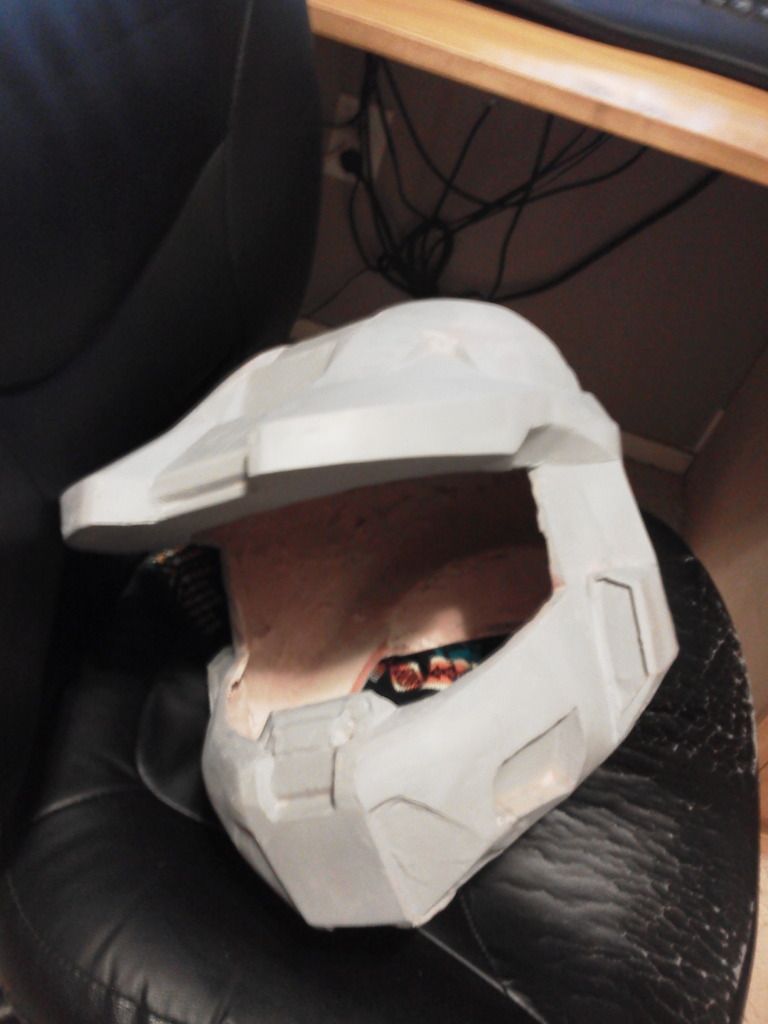
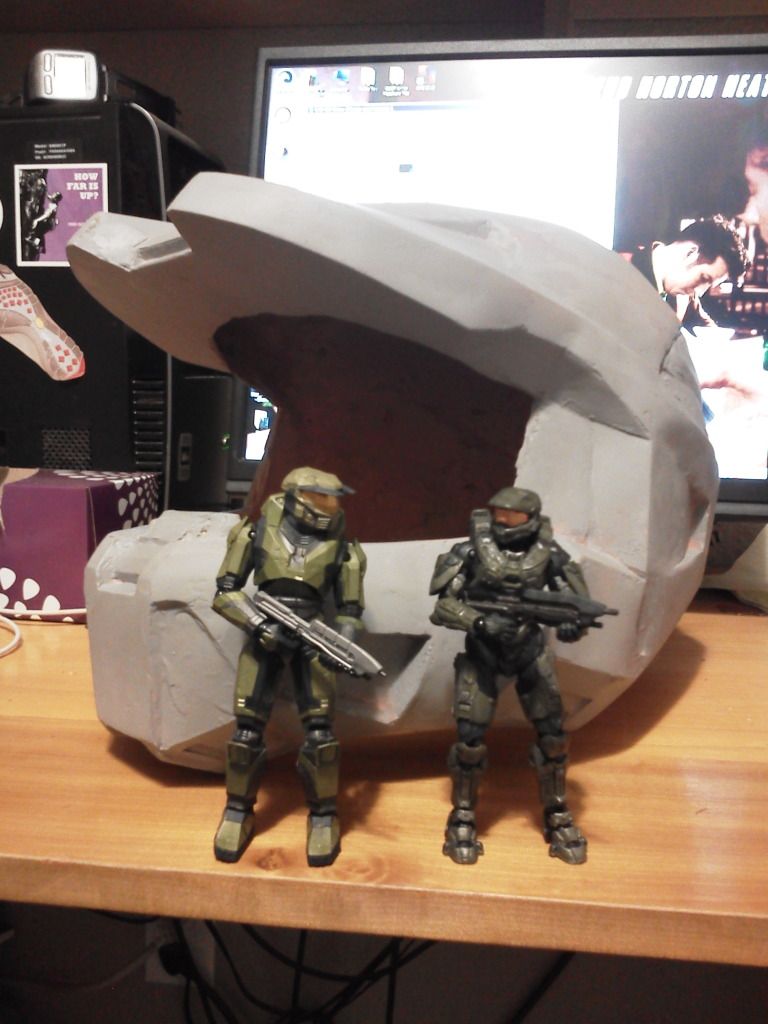
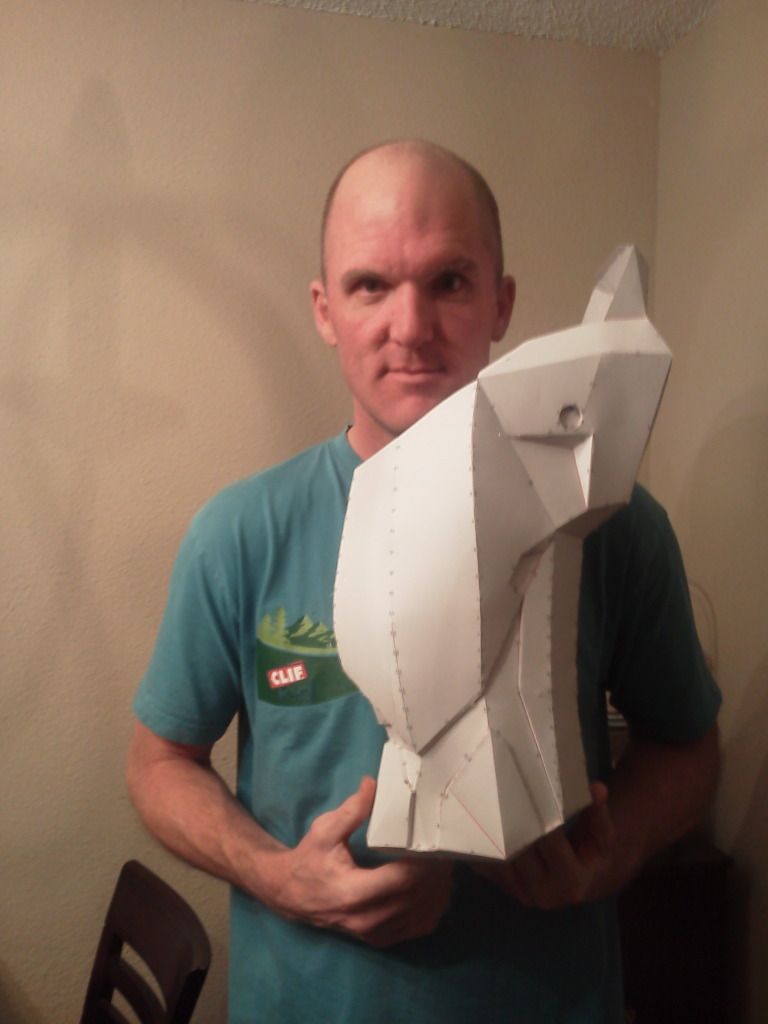
It has been awhile since my last update, but I'm still working on the armor
The good news is my v3.0 helmet fits!
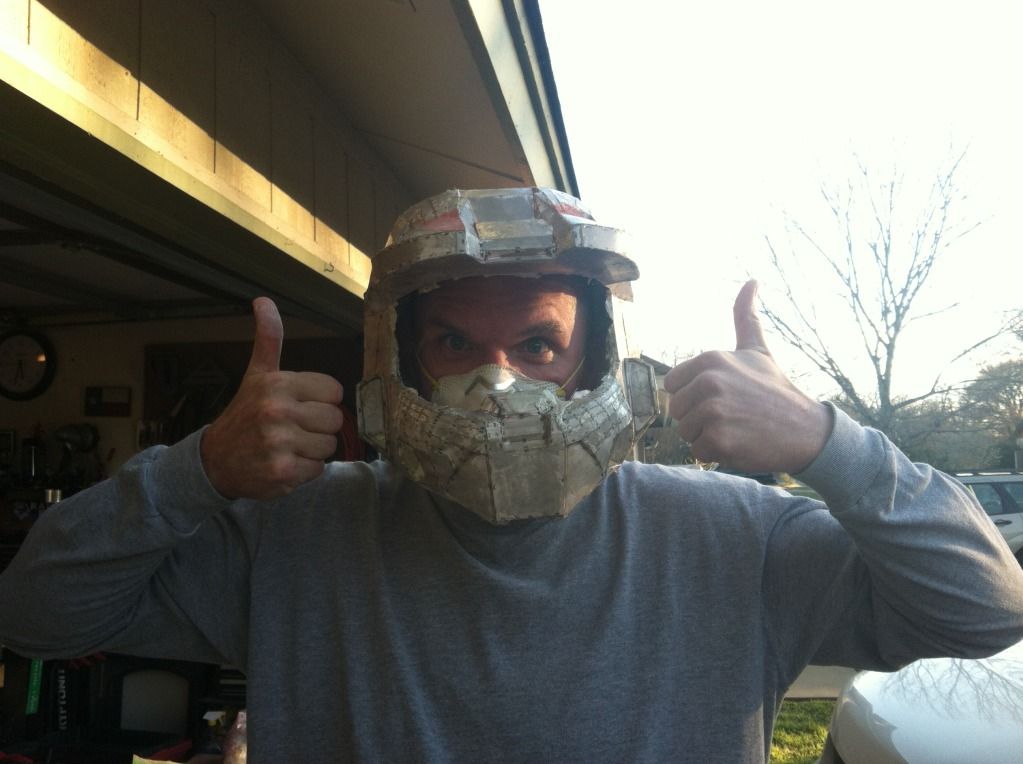
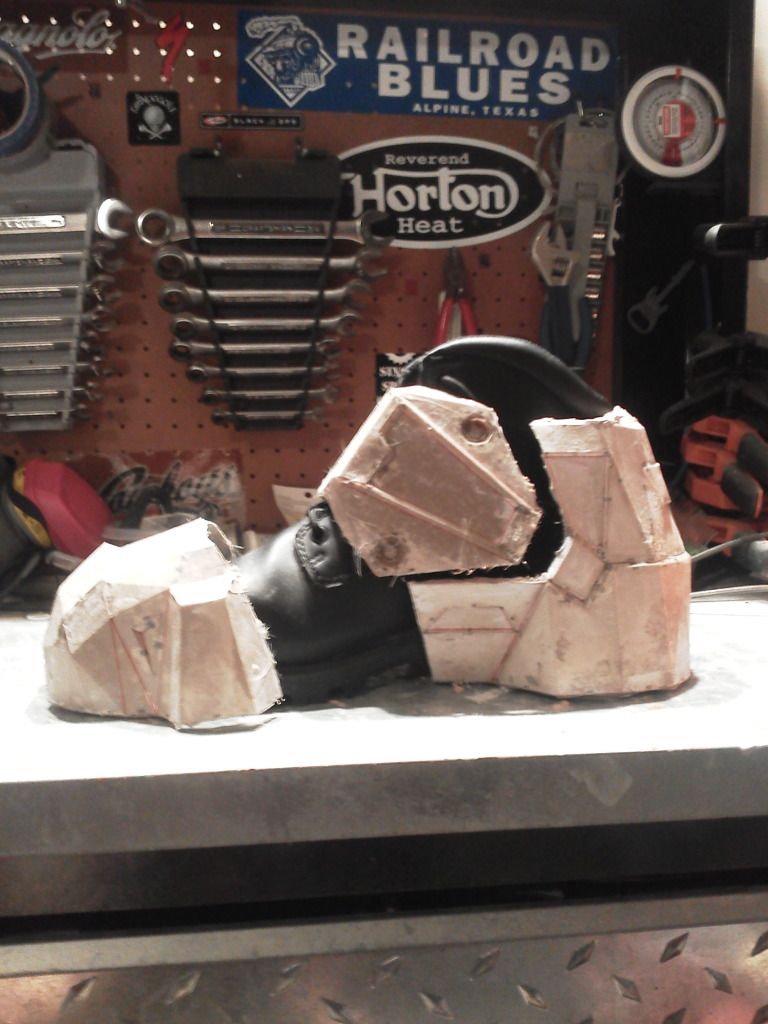
I was very, very relieved that I was able to get it over my head - had to trim the inside a bit, but not where you will be able to see it. The weather turned bad, so I spent some time doing clean-up with the dremel on the helmet and also the boots. The boots will need a little work - a few air pockets that will need to be filled with bondo, but the weather has to cooperate for that to happen.
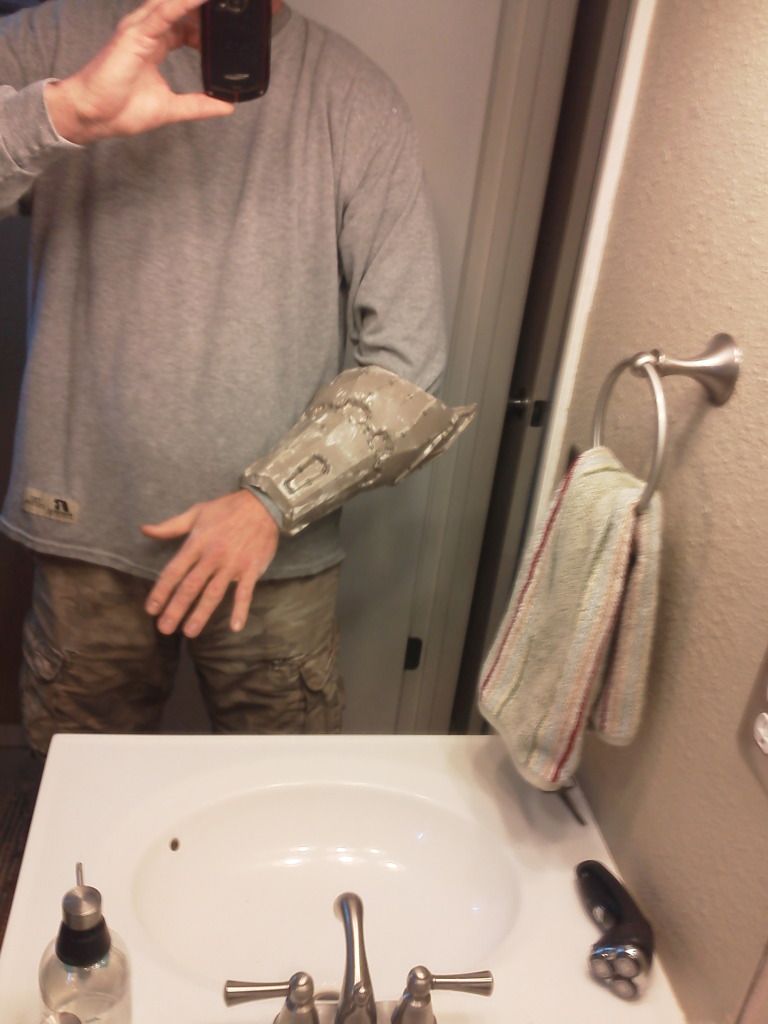
Another (hopeful) good thing is that I am pretty sure the v2.0 forearms are correctly sized - I had the opportunity to get one coat of resin on the left one before the humidity went over 50% (it is cold & drizzling outside). Once I get some fiberglass in I can trim the wrist area to get my hand through - it was pretty close but tearing the paper when I got it all glued up last night. The right forearm is glued & waiting for resin.
Earlier this week I was pretty down on this project - it seemed overwhelming...but I sat down & started cutting out the forearm pieces and started feeling better about it again. Getting the helmet over my head was a huge motivator to keep on working towards the finished armor. There is still a lot of work to be done and I'm sure I will hit some lows along the way, but it's all good for now


Pepakura HALO Mk VI armor build
in Build Threads Requireing Maintenance
Posted
I think everyone who wants to build their own armor should have a go at Pepakura - for the record, however, I think I will be using EVA foam going forward. The build was good experience (using pepakura), but I am going to see if EVA allows for more comfort and mobility.