gazmosis
-
Posts
4,043 -
Joined
-
Last visited
-
Days Won
23
Content Type
Profiles
Forums
Gallery
Articles
Everything posted by gazmosis
-

Doopydoos all resin E-11 build
gazmosis replied to MartinSivertsen's topic in General Weapons Discussion
Woo hoo!!! -
TK27883 requesting ESB Stunt EIB Status[TM][396]
gazmosis replied to ChrisODW's topic in Request Expert Infantry Status
Seems you and Patrick did some armor building (and thigh bruising) together!! Hey Christoph! Thank you for your EIB application.Another great set of TM armor coming through!! Let's look at your armor! CRL and EIB Application Requirements: You seem to be missing one picture, but I will ask to you post two. The one you are missing is a close-up of your hovi tip details, but I would also like you to post a fully lit pic of your helmet face without backlighting for your lens color. Here is why. The black paint on your teeth cannot exceed the teeth and go in between them. It might just be a case of the lighting direction but I need to be sure. If the paint is indeed past the teeth onto the spaces in between, it needs to be removed. When this is clear, I will go forward with the approval. Other-Armor Fit/Assembly: This section is where observations are made that may not affect your applications, but may go towards improving the overall look of your armor. For those of you who may be newer troopers, the Pugman blaster was brought up. What is the difference between this and other blasters? The base ESB blaster is without the power cylinders on the magazine well or the Hengstler counter like in ANH. Although the M19 scope is prefered over the M38, both are accepted. The original Pugman promo blaster has the obvious greeblies added to the left, right and top of the blaster. Items removed were the magazine release button on the top/rear of the mag housing, the small cylinder on the backside of the mag housing, and the "D" ring and holder from the butt cap. An additional small strip of T-track was added just behind the bayonet lug. I cannot recall if the front muzzle is different. Please chime in to confirm/deny this! It's a cool blaster that is a fine addition to any ESB armor. Back to your armor, Your dirty armor is fine with me. It adds a little battle action and authenticity without going overboard. The only other thing I wanted to bring up was a comment regarding the positioning of your rank bars on your ears. As long as they are present, I am OK with it. However, they should be painted ON the bumps themselves and not in between them. A very easy fix if you ask me. Centurion Suggestions: With all the detailing and hard work you have put into your armor, I can only assume you will be shooting for Centurion. The only thing I want to address regarding this is the gap on your right torso side. Since you have full closure on your left side, I wasn't going to split hairs regarding your EIB. However, if you end up applying for Centurion, this gap must be eliminated down to a single seam. From looking at your body type, this looks like a belt tightening issue, but whatever it is, it needs to be removed for Centurion pictures. You have a wonderful set of armor and I am sure you are making your Garrison proud. Please post up those pics so I can see if that paint is between the teeth or not. Don;t forget about the Mic tip pic as well so we can move towards your approval. -
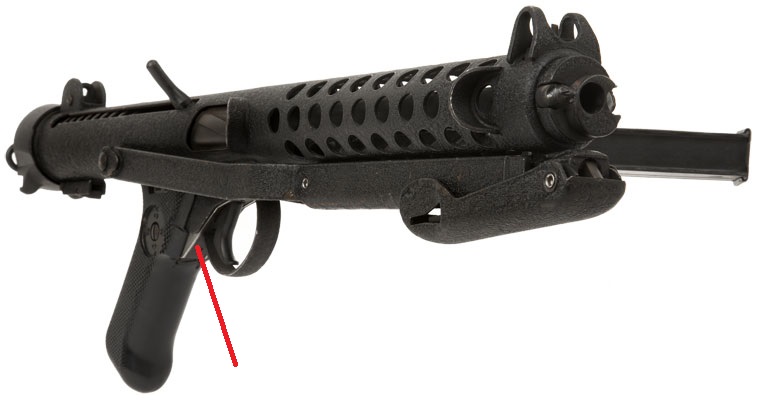
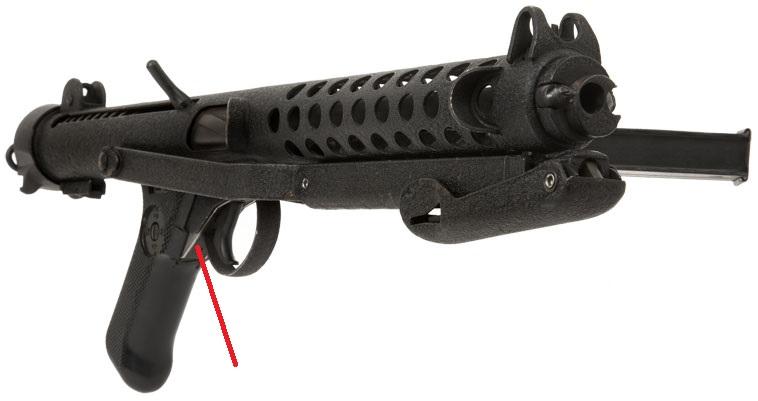
Alright Patrick! Wonderful armor build! Wow! I am glad your combination of the RS helmet with the TM armor matched well. Let's look at your armor! CRL and EIB Application Requirements: All require photo submissions posted. Your armor meets all the requirements for EIB. With that I would like to congratulate you on your approval of this armor for EIB. Since you are already EIB approved I can't assign you an additional number but I will update your approvals on your profile. Other-Armor Fit/Assembly: In this section we look at your build overall and comment on things that will not affect your applications but can go toward improving the overall look of your armor. Some things to note: Nice bracket upgrade. I LOVE...not like...LOVE your neckseal. Is there anything you want to share about how you have an accurate belt without frays??? Well done! Some guys don't prefer a lot of weathering on their blasters. However a little can go along way to adding depth and realism to it. If you added a bit of silver to the underside of the trigger group like this: It would really pop. But that is your choice. Also, a little black marker or paint on your thermal detonator screws will also add to the accuracy factor. And yes....your dramatic lightning action shot will do well! It did pick up one detail I will mention next. Centurion Suggestions: One things that might catch the eye of a Centurion is the slight overlap of your backplate on the right side. In my opinion, this does fall into the category of "slight" so I am not requiring repair here unless that is something you want to adjust. However, one thing you will need to adjust is to remove all return edge into the wrist opening of your forearms. This included into the square indent and cover strip ridges. Make sure that if this is showing in any photos on your Centurion application that you re-take those pics. Nice work on this build and congratulations on the approval!
-
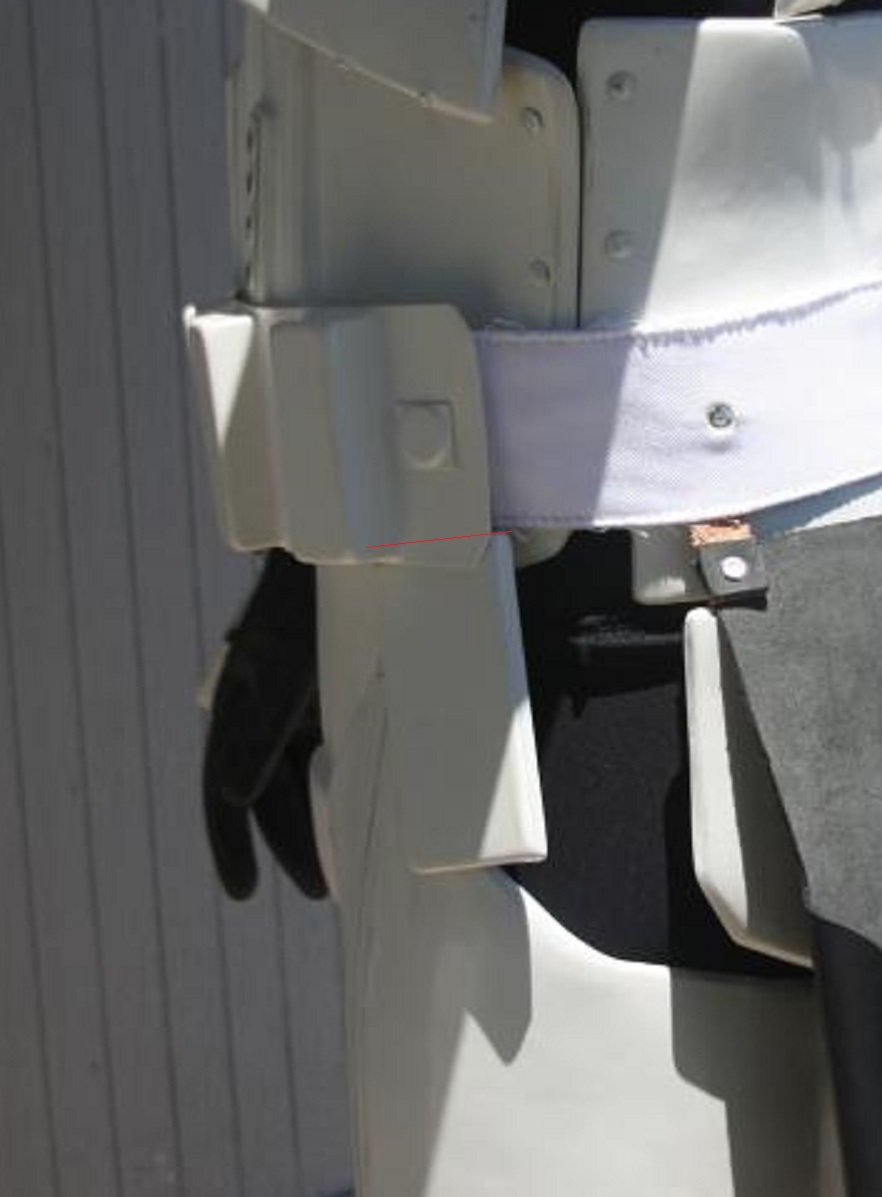
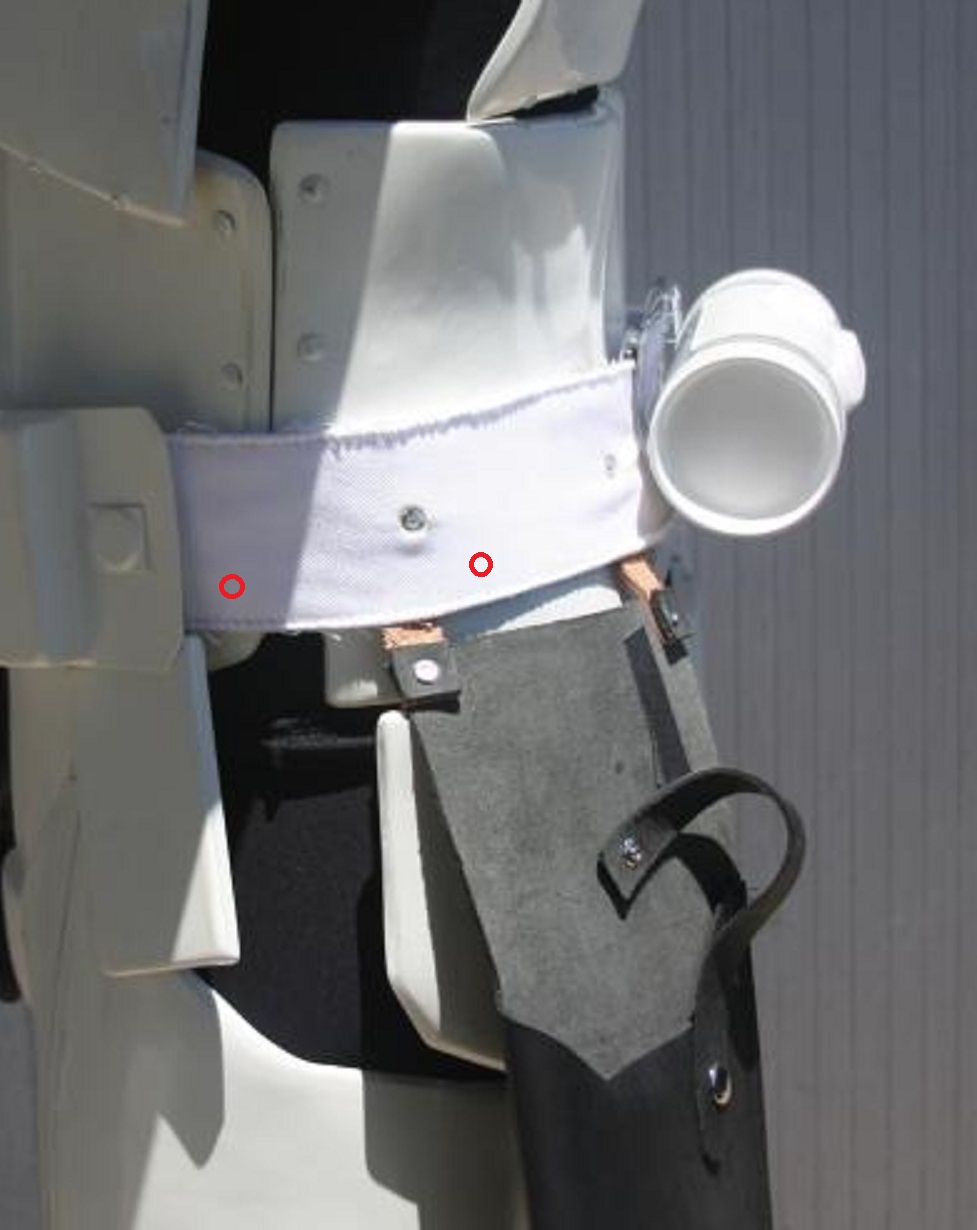
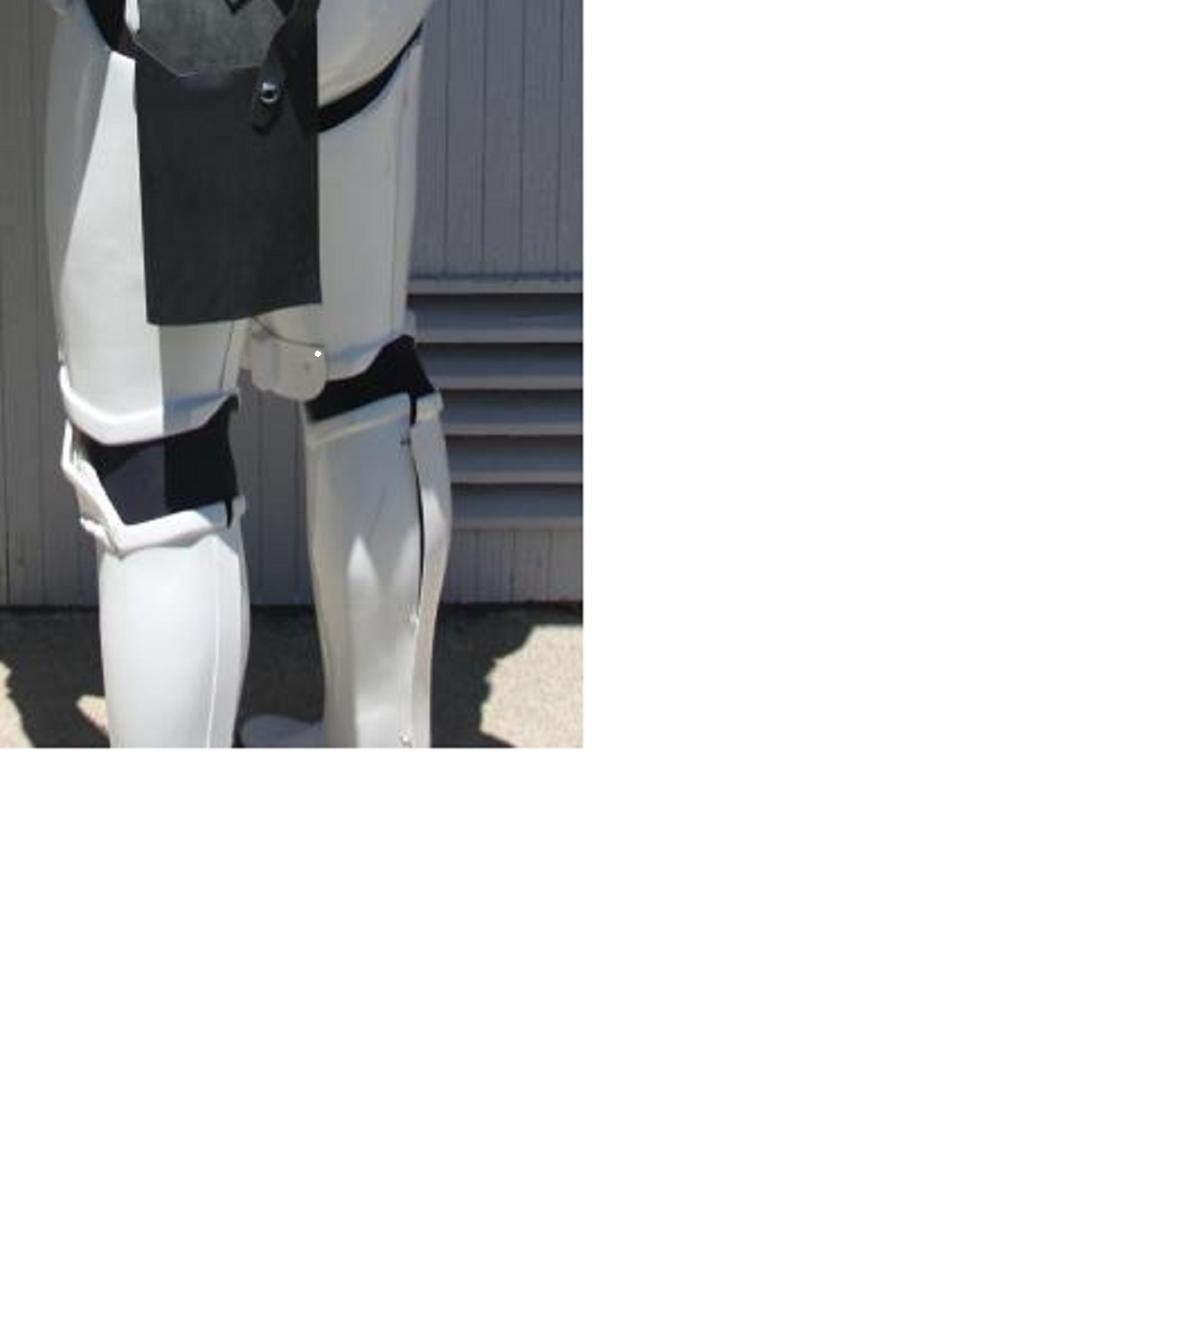
Hey there Cary! Yet another fine set of RS to come to the surface!! A very nice looking build so let's look at it! CRL and EIB Application Requirements: A right side full body shot is missing but other photos show enough detail to to continue forward. Your armor meets all requirements for your second EIB . Although a new number can't be issued, your EIB count will be updated in your profile. Other-Armor Fit/Assembly: This is the section where suggestions are made only to improve the overall look of your armor but that will not affect your applications. You don't get pinched by your left forearm?? TROOP ON! Your drop boxes are getting sucked up under your waist belt. I don;t know if this was your positioning at the time of the pic, or your elastic might need to be adjusted. I marked what i see is being drawn under your belt: The next thing I want to cover is your holster placement. This has given me unrest because it's not just a simple repair. Your placement is a bit high and a bit far back. You can see the placements in this screen shot:. You may leave this because the only way to really repair this is to purchase a whole new belt. But it is to be noted the proper placement should be just behind the waist belt and on the lower third of the canvas belt. Lastly, you might want to grab a black marker and dab the screw on your Thermal Detonator like Jason suggested. It just ads to the accuracy thing Centurion Suggestions: I would hope to see a Centurion application at some point seeing as you seem to be collecting armor nowadays! Your build is clean, your fit is nice, your paint details are on point. The only thing I feel needs to be repaired is the cap rivet placement on the thigh pack on your right thigh; specifically on the inside. The thigh pack needs to be mounted with the rivet in the far upper corner, not in the center as you have it. I marked in white where this needs to be: When re-positioning this, make sure the corner aligns with the lower molded ridge like on the outside of your thigh. Nice work on this armor and congrats!!!


-
TK-20421 Requesting ESB EIB Status [TM][394]
gazmosis replied to Cantina Security's topic in Request Expert Infantry Status
Hey Jason! Sorry for the delay but it's back to business and back to marveling at armor builds like yours! Let's look at your armor!!! CRL and EIB Application Requirements: All required photo submissions have been posted. This armor suits you perfectly. A very clean build. You armor meets all requirements for EIB. With that, I would like to congratulate and welcome you to EIB!!! Other-Armor Fit/Assembly: Like I stated before, there really isn't much that could be done to improve on this armor. The one point that Mathias has brought up about the double stitch pattern in the handplates requiring a stitch location on the front or knuckle portion of the handplate was repaired. Doesn't get much better than this! Centurion Suggestions: In regards to suggestions to meet Centurion standards, I have nothing to state. All I ask is for you to review all the required Centurion photos and to retake any photos showing the original incorrect handplate stitch pattern. Your Centurion application should depict your Centurion armor. It was a pleasure to review this. Continue making your Garrison proud! Congratulations again!!! -
ANH Stunt Helmet Frown with five holes
gazmosis replied to TK-Sharp's topic in Build Threads Requireing Maintenance
In your research you will also see a stunt helmet from time to time show up with three teeth on both sides. (This is more associated with the "hero" helmets) These fall into a category known as anomalies. These were oversights during a very rushed movie shoot where consistency took a back seat to getting the film done. Until a category for specific costume replication is created, stick with the 4 teeth frown or nothing is stopping you from getting another helmet and having a second option to wear for troops. -
Doopydoos all resin E-11 build
gazmosis replied to MartinSivertsen's topic in General Weapons Discussion
If all the stars are aligned count on about 10 days. -
I like both, but the webbing snaps are far easier to make and apply.
-
RS PVC Kit / ANH TK Stunt Build / Bulldog44
gazmosis replied to Bulldog44's topic in Build Threads Requireing Maintenance
Glue as much of the strap to the chest as you can. I have always added extra slivers of scrap PVC between the ribs on the underside to create as much gluing surface as possible. There is stress on these shoulder bridges. You don't want these popping off. -
Yes that is fine. Just make sure not yo use any rivets when you attach your straps. They should be glued to the chest and that's it
-
Pretty darn sharp! Museum piece!!! Man you guys have some funky looking electric outlets!
-
Chookaboom's Walt80 ANH Stunt Build
gazmosis replied to Clamps's topic in Build Threads Requireing Maintenance
Try a kids dance clothes supplier -
TK-7961 Requesting ESB Stunt Centurion Status[128]
gazmosis replied to Front-a-Little's topic in Request Centurion Status
Hey Pat! Thank you for sharing your armor with us. However, even though you already have an EIB award, that award was based on a completely different set of armor. You will need to re-apply for an EIB clearance on this armor first then we can move on to Centurion. It looks like a great set of RS. Second question is in regards to your photo links. It would make life easier for a lot of people if the pictures appeared in your post rather than links. You have a couple options to accomplish this: first, you can do what I did above. Open a second browser window and start your thread. Wherever you want a picture to be, go back to this thread and open the picture you want. Right click on the picture and a box will appear. Go to the bottom and left click on "properties". Another box will appear with the URL address. Highlight and copy that. Go back to your new post and click on the image icon above the text box. A box will appear. Paste the copied URL into the box and hit "OK" when done. The picture will appear in your new thread. The other means that might be easier is to use a photo host like photobucket. You can copy/paste pics directly from them. Please don't hesitate to contact me should you have any questions. -
Bossman to the rescue!
-
You would need some incredible amount of creativity with the numbers to not qualify for Centurion.
-
TK-20421 Requesting ESB EIB Status [TM][394]
gazmosis replied to Cantina Security's topic in Request Expert Infantry Status
We would rather see it done right than fast. Your safety comes first. Be well! -
Nice work, trooper!
-
Which Paint for Ab Rivets and Bracket Screws?
gazmosis replied to millenium1's topic in Assembly, Mods, and Painting
http://www.whitearmor.net/forum/topic/8117-helmet-ab-paint-detail-reference-guide/Anything that needs to be painted white can be painted using any white paint from a can or a model jar. I even heard of a trooper using a bathtub porcelain repair paint. Tough stuff! As for the other paint colors reference the link: -
Helmet question - Hovi Mic Reinforcement?
gazmosis replied to usaeatt2's topic in Hard Armor (General Discussion)
NO HOT GLUE!!!!!!! The plastic is so thin in this area hot glue will warp the plastic badly if applied here. If you want to re-enforce the area, a common trick is to lay a piece of cotton t-shirt over the mic tip area on the inside of the helmet and soak it with super glue. This is known as poor man's fiberglass. but it works. Watch for the fumes, though -
Those handplates are amazing and you NAILED those helmet details. Best I have seen in a while!!!
-
unclesven's RS ANH Stunt build [*RS]
gazmosis replied to unclesven's topic in Build Threads Requireing Maintenance
Darn it! I was gonna chime in on that, too! Yes! Do not trim anything on your scope! Ian is a wise man! -
It is great see your progress coming along so well! The only thing I see that no one has brought up was the ample amount of return edge on your back plate that you still need to remove. I also wander about your decision to use a snap plate on your ab rather than installing a snap directly to your ab. A snap plate is going to raise the height that your belt sits off the ab. You want this as close to the ab as possible. I just don't see the advantage. And the fact that pretty much 100% of all builds install the snap into the ab is a testament that it works. By the way.......GOT Q-TIPS?????
-
Your photo references are your friends. Consult past Centurion threads and the array of archive photos. Everything you need is here to guide you to a mistake free build. Your methodical approach is good. A willy nilly approach is NOT the way. We await your progress!
-
No specific details....it is in the list of required photos: full body front/back, full body arms raised left and right , close up side details with arms raised left and right
-
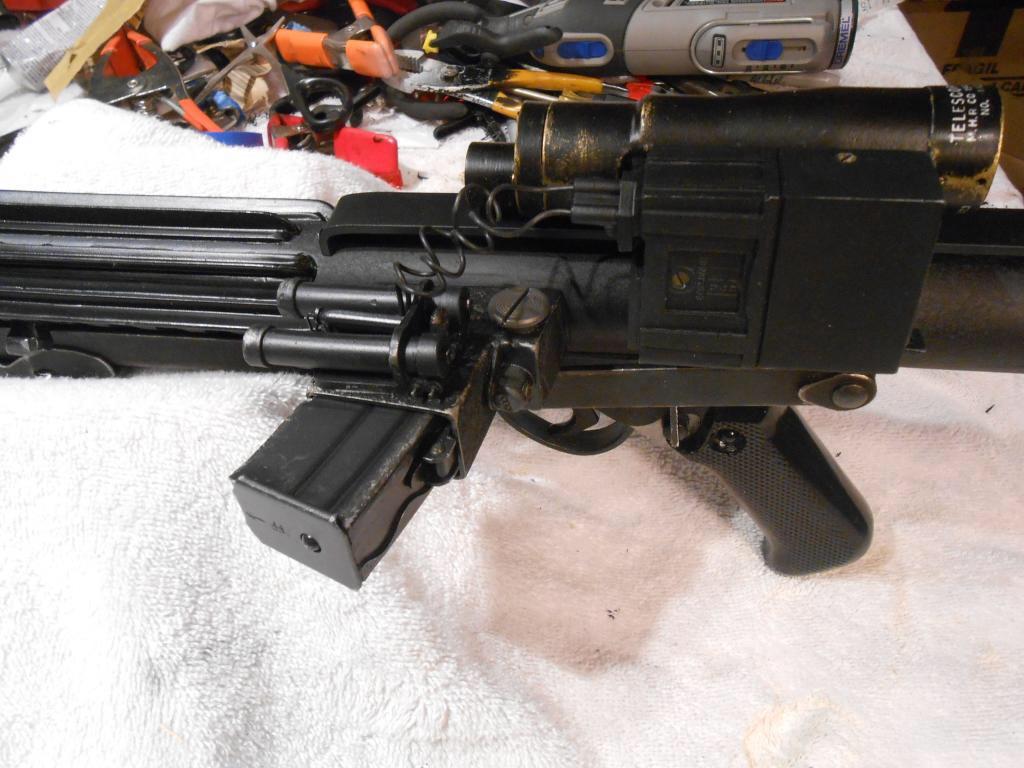
Negative on the attachment points. The wires did come from the front of the counter, but if you look at shots of the screen used power cylinders, there are screws on the back side. Although this is not a screen used blaster, these are as close to the actual cylinders as you'll get. I just tucked my wires between the fuses between the two cylinders