-
Posts
4,043 -
Joined
-
Last visited
-
Days Won
23
Content Type
Profiles
Forums
Gallery
Articles
Media Demo
Posts posted by gazmosis
-
-
Great looking overall build. The gray paint for your ab buttons looks really dark. Also, like Joseph mentioned, you need a pic of the attachment side of your thermal detonator. I noticed a black center to the round detail?? If that is present, that must be removed. Keep in mind that forward progress on this application will be held up until your blaster and action shots are provided.
-
Keep in mind that E6000 is a 24 hour set. Don't rush it. Do a very light sanding on the gluing surfaces of parts to be joined. Plan out your attack and your clamping procedures.<br>
. Rehearse it. Sounds goofy, but if you make a mistake, it's best to make it when there is no glue. If you used a razor knife to trim your parts, make sure the little raised edge created by the razor cutting into the plastic is removed. This will affect how parts lay against one another if this is not removed
-
 1
1
-
-
This is all constructive and we want you to look your best so please take no offense. Chris made some good points. You do have a couple options. First is to start over if you are up for that. Second is to try to clean the OUTER edge of the black as uniform as you can. Then work onto the black with gray until you have reached the pinstripe that the tears and traps should have outlining them.
If you do start over, Like Chris said, a thin, long bristled brush will help you maintain the thin outline. It will take practice so make some straight and curved lines on some scrap plastic and practice there. Once you get the feel, you will get to the results you desire.
-
 1
1
-
-
does no one believe in quality anymore? There is no excuse for the bubbly castings. Sometimes makers sell their items at a discount marking them "B" or "C" grade. That was a "S" grade for......well....you know
-
 5
5
-
-
Go really subtle on the scope. Less is more with weathering. Lay your blaster down and look at the parts and corners that touch the surface or that are handled the most. Can there be too much weathering? Absolutely
-
 2
2
-
-
First off, don't worry about the bottom opening just yet. Once the rest of the helmet is assembled, you can trim the opening so it is even all the way around.
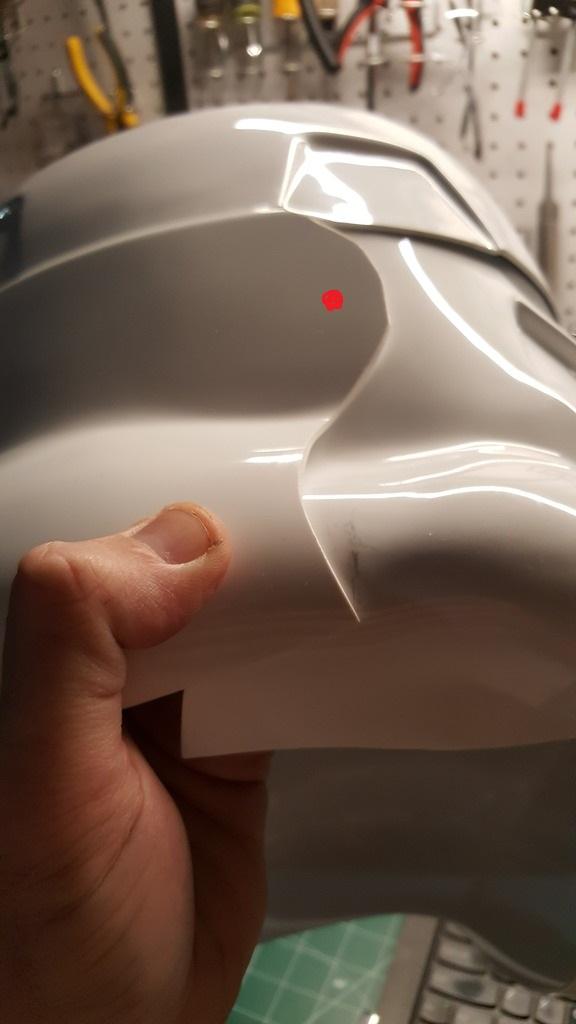
At the point you are at, the helmet assembly is really no different than any other. First, drill out your mounting holes in the round portion of the cap "ear" just below the temple traps. Roughly here:
 . Make sure your hole is the same size as the rivet you will be using to do the final mating of the cap and face. Find a screw and nut and use that FIRST until everything is aligned the way you want and the construction is finished. You can then go back and permanently rivet everything down in the end.
Then trim and install your brow trim. This is essential to making sure your trim fits tight across the brow line. Add the face and find the position of the brow line you like. Make sure to use the outer corner of each eye and the front trap edge for alignment so your face is centered. Once you have things lined up how you like, mark your mounting point onto the face through the ear hole you drilled BUT DO ONLY ONE SIDE!!! You'll see why in a second.
Drill your mounting hole on the face and join the face and cap with a screw and nut. With the one side secure, you are free to align the second side without the worry of the first side sliding or moving out of position. You also want to make sure at this point that the brow is even and tight to the face. It doesn't need to be perfectly level. It can be a little raised in the center but just make sure it is even or it will look wonkey from the front.
Once the brow is how you like it, mark and drill out the second hole and secure that side. Now, set it down and step back. look at the helmet and make sure the brow is even. If it is not, don't panic. The mounting holes are adjustable. A little sideways pressure with your drill bit can move the mounting hole up, down, backward, or forward. Just do your adjustment on the face only.
Many people then install an auxiliary mounting rivet on the cheek tube right at the seam. This will prevent the cap from hinging on the face which is important when trimming the ears because those need to be trimmed in one location on the helmet.
Good luck!
-
 1
1
-
-
Polishing compound or mineral spirits
-
 2
2
-
-
I am sorry that your dream was so close...yet so far away. However, you are in the right place to keep that dream alive. Poke around until you have decided which armor works best and threads will guide you to make your dream a reality. For now, just chalk it up to a lesson learned.
-
Hey Tim:
The advice given is sound. This person does nothing more than use someone else's armor, makes molds of it, then sells it as his own. That is known in general as piracy but here it is re-casting and is highly frowned upon. Not to mention the material he uses is hyper thin styrene which cracks if you look at it too hard. Stay clear and support FISD and the REAL armor makers.
-
 2
2
-
-
It's not bad it's just that the center is a bit wider than it should be
-
Welcome! Can we see pics of your work so far!?
-
WELCOME PLASTIC BROTHER!!!!
-
best of luck to you!! Post lots of pics along the way so that if you have any questions, we can help!!
-
 1
1
-
-
Doesn;t look like anything auto rubbing compound won;t fix
-
Well this is incredibly touching. And also I am ashamed that it took me so long to see this. I was searching for another thread and happened upon it. Thank you for all the well wishes. Blessings to all of you!
-
 2
2
-
-
You also might want to look at these! Incredible t-tracks!!! http://www.toddscostumes.com/costume-supplies/star-wars-prop-builders-supplies/star-wars-prop-makers-t-strips/ you will want package #4
-
 1
1
-
-
count 5 ribs up on the shoulder bridges. That will put you there. Make sure, though, you have them angled correctly to curve and sit nicely on the back plate
-
Wow! Stunning build. I am speechless.
-
So darn cool!! Well done all around
-
 1
1
-
-
Hey Red!! Nice looking armor bro!! EIB should be an easy pass for you. Nice lines, great details on your helmet and a solid blaster. I would look into a couple things if you're shooting for Centurion. I would put a little more diameter on your ab buttons, check the cover strip on your left thigh....it looks like it is covering the molded ridge at the bottom and it should end before it. Maybe it is just the pic (and my failing eyesight) I was also looking at your belt assembly. The cloth belt looks really wide to me. I know that the CRL states it can be up to 3 1/4 inches wide but it really should only be around 3...or the height of the vertical end of the plastic belt between the angled corners. Which leads me to those. They look a little enthusiastic. The angled corners of the belt are really a minimal trim just to knock off the corners. See here:
 Lastly, your holster body also looks wide. Most holsters are about 5 1/2 inches wide but perhaps it is just camera angles and bad eyes....again...
Lookin great though!!! Good luck
-
 1
1
-
-
Welcome young man!!! Love another hometown trooper!!
-
Nice looking armor. Well built. I don't know if it is going to make a difference but "hero" handplates? Also, I'd find a way to eliminate the tape on your blaster.
EIB should be an easy pass. I know the side gaps on your torso and a charging handle for your blaster will beed to be addressed for Centurion.
-
Kman said it well. I highly recommend the cheesecloth. It gives the inside of the helmet a really cool "lined" look. When you apply it, make sure you have a lot of pieces pre-cut. Spread a layer of plasti-dip into the helmet. Work in sections. Don;t try to coat the whole inside at once. It will skin over before you get to it all. Anyway, Coat a section and lay the chesecloth into it. Dip your brush into the can of "dip" and DAB the brush onto the cheesecloth until it is all embedded. Don't brush it!!! The cloth will stick onto the brush bristles and pull out of the plasti dip. Once everything is done, you can speed up the drying time with a hair dryer on a low setting. Then one more coat and you are good!!
http://www.whitearmor.net/forum/topic/28633-howto-ata-helmet-build-hand-painted-details-pic-heavy/ there are pic of my process here
-
 3
3
-
-
Nice pick up on that rear sight and terrific armor all together. I'd probably throw aneedle and thread together and seal up the open side of your belt to keep it from coming apart. Nice work overall
-
 2
2
-


A sad day for FISD Our dear friend Terrell Reber
in Announcements
Posted
So many sets of his armor in the Legion will be his legacy forever. Every year the Midwest Garrison held a charity auction and Terrell never thought twice to donate the parts for a helmet. A great trooper.....a greater human.