Leaderboard


Popular Content
Showing content with the highest reputation since 04/16/2024 in all areas
-
Troop #11 April 20th was a two-troop day for me! The second troop was at the Indianapolis Symphony Orchestra for Star Wars: The Force Awakens in Concert! We provided the proper atmosphere for the performance by trooping the lobby of the theater before the show and during intermission. Following Legion guidelines, we remained outside the ticketed areas. Many photos were taken, and I should receive those soon, but here's the one photo I have in the mean time: We took part in the Star Wars Indiana tradition of getting photos near the Soldiers & Sailors monument (the theater is right next to it) that Indianapolis is known for. I'll also post that photo when I get it!5 points
-
Troop #10 A favorite troop among many members in Star Wars Indiana is the Republic Airways Plane Pull. This is a charity event put on by Republic Airways to raise money for children's hospitals, and teams that sign up for the event (and raise money) are given their turn to, literally, pull a plane a short distance. The Republic maintenance hangar at the Indianapolis airport was set up for the plane pull itself, as well as included different food vendors, booths and activities with the local professional sports teams, and different aircraft on display. The event started with the mascots of the local sports teams pulling a small, single engine airplane. This was followed up with children directly benefiting from the charity event pulling the small plane! Star Wars Indiana was then given our turn, but we were given the rope to the plane all the other teams would be pulling, which was an Embraer 175 regional commercial airliner. Wikipedia notes the empty weight of an Embraer 175 as 21,890 kg (just above 24 tons). I was surprised that we were able to get the plane moving so quickly and covered the pull distance (15 feet) in such a short time, but we also had 18 of us pulling the plane, and aircraft are supposed to roll pretty easily. Someone was in the cockpit of the plane to apply the brake as soon as we reached the max pull distance, and they certainly weren't playing around with getting the plane stopped! Here's a photo of us pulling the plane! After we had our turn with the plane, we were let loose to roam around the open areas of the hangar and tarmac. I headed with some of our TIE pilots to go in the other commercial aircraft on display. We made sure to verify the credentials of the captain before the TIE pilots examined the controls of the plane. Not being able to negotiate the small space of the cockpit, I decided to make sure the coffee maker was in working order in the event our pilots needed coffee. Our pilots may have had the more exciting job: Plenty of photos were also taken with the smaller aircraft on display on the open areas of the tarmac! TIE pilots and rebel pilots alike had fun taking various cockpit photos, and like usual, the public absolutely loved us!5 points
-
First enhancement, replace the solid resin detonator with an accurate, two piece 3D printed detonator. The model came from here on the FISD forum. It is sooo much lighter than the resin. Painting the tube and the enclosure using the Behr satin black and gloss white:5 points
-
A bit of delay as I was completing the lights for the jetpack, chest and gauntlets (will post some nice pics later, but very satisfied with low cost solution to get screen accurate lighting ). Here is one nasty part that gave me a lot of trouble... the ABS Abs section Probably the most challenging part is going to be the ABS section. The canon pictures are showing flexible armor With only one seam on the right side. On top of being accurate, I really did not want a hard armor, since either will be too large of a fit, or will be very uncomfortable (I can relate with my sith trooper). So I decided early on I would cast the ABS. I designed a mold out of 3D print (+bondo+ filler+ clearcoat to get perfect smooth finish) based on many pictures. 3D models online are not perfectly accurate and of course cannot be made flat. I will have the 3D model available on my Etsy soon for everyone. It had to be printed in 4 sections on my large printer to be approx. 330mm x 1000mm, as I am 5’8’’ /165lbs but I want the ABS mold to be fitting a bit larger/taller troopers if needed. casting material So I did a LOT of research on best suited material (I didn’t want to go to silicone, unless last resort as it cannot be painted ( except with costly stuff) and with the size, would be also costly. I went with Smooth-on Tuff Stuff 15, which is supposed to be designed for cosplay. Ok, that was a learning experience which cost me 4 full bottles, chat with Smooth-on tech guys, frustrations,… I colored it with so-strong pigment white and black to end up with a grey. Just black is not accurate or enough qty. Lessons learned: - Works great if : - You cast it with a room that is 20-23C. Don’t do it in hot or cold environment. The foam WILL collapse - You have to use the proper mold release and don’t be cheap on it, urethane is very sticky - Don’t remove it out of the mold before 24h, even if they say 3h,… it WILL collapse in some areas - Mix it with color in part B only. Mix it with mechanical mixer ( I used Allway HMQHelix paint mixer drll attachment on Amazon) in a high container (from 1$ store- you will throw it away) so that your mixer on your power drill will not inject air into it. Mix it for 1min at full throttle, after the first 30s, poor in new container, otherwise you will have some areas that will not cure. - Once mixed…you have 1min to poor it and level. You’ve got to be fast and accurate as it will expand 4x, not to have thin and way too thick - You have to put a plate with stoppers over it to control thickness uniformity (aim 8-9mm) and have a nice surface finish. - Even with all this, you will end up with marble finish (after several chat with smooth-on staff) , but surface finish will nice and even, so when you apply the paint it will be smooth and nice. I used Tulip grey fabric spray paint ( you can get it at Michael’s if your in US or Canada). Fabric spray paint is the best for this flexible material. It’s scary when you apply it, but when dried it is very uniform. Below are images of the mold open and closed with the cover (showing white stoppers to have 8-9mm thick ABS ( I tried several thickness and this is the optimal for this product). Here is the ABS as demolded. Painted The ideal is to use straps on the ABS to support weight of the belt, cod and holster. I used velcros from brand 'Velcro' heavy duty, white from Amazon) inside and outside to secure the parts to the ABS4 points
-
Troop #47 G-Note Comic Con Bellahouston We attended a small local comic con raising funds for Glasgow Children's Hospital charity today.4 points
-
Troop 49 Niagara Falls , Ontario April 6, 2024 Niagara Falls pre Eclipse Party This was a Star Wars themed pre eclipse party put on by the City of Niagara Falls. We were asked to be there to interact and take photos with guests. Unfortunately the event was not well attended and only 20 to 30 guests came. We still had a great time dancing away in our costumes. Pre event group shot Obligatory elevator selfie There was an odd pole in the middle of the room we used to change. So I had to try it out. Got a bunch of credits for my effort from the FOTK in the back. Had to also grab a photo with my new transport vehicle. They said the barrel ride was completely safe. Not so sure4 points
-
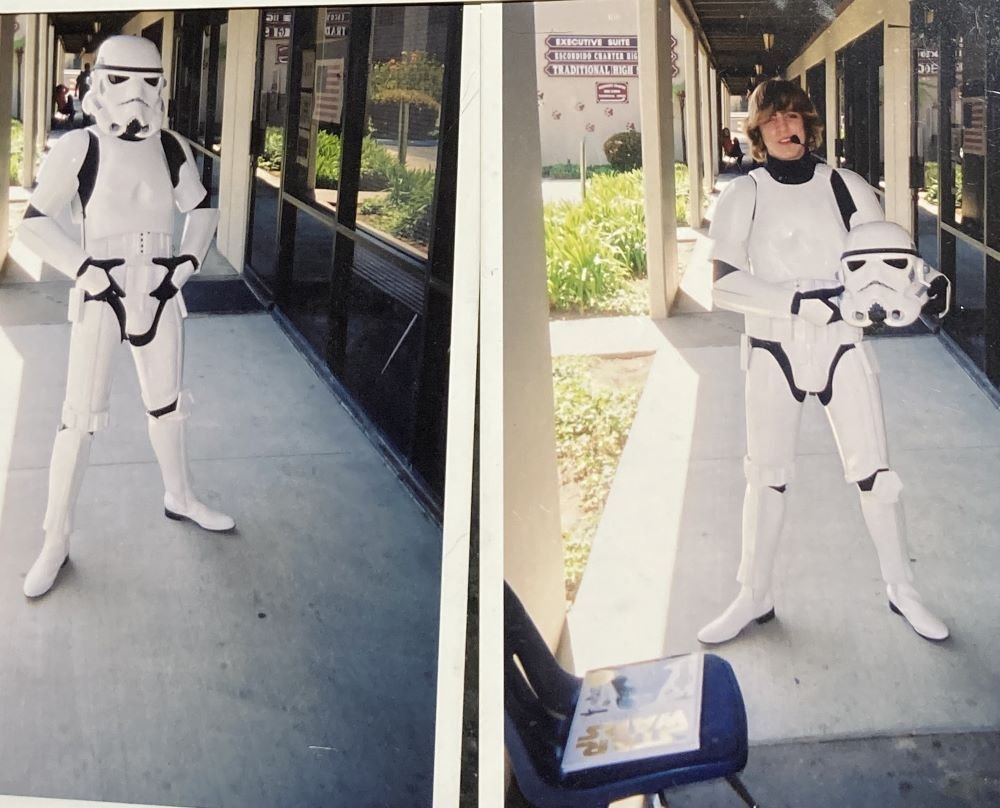
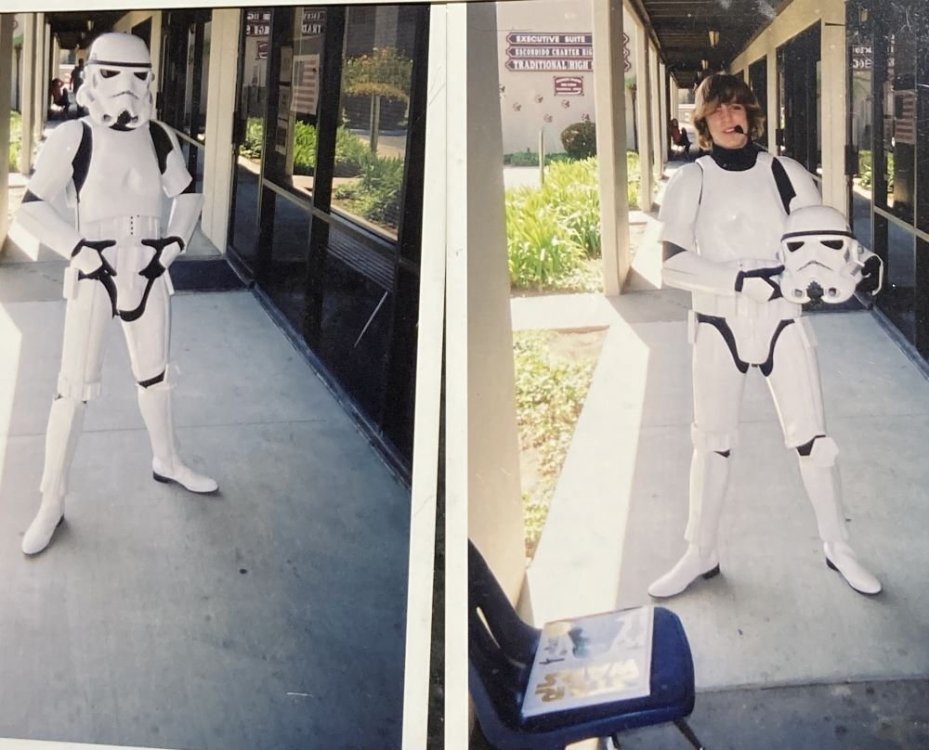
Howdy Folks. I found some photos of myself in high school wearing my MovieFX armor. This had a three peice helmet and was made of HIPS. I saved up three paychecks and sent two money orders to Germany IIRC. That was over twenty years ago and a lot has changed, I no longer have my old armor for one. Recently I found a rotocast of a screen used Move Along helmet in my garage from the same time period, it sparked interest in me to recreate some old props that I miss. Hopefully I can contribute more to the 3D Depositary as in the past two years have successfully self taught CAM/CAD. You can find my ANH Hovi tips and soon I will have some ROTJ tips as well. Have a great day! P.S. I Think I'm going to buy a MovieFX suit again, although I love the TM suit.
 3 points
 -
... Oops, I did it again~3 points
-
Mision 1 22/11/2023 – MADRID – VISITA HOSPITAL UNIVERSITARIO LA PAZ3 points
-
41. 21/04/2024 - TORREJON DE LA CALZADA - MADRID - II DUATLON MENUDOS CORAZONES - Stormtrooper ANH Stunt3 points
-
Lighting of the Armor There are 4 parts that need lighting to be screen accurate: - The jetpack grill - The two gauntlets (2x red lights) - The chest armor (1 red light on right side) The jetpack grill was straight forward as I already had done the red transparent part (see thread above) inside the top grill. I simply put a white light you can find at any hardware store that has a remote and works on 3xAAA batteries. I will last several 10’s of hours before replacement, as with a remote no issue opening the top cover each time to power it or shutdown. For the other parts, I went with easiest way forward for me, which was to use discrete LED. The ones I picked are rectangular 2x5x7mm red LEDs that work with 15-20mA/1.9-2.2V from Amazon. I have put the link belowand hope it will stay there, but these are pretty standard and can be easily replaced by Digikey/Mouser equivalents. https://a.co/d/a1I6r5v I used a small 3xAAA battery pack with rechargeable batteries that generates 4.4V and will also last 10s of hours in the Gauntlet (around 8-10h on the chest), which is perfect for using with the LED (I put 2 diodes in series). I simply added a small resistor adjusted to number of diodes to limit current. (ex: 4ohms for 2 x 2 diodes). For the 4 squares in the gauntlets, I used 4 LEDs (2 x 2 in series), for the larger rectangle, I used 6. As for the large rectangle in the chest, I used 20 (10 sets of 2 diodes in series). I glued them on an aluminum sheet (from dollar store), it helps reflect back the light in the right direction. As those are still discrete LEDs, you have to diffuse their light to have a uniform red glow. I used 2x 0.3mm layers on white PLA sheets I printed, cut and glued in front of the transparent red plastic of the gauntlet/ chest armor. I soldered them and attached them to the gauntlet with white duct tape (so that they can be removed if broken). Took me around 3h to get it done for all the parts, pretty straight forward stuff. Could be nicer looking, but nobody sees it…! N.B. I added aluminum foil on top of the duct tape and secured it with yet another layer of duct tape to block the light... otherwise the armor was glowing from the inside 😊 The first trial zoomed in below ( I realized afterward I forgot to take pictures of the final assemblies), but the concept is there. The soldering was done super quickly on this one 😊 The inside of the gauntlets after assembly Very difficult to take pictures of the light with a phone without over exposing the light/ under exposing the armor (phones hate LEDs), but here is a first pic that show the functional light. The most realistic view is actually from reflection on the floor…! For nicer images, I did use my reflex on the chest with two light settings and take some longer exposure to get the color right, gives a pretty good idea.3 points
-
Whoever says that you're done with working on your armor once you get approved is lying. So here I am, once again! Aside from the usual clean-up and crack repair, it was time for something more unusual: Bleaching my armor Now, if you've taken a look at my troop log, you might have noticed that every since June last year my armor color hasn't quite matched up with that of my fellow troopers. Long, long hours of trooping in the sun can do that to ABS. After a bit of looking around and researching, I stumbled across the fact that you can bleach your armor. Here is a good tutorial. First things first, I got rid of everything that didn't need bleaching or that might make the process more difficult. Just look at this part of my helmet: you can clearly spot which parts were covered by the ears and which had some sun exposure! By taking my helmet apart I could more or less guarantee equal sun exposure during the bleaching process, as well as making sure the screws, the lens foil or the rubber parts wouldn't get bleached by accident. The paint however won't be impacted by the bleach. Similarly, I made sure to remove padding and strapping wherever possible. For bleaching the armor I used this hair bleach. I put a dollop of it onto the cardboard and painted a layer onto my armor. I then wrapped the armor in clingfoil and sealed it as airtight as possible with see-through tape. Remember to only use bleach whilst wearing skin protection and being in a ventilated area -- I forgot the gloves at first and my skin got really itchy and a bit spotty. Once I had everything wrapped up, I put the armor parts out in the sun, making sure to give them the most sun exposure they could get. Originally, I had planned on leaving them there the entire afternoon whilst I relaxed inside, but it was a rather windy day and I instead spent the next two hours playing catch with it in the garden. After those two hours I decided enough was enough -- at this point it was fairly likely that all the tumbling around would mean risking cracks and there were storm clouds coming up anyways -- so I carefully removed the cling wrap and wiped off all the bleach with water. Since I was already dedicating that day towards armor maintenance, I decided to give everything a good clean up as well, getting rid of some of the scuffs with a magic eraser. At a first glance, my armor certainly appears to be less yellow than before. I didn't get around to bleaching the whole armor, but only the more yellowed parts -- shoulders, helmet... anything with sun exposure from the top -- so we'll have to see just how well I will fit in with my fellow TKs at the next troop.3 points
-
What do you mean, it's been almost a month without memes??3 points
-
4/15 preapproval troop (GCO approved) at Randall Children's Hospital, Portland, OR: Wore the costume for about 1.5 hours, walking for most of it. Overall went very well. Learned that I have a few things that need adjusting.3 points
-
*WonderCon 2024 - Anaheim, CA - Sat. 3/30/24 (ID & Lt. Gauge)2 points
-
Troop 3+4 Gold Coast Supanova April 13+142 points
-
Hey all, I'm hoping to document my first order TK build here! This will be my first build, and I will inevitably have a million questions, so I'm hoping I can have some guidance! Here are my current plans: My dream is to make the TFA version of the trooper, as this design is what truly got me invested in stormtroopers years ago when I first saw them walking around Hollywood Studios. The DN kit is obviously intended to be used as a TLJ/TRoS suit, but from what I can tell, it can be made into a TFA kit. So that leads me to my next question, are the only differences between the two versions the helmet, forearms, and cod piece, or are there more? My plan is to order the individual TFA pieces from Imperial Surplus, and make both versions of the suit. Long term, id like to have an approved TFA kit, TLJ/TRoS kit, and Executioner kit. Lofty, but doable I think. As far as the helmets go, I would love to have both of the DN premium helmets, however, im not keen on dropping nearly $1,300 on the two of them. I will certainly get the premium TFA one, however, for TLJ, im going back and forth between the premium and standard line. The premium line helmet is very accurate. The standard line helmet is slightly inaccurate beneath the mouth, using the TFA chin. I thought about converting a black series helmet, as the chin is more accurate, however, I have quite a large head, and worry it won't fit. I have 3D printed 5th Horseman's F11-D, and SE44-C. Geeky Pink seems to be the go-to for gaskets, however, I am looking for rubber ones, as I hope to apply for centurion. I believe there are runs of accurate metal holsters, as well as well defined resin hand plates, both of which I hope to purchase. In addition, I may upgrade to Dino's spats. Any guidance and/or tips are greatly appreciated! I have completed a few ANH TK kits before this, and I'm excited to add this to the roster!2 points
-
Back to MA (memes anonymous) for you, you didn't even manage your 1 month chip.2 points
-
7) April 20th, 2024 - Star Wars (for our UWS Bravo Explorers) (Greenville, SC)2 points
-
Also don't cut into corners, best to drill then cut, the round hole should prevent splitting2 points
-
Doing some forearm trimming on a rainy Sunday. Next step is to get them sized and then move on to the biceps. Sent from my SM-N981U1 using Tapatalk2 points
-
Mision 5 03/04/2024 (MAD) SEMANA DE LA SALUD DE GETAFE2 points
-
Mision 4 [BURGOS][06/04/2024] 40 ANIVERSARIO ASOCIACIÓN AUTISMO BURGOS2 points
-
Mision 3 04/04/2024 - GUADARRAMA (MADRID) - VISITA ADISGUA como colgar fotos en la nube2 points
-
Mision 2 16/12/2023-MÓSTOLES (MAD) - MERCADILLO SOLIDARIO COLEGIO VILLA DE MÓSTOLES2 points
-
Thanks for those reference photos! Due to an interview, hand pain, and getting ready for a vacation, I've not spent much more time on this, but I hope to have a few more hours soon to plug away at this.2 points
-
I like to use a pencil, mark in a few places then lay some masking tape as a guide. Not sure if you have painted or stickers, if it's stickers you can lift with a knife an pull off, if painted you could use some mineral turpentine and buff any residue with some polish2 points
-
It's BBB day!!! Just ordered my boots and the chiffon. Once I get it coated in plastic dip I'm going to start drawing where I want the cracks and different sections.2 points
-
I think you will find that gap will be reduced once worn2 points
-
Completed the new detonator: Install on the spine plate just using a couple of wood screws: Been working on some refinements to my suit-up process. * Put spat on the shin before putting shin on. This puts less stress on the spat than trying to spread it open and putting it on with shin already on leg. * Attach leg gasket to thigh before putting thigh on. This will be much easier than putting the gasket on first, then trying to get the thigh on properly without shifting the position of the gasket. Here is my suit-up process. All steps are done by myself unless otherwise is mentioned: 1. Put under-suit on. 2. Put on neck seal and balaclava. 3. Put shoulder/arm gasket on. 4. Put thigh garter belt on. 5. Put lower torso on. 6. Attach gaskets to thighs, put on thighs, attaching thigh support straps to garter belt. 7. Put spats on shins, put shins on, tucking gaskets inside. 8. Slide up shins, put on boots, slide shin down over boot, position spat. 9. Attach cod piece to butt plate/spine plate. Hang spine plate on back of lower torso. 10. Attach cod to front of torso. 11. Put fabric pouches on belt, put belt on. 12. Attach shoulder bells to upper torso, put on upper torso. 13. Put on biceps. Have helper buckle bicep under shoulder bell. 14. Put on forearm. Have helper attach gasket to inside of forearms. 15. Put on gloves. 16. Put on helmet.2 points
-
Ha! It was bad enough when I started obsessing over the different sabers, let alone this! 🤣2 points
-
Troop 124: 4/16/2024 - Reading Celebration - Camas, WA (291st troop overall)2 points
-
Looking zoomed in to the promo image, the waist band and front panels are defiantly leather. The red border trim matches the trim on the hips. The hip panels do not appear to be leather but harder to tell. The backing behind the 2 front panels looks fabric, something like a raw silk or taffeta maybe. To get that nice clean fold on the back I doubt it would be leather as the drape is worng. I can also see a bit of a point at the front in the promo. So this makes me think it's less of a Kama more of a skirt, with the two front leather "flags", leather wrap and then a padded panel on the hips.2 points
-
Also looking at that promo image we would want to add the ribbed texture to the under suit, either at level 2 or 3. The neck section is black with matching texture, https://i.imgur.com/BxLg18K.png this confirms black to me. The neck seal texture would be a level 2/3 thing for me.2 points
-
TK-54815 requesting 25th Troop https://www.whitearmor.net/forum/topic/51226-25-tk-54815-troop-log2 points
-
Thank you so much for the information! I've made contact and put it the request with the 501st! Thanks again!!2 points
-
Approved!!2 points
-
It's much easier to add reference with the text rather than going off forum looking for a specific image, makes it easy to follow. It's also good for later when referring back to the CRL creation and updating when new reference material comes around.2 points
-
The new home for Captain Enoch as seen in the Disney+ series Ahsoka This thread is for the creation of the CRL for this costume, please keep all discussion relevant to the main goal. As this armour has similarities with elements from the Night troopers we will be able to reuse some of the work down there: https://www.whitearmor.net/forum/topic/53884-welcome-to-the-night-trooper-resource-thread-for-crl-creation/1 point
-
So I started to watch the 850 AW build videos to get an idea of how different this build will be from an OTTK and I discovered that I'm missing some pieces. First off, I'm missing the TD mounting block (cheers to @gmrhodes13 for providing me a few 3d printed options to try). And secondly, I seem to be missing the 37" ABS strip for the belt. So it is time to source a few parts. I'm hoping to at least start building arms and legs this weekend as they seem pretty much the same accept the build video showed it done as overlapping joints instead of butt joints. So I'll need to check some other build threads and the Crl to verify some build techniques. Sent from my SM-N981U1 using Tapatalk1 point
-
Congratulations trooper, well deserved and welcome to the FOTK ranks1 point
-
Huge congrats dude! Looking awesome1 point
-
Congratulations on joining the First Order!1 point
-
Hey Jeff - I'm a fan of lexan shears for rough cutting (but it helps to have a couple different types/shapes of scissor because you will absolutely get blisters or hand cramps), then I smooth out my cuts with a belt sander and one of these big flappy wheels on a Dremel/rotary tool, and finish with emory boards for a smooth, pinch/bite-free, slightly-rounded edge. Links for inspiration, but shop around. Luckily on Anovos kits, the cut lines on the inside edge of the armor are easy and like 90% accurate if you're a standard sized trooper, so I usually mark them with a pencil, rough cut, then sneak up on my line with sanding. I only use a utility knife (AND A CUT GLOVE) and a metal ruler (with some magnets) to cut my coverstrips in straight lines really, which isn't needed for this kit (unless you make inner cover strips, which you should!). I know some people score-n-snap, but I haven't found many places on the armor that it's super practical/safe for me to do. Oh and wear a respirator. Hope that helps!1 point
-
I think the trousers are burgundy like the top, this image shows it If the gloves are the same as the rouge one, should there be decorative stiching at the index finger for like Level 2 or 3? Also the hand grips of the blaster seems to be gold as well.1 point
-
Added General Construction Notes, which covers some general things like no 3d print lines, damage and weathering must match the references.1 point
-
So close to 20 now Angie! How's the armor holding up? No nasty cracks or anything?1 point
-
Don't forget to update total troops in the title of the first thread, makes tracking easier Troop log title examples:1 point
-
Congratulations on your 1st troop Angie1 point
-
Congrats on number one! Looking forward to seeing some pictures! Bart1 point