Leaderboard


Popular Content
Showing content with the highest reputation on 06/22/2019 in all areas
-
Success!4 points
-
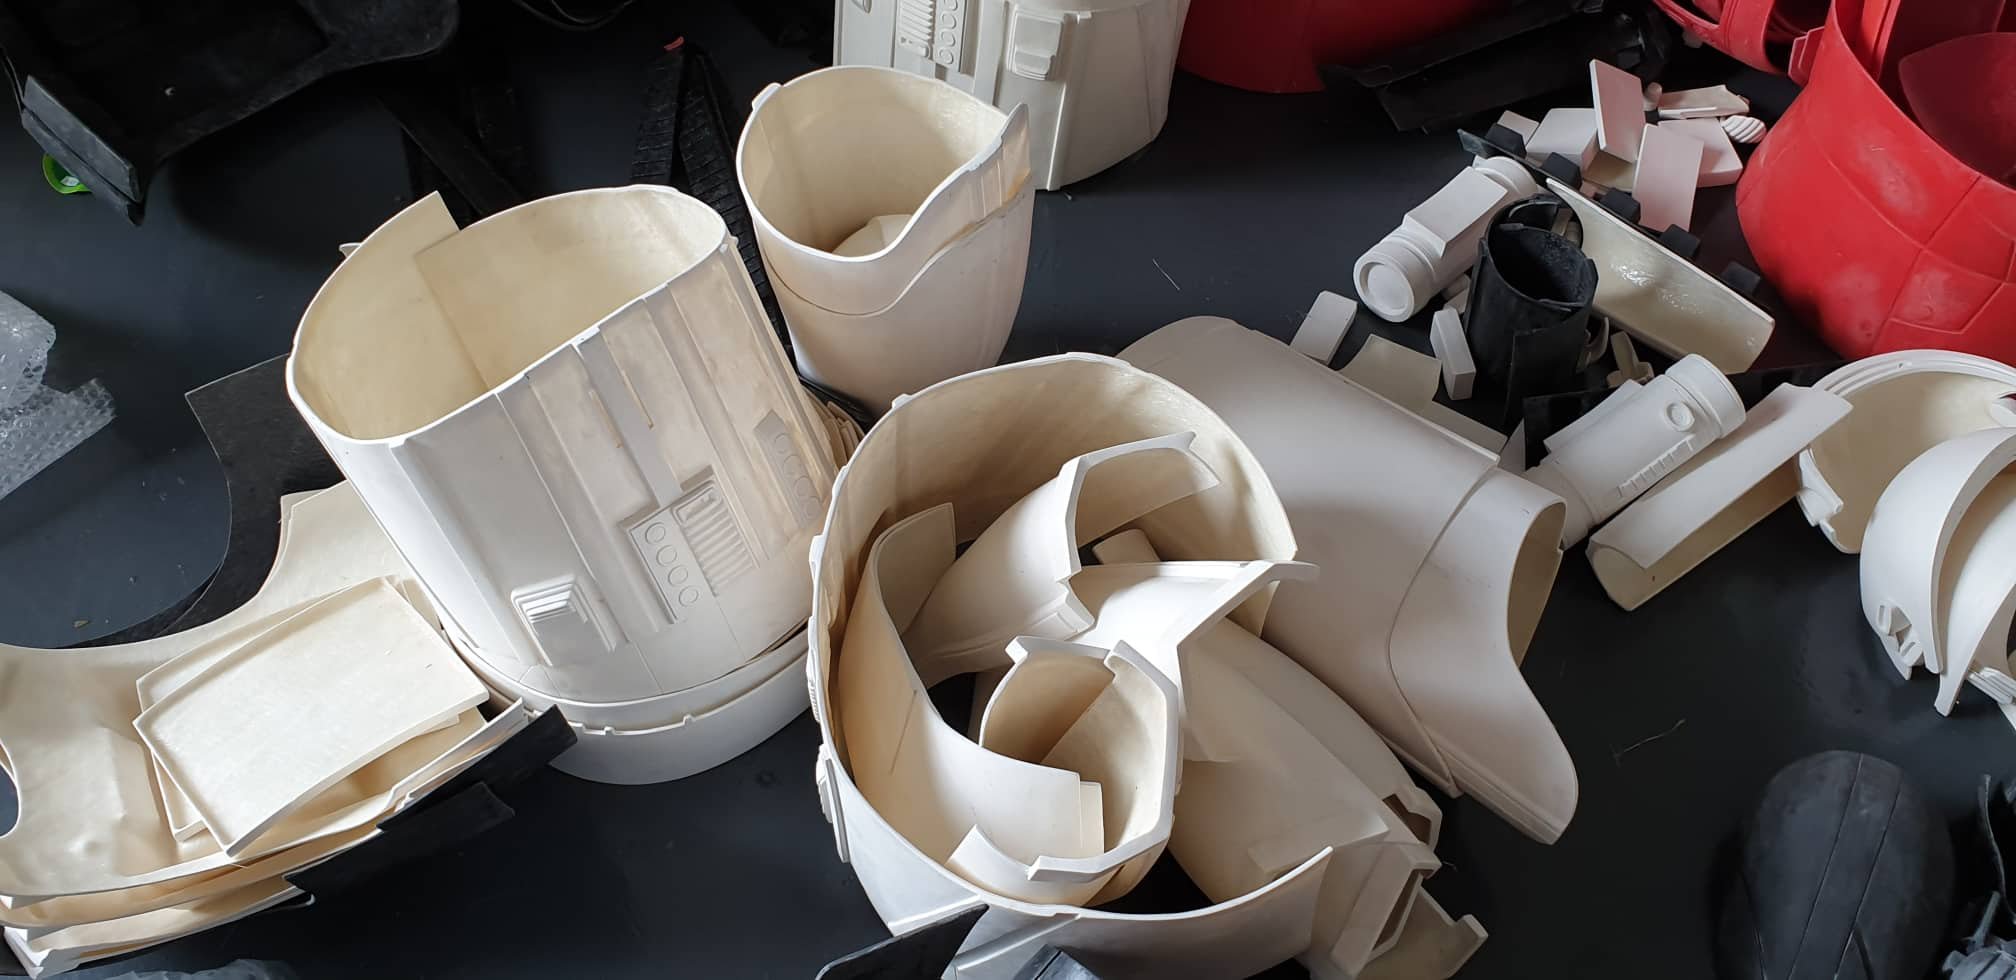
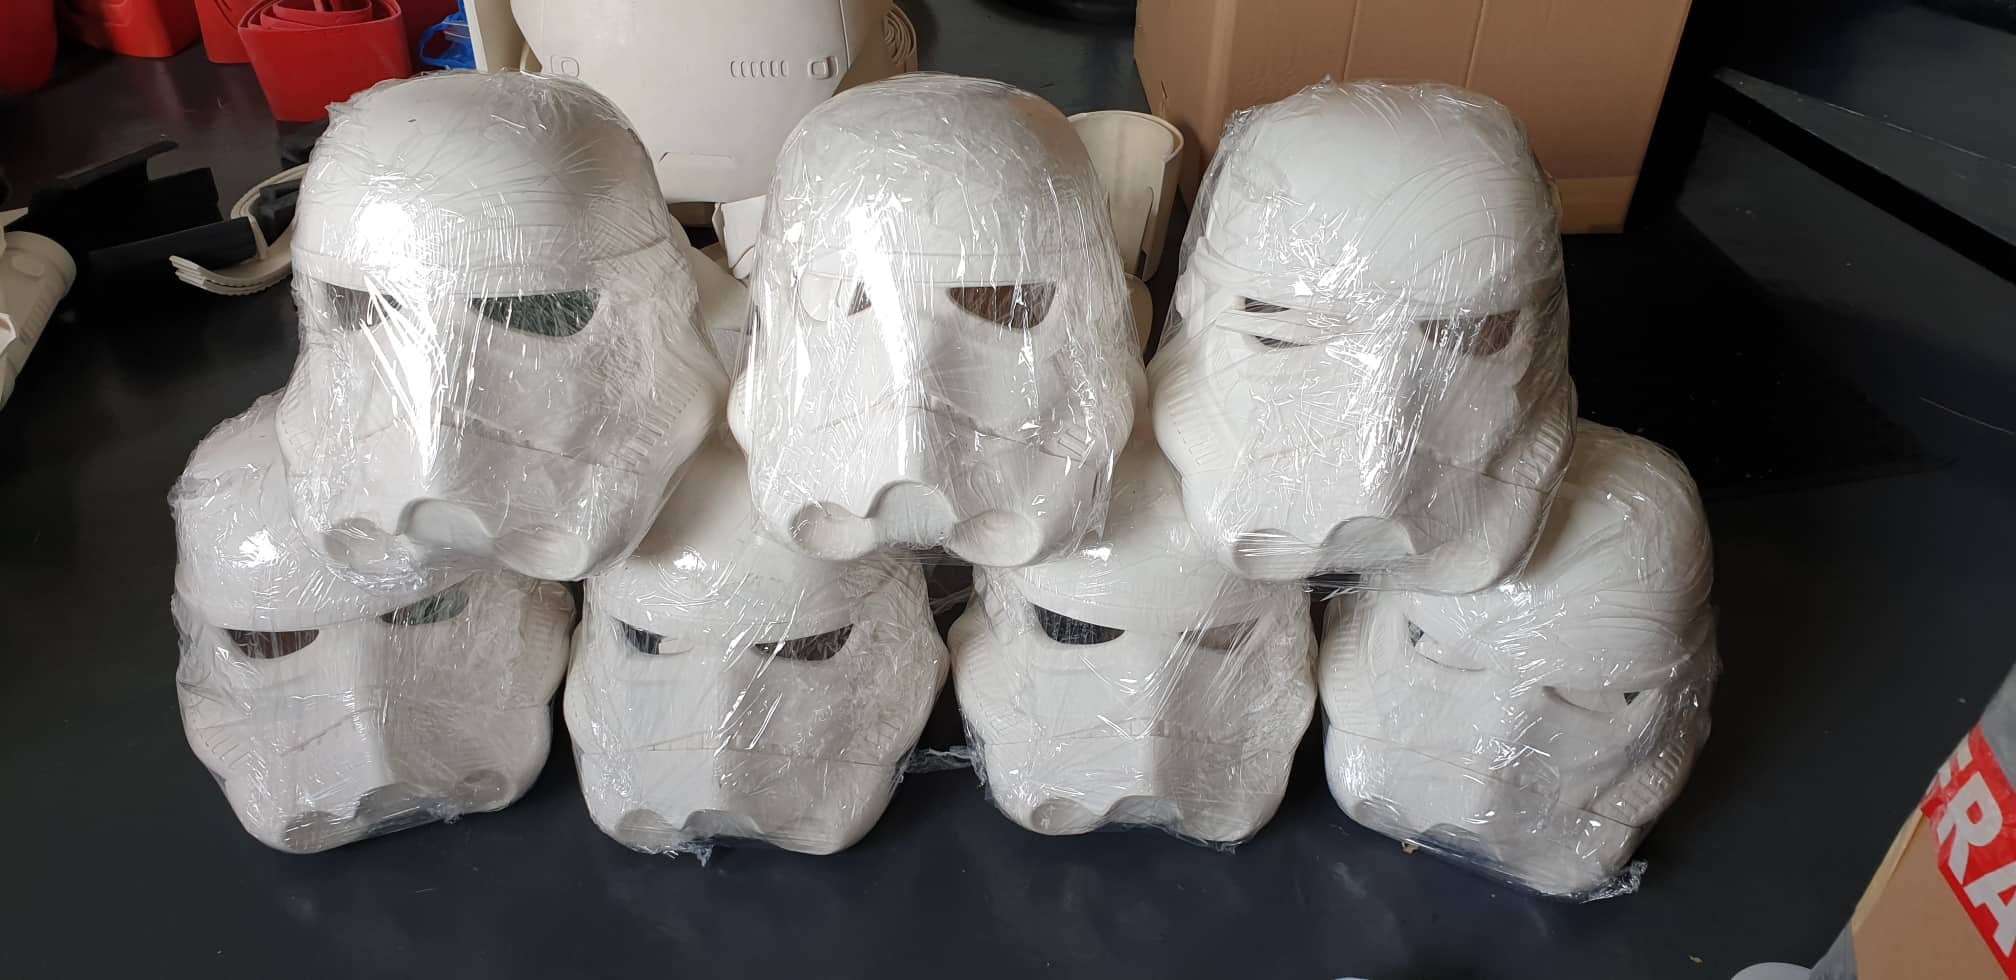
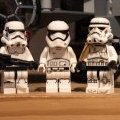
Hey party people, Justin "TheRascalKing" R. here. My Anovos ANH-S TK is starting to show some wear and tear after 3 years of trooping in it pretty frequently, and I've decided that it's finally time to start moving towards retiring it. That being said, I'm a stormtrooper through and through (Centurion #396, TK Mentor for SCG, working towards Armorer), so I knew I had to replace it with something else white and shiny. After some research, (at time of writing) it looks like Jim Tripon ("Jimmiroquai") from the Philippines' kit is the only high quality one currently available (aware of 850AW soon at least). But I liked the idea of flexible fiberglass and I was very impressed with some of his Praetorian Guard suits that SCG members have. Plus, it looked most similar to the material used for the suits I saw on set (recycled from R1 and Solo). I already knew shipping from the Philippines was expensive and group buys were the way to go, so I started reaching out to others in my Garrison to see if we could get something going. Turns out another member was already starting to do the same and we were able to get together a group buy of at least 7 suits! Parts are starting to come off the line and Jim has been great to work with. I'll post back with more when BBB day comes, but I thought I'd start a thread and get things going. I'll do my best to document our build, as there isn't much out there on these suits yet. We have some experienced builders and we plan to loop in some master Clone builders as well, as this almost has more in common with a Clone or FO build in many ways. Teamwork makes the dream work. Planning on getting Jim's undersuit and having it tailored if needbe, and having a friend who has his own paint business spray the kit for me (he mostly does motorcycles, but has sprayed helmets in the past for me and does top notch work). Boots from Imperial Boots, gloves from Endor Finders. Excited to get started and I'll post more soon! Thanks for the interest and keep checking back!

 3 points
 -
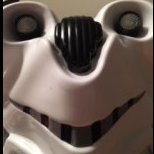
So I took the face/cap back apart. I filled in the holes with some ABS paste and added some small pieces of ABS sheeting behind the repairs to make things a little more structurally sound in there. Reattached things so the tubes were more in line with each other. Then got to work on trimming the fronts of the ears down. Much better now, methinks! Befores and afters: I also removed some extra material from around the eyes. I have the most difficult time seeing exactly how much to remove off of them. I stare at the screen refs, and I still don't see it as well as I'd like to. Seems okay to me? ¯\_(ツ)_/¯ Thanks again to Paul for the suggestions for the ear fix!3 points
-
Hello my TK brothers and sisters, after I completted my two classic TK builds ESB TK / ANH Hero TK is now a new and larger project born. My friend TI-20190 (Ratte) and I started a few weeks ago with our First Oder Executioner of The Last Jedi. Pics coming soon2 points
-
Hey guys and gals, My name is Shawn and I am brand new to this world. I have dabbled a bit in 3d printing some SW blasters and helmets to make masters of and then cast but never really pursued it further. This go around I decided to fully commit and build a complete armor set, and I have learned a ton so far and have even more left to learn. I wanted to share some of my progress, I know there are big gaps in the pictures as I didn't intend to create a tutorial/guide when I started, but I think some people may benefit from what my life and work experiences bring to the build. I run a small automotive/marine detailing company in southern Alabama ( but I am originally from the Boston area), went to school for CAD (mechanical/architectural) and an avid hobbyist in multiple fields ( electronics, model making, music) Everything trimmed out2 points
-
I thought I was being clever by making test pieces of silicone from a tube that said "100% silicone", and CA worked great. The handguards that Mark makes is probably a higher quality 2 part that needs different glue. It definitely feels softer and more flexible than regular silicone out of a tube. I'll cut a piece of rubber from my test gloves and try gluing it to handguards before I go all in.2 points
-
Updated pack. Added some light weathering and removed the blaster mount. I’m 3d printing a DLT-20 and I have the files for a -19 that I’m doing next for my BFG. I have 2 homemade ammo pouches and one cheap but serviceable one from amazon (costumebase, I think) that I’m going to use until I can save more money for another sheet of leather. Thanks for all of your feedback! Sent from my iPhone using Tapatalk1 point
-
Was kind of a well kept secret I didn’t find an answer here. A lot of people mentioned the curved bell but didn’t find an explanation how to get there. And if there’s one thing I learned while building: uncomfortable is normal, pokey is to avoid1 point
-
That you know what to strive for and don´t need more input on it from me Use the reference I provided and eye-balling it. Or...print it out to scale and use it as a stencil - do check that you don´t trim to much though.1 point
-
In that case - carry on Trooper1 point
-
Hi Pam Just a friendly reminder that the TD was only a suggested fix1 point
-
Ok, perfect. Thank you. Will post updated pics shortly Sent from my iPhone using Tapatalk1 point
-
Lol, it's all good, just a slight difference of opinion. Like many here we're just passionate about armor , Paul's focus on the elbow gap is correct and I don't dispute that, my concern was the overall length of your arms and armor placement. Again, coming from someone who has long arms if my armor was built to his specs my forearm armor would be at the middle of my forearm. So, placement is relevant so it doesn't look odd. That said, dropping the biceps as low as they can go without popping out the bottom of the bells and minimizing the gap between biceps and forearms is key. If for some reason you find yourself with unusual amount of space between the forearms and hand guards I suggest consulting one of the DOs here as well your garrison's GML for advice as those will be the folks ultimately approving your armor. Keep up the great work1 point
-
Thanks you guys! The knee has given me grief for the past week, lol. I am ready to move on to the next thing to fix. The thermal detonator! Hopefully this won't be so tough! Sent from my SM-G955U using Tapatalk1 point
-
I always understood it meant the lower corner of the return edge. And that's how I approved applicants. Yes the top section needed to be trimmed a certain way but it wasn't the main focus.1 point
-
The CRL need to be rewritten. The original knee plates didn't follow the tops of the shins exactly and it's asking a lot to do so. I think you should just get them on as neat as possible, regardless if they slope one way or the other, they should just look neat. I remember one of my guys cutting his shin plate because it was mentioned his knee plate didn't follow the shin. It was an extreme measure but that's the lengths some people will go to in order to fit in. I think Pam's knee plate looks spot on now1 point
-
Looks good Pam1 point
-
Awesome job1 point
-
Nice job, Andrew! Easy pass. See you at EIB.1 point
-
Looks amazing, great job. Sent from my SM-G960F using Tapatalk1 point
-
I think I'm done! Maybe a few tweaks to do, but I'm pretty happy with the way it turned out.1 point
-
Suitcase and Helmet bag for me1 point
-
The only positive is that they are shipping orders, still, I have only heard of a few that have received their FOTK kits. Let’s hope this trend is on an upward trajectory. Sent from my iPhone using Tapatalk1 point
-
I'd guess it's the same stuff. I gave it a try and it works! I left a little edge on my test patch unglued so I could try to peel it off and it just tore the rubber.1 point
-
This was suggested to me from a Japan Garrison member.1 point
-
Different make handguards I've found need different glues to adhere to the rubber so it's a bit of trial and error, I've used super glue, E6000, contact cement and also silicon. A test patch is the best idea to find the best adhesion.1 point
-
Hi Pam, As I can see, is that the rigth side is aligne with the ridges of the shin as it was requested in your EIB submission, but the left one I think seems a little low. I'm not sure about the inner part, and if it's going to be an issue. Hope some else could give some advice. Looking at you EIB submission I note that you made the sniper knee correction. It was ok there. Cheers1 point
-
I ended up picking one of these up during the cast preview and of course couldn't post about it during the NDA window There's also a small compartment for sticking a passport-sized photo1 point
-
I don't have the capabilities to myself, but if I could find someone that could do the printing/etching part (and figure out how to replace the plastic without breaking the electronics board), I'd be totally up for it...1 point
-
You may like to read this thread1 point
-
My first trial fit with my nearly completed armour. I need to paint the helmet screws, tighten the sides a biit, attach the straps between the biceps and forarems and put the hand plates on the gloves. I'm wearing Nomex gloves in these pics, but I will be making a rubber pair as well. I can see that the camera should be lower, the left forearm is sliding down and the neck "bib" should be under the shirt. Anything else that should be changed? My spine/neck isn't totally straight, (mild scoliosis) so I hope I'll be able to stand straight enough to get better pics when submitting.1 point
-
You're welcome Another trick you can do if you still have trouble with gaps on the lower 'tail' of the ear caps is to remove the lower rivet or screw holding the helmet together and push the tubes into place, then drill a new hole through the ear cap and tighten it up. This will bring everything together. This is why I always temporarily screw the helmet together when I build one rather than rivet straight away, so I can make any adjustments if necessary then rivet when I am happy with everything.1 point
-
Well done, Lindsey. Welcome to EI. :-)1 point
-
Congratulations on making EIB!1 point
-
You are a brave man indeed but wow that's effective. Who'd have thought? Weathering your armor by actually weathering it!1 point