
All Activity
- Past hour
-

TK ANH Stunt by CloseTheBlastDoor
shashachu replied to CloseTheBlastDoor's topic in ANH Build Threads
Here's a photo of my shoulder straps as well https://photos.app.goo.gl/oNr1ozuqGPA2nwbw6 -
TK ANH Stunt by CloseTheBlastDoor
shashachu replied to CloseTheBlastDoor's topic in ANH Build Threads
Really great progress on this build! I looked back at my build photos and I have about the same amount of overlap on the front, but I did not cut off the big tabs on the back. Yours look a bit short if I'm being honest but it depends a lot on how far apart the chest and back are, which depends on how they fit on you. I'd personally leave the shoulder bridges for now and instead work on getting the strapping between chest and back dialed in before deciding exactly where you'd like the shoulder bridges to sit. They're just decorative so they can be left until much later in your build. https://photos.app.goo.gl/oGxcS2ANssQ5kWcA6 -
Congratulations !!!
-
 To me its not a full rear skirt. Picture below! It shows clear that both panels are seperate, and that the left panel is abouve the right Second pics shows for me that it really could be an extra panel above the two big rear panels. There is a clear line where the arrows are
 - Today
-
Cadet 3040 here, What parts of the armor should you use rivets and what parts do you use the snaps? What are the parts that you should be glued only? Just trying to get an overall idea of what goes where. Thanks.
-
Congratulations!!!
-

Jefoid's RS ANH Hero Stormtrooper Centurion Build. First timer.
JeffD replied to jefoid's topic in ANH Build Threads
Thanks for reaching out to me Gerald! I appreciate being encouraged. -
 TerribleBen changed their profile photo
 -
Welcome Laura!!🫡 Nice to have you here!!
-
 SirNukeBoy joined the community
 -
 Ha! It was bad enough when I started obsessing over the different sabers, let alone this! 🤣
 -

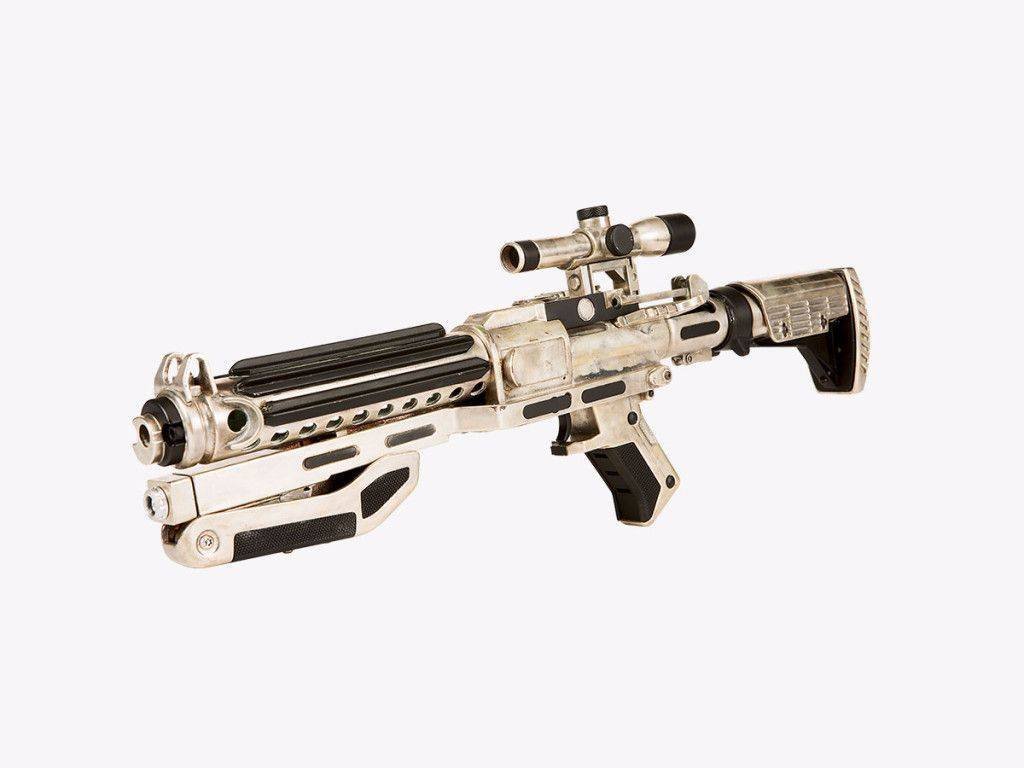
Solid resin E-11, reportedly from the UK about 10 years ago
gmrhodes13 replied to Peter Hamilton's topic in ANH BlasTech E11
Our Blastech section is full of different version E-11's and info https://www.whitearmor.net/forum/forum/116-blastech-e11/, down the rabbit hole you go -
[snip] ...Heh. I actually spend last weekend watching ANH frame-by-frame looking at any scenes that had E-11s, so you certainly see how different the screen-used ones are. For me personally, it just looks more complete with the counter and the cylinders, but given the variations, there's certainly not single 'right way'. Thanks for that. Heck, even googling RS Props and resin E-11 has helped. I've now seen pics of the "Pugman" which wasn't a term I was familiar with, so I'm sure all the details will come into view. I've emailed the seller as well in case they knew more about it. But as I say, I suddenly became concerned today about the risk of ruining something by modifying it. I mean, sure, it's mine, and I can do with it what I want, but just want to check these things first.
-
Solid resin E-11, reportedly from the UK about 10 years ago
gmrhodes13 replied to Peter Hamilton's topic in ANH BlasTech E11
Hello and welcome. Setup for ANH Luke or an ESB as both versions have no hengstler or cylinders May have come from RS props and SDS have ESB version resin blasters I'll let the UK lads chime in with it's possible origin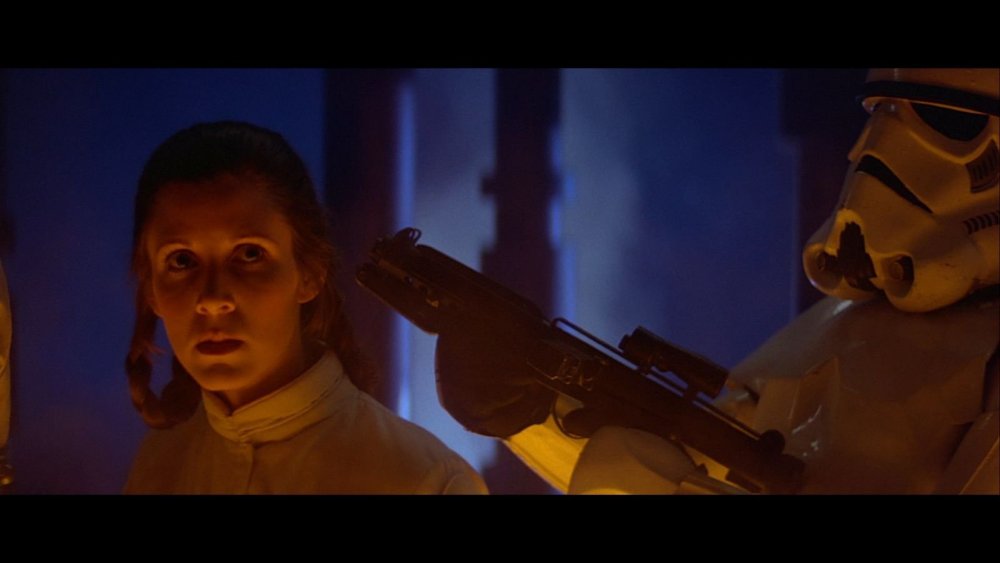
-
Hi all. First post, so please be gentle. I'm a long-time collector, and joining the 501st has been on and off (and on and off) the to-do list. None of my existing stuff would make certification (For example, my Vader still has a lot of Rubies stuff in it), except for my TK which I'm working on. Well...Working on as in it's in a box in the garage while life has higher priorities at the moment. Now I'm in New Zealand, so things can be harder to come by, or have some pretty hefty freight sometimes. An E-11 has been on my to-get list for a while. I have a kit I'm looking at putting together, or having done professionally, as I worry about not doing it justice myself. But I recently had a solid cast resin (Not 3D printed resin) E-11 come up on our version of eBay, so I snagged it. This blaster lacks the Hengstler counter and metalmite capacitors/power cylinders, and so I printed some up with the intention of adding them, and suddenly I thought, "Hold up. What if this item has some history behind it, and you're about the damage that history by modifying the item?". So before I went down that road, I wanted to ask if anyone is aware of who might have been making solid resin E-11s like this one in the UK, 10+ years ago. Thanks in advance, Peter

-
Peter Hamilton joined the community
- Yesterday
-
 I take back what I just said, that will teach me to post from memory. Thats the front. You can see the front point I mentioned, with a border to give it a clean finished appearance. Looking now with it fresh what I notice is I can see the thigh armour. If it was a full wrap of skirt you wouldn't be able to. And I think I can just make out the ribbing in the under suit so it's not caught behind. As for the rear I've tried to highlight the edge in red, and the pleats in blue. I cannot see a split that would indicate an overlap. What I can see is one continuous edge, where the pleats have come open at the bottom edge. It also all stops at the hip, so not a skirt. Seems I was seeing things that where not there last night. This would mean we end up at something like this: Rear half skirt, hip to hip, 2 pleats to form a centre panel in the back. Ends mid knee. Width of that section is 50-55%% of the width of the raised section on the back plate. Front tabard with a pointed tip, measured at 110º, ends mid thigh. Trim in matching fabric to the body of the tabard. 2 leather "flags" with red trim. That red trim is brighter that the rear half skirt. 2 hip pads with vertical diamond quilting , same red trim as the front flags. Could be leather like the front, could also be the same material as the half skirt. The promo image makes it look like it could even be a 3rd material as the colour and how reflective it is doesn't match the leather its next to, the trim around it or the tabard material next to it. I don't think thats down to lighting. I would say the half skirt and the tabard are the same material.
 -
-
I appreciate you and the FISD being patient and not giving up on helping me!👍
-
So you say its pleated above and is not an extra piece at the rear?
-
Great to hear you have worked it out
-
The first image to me shows clearly that section is not separate. And looking again today I think it also shows that the bottom edge continues past the end of the right “edge” which to me says pleat, which when combined with the front view, sorry forgot to post that last night and my wife is on the computer, which shows the same fabric around the front. At this point in am convinced the bottom layer is a full skirt, with the rear detail formed by 2 pleats. Then the rest is all layered over this. This is all cobblers, ignore it.
-
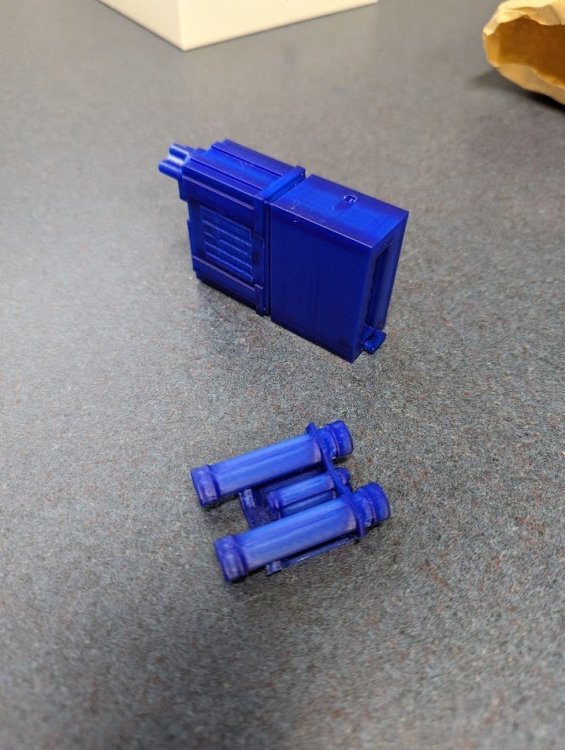
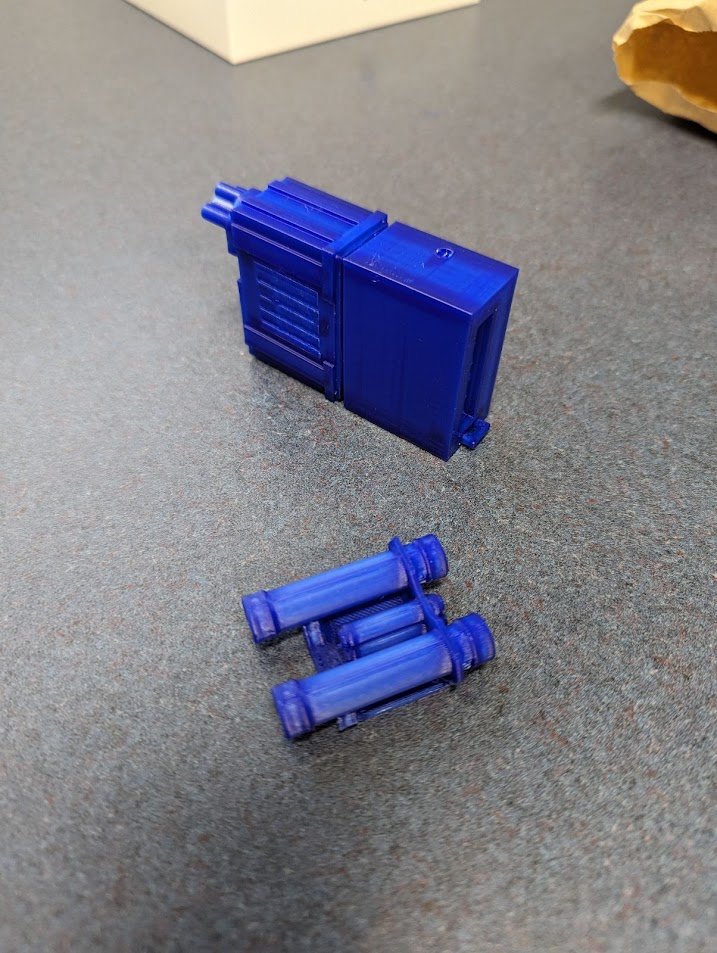
First enhancement, replace the solid resin detonator with an accurate, two piece 3D printed detonator. The model came from here on the FISD forum. It is sooo much lighter than the resin. Painting the tube and the enclosure using the Behr satin black and gloss white:
-
When i started my kama reseach, i thought it is a third panel too.SInce it appears to be very floaty in the show. Looking at the second picture, i could be a panel layed on top of the two big ones, with border on both sides (border in the same color as the panel itself). Is it possible to get a direction this regarding soon? Since my friend who makes the kama for me is nearly this point
-
So, a bunch of photos: First, the blaster. Definitely bigger than i thought^^ Second, the chest and backplate, assembled with tape Third, me holding the chest as a size reference, yes i need to adjust the abs-plate Then my figurine with the helm, chest/back and the abs-plate There is some evidence in the show, that the top of his abs-plate is visible under the chest/back. If not allowed, i have to cut the abs-plate
-
Glen, I think i just figured out the jpeg problem i was having. I needed to first drop the URL into my thread, then re-open the image in imgur. Then re-post it back to my thread as a jpeg.
-
-
Bart, I'm in the process of trying something with my imgur jpeg image. At At walker https://imgur.com/gallery/TESdgLN


-
Who's Online (See full list)
- Sithping[TK]
- OddjobBond007[TK]
- JCoscu[TK]
- Tilheyra[TK]
- jsilvius[Staff]
- matthew_green88[TK]
- Dark PWF[Staff]
- Hoda[Staff]
- PiettLives[TK]
- Veist[501st]
- FUZZMA[TK]
- TKSpartan[Staff]
- rocoflyer[TK]
- Sea_Marshall[TK]
- Locitus[Admin]
- Colin1138[TK]
- Coil[TK]
- shashachu[TK]
- revlimiter[Staff]
- Roaster[TK]
- elwessbrandon[TK]
- Nairy[Staff]
- MissSteelworker
- TD369
- Coolajxl[TK]
-
Albums
-
Captain Enoch (Ahsoka)
- By themaninthesuitcase,
- 0
- 0
- 2
-
Promo pictures & others
- By Locitus,
- 0
- 35
-
.jpg.da3b75dcced28b94590e16b06907ce49.jpg.d3465bdfa251d57f1217de22fbf5842f.jpg)
Publicity Blaster - Nambu Type 99 LMG
- By gmrhodes13,
- 0
- 0
- 4
-

TFA F-11D Blasters
- By gmrhodes13,
- 0
- 0
- 13
-
Captain Phasma TFA References
- By gmrhodes13,
- 0
- 0
- 59
-