
All Activity
- Past hour
-

[5]TK-23072 Troop Log (Social Media Consent)
budu1 replied to budu1's topic in Field Training Exercises
Mision 5 03/04/2024 (MAD) SEMANA DE LA SALUD DE GETAFE -
[5]TK-23072 Troop Log (Social Media Consent)
budu1 replied to budu1's topic in Field Training Exercises
Mision 4 [BURGOS][06/04/2024] 40 ANIVERSARIO ASOCIACIÓN AUTISMO BURGOS -
[5]TK-23072 Troop Log (Social Media Consent)
budu1 replied to budu1's topic in Field Training Exercises
Mision 3 04/04/2024 - GUADARRAMA (MADRID) - VISITA ADISGUA como colgar fotos en la nube -
[5]TK-23072 Troop Log (Social Media Consent)
budu1 replied to budu1's topic in Field Training Exercises
Mision 2 16/12/2023-MÓSTOLES (MAD) - MERCADILLO SOLIDARIO COLEGIO VILLA DE MÓSTOLES -
Mision 1 22/11/2023 – MADRID – VISITA HOSPITAL UNIVERSITARIO LA PAZ
-
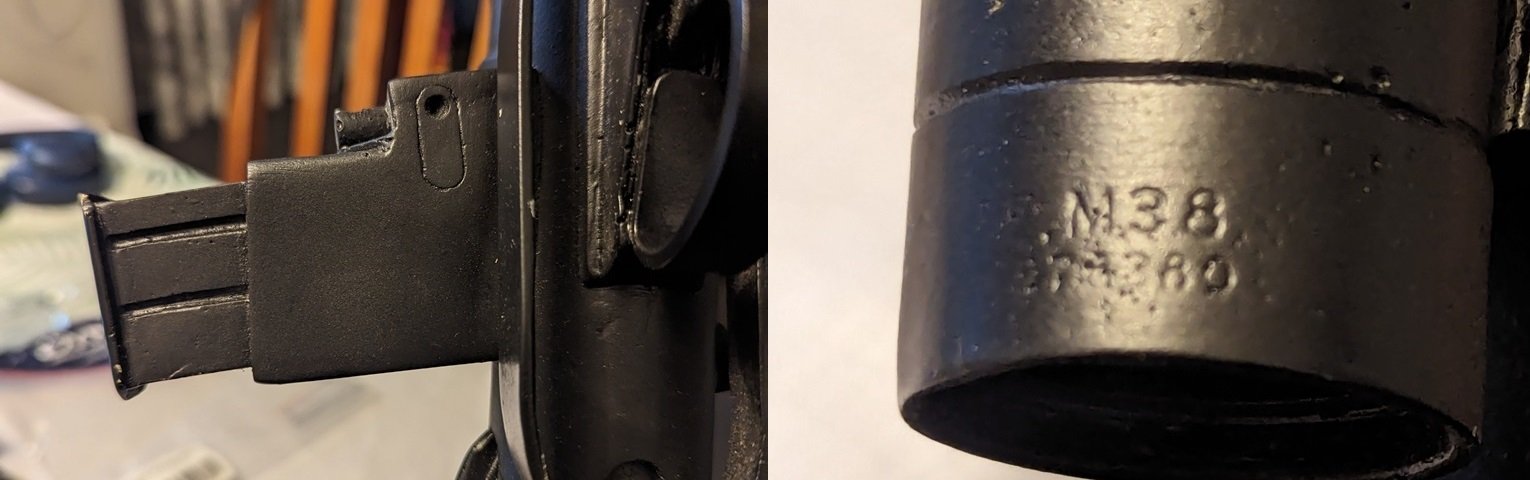
 Thanks themaninthesuitcase. There is no visible serial number on the sterling itself, so perhaps that helps in itself. The last few numbers in the M38's serial number are hard to make out, but looks like "...380".
- Today
-
LOL! That's the best!
-

CommanderMeiloorun's Night Trooper (Ezra) Build
Sly11 replied to CommanderMeiloorun's topic in Night Trooper Build Threads
-

TK ANH Stunt by CloseTheBlastDoor
CloseTheBlastDoor replied to CloseTheBlastDoor's topic in ANH Build Threads
Thanks for those reference photos! Due to an interview, hand pain, and getting ready for a vacation, I've not spent much more time on this, but I hope to have a few more hours soon to plug away at this. -
TK ANH Stunt by CloseTheBlastDoor
CloseTheBlastDoor replied to CloseTheBlastDoor's topic in ANH Build Threads
Thank you for the advice, ShaSha! I agree that getting the strapping done is the next logical step. I did already trim the large tabs from the backs of the straps, so we'll see! -
 I like to use a pencil, mark in a few places then lay some masking tape as a guide. Not sure if you have painted or stickers, if it's stickers you can lift with a knife an pull off, if painted you could use some mineral turpentine and buff any residue with some polish
 -

TK-13239 Requesting ANH Stunt EIB Status (AM) (1071)
Sawanator replied to Sawanator's topic in Request Expert Infantry Status
For the Tube strips, are there any tricks to getting that lined up properly? It's one of the last things I have to do Also, to take the old ones off, is it just elbow grease? -
If you haven't figured it out, Glen Is the G.O.A.T when it comes to anything Storm Trooper
- Yesterday
-
Oh happy days
-
 It's BBB day!!! Just ordered my boots and the chiffon. Once I get it coated in plastic dip I'm going to start drawing where I want the cracks and different sections.
 -
Thank you so much! I appreciate your help!
-
https://i.imgur.com/wTB23Ow.jpeg
-
Should do the trick. If you have any issues with the posts not squashing enough and locking (I had a really bad batch once) I came up with a work around
-
I just got my punch set for my snaps. Punch set https://imgur.com/gallery/GuYC9qm
-
Welcome to FISD Laura!
-

New trooper from Spain
themaninthesuitcase replied to lauratrooper's topic in New Member Introductions
Welcome to FISD. -
I don't recognise it, but it looks like it's based on a cast of a real sterling so maybe you can use the serial number to help you. I don't think it's a Doopy Doo, but it could be I suppose. If so then the Sterling serial is S 21227, the scope serial is 110332.
-
Rough guide on strapping and placement, some use double snaps in case one fails. Chest to backplate A couple of threads for you interest Snap upper right corner \ Snaps posterior plate Rivets For Level 3, three domed head bifurcated (split) rivets approximately 5/16" (8mm) in diameter are present on the left side of the abdomen and kidney and are equally spaced along the depth of the armor and are painted white. Note that the measurements are from the center of the rivet. Rivets on both kidney and ab should line up horizontally. Interior pic showing split (bifurcated) rivets For Level 3, a single split rivet is present on the lower tab of the abdomen armor (cod) This can have a brass or chrome finish, but cannot be painted. For Level 2, The thigh ammo belt is attached with one solid head rivet on each side, painted white, and located in the upper corner fastened to the lower thigh ridge. Rivets shall be cap or split style rivets. No pop rivets are allowed. Rivets should be approximately 5/16ths (8mm) in diameter (exterior).
-
TK ANH Stunt by CloseTheBlastDoor
gmrhodes13 replied to CloseTheBlastDoor's topic in ANH Build Threads
I think you will find that gap will be reduced once worn -
First order accessory...what is it?
gmrhodes13 replied to Andrewdaandroid's topic in Gallery & Research
Vest also seen in this cut scene with red pauldron and shoulder pouch Quite a few vests Some miss the riot troopers in that scene Oh and there's the odd black shoulder bell


-
Albums
-
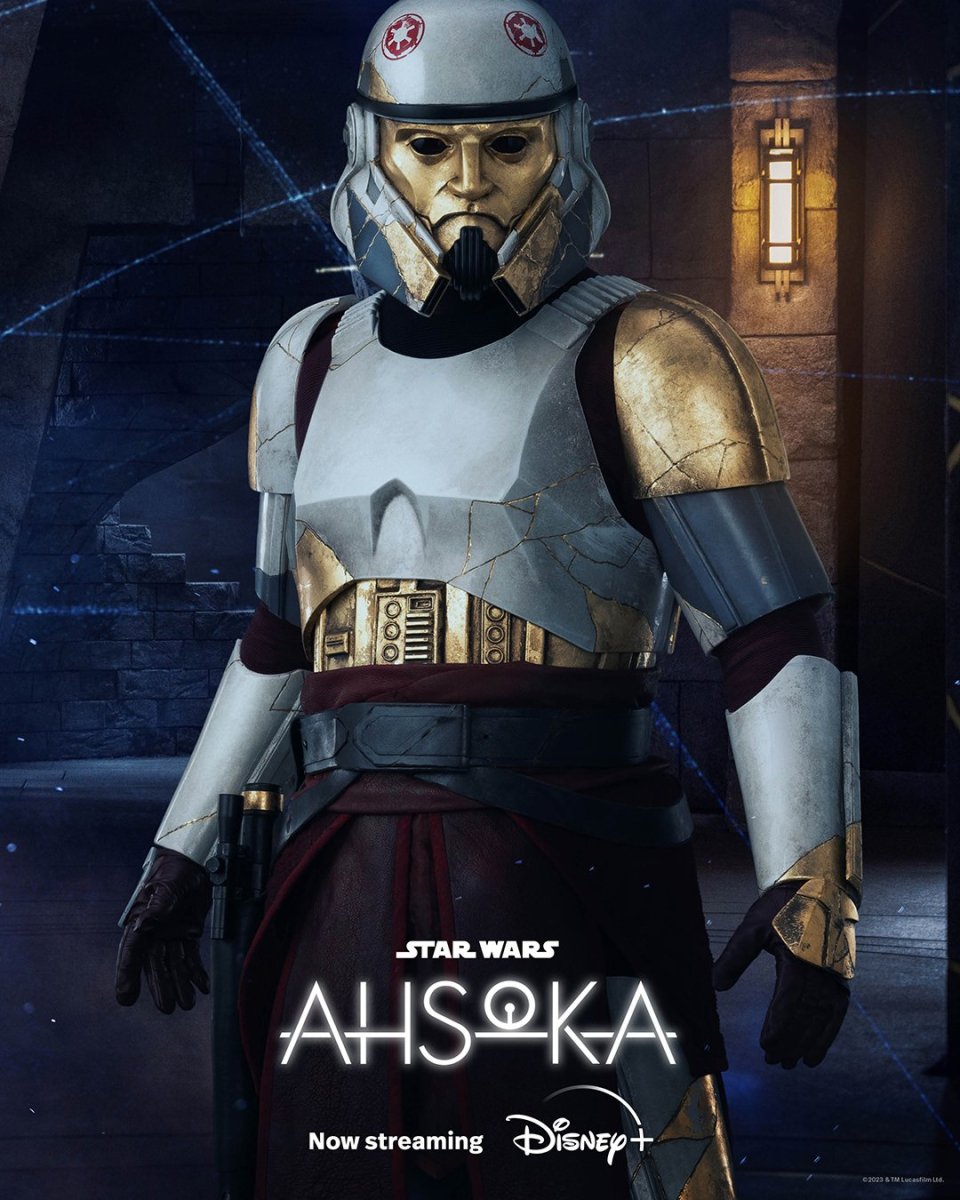
Captain Enoch (Ahsoka)
- By themaninthesuitcase,
- 0
- 0
- 2
-
Promo pictures & others
- By Locitus,
- 0
- 35
-
.jpg.da3b75dcced28b94590e16b06907ce49.jpg.d3465bdfa251d57f1217de22fbf5842f.jpg)
Publicity Blaster - Nambu Type 99 LMG
- By gmrhodes13,
- 0
- 0
- 4
-

TFA F-11D Blasters
- By gmrhodes13,
- 0
- 0
- 13
-
Captain Phasma TFA References
- By gmrhodes13,
- 0
- 0
- 59
-