
All Activity
- Past hour
-

Hello there, from Arch City Squad in Ohio!!
wingnut65 replied to DarthBeale's topic in New Member Introductions
I looked into the garder system for the thighs, but decided to just add a loop of elastic, snapped to the inside of the thighs. I use a 1" black leather belt to hold them up and have never had any issues with them. - Today
-

Hello there, from Arch City Squad in Ohio!!
MaskedVengeance replied to DarthBeale's topic in New Member Introductions
Troopers often make garters for themselves, but I'm sure some might also purchase prefabbed ones. I bought mine off another member. You would just need to market your product in the ongoing runs section of this forum. -
Hello there, from Arch City Squad in Ohio!!
DarthBeale replied to DarthBeale's topic in New Member Introductions
So, question for you all. I was looking at the Thigh Garter System that was posted here. I've tried to reach out to the trooper who created it, but it appears that he is no longer active here, and he does not have an active 501st presence either (tried looking up his TKID and nothing there anymore). I was going to look into starting to make them, for myself and others, if interested... since I've tried to find them and can't, I tried my due diligence... would that be "kosher" or not? -
41106 requesting 501st Trooper access level. https://www.501st.com/members/displaymember.php?userID=34681&costumeID=93
-
Premium Anovos Helmet is arriving Monday!
-
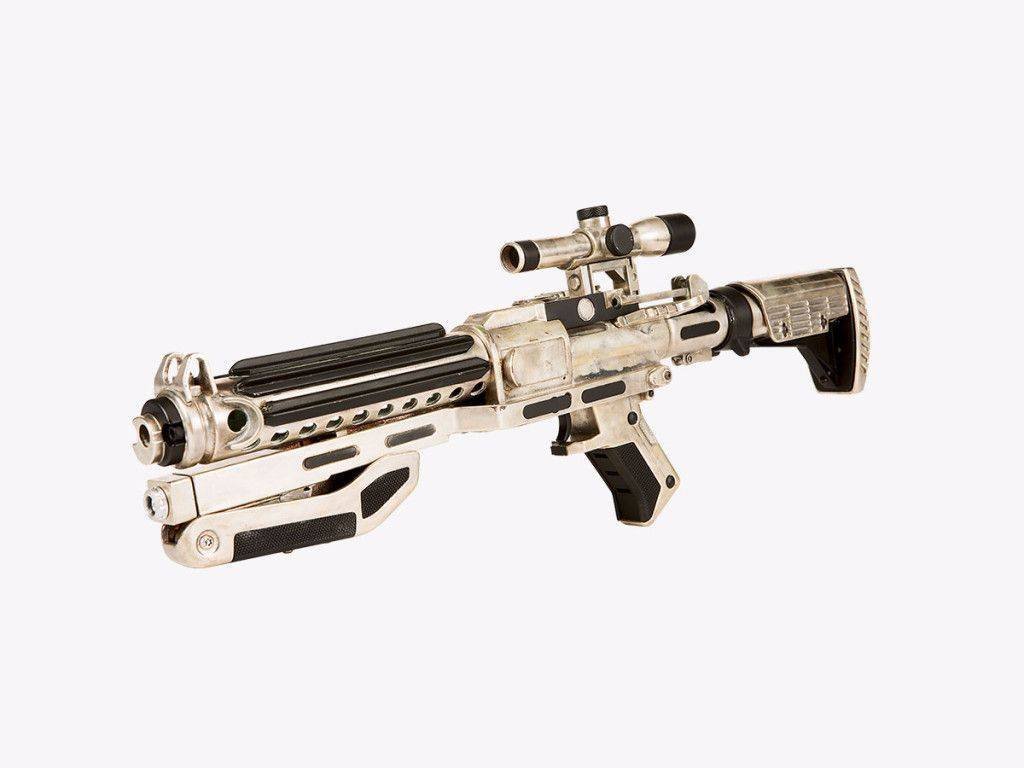
Would you look at the time, seems like it's pew pew o'clock. So let's get to it! Due to airsoft guns being outright illegal in Australia (sigh), I wasn't able to get the initial base gun I wanted. Nor was I able to obtain the import permits for a deactivated Sterling due to it requiring permission from my states AG. So instead, I acquired a 'basic build kit' from BlasterFactory. The BF E-11s are based on the traditional Sterling SMGs used in the OT films; where as the Rogue One and anthology series E-11s use an airsoft variant as the base, both real and casts. So basically this build is a kinda love child of the two, or a mutant.. anyways, the primary reference I used for the build is this one from the reference library: It is what I've been referring to as the 'hero' version. Much like OT blasters, there's decent variation between the E-11s we've seen on screen in recent years, so I wanted to have a specific 'fallback reference' to come back to, despite the airsoft/sterling differences. I also prefer it's scope rail over the block ones so there's that too. Delivery was super quick with no import issues thankfully. My previous experience importing blasters hasn't gone so well in the past. Despite me jumping through the many hoops that be our ridiculous import laws, I had one of my resin blasters quite literally broken and destroyed by customs (with what I still believe was malicious intent). Here's how I received that one: Forever salty about that, but anyways, here's the basic BlasterFactory E11 with a (not destroyed) resin E11: She's a beaut. Chris really does fantastic work. - Got it dis-assembled and ready for prep: -Vintage folding stock was delivered with no issues either: -Sourced a vintage R1 appropriate scope that was re-purposed for civilian use and repainted, so it needed stripping: - After removing it from the mount I used acetone to remove the blue paint which was easier than expected. The large optic ring was shiny brass so I repainted with hammer finish followed by flat clear, which was the closest match to the rest: I did keep the original mounting screws, but still have the mount itself if anyone's interested in that sort of stuff. - Also bought the replica 'Surefire' flashlight and rails. Link to my rails post HERE Flashlight link HERE. - As mentioned before, the new era E-11s use a number of different scope rails/mounts so I just bought one from BlasterFactory. The counter mount isn't accurate but I'll probs mod that in the future. Ordered a vintage end cap too, but decided against the vintage grip as there's almost no difference besides the age and weathering. I do plan on swapping some minor stuff too, like the stock screws for example. Sterlings had a smooth dome where as the R1 version had flat head ones, and the BF replica uses hex ones. The aluminum folding stock also uses grub screws instead of a pin-locking system but that's part of the design with the reproduction so I don't think there's much I can do there. Another is the rear sight screw being flat-headed instead of a hex, I think? Will have to double check, but this is just me being picky. - For the Hengstler, I'm waiting until I can find a vintage small eagle version for a good price, but for the time being I just used an already finished resin one I had spare, though it is a medium eagle one (with a small crack/split). I did print up a Rogue One style counter (thanks Trooper96) but haven't gotten around to getting it completed just yet: After getting almost all the required parts, it was now time for primer and paint. - I painted certain pieces (barrel for example) with straight-up flat black, but parts like the mag-well, front sight and rear catch got coats of etch primer to retain as much detail as possible. - Got the trigger housing/grip assembly and power cyls complete, then slightly weathered for now. Just sandpaper for the grip, but for the cylinders I used gun-metal paint and liquid latex before the flat black, then removing the latex to reveal a gun metal colour instead of the base aluminium, finished with flat clear. Everything here got the same black and clear, though the selector switch is untouched at this point: I used a thin disc magnet glued to the base of the cylinders to attach it, this way the mag-well details aren't ruined by glue or anything. The magnet is strong enough to reach the magazine inside and is secure enough that it won't fall off easily. - Probably unnecessary, but the main body tube got some etch primer for texture before the other etched parts were attached and ready for final paint. When painting/priming I suspended most parts from wire and cut coat hangers. For body tube primer and then final paint, I used a set-up similar to what Chris does in THIS video and can't recommend it enough, made everything way easier. - Now, the final paint was rustoleum hammered with flat clear. I tried multiple paints and primer combos on scrap aluminium before settling on the etch+hammered+flat clear. I wanted to closely match the vintage parts without repainting them and I am happy with the result. I did consider trying wrinkle paint but felt the forces of Vern cursing me so I decided against it. Because this is a weathered build I also applied gun-metal paint to spots across the blaster, followed by liquid latex before the hammered. Same as what I did with the power cylinders. - Found the sling mount and talon swivel thingies at a local gun store which was a bonus. It was easily swapped with the bayonet lug. (Still really wanna use a sling with the R1TK, crl update maybe? Plz? I beg) - Bought some "M-Loc t-nuts" for the rail, these seem to be the best solution to attach it securely for trooping. I did this step almost last and it was a pain, I'd suggest doing it earlier in the build. I couldn't use the included rail screws as they were too short, so I used the ones that came with the t-nuts. Not accurate, but it'll do for now. I found the t-nuts locally but you can find the same type on Amazon HERE. I picked up some accurate t-track and installed it using THIS method as hot water didn't work for me. I cut the tracks to these lengths: 1 x 7.25" 4 x 6.5" 2 x 2.5" Once installed they're actually quite secure, I only used glue on one that was a little loose. And without further ado, here it is completed (for now): (scope works too, couldn't pickup the crosshairs with the pic but its way more clear irl) With R1 being ANH adjacent I was going for a more 'real' look and feel with this build, more Sterling and less airsoft if you will. Total weight comes to 2.2kg/4.85lbs for anyone wondering. This was my first proper, full blaster build and I'm very happy with the final product. Test-trooped with it too and everything held up great, even against some VERY grab-happy younglings. My resin and printed ones would've had pieces break off in that situation. Still got some upgrading to do, gotta get a vintage counter, add a dome hex bolt to the mag and a lil more weathering, but I'm deeming it finished as of now. (is anything ever truly "finished" in this hobby though xd). I also can't wait to see how it fares in the coming years, with the wear and tear of trooping I really hope it gets more of that grubby, beat-up R1 look to it. Side note. Unfortunately I had to ditch the vintage stock because of issues when installing. The catch sits further back on the vintage one and doesn't lock into the folded position, even when swapping the catch parts with parts from the included aluminium one. I really tried to make it work without any serious modifications but it just won't. It also didn't wanna work with both the aluminum and vintage end cap for whatever reason.. Really disappointed as it not only wasn't cheap, but it looks, sounds and feels amazing compared to the aluminium. The only bummer of the build. I do plan to build a non-weathered version, expanding on what I've leant from this build. I am also considering doing a few R1 E11s in a run at some stage, once I work out the most viable (and accurate) parts from the currently available vendors/sellers that is. Now, now it's time to blast some rebels!!
-

Introduction from Southern California
chrioboy replied to chrioboy's topic in New Member Introductions
Thanks! Since my first go around was an ANH hero, I’m tempted to try a RO build but I know I would be in for quite a bit more work to get everything fitting and looking correctly. The strapping and garter is very attractive when completed though. -

Field Exercise Awards -- Post your milestones here
daryldoak replied to Alay's topic in Field Training Exercises
TK-11371 requesting 125 troop badge. -
hmmm... I'll resend it.
-
Hey, haven’t seen a DM
-
Troop 125: 4/23/2024 - Thomas Jefferson Middle School READCON - Vancouver, WA (292nd troop overall)
-
Introduction from Southern California
MaskedVengeance replied to chrioboy's topic in New Member Introductions
Hi Vic! Great throwback photos! I'll second Adam's suggest of an ANH-S. Additionally, here's a link to a thread listing reputable armor makers that may be of interest to you as you begin your journey to join the 501st. https://www.whitearmor.net/forum/topic/11538-the-various-types-of-armor-and-where-to-find-them-updated-2023/ -
-
Just picked scissors to help trim some of the armor parts. Lexon Curved Scissors https://imgur.com/gallery/OQDjyuV
-
Oh that thing looks sick, very nice lol.
-
There isn't much weird we haven't seen before It's much the same way as using a pencil wood scribe, I'm pretty simple so a ruler and pencil does fine.
-
It seems today was productive enough to earn a double update!! After I got home from my wing night I set back to work, finished the trimming for the left shin, and started on the right leg. In order to get the measurements I probably did a weird and just used calipers and a pencil to mark out where I wanted to trim with an Exacto knife. Perhaps a strange way to do it but it made sense in my head. I also used tin-snips to cut in the return edge a little bit to divide it into sections and make it easier, rather than just cutting one big thing. End result after going back and cleaning back up with the Exacto knife is pretty darn good, very happy with how the ends turned out. (I'd have taken more pictures but my phone was about to die :/) Anyway, have a good night, I'm off to sleep.
-
 Requesting access please. https://www.501st.com/members/displaymemberdetails.php?userID=39872 Many thanks
 -
 Thanks for the feedback, I will add more color/ schematics to the post above for newbies in electronics. This picture was just to show the quick test I made to verify the circuit as described ( final circuit doesn’t look like this, I will remove and place a schematic instead). There is/needs to be a current limiting resistor in the circuit just after the batteries, as I mentioned. There should never be a short directly if there is a bad contact, as it always should be with diodes. The aluminum sheet is there for a good reason, LEDs need to have a heatsink in confined spaces like this. Especially thru for the large array on the chest plate, otherwise the heat generated could locally melt the plastic so just plastic backing directly on LED probably won't do if you want to have the proper lighting level. Alternate is to have a powerboard with heavy copper layers and large ground planes. One should also place an isolating tape between conductor and ground i.e. to isolate the leads from the aluminum. I also potted the leads in silicone to make sure they don’t short while moving around. I will add schematics to clarify
 -
 jyoslens01 joined the community
 - Yesterday
-
 I would be careful when using a metal backing like this, I am sort of amazed thats working as it looks like a dead short to me. Whilst the voltages are low here, a short will happily dump as much current as the batteries can send. Best case, you drain the batteries quickly, less best case it melts something, burns you or worse. A custom PCB here is an option, but a tad on the extra side for most. A layer of clear plastic or tape is probably all you need, though some Vero board painted white would probably be almost as good reflective wise.
 -

Boots as of April 2024
gmrhodes13 replied to Generalsneers's topic in Boots, Soft Parts, and other Accessories
I would also suggest looking through our gallery sections if you are thinking of any other supplier, there are a lot of boots which look close at first glance but can have other issues, front stitching, low elastic on sides, large heel and so on. Boots -
Introduction from Southern California
gmrhodes13 replied to chrioboy's topic in New Member Introductions
Hello and welcome aboard and thank you once again for the 3D files -
TK ANH Stunt by CloseTheBlastDoor
gmrhodes13 replied to CloseTheBlastDoor's topic in ANH Build Threads
Easier to trim a little more off than try to add it back -
Boots as of April 2024
themaninthesuitcase replied to Generalsneers's topic in Boots, Soft Parts, and other Accessories
Try Imperial Warfighters, see if they can help you out. https://www.facebook.com/profile.php?id=100063820369262 I thought they'd closed doors, but apparently I misremembered. -

TK-62000 Troop Log (173 troops) Social media use granted
scottdm62 replied to scottdm62's topic in Field Training Exercises
Troop #173 4-20-24 The Force Awakens @ Indianapolis Symphony Orchestra

.thumb.gif.3133dfe8baa328ad146bfe40afe330f0.gif)


-
Albums
-
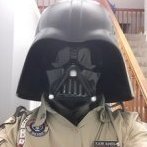
Captain Enoch (Ahsoka)
- By themaninthesuitcase,
- 0
- 0
- 2
-
Promo pictures & others
- By Locitus,
- 0
- 35
-
.jpg.da3b75dcced28b94590e16b06907ce49.jpg.d3465bdfa251d57f1217de22fbf5842f.jpg)
Publicity Blaster - Nambu Type 99 LMG
- By gmrhodes13,
- 0
- 0
- 4
-

TFA F-11D Blasters
- By gmrhodes13,
- 0
- 0
- 13
-
Captain Phasma TFA References
- By gmrhodes13,
- 0
- 0
- 59
-