
All Activity
- Past hour
-
[53] TK-62257 - Mathew Deliso Troop Log
MDeliso replied to MDeliso's topic in Field Training Exercises
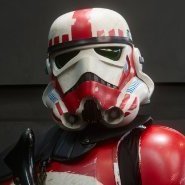
Troop number - 53 Date - 4/25/24 Event - FBI NY Office Family Day Location - 26 Federal Plaza, New York, NY Hours - 2 Costume - TK - Shocktrooper -
Event: # 20 Event Name: FBI's NY Office Bring Your Child to Work Day Celebration Location: 26 Federal Plaza NY NY Date: April 25, 2024
- Today
-

TK ANH Stunt by CloseTheBlastDoor
CloseTheBlastDoor replied to CloseTheBlastDoor's topic in ANH Build Threads
I took the smallest amount off the sides of the butt plate and was careful to round into the inside corner of the notch. I think it looks pretty good! I’ll probably end up hitting it again later with a file or other fine tool. I also got a few of the snap plates in, and added a few straps. It feels good to see this all coming together! A few snaps, I found very difficult to get in. But it might be because the posts inside the snaps are not all the way down, and are bumping into each other when attempting to push male and female pieces together. With the hand pain I’m having these days, this might become an issue. I’ve not set snaps before, and I’m using this crimp-like tool to do it (no hammer). This tool looked great, but it does not perform too well. It has these tiny magnets that are set inside the die, but are not glued in. When I was pressing one of the snaps, there was a big spark! It turned out that one of the tiny magnets had come out and wedged itself between the tool and the underside of the die, and completely shattered! That was thrilling. Starting tomorrow, I’ll be on vacation for a few weeks, meaning no progress on this, but maybe my hands will recover. See ya soon! -
Today I'm not gonna have too much time to work on but I'm happy with what I did get done. Yesterday I took the clamps & magnets off the bicep and forearm, both turned out well and I started gluing another cover strip on the bicep, and cleaned up the forearm with a rag. The right forearm is all glued now so woo. As for today I managed to trim all of the right leg, so very woo. Although I do now have a bunch of leftover ABS chunks that I'm not entirely sure what to do with, I may just use my dremel to grind them all down into bits for paste/slurry. Anyway that's all for today, I'm gonna have some lunch.
-

R1TK build by TK-12953 for DS-32076 850 Armorworks
TKModder421 replied to jsilvius's topic in Rogue One Build Threads
Hey Mike, this is Greg. Yeah I’m happy to share my mods with anyone that has purchased Nico’s original files. Feel free to DM me with some sort of proof of purchase and I can get you the files Sent from my iPhone using Tapatalk -

R1TK build by TK-12953 for DS-32076 850 Armorworks
MikeRadness replied to jsilvius's topic in Rogue One Build Threads
Yeah, the mods look awesome. Maybe someday I’ll build one. And make this current one a Mimban for Display. Will Greg share with anyone that has purchased Nico’s files? Or? I’m pretty green in the FISD community, so I don’t know many people. Sent from my iPhone using Tapatalk -

R1TK build by TK-12953 for DS-32076 850 Armorworks
jsilvius replied to jsilvius's topic in Rogue One Build Threads
Yep you found it. Greg did some amazing updates, and I can't wait to get these printed, and see how it compares to what I have. The alignment pegs alone will be worth the extra print time IMHO. -
 Other Armor parts I did a first pass at how I made the rest of the armor below (high definition pictures of each part are in the first post of the build thread). I designed/built them to be as screen accurate as possible to the best of my knowledge and easy to troop with. Other than printing, coloring and finish already described, I will try to list the specifics of each part. I will also to make all the parts from my own creation available eventually on Etsy, but in the meantime, if you need them, just PM me. Clear coats For the clear coat, I used the Glamor 2K for the white and Rustoleum satin for all other colors. N.B. screen accuracy can’t tell the exact finish, but obviously the white is either semi-gloss or gloss as it has specular reflections. The other colors are visibly lower reflectivity as they do not have specular reflection, but diffuse ones, so some kind of satin finish. Fasteners disclaimer 😊 As a disclaimer, I don't like velcros! they are a quick fix though. I started with those on this armor for several reasons: initial adjustment, fitting for screen accuracy, difficulty to attach fasterners on soft armor. My 2 cents on this: - The preference should always be snap buttons and straps, but sometimes they lack the rigidity to maintain uniform flexible joints between attached armor parts (like chest and back armor for example). - Velcros keep the suit and armor pieces in close contact on the periphery of the armor, so this can be required for screen accuracy (like in this case for belt, knee, thigh, bicep). I will add snap button to the velcros for sturdy attachment on knee plates, holsters thigh plates once I have the final fitting. - When possible, try to stich the velcros instead of gluing (never glue velcros on fabrics, it will fail). If using the adhesive backed velcros, only rely on high quality brand (3M or Velcro), not cheap stuff on Amazon. Otherwise, you’re way better off using plain Velcro that you will secure with E6000 or Silicone adhesive (for gluing to silicone parts or very flexible parts) Helmet The helmet is from Big Fred’s custom (no changes, except for the clips which I made thicker for screen accuracy). I printed and built all the parts separate for accuracy and ease of finishing. A lot of different colors and finish, so a lot of masking…! Some tricks for clean paint lines is to use good quality masking tape. I would recommend Frog tape, you won’t get overspill if applied correctly (you can find it on Amazon, use narrow one or cut it) The lens is a cut faceshield from amazon (see picture below) that a lot of people are using for their helmets (Hobart 770580 Face Shield replacement lens shaded). Pretty cheap and you can do multiple helmets with one shield. I secure it with duct tape so if it scratches it can be replaced and it’s very sturdy. Glue is not an option for this lens as there is not large overlaps with the helmet body. For padding, I used tactical helmet padding you can find on Amazon for less that 15$. This helmet is designed to be tightly fitted to your head, so not a lot of room for padding. You WILL need fans in this helmet, as the seal is almost making it airtight 😊, no way to wear without those. No wonder why you see the guys without their helmet while waiting for shooting… You will need low profile fans and very small battery pack. I suggest you 3D print a couple of fans form factors before purchasing and try to fit them first. Standard Stormtrooper fan kit or voice changing kit WILL MOST LIKELY NOT fit in this helmet if you maintain the proportional ratio of the helmet to screen reference (i.e. you should check carefully the space left before ordering standard kits). I will include a picture once all the pieces are in place, still WIP Chest armor The chest armor needed some mods to be wearable and screen accuracy. First, the overlap between the bottom and top portion is just a lip on Big Fred design, So I basically redraw the chest and added clamps so that both parts are rigidly attached while still showing that they are two separate parts. I wouldn’t count of glue to secure these critical parts together with original design (in my humble opinion) as the gluing surface is not very large vs the length of the parts. If not using this design, I recommend you secure the two parts with additional brackets/ reinforcements. The ranking box also needed some tweaking to have the right size of button and thickness per screen reference. I suggest you print the parts individually and scale them to have better screen accuracy and ease of painting. I glued the chest armor large parts together with E6000, just like all the small parts. I like E6000, as it remains flexible, but there are for sure other options (everyone has his own preference for gluing PLA/PETG). I attached the chest armor to back armor with large black heavy duty 2in velcros on the shoulder (I like the ‘VELCRO Brand Extreme Outdoor Mounting Tape’ from Amazon). this is what holds the back +jetpack so it needs to be strong, while keeping joints together closely). The sides can be secured with lighter velcros. You may need to add some plastic guides to prevent the sides from offsetting laterally while moving around. I forgot to add those on mine, but may add it to the model later. Grey is Rustoleum grey primer. The red is airbrush Vallejo game color 72.012 Lighting of the chest is discussed in another post in this thread Below are the two pieces from internal side showing the attachment clamps prior to assembly Back armor The back armor main body is Big Fred’s design without modifications. The jetpack anchorings are completely custom, but fully compatible with Big Fred’s original JJ industries bolting pattern (as described in jetpack section). I designed those to be 3D print robust. I added M4 threaded inserts in the back armor bottom anchor (you can see them in the picture below). For the upper T-shape Anchor, I used same principle as JJ industries and have an independent plate that I 3D printed and added M2.5 Threaded inserts. (you can see those in the picture below). To attach to chest armor, I used heavy duty black velcros for the shoulder and lighter white velcros for the sides. Bicep boxes I ended up redoing the bicep box from Big Fred’s as the sides were not accurate. I kept the same design, but added the central notch to be screen accurate. I secured them to the suit with velcros doing the full size of the rear notched portion to end up with the same fit as the screen reference. Grey is Rustoleum grey primer. The red is airbrush Vallejo game color 72.012 Gauntlets Both Gauntlets from Big Fred’s needed corrections to be perfectly screen accurate/trooping (IMHO). Here is the list of mods on Big Fred’s original model: - Rescaling of the gauntlets to have the right proportion to screen accuracy - Redrawing all boxes so that they are thicker (they protrude quite a lot on screen reference) - Redrawing the whipcord and the dart launcher (missing the cone) - Adding internal guides to clamp the gauntlet with ease and no visible attachments (you really DON’T want to put velcros there as you need a minimal and uniform joint). Guide pins are 4mm dowels you can buy on Amazon (left overs from my Pit Droid antennas). - Printed all parts separately for screen accuracy https://a.co/d/a3muoaW Painting for metallic parts is airbrush Vallejo 77.701 aluminum. Medium grey is Rustoleum grey primer. For the red squares/rectangles, I used 3mm dark red transparent plexiglass on amazon. I cut them with a Dremel saw and polished the sides. At 3mm it protrudes enough to be screen accurate. https://a.co/d/7DojMLk Lighting of the gauntlets are discussed in another post in this build thread. Below are pictures of the internal of the gauntlets. Belt I tried to scale the size and features of the belt strap against references. My best estimate is that it is approx. 2in wide. The material is some sort of cotton with quilted horizontal ribs (3 even large in the center and 2 small on each top and bottom edge). For that, my girlfriend used simple cotton from the local fabric store with the closest white matching and some very light filler in between layers. Once sewed, you end up with a study belt ( I was surprised how nice this end up fairly straight forward). Below if a picture of the filling material used in the belt, pretty cheap at the fabric store. For the belt boxes, I used Big Fred’s initial design for starting point with the following mods: - redrawn the circular boxes to have the proper angled fin and proportions - Modified all the boxes and clips to have proper scale and still maintain the 2in wide belt. Added 3 holes at the rear of the boxes to secure properly the boxes onto the belt. - Modified the belt clips to add 20mmx3mm magnets holes to keep them secure. I used M5x8mm setscrews to secure the belt boxes. You can find them at reasonable pricing at any store. In the US, the equivalent would be 10-32 setscrews. I added white velcros at the rear of the boxes to secure them against the abdomen armor. I painted the male front clip with 3 colors for screen accuracy (one can see on reference pictures that the belt male clip has a metallic finish connecting part that is followed by a black section). For these two sections, I used Vallejo Aluminum 77.701 and Rustoleum Matte black, followed by satin finish Rustoleum clear coat. Holster For the holster, I made it out of two parts (the holster straps and pistol holder). I used synthetic leather with 2.5mm thickness (bought on Amazon). for the main straps section I measured the length to attach under proper boxes to fit screen accuracy (first and 4th boxes on right side). I attached velcros to secure under the Abdomen section. There is no clear answer whether it is secured under the abdomen or under the belt. I choose under abdomen because it keeps the belt with even gap against the abdomen armor (otherwise you will see two boxes protruding from the other boxes. For the pistol holder section, I used a 3D print frame to give it a nice rectangular shape on which I glued a thinner 1mm synthetic leather (with spray gorilla glue). I added a pistol strap with standard snap buttons for thick material to secure the pistol per screen reference. Cod I modified the Big Fred cod to add the trapezoidal section and rescaled it (X-Y-Z) to have proper shape for screen accuracy. The cod is secured under the abdomen armor section with Velcro band so that it’s flexible and can move back and forth but not sideways. Knee plates No change to Big Fred, except scaling. Secured to suit with velcros on the whole back face so that there is no gap visible while moving around. Thigh plates No change to Big Fred, except scaling. Secured to suit with velcros on the whole back face so that there is no gap visible while moving around. Shins & spat Both Big Fred and Galactic Armory have a two-piece split design and were not fully screen accurate. Having had a split design on my current Sith Trooper, it’s a NIGHTMARE to put together and very difficult to have them stay perfectly closed with just velcros. So, I decided to design a single piece flexible 3D print (you can print it with any rigid plastic, but by design it is flexible). I designed them with the opening at the rear along the internal side of the flat portion as per screen reference. It opens up just like molded ABS would do, it clips and stay closed with magnets. I have placed them on Etsy if you want to have more details and a small video on how flexible it is: https://www.etsy.com/ca/listing/1704251352/imperial-armored-commando-shin-files?click_key=98d055ce0aceca6cb2e49b78066827e614e8b8e8%3A1704251352&click_sum=37b14591&external=1&rec_type=ss&ref=landingpage_similar_listing_top-2 Blaster Pistol I used Big Fred’s pistol as is, no mods required. I painted according to what is available on the screen reference. The painting on the blaster pistol (and for the blaster rifle) is as follow: - Standard finishing (200grit sanding/bondo+acetone/400grit sanding/filler primer/ 400-1000grit sanding) until very smooth. Metallic surfaces need 1000grit finish before appliyingpaint and graphite. - Rustoleum black spray paint for hard base color coat (matte / semi-gloss, doesn’t matter). Thin film just to evenly color before mettalic finish. Let dry overnight**. - **For fully exposed metallic parts, I applied graphite powder while the black rustoleum paint was just an hour dry so that it sticks into the paint. - Vallejo Dark aluminum 77.703 airbrush all over the pistol, except for parts that are already graphite coated. Let dry for an hour at least. - Vallejo black 71.057, thinnest coat possible, just to hide the aluminum paint. When the paint dries and just stops being shinny, you can rub it with your finger to expose some of the aluminum underneath. I makes the easiest weathering 😊 Blaster Rifle I have a post in the weapon’s thread section on this rifle. There was no existing model, So I did it to be as screen accurate as possible. There is only one good picture of it, rest give ideas, butt blury. Black series/Hot toys are not available, so this is my best interpretation. The gun is a mix of E-11 (scope, parts of the receiver, folded stock) and some other mixed parts (the ejector is not the E-11). It has a modern M4 butt stock on top of it! I will update the design when more info becomes available. I wanted it to be trooping grade, so there is a metal rod going through it. You can find it on Esty with more info as well (3D model or printed if you don’t have a printer). Finishing and weathering is identical to the blaster pistol described above. https://www.etsy.com/ca/listing/1667406690/imperial-commando-rifle-blaster-stl?click_key=25ecdbab2cfbfaa3d409f4d598185ec222a74f17%3A1667406690&click_sum=885df68a&external=1&rec_type=ss&ref=landingpage_similar_listing_top-1
 -
R1TK build by TK-12953 for DS-32076 850 Armorworks
MikeRadness replied to jsilvius's topic in Rogue One Build Threads
I think I found it. I wish I would have found this before I finished just about everything on my original Nico Files helmet. -
R1TK build by TK-12953 for DS-32076 850 Armorworks
MikeRadness replied to jsilvius's topic in Rogue One Build Threads
Hey James! Modified files for the Nico R1TK helmet? Where can I see what these are, I'm very interested! -

Boots as of April 2024
Generalsneers replied to Generalsneers's topic in Boots, Soft Parts, and other Accessories
I’ve tried but maybe they have ceased trading. -

[77] TK-39093 Troop Log (Hong Kong Garrison)
giskard8 replied to giskard8's topic in Field Training Exercises
77) 25/04/2024 - HOTTOYS Darkside of the Force Event Press & Media Tour @ CityPlaza -
R1TK build by TK-12953 for DS-32076 850 Armorworks
jsilvius replied to jsilvius's topic in Rogue One Build Threads
started to work on the helmet some. I'm not happy with how it printed, so I reached out to @TKModder421 to see about getting his modified files for the Nico R1TK helmet. He sent them on to me, so I'll start printing those today. I've sent some of the smaller bits (ears, ear caps, traps and tears) to one of my friend for resin printing. I hope that they will turn out as well as Greg's pictures did on his post. Here is what I was working, with. I'll hold on to it to practice finishing work on. -
Welcome again Vic, generally I recommend going with the costume that means the most to you. Your throwback photos tell me you are in the right places for sure, now it's a matter of your first love of a costume. With the humble original trilogy Stormtrooper, you do have a few choices. ANH-Stunt, ANH-Hero version, then ESB, which is an ANH stunt with a few small differences, then RotJ which has even more differences. Nair mentioned the R1 Stormtrooper, a slightly modernised version which has extra details, sharper lines, but is more limited in availability with 2 main makers currently available. Which ever way you go, you will have a far more accurate Stormtrooper than the old FX kit. Looking forward to seeing which way you go and watching you progress on a new build.
-

Boots as of April 2024
dblcross replied to Generalsneers's topic in Boots, Soft Parts, and other Accessories
I Believe while they are making their latest run the web site won't let you order anything until the next run opens. I could be wrong but I think that's how it worked with me. -
Mighty impressive numbers you have here, congratulations on hitting 125!!! New badge available!
-
We don't have as many ROs out there as I'd like! If you are excited about the thought, you should definitely entertain it!
- Yesterday
-
Hey @TKModder421, I resent the DM and shot you an email on your FISD listed email address.
-

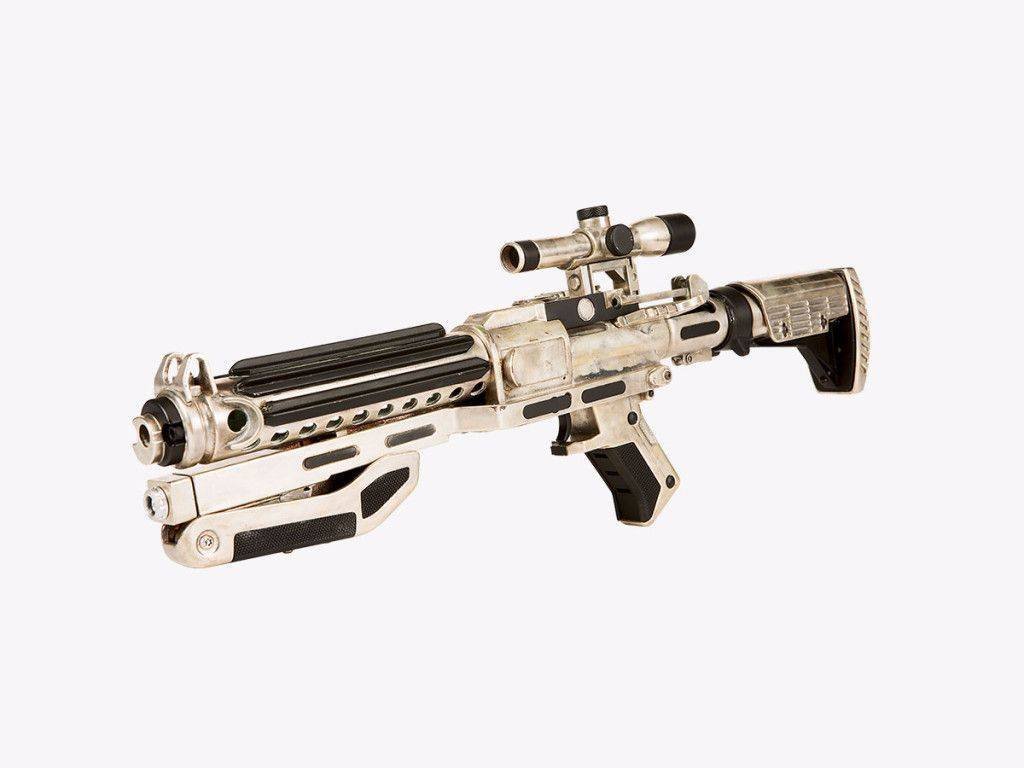
Jedxh's Rogue One E-11 Build (FieldMarshall/BlasterFactory)
revlimiter replied to Jedxh's topic in R1 BlasTech E11
That looks FANTASTIC!!! Especially the vintage scope. I'm jealous of that. My own BlasterFactory E11 worked fine with one of Joseph's vintage folding stocks. The measurements of it and the aluminum one were identical. It bolted on with no effort. Sorry yours wasn't as lucky. The extra weight at the nose is so nice. Hopefully you can figure it out down the road. -

Jedxh's Rogue One E-11 Build (FieldMarshall/BlasterFactory)
gmrhodes13 replied to Jedxh's topic in R1 BlasTech E11
Came out a treat, you must be happy with that. -

Hello there, from Arch City Squad in Ohio!!
wingnut65 replied to DarthBeale's topic in New Member Introductions
I looked into the garder system for the thighs, but decided to just add a loop of elastic, snapped to the inside of the thighs. I use a 1" black leather belt to hold them up and have never had any issues with them. -

Hello there, from Arch City Squad in Ohio!!
MaskedVengeance replied to DarthBeale's topic in New Member Introductions
Troopers often make garters for themselves, but I'm sure some might also purchase prefabbed ones. I bought mine off another member. You would just need to market your product in the ongoing runs section of this forum. -
Hello there, from Arch City Squad in Ohio!!
DarthBeale replied to DarthBeale's topic in New Member Introductions
So, question for you all. I was looking at the Thigh Garter System that was posted here. I've tried to reach out to the trooper who created it, but it appears that he is no longer active here, and he does not have an active 501st presence either (tried looking up his TKID and nothing there anymore). I was going to look into starting to make them, for myself and others, if interested... since I've tried to find them and can't, I tried my due diligence... would that be "kosher" or not? -
41106 requesting 501st Trooper access level. https://www.501st.com/members/displaymember.php?userID=34681&costumeID=93
-
Premium Anovos Helmet is arriving Monday!


-
Albums
-
Captain Enoch (Ahsoka)
- By themaninthesuitcase,
- 0
- 0
- 2
-
Promo pictures & others
- By Locitus,
- 0
- 35
-
.jpg.da3b75dcced28b94590e16b06907ce49.jpg.d3465bdfa251d57f1217de22fbf5842f.jpg)
Publicity Blaster - Nambu Type 99 LMG
- By gmrhodes13,
- 0
- 0
- 4
-

TFA F-11D Blasters
- By gmrhodes13,
- 0
- 0
- 13
-
Captain Phasma TFA References
- By gmrhodes13,
- 0
- 0
- 59
-